Google Docs Northside ISD Technology Training & Development 6632 Bandera Road, Building D San Antonio, Texas (210)
|
|
|
- Melinda Rice
- 5 years ago
- Views:
Transcription
1 Northside ISD Technology Training & Development 6632 Bandera Road, Building D San Antonio, Texas (210)
2 Table of Contents Google Docs Getting Started...5 How can Google Docs be used...5 Benefits of using Google Docs...5 Google Drive... 6 Google Drive Settings...6 Create a Folder...6 Google Docs...7 Docs Home Screen...8 Search...9 Filtering Search Results...9 File Upload...10 File Download...11 The Docs Editing Interface Creating a Document...13 Blank Document...13 Using a Template...13 File Menu...14 Name/Rename a File...14 Make a Copy...14 Move to a Folder...15 Page Setup...15 View Menu / Zoom Options...16 View Options...16 Zooming...16 Format Menu & Toolbar...17 Formatting Text...17 Font Style...17 Default Font...18 Text Case...19 Bullets and Lists...20 Add a List...20 Edit a List or Bulleted Items...21 Restart a Numbered list...22 Paragraph Alignment...23 Line Spacing...23 Paint Format...24
3 Clear Formatting...24 Using Styles...25 Titles and Headings...25 Custom Text Style...26 Apply a Default Heading Style:...26 Insert Menu...28 Images...28 Delete an Image...29 Crop an Image...29 Add a Border to an Image...29 Adjust Color and Filters...30 Reset an Image...30 Links...31 Insert a Link...31 Remove a Link...31 Edit a Link...31 Equations...32 Headers & Footers...33 Insert a Header...33 Insert a Footer...33 Page Breaks...34 Delete a Page Break Special Characters...35 Insert a Special Character...35 Draw a Special Character...36 Horizontal Lines...36 Bookmarks...37 Create a Bookmark...37 Link to a Bookmark...37 Table of Contents...38 To Delete the Table of Contents...38 Tables...39 Merge cells...39 Distribute Rows and Columns...40 Edit Style within Cells...40 Charts...41 Tools Menu...42 Spelling...42 Google Docs
4 Personal Dictionary...42 Preferences...43 Explore...43 Search...43 Cite as a Footnote...44 Define...44 Document Outline...45 Word Count...45 Voice Typing...46 Collaboration...48 Sharing Rights...48 Owner Settings...48 Link sharing options...49 Share...49 Get Sharable Link...50 Edit Share Settings...50 Change Share Rights...50 Change Sharing Privileges...51 Set Expiration Date for a Shared File...51 Revision History...52 Comments...52 Add a Comment...52 Assign an Action Item in a Comment...53 Suggest...54 Suggest Changes...54 Accept or Reject Suggestions...54 Chat...55
5 Getting Started Google Docs is a free Web-based word processing application that is part of G Suite. With Google Docs, you can access, create, and edit documents wherever you go. As a Google District, Northside employees can enjoy anyday-anytime access on a variety of devices such as smartphones, tablets, Chromebooks or computers even when there s no internet connection with offline access. How can Google Docs be used Collaborative Lesson Planning Meeting / Professional Development Notes Shared Lesson Repository Translate Parent Letters Improve the Writing Process Students can work collaboratively on projects and writing assignments Peer Review Group Work Accountability Daily Journals Collaborative Text Analysis Benefits of using Google Docs Easy to use Anytime / Anywhere access (with internet connectivity) Document Statistics Collaboration 5


6 Google Drive As a Google District, NISD employees and students enjoy access to Google Drive, a secure and unlimited file storage service from Google. This cloud service provides anytime-anywhere access to your important files. 1. Launch Chrome. 2. Navigate to drive.nisd.net. 3. In the USERNAME field, type your enumber. 4. In the PASSWORD field, type your Network Password. 5. Click LOGIN. 6. From the main Drive screen, click New. 7. Select Docs. Google Drive Settings If you want to upload files like Microsoft Word documents, you can change a setting to automatically convert files into Google Docs. Convert documents into Google formats 1. Using a computer, go to drive.google.com/drive/settings. 2. Next to Convert Uploads, check the box. NOTE: Changes to settings in Google Drive can only be made from a computer. Create a Folder Creating descriptive folders to organize files will assist you in keeping your Google Drive clean and organized. A well planned file management system will allow you to find files with ease. 1. From the upper left of the Drive dashboard, click the New button. 2. Select New Folder. 3. In the New Folder window, replace the phrase untitled folder with the new folder title. 4. Click Create. The new folder will now appear in Google Drive. 6
7 Google Docs Google Docs is a free Web-based word processing application that allows users to create and format documents online while collaborating with others in the district. NOTE: Northside ISD does not allow users to collaborate outside of the district. 1. Launch Chrome. 2. Navigate to gmail.nisd.net. 3. In the USERNAME field, type your enumber. 4. In the PASSWORD field, type your Network Password. 5. Click LOGIN. 6. In the top right corner of the main Gmail screen, click the Google Apps grid. 7. Locate and select Google Docs. 7

8 Docs Home Screen Google Docs A. Search allows users to find files by entering a title or keywords within a file. B. Blank allows users to create a document with no pre-formatted text or image place holders. C. Template Gallery offers users a variety of pre-formatted file types. To see more template options click the up/down arrows. D. More Options icon allows users to hide the Template Gallery. E. View Files by activity date or time: Today offers the file title along with a time stamp of when the file was last opened. Previous 30 days offers the file title along with the date last opened. F. Sort files by Owner type: Owned by Anyone (including me) Owned by Me (just me) Not owned by me (anyone but me) G. List or Grid View options allows users to view files in the desired format. H. Sort Options allows the user to view files by the following options: Last Opened by me Last Modified by me Last Modified Title I. File Picker option users can open files by selecting or searching within a folder. 8


9 Search Google Docs You can find files in Google Docs by searching for: File title File contents 1. From the top menu Search box, enter a search term either a title or a keyword. 2. On your keyboard, press Enter. Filtering Search Results To find files more easily in Docs, you can narrow search results by filtering them with the following options: Top Results, searches only for the title of the file. Recent Documents, the date a file was last edited. Owned by: Owned by me Owned by anyone Not Owned by me Views: Grid View, provides a view of documents and folders in a grid with a preview of each document. List View, provides a view of all documents and folders in a list. NOTE: The icon in the menu will show the alternate viewing option, not the active or current viewing option. 9


10 File Upload Transferring files from your desktop computer to your Google Drive is easy. 1. From the Google Docs home screen, click the Folder Picker icon. 2. In the Open a file window, select Upload. 3. From within the Open a File window, click Select a file from your computer. 4. In the Windows Explorer window, navigate and select the desired file. 5. Select Open. The file will automatically launch and open. The file can also now be found in your Google Drive or in your Google Docs home page. 10

11 File Download While NISD does not currently offer offline sync access to G Suite applications, users can download files to read, edit, or access when internet connectivity is not available. 1. From the top menu, select File. 2. Click Download as. 3. Select desired file type. Document will automatically store to the computers downloads folder. 11

12 The Docs Editing Interface Google Docs provides users with an intuitive interface that allows for a myriad of text editing options. The menu and toolbar provides easy access to the most commonly used Google Docs features such as editing the text, paragraphs, line spacing, font style, size, and color. Notably, you will not find a save feature as Google Docs auto saves your document as you work. Below you will find a brief layout of the Google Docs interface. 12


13 Creating a Document The Google Docs home screen offers users two easy ways to create a new document. Blank Document 1. Open Google Docs. 2. Under Start a new document, select Blank. Using a Template Google Docs offers a myriad of templates to create professional looking formatted files such as resumes, reports, essays letters, etc. 1. From the Google Docs home screen, click Template Gallery. 2. Review Gallery options, select desired template. 13


14 File Menu File management describes the fundamental methods for naming, storing and handling files. By using appropriate file and folder naming strategies you can organize and access your Google Doc files with ease. Name/Rename a File Files will automatically be named Untitled document, the name you choose for a file will have an impact on the ability to find those files later and to understand their contents. 1. From top left, click the Untitled document field. 2. Type a new title. 3. Press Enter. Make a Copy Users can create copies of shared or owned files. Users may want to copy a file if the original must remain in tact or there is a desire for continued access to a file that one does not currently own. 1. Launch Google Docs. 2. Navigate and open desired file. 3. In the Menu, click File. 4. Select Make a copy. 5. In the Name field, enter a title for the file. 6. In the Folder field,navigate to the desired folder. 7. Once a folder location is chosen, click Select. 8. Click Ok. 14

15 Move to a Folder Google Docs 1. From the top left Menu, select File. 2. Click Move to. 3. Select Move this Item. 4. Select My Drive. 5. Select the appropriate Folder. 6. Select Move Here. Page Setup Within the file menu users will find the Page Setup menu. Use this menu to change or customize the default look of a Google Doc. A. Orientation refers to whether the document is oriented vertically or horizontally. Portrait mode orients content for reading across the shorter length (approx 8.5 inches) of a sheet of paper. Landscape mode orients content for reading across the longer length (approx 11 inches) of a sheet of paper. B. Paper Size while most projects use the customary 8.5 x 11 letter paper size some projects require special paper sizes such as legal, executive or folio paper size. Using the Paper size option users can specify the appropriate paper size for their project. C. Page Color provides background color options for the documents contents. Users can choose from the standard color options or customize the color by using a hexadecimal color code. D. Margins are space between the text and the edge of your document. You can customize the margins along the top, bottom, left and/or the right of your page. E. Set as Default if the Google Doc default page setup is not adequate for everyday needs, users can change the Page Setup default as desired. Once a default is changed every new page will open with the custom page settings. 15
16 View Menu / Zoom Options View Options The view menu allows users to change how a document is viewed and the quick access to several key word processing tools such as spelling suggestions. When you change your document view, Google Docs remembers and opens the next document with the same selections. A. Print layout: Shows your headers, footers, and margins between pages as if you printed out the document. B. Show / Hide Options: Show ruler Show equation toolbar Show spelling suggestions C. Compact controls: This hides the menu bar, but leaves the toolbar visible. D. Full screen: This hides the menu and toolbar. To exit full screen, on your keyboard, press Esc or Escape. Zooming Google Docs provides users with the ability to zoom in or out based on preference. 1. In the top toolbar, click 100%. To make the document always fit the browser, click Fit. To choose how much to zoom in or out, select a zoom level. 16

17 Format Menu & Toolbar Google Docs offers a wide range of word processing format tools which allows users the ability to produce professional looking letters, memos, flyers, reports, student projects and many other kinds of digital documents that can be shared or worked on collaboratively. Easily use different fonts, align text, and add graphics to create professional looking documents. Formatting Text Select text you want to change, then choose from the available options in the Format menu or toolbar at the top of the screen. Font Style The top toolbar offers multiple options to format text. A. Font Type B. Font Size C. Bold D. Italics E. Underline F. Font Color / Highlight Text Add Fonts to Font List To further customize font options,add new fonts to the font list. 1. From the top toolbar, select the font drop-down arrow. 2. Next to the F+ icon, click More fonts. 3. Browse or search for new fonts. 17


18 4. To add a desired font, click the font to add a check mark. 5. To finalize selections, click OK. Default Font Set a preferred font for all new documents: 1. Highlight text to select desired font. 2. From the toolbar, click the font drop-down arrow. 3. Browse to the desired font(s), select font. 4. From the top Menu, select Format. 5. Hover the cursor over Paragraph styles scroll over to Normal Text, select Update Normal text to match. 18


19 6. With the text still highlighted, return to the top Menu select Format. 7. Hover the cursor over Paragraph styles, scroll over to Options, select Save as my default styles. NOTE: Once the default font has been updated, all new documents will use the new font unless the default option is updated again. Text Case 1. To change the title case, select and highlight desired text. 2. From the top Menu select Format. 3. Select Capitalization. 4. Select UPPERCASE, other options include: lowercase Title Case 19
20 Bullets and Lists Google Docs Numbered or bulleted lists can create visible interest and make items stand out when providing important information or steps within a document. Add a List 1. Place the cursor in the document where you would like the list to appear. 2. From the top toolbar, choose a list type. Numbered list Bulleted list 3. To see bullet options, click the More drop-down arrow. 4. To start a list inside a list, on the keyboard press Tab. The new list will be indented. 5. To go back to the main list, on the keyboard press Enter twice. 20


21 Edit a List or Bulleted Items You can change the bullet type, indents, prefixes, and suffixes of a list. Choose a New Bullet Type 1. Click a bullet or number. 2. From the top toolbar, click Format. 3. Select List Options. 4. From the List options window select the option that best suits your needs: From the available options, select a new bullet symbol. For more options, open the special characters window and select More bullets. Change list color 1. Click a bullet or number. 2. In the top toolbar, click Text Color icon. 3. In the Text Color window, click Text. 4. Select a color. 21


22 Restart a Numbered list 1. Double-click the first number in the list. 2. From the top Menu, click Format. 3. Hover the cursor over Lists, scroll over to List Options, select Restart numbering. 4. In the Restart numbering at field, enter a new start number. 5. Click OK. 22
23 Paragraph Alignment 1. Select the desired paragraph. 2. From the top toolbar, choose one of the alignment options: Left align Center align Right align Justify (full left to right alignment) Line Spacing 1. Select and highlight the desired text. 2. From the top Toolbar, click the Line spacing icon. 3. Select Custom spacing. 4. In the Line spacing field, enter a number. 5. Click Apply. 23
24 Paint Format Google Docs The Paint format tool will allow users to update one block of text, a cell or an object to match another one without having to use a style. 1. Select and highlight the desired formatted text. 2. From the top toolbar, click Paint format. 3. Select and highlight the un-formated text. Clear Formatting 1. Select and highlight the desired text. 2. From the top Menu, click Format. 3. Select Clear formatting. 24

25 Using Styles Styles are pre-set to be formatted in a very specific way. In one click, you can change the font properties of the varies styles such as headings, titles and document text all at once. The Style Normal text is the default body style for the document. Titles and Headings 1. Select and highlight the desired text. 2. Click Format. 3. Select Paragraph styles. 4. Click the desired text style: Normal text Title Subtitle Heading Click Apply text style. 25


26 Custom Text Style 1. Select and highlight text with desired style. 2. From the top Menu, click Format. 3. Hover the cursor over Paragraph styles, scroll over to Normal text or any of the Headings 1-6. For this example we will select Heading Click Update Heading 4 to match. All of the text in your document identified with the same heading (example, Heading 4 or Normal text, ) will be updated to match the new font style. If the style of normal text is updated, the heading fonts will also change to the new style. Apply a Default Heading Style: 1. Select or edit the text with the style you want to use. 2. From the top Menu, click Title. 3. Locate the check mark indicating the Style currently in use, click the More arrow. 4. Click Update Title to match. 26

27 Restore default Google style 1. Hover the cursor over Paragraph styles scroll over to Options, select Reset styles. 2. Once the style has reset, hover the cursor over Paragraph styles scroll over to Options, select Save as my default styles. 27
28 Insert Menu The Insert menu offers features and options that allow users to create visual interest to your document. Images 1. From the top Menu, click Insert. 2. Select Image. 3. Select from the following options: A. Upload - Choose an image from your computer and click Open. B. Take a snapshot - Use your webcam and click Take a snapshot. Google may request to Use your camera and microphone, if this messaged is received, select Allow. C. By URL - Paste the URL of an image from the web and click Select. D. Your albums - Choose an image from one of your photos albums stored on the web and click Select. E. Google Drive - Choose an image stored in Google Drive and click Select. F. Search - Choose an image from the stock photography archive, or the Google and Life archives, and click Select. G. Drag an image - drag images from your desktop or a website to your document or presentation. It may take a moment for the image to appear. NOTE: Images must be less than 50 MB and be one of the following file types.gif,.jpg or.png. 28


29 Delete an Image 1. Select an image. When an image is selected a blue adjustment frame will appear around the image. 2. On the keyboard, press the Delete or Backspace key. Crop an Image You can trim the edges of an image or remove an unwanted section. 1. Select an image. 2. The top toolbar will now reflect image editing options, select the Crop icon. 3. Black adjustment bars will appear next to the blue image frame squares. Click and drag from any of the adjustment bars to achieve the desired shape. 4. On the keyboard press Enter. Add a Border to an Image 1. Select an Image. 2. Select Line color. 3. Choose a Color. 29

30 Adjust Color and Filters Change the color, brightness, transparency, or contrast for any images within the document. 1. Select an Image. 2. The top toolbar will now reflect image editing options, select Image options. Additionally, from the top Menu, select Format, then Image Options. 3. On the right Image Options panel: A. Select Recolor, to change the color of your image. B. Under Adjustments, use the sliders to increase or decrease the: Transparency: How much of the background shows through the image. Brightness: How bright the image appears. Contrast: How much the image stands out from the document background. Changes to the image will appear as edit occurs. Reset an Image If you want to undo the changes you have made to your photo, reset an image back to its original photo. 1. Select an image. 2. Click Format. 3. Select Reset image. The edited image will return to the original photo you added to the file. 30

31 Links You can insert URL links into images and text Google Docs. Reasons to use links: Quick access to research materials. Quick access to shared Google files. Link to Google Forms quiz. Insert a Link 1. Place the cursor, highlight text or select the image in the document where you would like the link to appear. 2. Click Insert, select Link. 3. In the Text field, enter the title of the link. 4. In the Link field, enter a URL of the link. 5. Click Apply. Remove a Link 1. Click the link you want to remove. 2. Select Remove. Edit a Link 1. To update the link, click Change. 2. In the Text field, enter the title of the link. 3. In the Link field, enter the new or updated URL of the link. 4. Click Apply. 31

32 Equations You can insert mathematical equations into your Google docs. 1. Place the cursor, in the document where you would like the equation to appear. 1. From the top Menu, click Insert. 2. Select Equation. An equation box will appear where your cursor was placed. 3. In the upper left, below the format menu, a mathematical symbol menu will appear. Select the symbols needed to build the equation. The symbol menus are as follows: Greek letters Miscellaneous operations Relations Math operators Arrows 4. Edit the equation by adding numbers or substituting variables in the box. 5. To add another equation box, click New equation. NOTE: To keep the equation menu available, click View and then Show equation toolbar. 32


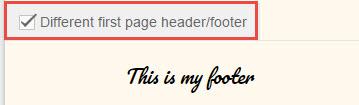
33 Headers & Footers Google Docs Insert a Header 1. From the top Menu, click Insert. 2. Choose Header. 3. In the header box, enter text. 4. To the left of Different first page header/footer, check the selection box. This option is only available for the first page. Insert a Footer 1. From the top Menu, click Insert. 2. Choose Header. 3. Enter text into the header. 4. To the left of Different first page header/footer, check the selection box. This option is only available for the first page. 33

34 Page Numbers You can add page numbers and the number of total pages to a document. Google Docs 1. In the top left, click Insert. 2. Select Page number. 3. Select desired option from the Page number menu: Choose to skip or not skip the first page. Choose to place the page number in the header or footer of the page. Page Breaks You can insert or delete page breaks in Google Docs. Page breaks are useful if you want to break up an idea or set an image apart from text in your document. 1. Place the cursor, where you would like the page break to appear. 2. Click Insert. 3. Select Page break. The page break will be added to your document, any text after the cursor will be placed on the next page. Delete a Page Break. 1. Click underneath the page break. 2. On the keyboard, press Backspace until the page break is removed. 34


35 Special Characters Add special characters such as arrows, shapes, or accent marks to your documents. Insert a Special Character 1. Place the cursor in the document where you would like the special character to appear. 2. From the top Menu, click Insert. 3. Select Special characters. 4. To the left of the each Special Characters dialogue box, click the drop-down arrow to search the character list. 5. To narrow down search results, use the additional search options as offered. Example: Select Categories. Select Emoji. Select Animals, Plants and Food. 6. Click the desired character. The selected character will be automatically inserted into the document. TIP: You can use the top toolbar Help search box to access and insert special characters. Search Insert special characters. 35
36 Draw a Special Character 1. Place the cursor in the document where you would like the special character to appear. 2. From the top Menu, click Insert 3. Select Special characters. 4. To the right you will find a blank pane, draw the character you would like to insert into your document. Located to the left in the Search Results, Google will offer a selection of special characters based on your drawing. 5. Select the desired symbol or character. Horizontal Lines Horizontal Lines are an elegant and easy way of creating separation within a document. Its important to note that inserting a Horizontal line is not the same a drawing a line. NOTE: A Horizontal Lines cannot be modified, the line size or color will remain static. 1. Place the cursor immediately above where you would like the horizontal line to appear. 2. From the top Menu, select Insert. 3. Click Horizontal line. 36


37 Bookmarks Use bookmarks to link within a document to a specific section or page. Create a Bookmark 1. Place the cursor in the document where you would like the bookmark to appear. 2. Click Insert. 3. Select Bookmark. Link to a Bookmark 1. Select the bookmarked text you want to associate with the link. 2. Click Insert. 3. Select Link. 4. In the window that opens, click Bookmarks. 5. A list will appear, select the desired text / URL. 6. Click Apply. NOTE: To remove, select the link or bookmark and click Remove. 37

38 Table of Contents You can see your document structure with a table of contents. Each item in the table of contents links to your document headings or title. 1. Place your cursor where you would like to place the table of contents. 2. Click Insert. 3. Select Table of contents. 4. Scroll over and select desired Table of Contents layout. With page numbers With blue links The table of contents will appear. The table of contents reflects the titles and headings of the document to edit the table contents updated the titles and headings of the document. To Delete the Table of Contents 1. Within the document, locate the table of contents. 2. From within the table of contents, right-click to access the contextual menu. 3. Select Delete table of contents. 38


 together to create titles, add headers,")

39 Tables Tables and graphs are visual representations of data sets. They are used to organize information to show patterns and relationships in an easy to understand format. 1. From the top Menu, select Insert. 2. Select Table. 3. Use the cursor to highlight/add the desired number rows and columns. Tables can extend to 20 x 20 cells. The table is automatically added to the document. Merge cells Cells can be combined (merged) together to create titles, add headers, or put information from several cells into one. 1. With the cursor, click and drag to highlight cells. 2. From the top Menu, select Table. 3. Click Merge cells. Cells will merge into one. Edit as necessary. 39


40 Distribute Rows and Columns 1. Place the cursor within the table. 2. From the top Menu, click Table. 3. Select Distribute rows/distribute columns. Edit Style within Cells 1. Select and highlight desired cells. 2. From the top toolbar, click one of the following style option: Border color Border width Border dash Background color 40


41 Charts 1. From the top Menu, click Insert. 2. Select Chart. 3. From the options available, click the desired chart type. 4. In the action window, select Edit in Sheets. 5. Once the Google Sheet app launches, edit data as desired. 6. Re-open Google Docs. Google Docs may already be open, check browser tab. 7. On the chart, click Update. Chart will automatically update based on the new data in the corresponding Google Sheet. 41


42 Tools Menu Spelling Google Docs automatically spell checks a document as its being created. If misspelled words are found a red line will appear under the word. Use spell check to accept or ignore the corrections. 1. Click Tools, select Spelling. A box will open in the top right corner. 2. In the Change Misspelling to: window, select the appropriate option: Click Change, to use a suggested spelling. Click Ignore, to ignore the suggested spelling. Click the Ignore down arrow, then Ignore all, to ignore all instances of the word. Click Add to Dictionary, to add a word that incorrectly appears as misspelled,. Personal Dictionary Commonly, NISD or Northside ISD appears as misspelled in a document; to further customize the Google Docs experience add words to the personal dictionary so that Docs does not identify them as misspelled. 1. Click Tools, select Personal dictionary. 2. In the Add a new word text box, type the word to be added. 3. Click Add. 4. Click Save. 42


43 Preferences Google Docs Editing your preferences will help you adjust auto correct. The auto correct feature allows users to replace-as-you-type or auto correct using an automatic data validation function. This feature helps to save time and create a customized text editing environment for the user by automatically inserting special characters or recognizing character usage, or symbols added to the auto correct catalog saved by the user. 1. To turn on automatic corrections place a check mark next to the feature, conversely to turn off automatic correction un-check the feature. Features include: Automatically capitalize words (English only). Use smart quotes (changes keyboard quotes to curly quotes). Automatically detect links. Automatically detect lists. 2. To add an automatic substitution in the Replace field, enter the text or character that will be replaced. Example, (/) 3. In the With field, enter the new text or character. Example, ( ) 4. To deselect an auto substitution, un-check the text or character sequence. 5. To delete the auto substitution, click the x next to the text or character sequence. 6. Click OK. Explore With built in Google scanning, users can research while still in Google Docs. The Explore tool provides search results in the right side panel as well as provides the option to insert a footnote for used resources. Search 1. From the bottom left of your screen, select the Explore icon. 2. In the Search field, enter a search term. 3. On the keyboard, press Enter. 4. From the search results, select web. Other options include: Images Drive (your Google Drive file storage) 43


44 Cite as a Footnote Explore allows you to add a footnote directly from the side panel. The footnote will include more details about the selected resources such as the source, URL and date obtained. 1. Place the cursor in the document where you would like the corresponding number of the footnote to appear. 2. From within the Explore pane, click the More icon. 3. From the Change citation format window, select MLA. 4. From the search result options, select Web. 5. Under Web results, select the desired Web resource. 6. To the right of the selected Web resources, click the Cite As Footnote icon. Define Google Docs provides users with two options to access the dictionary to search for word definitions. Open the Dictionary from the tools menu and select Define. Right click on a word and select Define. 1. From the top Menu, select Tools. 2. Select Define. 3. A Dictionary window pane will appear on the right, enter a word. 4. On the keyboard press Enter. 44

45 Document Outline Google Docs Structuring documents is easy with the document outline feature in Google Docs. The outline feature will detect the titles and headings used within the document to create the outline. 1. To open the outline, click Tools. 2. Click Document outline. The outline will open on the left. 3. To remove a heading from the outline, click the X. Word Count You can count the number of words in a document or in a selected portion of text within Google Docs. 1. From the top Menu, click Tools. 2. To see the following document statistics, click Word Count: A. Pages B. Words C. Characters D. Characters excluding spaces 45


46 Voice Typing Voice Typing allows a user to create a Google Doc through voice dictation. Google voice typing is flexible and very responsive; however keep in mind that remembering to included punctuation and formatting as you speak will take some time to get use to. Review a list of commands by visiting Google s support site at and search for Voice Typing Commands. Before you being ensure that your microphone is set up and works properly. Voice typing is only compatible with the Chrome browser. Voice typing works is available in over 40 languages and accents: 1. From the top Menu, select Tools. 2. Click Voice typing. 3. A microphone icon will appear, click the microphone. 4. At a normal volume and pace, speak clearly. The microphone will appear red when on (hot). 5. To stop dictation, click the microphone again. 6. Review text and make edits where necessary. 46
47 Translate Document 1. From the top Menu, click Tools. Google Docs 2. Select Translate document. The translate document window will appear. 3. Under New document title, enter a Title. 4. Under Translate into, click to select a language. 5. Click Translate button. A translated copy of the document will appear in a new window, it will also be added to your Google Drive. 47
48 Collaboration Collaboration is a key component of the G Suite apps, sharing enables collaborators to work on the same document at the same time. Using this feature users can be confident that they are working on the most current version of the document in one safe and secure location. Documents within the NISD domain can only be shared within the district. Sharing Rights When a file is shared with someone, owners can choose the level of access collaborators have which determines what they can do with it. View - People can see, but can t change or share the file with others. Comment - People can make comments and suggestions, but can t edit or share the file. Edit - People can make changes, accept or reject suggestions, and share the file with others. Assigning a Task - This features allows the owner to assign a task to a collaborator. Owner Settings The owner or collaborators with edit access can change the sharing settings for the file. To make it so only the owner can share a file use the owner settings provided in the Owner settings and the access privileges are necessary. Is Owner - By default, you own any file you create or upload into Google Drive. Change Owner - Ownership of Google files and folders can be transferred from the owner to someone with a District Google Account. Only the owner can transfer ownership. Prevent Editors from changing access and adding new people - With this option selected collaborators cannot share the file with others or change the edit rights that the owner established. Disable options to download, print and copy for commenters and viewers - With this option selected individuals with commenting or viewing rights will be unable to download, print or copy the file the shared file. Editors will have full rights. 48
49 Link sharing options When you share a link to a file, you can control how widely the file is shared. Files created within the Northside ISD domain can only be shared with other Northside ISD accounts. On - Northside ISD, anyone signed in to a NISD account can search for and access your file. On - Anyone at Northside ISD with the link, anyone signed in to a NISD account can search for and access your file if they have the link. Off - Specific people, only NISD staff that you share the file with will be able to access it. Share Sharing a document is easy and provides a wonderful opportunity for collaborative learning between staff members or students. Teachers or students can study together, work on projects simultaneously in a peerto-peer online setting or as a large group collaboration. 1. Open the file you want to share. 2. From the upper right of the screen, click Share. 3. Under the People field, enter the name or address of the Google Group or person you are sharing the file with. 4. To the right of People, click the Pencil icon to choose collaborator access privileges. Can Edit, collaborators can edit files directly. Can Comment, collaborators can only make comments or suggestions. Can View, collaborators can view or print the file. 5. In the Notify people field, click to add a checkmark. If a note is not desired, un-check the Notify people field then click Done. 6. In the Add a note field, enter a message to collaborators. An message will be sent to everyone the file was shared with. 7. Click Send. 49

50 Get Sharable Link You can provide collaborators with a link to shared Google Doc files. Using a link will provide you with sending options such as, link or teacher web page, when sharing the file. 1. Open the file you want to share. 2. From the upper right of the screen, click Share. 3. Under the Link sharing field, click the Down arrow. 4. Select Anyone at Northside ISD with the link can view. 5. Click Copy link. A message will display, Link copied to clipboard. 6. Click Done. You can now copy and paste the link in an or any place you want to share it. NOTE: Files can only be shared or viewed by Northside ISD staff members or students. Edit Share Settings After you share a file, you can edit, stop, or limit sharing rights to any file you own at any time by utilizing the advanced feature within the share feature. Change Share Rights 1. Open the file you want to share. 2. From the upper right of the screen, click Share. 3. At the bottom right of the Share with others window, click Advanced. You are now in the Sharing Settings window and ready to make changes and edits as needed. 50

51 Change Sharing Privileges 1. From within the Share Settings window, locate the Who has access field. 2. Review the collaborator list, click the Pencil icon. 3. From the options list, select the desired sharing privilege. To stop sharing click the X to the right of a collaborator. 4. Click Save Changes. Set Expiration Date for a Shared File Expiration dates can t be set for people with edit access: Adding an expiration for someone with edit access, will change their access to comment only. If you change their access back to Can edit, the expiration date will be removed. 1. From within the Share Settings window, locate the Who has access field. 2. Review the collaborator list, click the Stop Watch icon. 3. In the Access expires field, click the drop down arrow to select an expiration date. 7 Days 30 Days Custom Date, this options opens a Calendar for a date selection. 4. Click Save changes. 51


52 Revision History To see a listing of all the edits made to a Doc access the documents revision history. Revisions will be color coded for each collaborator as well as provide the date and time of each revision. 1. From the top Menu, select File. 2. Click See Revision History. 3. The revision history will be located in the right panel window, select the date and time as desired. Clicking on a particular version will show you how the document looked at that time. To restore the document to a previous version, click Restore This Revision button located at the top of the screen. Comments To add comments to Microsoft Office files in Google Docs, Sheets, or Slides, change the file to a Google Docs file. Add a Comment 1. Select and highlight the desired text, images or cells. 2. To the right of the selected text, click the Comment icon. 3. In the Comment window, enter a message. 4. Click Comment. 52
 will appear along side the content in the file. 1. Select and highlight the desired text, images or cells. 2.")


53 Assign an Action Item in a Comment Use comments to assign action items to your students or colleagues. The suggested action item(s) will appear along side the content in the file. 1. Select and highlight the desired text, images or cells. 2. To the right of the selected text, click the Comment icon 3. In the Comment window, Name Last Name or address of the collaborator. For 4. A list of contacts will appear, select the correct contact. 5. To the left of the Assign to name, click the box to add a checkmark. 6. After the collaborator name, enter an assignment message. 7. Click Assign. The person you assigned the action item to will get an . If you add someone who doesn t have permission to see the file, you will be asked to share the file. 8. When the assignment is complete, In the top right corner of the comment window, click the checkmark to mark as done. 53


54 Suggest Google Docs You can suggest changes to a document without changing the original text. If the owner approves your suggestions, they replace the original text. Suggest Changes 1. To the right of Editing, click the down arrow select Suggesting. 2. While in Suggesting mode, make edits. Suggested edits will appear in a new color. Anything deleted will appear crossed out. 3. Click the Suggestion window to add more detail, type a comment. 4. Click Reply. The owner of the file will get an with the suggestions. Accept or Reject Suggestions If someone has suggested an edit to a document you own, you can accept or reject it. If a suggestion is accepted, the suggestion will replace the original text. If the suggestion is rejected, the suggestion will disappear and the original text will remain. 1. To accept or reject a comment, click the comment. 2. In the top-right of the comment window, click Accept or Reject. NOTE: To see all accepted and rejected suggestions, navigate to the top right and click Comments. 54
55 Chat Google Docs When you re working on a file at the same time as others, you can chat with the group viewing the file so that you don t have to back and forth while you work. Anyone viewing the file who is signed in to a Google Account will be included in the chat. 1. In the top-right corner, click Chat icon. 2. A Chat window will appear, type a message into the chat box. To chat collaborators must be signed into their Google Account. Only collaborators on the document can see the chat. 3. To send message on your keyboard, press Enter. 4. To turn chat sound notification on, in the top-right corner, click the Settings icon. 5. In the settings Menu, check the box. 6. Click Save. 7. To exit the chat, click the Close icon. 55
56 56
Technology Services. Leander ISD
 Technology Services Leander ISD 2017 2017 Contents Create Document... 3 Add Title... 4 Save Document... 4 Add/Edit Text... 4 Change/Add Fonts... 4 Edit Font... 5 Paint Format Tool... 5 Insert Image...
Google Docs: ipad Technology Training and Development 6632 Bandera Rd, Building D San Antonio, Texas (210)
") Technology Training and Development 6632 Bandera Rd, Building D San Antonio, Texas 78238 (210)397-8126 Table of Contents Getting Started...3 G Suite...3 Sign in Glossary...3 ipad Passcode...3 Apple ID...3
Technology Training and Development 6632 Bandera Rd, Building D San Antonio, Texas 78238 (210)397-8126 Table of Contents Getting Started...3 G Suite...3 Sign in Glossary...3 ipad Passcode...3 Apple ID...3
MICROSOFT WORD 2010 BASICS
 MICROSOFT WORD 2010 BASICS Word 2010 is a word processing program that allows you to create various types of documents such as letters, papers, flyers, and faxes. The Ribbon contains all of the commands
Google Docs. PD Learning Network 2014
 Google Docs Introduction Welcome to the Google Docs guide, part of a course designed to give you the skills needed to get the most out of using this word processing program for your needs as a teacher.
Microsoft Word 2010 Tutorial
 1 Microsoft Word 2010 Tutorial Microsoft Word 2010 is a word-processing program, designed to help you create professional-quality documents. With the finest documentformatting tools, Word helps you organize
11.1 Create Speaker Notes Print a Presentation Package a Presentation PowerPoint Tips... 44
 Contents 1 Getting Started... 1 1.1 Presentations... 1 1.2 Microsoft Office Button... 1 1.3 Ribbon... 2 1.4 Mini Toolbar... 2 1.5 Navigation... 3 1.6 Slide Views... 4 2 Customize PowerPoint... 5 2.1 Popular...
Introduction to Microsoft Office 2016: Word
 Introduction to Microsoft Office 2016: Word Last Updated: September 2018 Cost: $2.00 Microsoft Word is a word processing software. You can use it to type letters, reports, and other documents. This class
To create, upload, share, or view shared files through Google Apps, go to Documents in the black bar above.
 To create, upload, share, or view shared files through Google Apps, go to Documents in the black bar above. This will open another tab in your browser. Here you will see all files you own or that are shared
Spreadsheets Microsoft Office Button Ribbon
 Getting started with Excel 2007 you will notice that there are many similar features to previous versions. You will also notice that there are many new features that you ll be able to utilize. There are
Microsoft Word Part I Reference Manual
 Microsoft Word 2002 Part I Reference Manual Instructor: Angela Sanderson Computer Training Coordinator Updated by: Angela Sanderson January 11, 2003 Prepared by: Vi Johnson November 20, 2002 THE WORD SCREEN
Introduction to Microsoft Word 2010
 Introduction to Microsoft Word 2010 Microsoft Word is a word processing program you can use to write letters, resumes, reports, and more. Anything you can create with a typewriter, you can create with
Using Microsoft Word. Table of Contents
 Using Microsoft Word Table of Contents The Word Screen... 2 Document View Buttons... 2 Selecting Text... 3 Using the Arrow Keys... 3 Using the Mouse... 3 Line Spacing... 4 Paragraph Alignment... 4 Show/Hide
Introduction to Microsoft Office PowerPoint 2010
 Introduction to Microsoft Office PowerPoint 2010 TABLE OF CONTENTS Open PowerPoint 2010... 1 About the Editing Screen... 1 Create a Title Slide... 6 Save Your Presentation... 6 Create a New Slide... 7
Learn more about Pages, Keynote & Numbers
 Learn more about Pages, Keynote & Numbers HCPS Instructional Technology May 2012 Adapted from Apple Help Guides CHAPTER ONE: PAGES Part 1: Get to Know Pages Opening and Creating Documents Opening a Pages
What can Word 2013 do?
 Mary Ann Wallner What can Word 2013 do? Provide the right tool for: Every aspect of document creation Desktop publishing Web publishing 2 Windows 7: Click Start Choose Microsoft Office > Microsoft Word
Google Docs Suite: Basics
 Google Docs Suite: Basics The following Google Docs suite lessons highlight the common features and capabilities of Google Docs, Sheets, Slides, Forms, and Drawings. In addition to common toolbars and
GOOGLE APPS. If you have difficulty using this program, please contact IT Personnel by phone at
 : GOOGLE APPS Application: Usage: Program Link: Contact: is an electronic collaboration tool. As needed by any staff member http://www.google.com or http://drive.google.com If you have difficulty using
MS Word 2010 An Introduction
 MS Word 2010 An Introduction Table of Contents The MS Word 2010 Environment... 1 The Word Window Frame... 1 The File Tab... 1 The Quick Access Toolbar... 4 To Customize the Quick Access Toolbar:... 4
Word Getting Started The Word Window u vw. Microsoft QUICK Source. Creating a New Blank Document. Creating a New Document from a Template
 Microsoft QUICK Source Word 2007 Getting Started The Word Window u vw x y z u Quick Access Toolbar contains shortcuts for the most commonly used tools. v Microsoft Office Button contains common file and
Word - Basics. Course Description. Getting Started. Objectives. Editing a Document. Proofing a Document. Formatting Characters. Formatting Paragraphs
 Course Description Word - Basics Word is a powerful word processing software package that will increase the productivity of any individual or corporation. It is ranked as one of the best word processors.
MS WORD. You can use it for writing letters, reports and so on.
 MS WORD MS WORD 2 You can use it for writing letters, reports and so on. Starting Word application 3 To start MS. Word do the following: 1. From the Start button on the taskbar, select All Programs. 2.
Word Select New in the left pane. 3. Select Blank document in the Available Templates pane. 4. Click the Create button.
 Microsoft QUICK Word 2010 Source Getting Started The Word Window u v w x z Opening a Document 2. Select Open in the left pane. 3. In the Open dialog box, locate and select the file you want to open. 4.
WORD XP/2002 USER GUIDE. Task- Formatting a Document in Word 2002
 University of Arizona Information Commons Training Page 1 of 21 WORD XP/2002 USER GUIDE Task- Formatting a Document in Word 2002 OBJECTIVES: At the end of this course students will have a basic understanding
Microsoft Word 2010 Basics
 1 Starting Word 2010 with XP Click the Start Button, All Programs, Microsoft Office, Microsoft Word 2010 Starting Word 2010 with 07 Click the Microsoft Office Button with the Windows flag logo Start Button,
Computer Nashua Public Library Introduction to Microsoft Word 2010
 Microsoft Word is a word processing program you can use to write letters, resumes, reports, and more. Anything you can create with a typewriter, you can create with Word. You can make your documents more
MS Word Basics. Groups within Tabs
 MS Word Basics Instructor: Bev Alderman L e t s G e t S t a r t e d! Open and close MS Word Open Word from the desktop of your computer by Clicking on the Start>All programs>microsoft Office >Word 2010
Microsoft Word Important Notice
 Microsoft Word 2013 Important Notice All candidates who follow an ICDL/ECDL course must have an official ICDL/ECDL Registration Number (which is proof of your Profile Number with ICDL/ECDL and will track
DOING MORE WITH WORD: MICROSOFT OFFICE 2013
 DOING MORE WITH WORD: MICROSOFT OFFICE 2013 GETTING STARTED PAGE 02 Prerequisites What You Will Learn USING MICROSOFT WORD PAGE 03 Viewing Toolbars Adding and Removing Buttons MORE TASKS IN MICROSOFT WORD
DOING MORE WITH WORD: MICROSOFT OFFICE 2010
 DOING MORE WITH WORD: MICROSOFT OFFICE 2010 GETTING STARTED PAGE 02 Prerequisites What You Will Learn USING MICROSOFT WORD PAGE 03 Viewing Toolbars Adding and Removing Buttons MORE TASKS IN MICROSOFT WORD
DRAFT. Table of Contents About this manual... ix About CuteSITE Builder... ix. Getting Started... 1
 DRAFT Table of Contents About this manual... ix About CuteSITE Builder... ix Getting Started... 1 Setting up... 1 System Requirements... 1 To install CuteSITE Builder... 1 To register CuteSITE Builder...
Microsoft Office 2000 & Microsoft Word 2000 Page 1. ***** Help Options ***** To access [? ] quickly & for specific use then
![Microsoft Office 2000 & Microsoft Word 2000 Page 1. ***** Help Options ***** To access [? ] quickly & for specific use then](/thumbs/90/104468223.jpg "Microsoft Office 2000 & Microsoft Word 2000 Page 1. ***** Help Options ***** To access [? ] quickly & for specific use then") Microsoft Office 2000 & Microsoft Word 2000 Page 1 ***** Help Options ***** Microsoft Help: Options and Search [ F1 ] Fastest way to get to Office Assistant and MS Office Help! ESC to Exit File > Help
Microsoft Office 2000 & Microsoft Word 2000 Page 1 ***** Help Options ***** Microsoft Help: Options and Search [ F1 ] Fastest way to get to Office Assistant and MS Office Help! ESC to Exit File > Help
New York City College of Technology. Microsoft Word Contact Information:
 New York City College of Technology Microsoft Word 2016 Contact Information: 718-254-8565 ITEC@citytech.cuny.edu Opening Word 2016 Begin by clicking on the bottom left corner icon on the desktop. From
HOW TO SIGN IN... 3 HOW TO USE GOOGLE DRIVE... 4 HOW TO CREATE A DOCUMENT IN DRIVE... 5 HOW TO SHARE A DOCUMENT (REAL TIME COLLABORATION)...
...") HOW TO SIGN IN... 3 HOW TO USE GOOGLE DRIVE... 4 HOW TO CREATE A DOCUMENT IN DRIVE... 5 HOW TO SHARE A DOCUMENT (REAL TIME COLLABORATION)... 6 HOW TO SHARE A FOLDER... 7 HOW TO SEARCH FOR A FILE IN DRIVE...
HOW TO SIGN IN... 3 HOW TO USE GOOGLE DRIVE... 4 HOW TO CREATE A DOCUMENT IN DRIVE... 5 HOW TO SHARE A DOCUMENT (REAL TIME COLLABORATION)... 6 HOW TO SHARE A FOLDER... 7 HOW TO SEARCH FOR A FILE IN DRIVE...
Unit D Lecture Notes Word 2003
 Unit D Lecture Notes Word 2003 Objectives: In this project you will learn: Set document margins Divide a document into sections Insert page breaks Insert page numbers Add headers and footers Edit headers
Microsoft Word 2010 Lesson Plan
 Microsoft Word 2010 Lesson Plan Objective: This class is a brief introduction to Word 2010. It consists of 2 one and one-half hour sessions. By the end of this class you should be able to create a simple
Useful Google Apps for Teaching and Learning
 Useful Google Apps for Teaching and Learning Centre for Development of Teaching and Learning (CDTL) National University of Singapore email: edtech@groups.nus.edu.sg Table of Contents About the Workshop...
Center for Faculty Development and Support. Google Docs Tutorial
 Center for Faculty Development and Support Google Docs Tutorial Table of Contents Overview... 3 Learning Objectives... 3 Access Google Drive... 3 Introduction... 4 Create a Google Document... 4 Upload
Using Microsoft Office 2003 Intermediate Word Handout INFORMATION TECHNOLOGY SERVICES California State University, Los Angeles Version 1.
 Using Microsoft Office 2003 Intermediate Word Handout INFORMATION TECHNOLOGY SERVICES California State University, Los Angeles Version 1.2 Summer 2010 Table of Contents Intermediate Microsoft Word 2003...
Lesson 2 Quick Tour and Features
 Lesson 2 Quick Tour and Features Objectives Students will format a document page. Students will use a spell-checker. Students will copy, cut, and paste text. Students will adjust paragraph indentations.
Word 2013 Beginning. Technology Integration Center
 Word 2013 Beginning Getting Started... 2 Quick Access Toolbar... 3 The Ribbon... 3 Help... 4 Compatibility Mode... 4 Document Views... 4 Navigating the Document... 5 Moving Around in the Document... 5
Microsoft Office Suite
 Module 3 MODULE OVERVIEW Part 1 Getting Familiar with Microsoft Word 2007 for Windows Part 2 Microsoft Word 2007 Basic Features Part 3 More Basic Features Microsoft Office Suite Microsoft Word 2007 Part
Microsoft PowerPoint 2007 Tutorial
 Microsoft PowerPoint 2007 Tutorial Prepared By:- Mohammad Murtaza Khan I. T. Expert Sindh Judicial Academy Contents Getting Started... 5 Presentations... 5 Microsoft Office Button... 5 Ribbon... 6 Quick
Introduction to Microsoft Word 2010
 Introduction to Microsoft Word 2010 Microsoft Word is a word processing program you can use to write letters, resumes, reports, and more. Anything you can create with a typewriter, you can create with
Contents. Launching Word
 Using Microsoft Office 2007 Introduction to Word Handout INFORMATION TECHNOLOGY SERVICES California State University, Los Angeles Version 1.0 Winter 2009 Contents Launching Word 2007... 3 Working with
Microsoft Office Word 2010
 Microsoft Office Word 2010 Content Microsoft Office... 0 A. Word Basics... 4 1.Getting Started with Word... 4 Introduction... 4 Getting to know Word 2010... 4 The Ribbon... 4 Backstage view... 7 The Quick
Microsoft Word: Steps To Success (The Bare Essentials)
") Microsoft Word: Steps To Success (The Bare Essentials) Workbook by Joyce Kirst 2005 Microsoft Word: Step to Success (The Bare Essentials) Page Contents 1 Starting Word 2 Save 3 Exit 5 Toolbars, Alignment,
Microsoft Word: Steps To Success (The Bare Essentials) Workbook by Joyce Kirst 2005 Microsoft Word: Step to Success (The Bare Essentials) Page Contents 1 Starting Word 2 Save 3 Exit 5 Toolbars, Alignment,
Understanding Word Processing
 Understanding Word Processing 3.0 Introduction In this chapter you are going to learn how to create a simple memo or note or a complex and complicated multi column business document using word processing
HOW TO SIGN IN... 3 TRAINING FOR GOOGLE APPS... 4 HOW TO USE GOOGLE DRIVE... 5 HOW TO CREATE A DOCUMENT IN DRIVE... 6
 HOW TO SIGN IN... 3 TRAINING FOR GOOGLE APPS... 4 HOW TO USE GOOGLE DRIVE... 5 HOW TO CREATE A DOCUMENT IN DRIVE... 6 HOW TO SHARE A DOCUMENT (REAL TIME COLLABORATION)... 7 HOW TO SHARE A FOLDER... 8 HOW
Introduction to MS Word XP 2002: An Overview
 Introduction to MS Word XP 2002: An Overview Sources Used: http://www.fgcu.edu/support/office2000/word/files.html Florida Gulf Coast University Technology Skills Orientation Word 2000 Tutorial The Computer
DOING MORE WITH WORD: MICROSOFT OFFICE 2007
 DOING MORE WITH WORD: MICROSOFT OFFICE 2007 GETTING STARTED PAGE 02 Prerequisites What You Will Learn USING MICROSOFT WORD PAGE 03 Viewing Toolbars Adding and Removing Buttons MORE TASKS IN MICROSOFT WORD
This book will help you quickly create your first documents, spreadsheets, and slideshows.
 Getting Started Welcome to iwork 08 Preface This book will help you quickly create your first documents, spreadsheets, and slideshows. iwork 08 includes three applications that integrate seamlessly with
Microsoft Office Publisher
 Microsoft Office 2007- Publisher Opening Microsoft Publisher Using the Start Menu, click on All Programs and navigate to the Microsoft Office folder. Click on Microsoft Office Publisher 2007. Choosing
Inserting Information into PowerPoint
 LESSON 6 6.1 Inserting Information into PowerPoint After completing this lesson, you will be able to: Change the layout of a slide. Insert a clip art image. Scale an image. Insert and format a table. Insert
The major change in Word is the ribbon toolbar. The File menu has been replaced with a button.
 Word 2007 There are a lot of new changes to Office 2007. This handout will provide a few examples on how to do basic formatting. If at any point you get stuck, remember that Office has a feature that allows
BASIC MICROSOFT POWERPOINT
 BASIC MICROSOFT POWERPOINT PART ONE PHONE: 504-838-1144 IT Training Team Jefferson Parish Library EMAIL: jpltrain@jplibrary.net In this class you will learn to: Launch, close, and interact with Microsoft
Introduction to Microsoft Office 2007
 Introduction to Microsoft Office 2007 What s New follows: TABS Tabs denote general activity area. There are 7 basic tabs that run across the top. They include: Home, Insert, Page Layout, Review, and View
Word 2010 Beginning. Technology Integration Center
 Word 2010 Beginning File Tab... 2 Quick Access Toolbar... 2 The Ribbon... 3 Help... 3 Opening a Document... 3 Documents from Older Versions... 4 Document Views... 4 Navigating the Document... 5 Moving
HOW TO SIGN IN... 3 TRAINING FOR GOOGLE APPS... 4 HOW TO USE GOOGLE DRIVE... 5 HOW TO CREATE A DOCUMENT IN DRIVE... 6
 HOW TO SIGN IN... 3 TRAINING FOR GOOGLE APPS... 4 HOW TO USE GOOGLE DRIVE... 5 HOW TO CREATE A DOCUMENT IN DRIVE... 6 HOW TO SHARE A DOCUMENT (REAL TIME COLLABORATION)... 7 HOW TO SHARE A FOLDER... 8 HOW
Introduction to Microsoft Word 2010
 Introduction to Microsoft Word 2010 THE BASICS PAGE 02! What is Microsoft Word?! Opening Microsoft Word! The Title Bar! Page View and Zoom MENUS...PAGE 03! Quick Access Toolbar! The Ribbon! File Tab! Home
San Pedro Junior College. WORD PROCESSING (Microsoft Word 2016) Week 4-7
 Week 4-7") WORD PROCESSING (Microsoft Word 2016) Week 4-7 Creating a New Document In Word, there are several ways to create new document, open existing documents, and save documents: Click the File menu tab and then
WORD PROCESSING (Microsoft Word 2016) Week 4-7 Creating a New Document In Word, there are several ways to create new document, open existing documents, and save documents: Click the File menu tab and then
Microsoft Word 2010 Part 1: Introduction to Word
 CALIFORNIA STATE UNIVERSITY, LOS ANGELES INFORMATION TECHNOLOGY SERVICES Microsoft Word 2010 Part 1: Introduction to Word Summer 2011, Version 1.0 Table of Contents Introduction...3 Starting the Program...3
LESSON ONE AND TWO TOPIC: HOW TO USE MICROSOFT WORD. : Putu Putra Astawa, S.Kom.,M.Kom
 LESSON ONE AND TWO TOPIC: HOW TO USE MICROSOFT WORD Author : Putu Putra Astawa, S.Kom.,M.Kom Date : June 09, 2014 and June 16, 2014 Time : 08.30-10.45 Am. Materials Needed : Computer, Work Sheet Overview
Quick Access Toolbar. You click on it to see these options: New, Open, Save, Save As, Print, Prepare, Send, Publish and Close.
 Opening Microsoft Word 2007 in the practical room UNIT-III 1 KNREDDY 1. Nyelvi beállítások az Office 2007-hez (Language settings for Office 2007 (not 2003)) English. 2. Double click on the Word 2007 icon
Using New Google Sites
 Using New Google Sites With the New Google Sites, building websites is easy. Just drag content where you need it. Create a onestop destination for all important information, including videos, images, calendars,
* You can also just type in log in if you haven't already, and will be taken to the Slides page.
 1. Go to Google's home page and click on the grid in the upper right hand corner. From there, click on the Drive icon. You will be redirected to a log in page if you are signed out, if not you will be
Microsoft PowerPoint 2013 Beginning
 Microsoft PowerPoint 2013 Beginning PowerPoint Presentations on the Web... 2 Starting PowerPoint... 2 Opening a Presentation... 2 File Tab... 3 Quick Access Toolbar... 3 The Ribbon... 4 Keyboard Shortcuts...
Microsoft PowerPoint 2010 Beginning
 Microsoft PowerPoint 2010 Beginning PowerPoint Presentations on the Web... 2 Starting PowerPoint... 2 Opening a Presentation... 2 File Tab... 3 Quick Access Toolbar... 3 The Ribbon... 4 Keyboard Shortcuts...
Nauticom NetEditor: A How-to Guide
 Nauticom NetEditor: A How-to Guide Table of Contents 1. Getting Started 2. The Editor Full Screen Preview Search Check Spelling Clipboard: Cut, Copy, and Paste Undo / Redo Foreground Color Background Color
Microsoft PowerPoint 2007 Beginning
 Microsoft PowerPoint 2007 Beginning Educational Technology Center PowerPoint Presentations on the Web... 2 Starting PowerPoint... 2 Opening a Presentation... 2 Microsoft Office Button... 3 Quick Access
Microsoft Word Intermediate March 25, Exercise 1: Open Word Click on Word. OR Click Start. Click All Programs. Click Microsoft Office.
 Microsoft Word Intermediate March 25, 2014 Exercise 1: Open Word Click on Word. OR Click Start. Click All Programs. Click Microsoft Office. Exercise 2: Create a new document Click File Tab. Select New.
Beginning a presentation
 L E S S O N 2 Beginning a presentation Suggested teaching time 40-50 minutes Lesson objectives To learn how to create and edit title and bullet slides, you will: a b c d Select slide types by using the
Google Apps - Docs. Becoming a Guru. EdTechTrainer
 Google Apps - Docs Becoming a Guru Finding Google Apps Voice Typing Voice Typing (only in Chrome) If it is greyed out, check microphone settings: System Preferences on a Mac Control Panel on a PC Voice
SUMMARIES OF VIDEOS GRADE SOLUTIONS DEVELOPMENT GOOGLE DOCS
 SUMMARIES OF VIDEOS GRADE 10-12 SOLUTIONS DEVELOPMENT GOOGLE DOCS Solutions Development Google Docs Documents 1. Getting Started This lesson looks at what Google docs are how you get access to them and
Application of Skills: Microsoft Excel 2013 Tutorial
 Application of Skills: Microsoft Excel 2013 Tutorial Throughout this module, you will progress through a series of steps to create a spreadsheet for sales of a club or organization. You will continue to
MS Word Professional Document Alignment
 MS Word Professional Document Alignment Table of Contents CHARACTER VS. PARAGRAPH FORMATTING...5 Character formatting...5 Paragraph Formatting...5 USING SHOW/HIDE TO REVEAL NON-PRINTING CHARACTERS...5
Microsoft Office Word 2016 for Mac
 Microsoft Office Word 2016 for Mac Introduction to Word University Information Technology Services Learning Technologies, Training & Audiovisual Outreach Copyright 2016 KSU Division of University Information
Google Docs. Table of Contents. About Google Docs 3. Access Google Docs 3. Google Docs Home Page 3. Creating a New Doc 4.
 Google Docs Table of Contents About Google Docs 3 Access Google Docs 3 Google Docs Home Page 3 Creating a New Doc 4 Name the Doc 4 Add and Edit Text 5 Add pictures, links, tables, and more 6 Create page
TABLE OF CONTENTS TABLE OF CONTENTS... 1 INTRODUCTION... 3 BREAK... 4 DEFINITIONS... 4 STEP BY STEP- SECTION BREAK... 6 PAGE NUMBERS...
 TABLE OF CONTENTS TABLE OF CONTENTS... 1 INTRODUCTION... 3 BREAK... 4 DEFINITIONS... 4 WHY WOULD YOU USE THIS?... 4 STEP BY STEP- PAGE BREAK... 4 ALTERNATIVE METHODS... 5 STEP BY STEP- SECTION BREAK...
Microsoft Office Training Skills 2010
 Microsoft Office Training Skills 2010 Lesson 5 Working with pages, Tables, Shapes and Securing Documents Adding Page color Add color to the background of one or several pages in the document. 1. Click
Computer Shortcuts. Files menu options in current program. Edits options in current program Universal Help in almost every Windows program.
 www.bankjobszone.com Computer Shortcuts Shortcut keys Concept: Shortcuts keys help provide an easier and usually quicker method of navigating and using computer software programs. Shortcut keys are commonly
Using Word 2016: A Quick Guide
 Using Word 2016: A Quick Guide Prepared by Sali Kaceli http://kaceli.com GETTING STARTED WITH WORD 2016 CREATING A NEW DOCUMENT & THE DOCUMENT GALLERY 1. Open Word 2016 2. Click on Blank Document or click
Word Tutorial 3. Creating a Multiple- Page Report COMPREHENSIVE
 Word Tutorial 3 Creating a Multiple- Page Report COMPREHENSIVE Objectives Format headings with Quick Styles Insert a manual page break Create and edit a table Sort rows in a table Modify a table s structure
Google Slides Handout. Carol LaRow
 Google Slides Handout Create Presentations Online Carol LaRow Create presentations that users view in browser windows. Collaborate in real time, or work when it s convenient, inside a WEB browser window.
Do It Yourself Website Editing Training Guide
 Do It Yourself Website Editing Training Guide Version 3.0 Copyright 2000-2011 Sesame Communications. All Rights Reserved. Table of Contents DIY Overview 3 What pages are editable using the DIY Editing
OU EDUCATE TRAINING MANUAL
 OU EDUCATE TRAINING MANUAL OmniUpdate Web Content Management System El Camino College Staff Development 310-660-3868 Course Topics: Section 1: OU Educate Overview and Login Section 2: The OmniUpdate Interface
Office 365: . Accessing and Logging In. Mail
 Office 365: Email This class will introduce you to Office 365 and cover the email components found in Outlook on the Web. For more information about the Microsoft Outlook desktop client, register for a
TABLE OF CONTENTS TABLE OF CONTENTS... 1 INTRODUCTION... 2 USING WORD S MENUS... 3 USING WORD S TOOLBARS... 5 TASK PANE... 9
 TABLE OF CONTENTS TABLE OF CONTENTS... 1 INTRODUCTION... 2 USING WORD S MENUS... 3 DEFINITIONS... 3 WHY WOULD YOU USE THIS?... 3 STEP BY STEP... 3 USING WORD S TOOLBARS... 5 DEFINITIONS... 5 WHY WOULD
1 THE PNP BASIC COMPUTER ESSENTIALS e-learning (MS Powerpoint 2007)
") 1 THE PNP BASIC COMPUTER ESSENTIALS e-learning (MS Powerpoint 2007) 2 THE PNP BASIC COMPUTER ESSENTIALS e-learning (MS Powerpoint 2007) TABLE OF CONTENTS CHAPTER 1: GETTING STARTED... 4 MICROSOFT OFFICE
1 THE PNP BASIC COMPUTER ESSENTIALS e-learning (MS Powerpoint 2007) 2 THE PNP BASIC COMPUTER ESSENTIALS e-learning (MS Powerpoint 2007) TABLE OF CONTENTS CHAPTER 1: GETTING STARTED... 4 MICROSOFT OFFICE
Microsoft Office Word. Help. Opening a Document. Converting from Older Versions
 Microsoft Office 2007 - Word Help Click on the Microsoft Office Word Help button in the top right corner. Type the desired word in the search box and then press the Enter key. Choose the desired topic
Creating Web Pages with SeaMonkey Composer
 1 of 26 6/13/2011 11:26 PM Creating Web Pages with SeaMonkey Composer SeaMonkey Composer lets you create your own web pages and publish them on the web. You don't have to know HTML to use Composer; it
PowerPoint 2016 Building a Presentation
 PowerPoint 2016 Building a Presentation What is PowerPoint? PowerPoint is presentation software that helps users quickly and efficiently create dynamic, professional-looking presentations through the use
WEBSITE USER GUIDE V.4
 WEBSITE USER GUIDE V.4 SEC. 01 SEC. 02 SEC. 03 SEC. 04 SEC. 05 SEC. 06 CASCADE INTERFACE OVERVIEW LOGIN PAGE USER DASHBOARD SITE DIRECTORY EDITING PAGES PAGE EDITOR OVERVIEW STANDARD ROW COMPONENTS EDITING
Introduction to Microsoft Word 2008
 1. Launch Microsoft Word icon in Applications > Microsoft Office 2008 (or on the Dock). 2. When the Project Gallery opens, view some of the available Word templates by clicking to expand the Groups, and
The first time you open Word
 Microsoft Word 2010 The first time you open Word When you open Word, you see two things, or main parts: The ribbon, which sits above the document, and includes a set of buttons and commands that you use
Create a new document based on default template, other available template like: memo, fax, agenda.
 Word Processing 3 Objectives: Working with Documents Enhancing Productivity Using the Application Open, close a word processing application. Open, close documents. Create a new document based on default
Document Formatting and Page Layout
 Word 2013 Document Formatting and Page Layout Introduction Instructional designers create a lot of documents such as job aids, training manuals, memos, and so forth. They do so using Word software. While
Basic Microsoft Word 2013
 Basic Microsoft Word 2013 1 Basic Microsoft Word 2013 General Notes: In Office 2013, tabs exist at the top; these are referred to as ribbons. The commands on each tab are organized into groups. The commands
Introduction to 9.0. Introduction to 9.0. Getting Started Guide. Powering collaborative online communities.
 Introduction to 9.0 Introduction to 9.0 Getting Started Guide Powering collaborative online communities. TABLE OF CONTENTS About FirstClass...3 Connecting to your FirstClass server...3 FirstClass window
MN Studio Website - User Guide
 MN Studio Website - User Guide Version 1.1 MN Studio Website Program 1. Introduction Welcome to the new website program! The MN Studio Website program allows you to create your own website with customized
Microsoft Word 2007 on Windows
 1 Microsoft Word 2007 on Windows Word is a very popular text formatting and editing program. It is the standard for writing papers and other documents. This tutorial and quick start guide will help you