3.1. Administrator s Guide TNT SOFTWARE. ELM Log Manager. Version
|
|
|
- Ella Small
- 5 years ago
- Views:
Transcription
1 Version 3.1 TNT SOFTWARE ELM Log Manager Administrator s Guide
2 TNT SOFTWARE ELM Log Manager 3.1 Administrator s Guide Copyright TNT Software All Rights Reserved 2001 Main Street Vancouver, WA USA Phone Fax support@tntsoftware.com
3 Table of Contents ELM Log Manager 3.1 Terminology... 1 Installation of ELM Server and ELM Console... 5 Installing the ELM Console... 7 Agents... 8 Installing Service Agents... 8 Installing Service Agents Using Setup Package...10 Installing Remote Agents...11 Installing IP Agents...13 Troubleshooting Service Agent Installation...14 Troubleshooting Service Agent Communications...15 Monitor Items...16 Monitor Item Properties...17 Monitor Item Best Practices...17 Creating Monitor Items...18 Event Alarms...18 How To Create an Event Alarm...18 Event Collector...19 How To Create an Event Collector...19 ELM Server Monitor...20 How To Create an ELM Server Monitor...20 File Monitor...21 How To Create a File Monitor...22 Monitor Item Actions...23 Event Filters, Rules and Notification Methods...25 Event Filters...25 Notification Methods...26 Alerts...28 How To Create an Alert...28 Beeps...29 How To Create a Beep Notification Method...29 i
4 Command Script...30 How To Create a Command Script Notification Method...30 How To Programmatically Enable or Disable Items...31 Forward Event...33 How To Forward an Event...33 Instant Message...33 How To Use an Instant Message Notification Method...33 Mail Notification...33 How To Use MAPI Notification...33 How To Create an SMTP Notification Method...33 Marquee Device...33 How To Create a Marquee Notification Method...33 Network Message Settings...33 How To Create a Network Popup Notification Method...33 Pagers...33 How To Create a Pager Notification Method...33 SNMP Notification...33 How To Create an SNMP Notification Method...33 How To Create an SNMP Trap Notification Method...33 Sound File...33 How To Create a Sound File Notification Method...33 Syslog Notification...33 How To Create a Syslog Notification Method...33 Text-To-Speech Notification...33 How To Create a Text-to-Speech Notification Method...33 Web Post Notification...33 How To Create a Web Post Notification Method...33 Rules...33 How To Create a Rule...33 Information Management...33 Event Log Records...33 Alerts...33 How To Create an Alert Notification Method...33 Receivers...33 SNMP Receiver...33 How To Receive SNMP Traps...33 Syslog Receiver...33 How To Receive Syslog Messages
5 Knowledge Base Articles...33 Event Views and Personal Views...33 Event Views...33 Event View Settings...33 How To Create an Event View...33 Personal Views...33 How To Create a Personal View...33 Reports...33 How To Create Reports...33 How To Schedule Reports...33 How To Add a Chart to a Report...33 Web Viewer...33 Web Viewer Security...33 Web Viewer User Interface...33 Pre-Configured Items
6 Chapter 1 ELM Log Manager 3.1 Terminology The following terms are used in this document, in the ELM Log Manager product documentation (ELMMMC.CHM) and in ELM Log Manager. Term Description ELM Server The ELM server process (elmsvr.exe) and supporting modules (DLLs). This component is comprised of several engines that handle such tasks as creating and maintaining a database for data storage, archiving and reporting, managing Agents and Agent licensing, processing Event Filters and Rules, and executing Notification Methods. ELM Server Database The ELM server includes Receivers (SNMP and Syslog), it monitors Remote Agents and Remote IP Agents, and manages sessions with ELM Consoles. The ELM Server database contains data collected from Agents, Alerts generated by Actions and the Alert Notification Method, Knowledge Base Articles created by administrators and end-users, and when configured, ELM Server diagnostic events. The ELM Server can use Microsoft Access (runtime included), Microsoft SQL Server 6.5 or later, Microsoft SQL Desktop Engine (MSDE), or Oracle 8i or later as its database platform. The ELM Server database requires the MDAC 2.6 SP1 or later and JET 4.0 SP3 or later. ELM Console The ELM Console refers to the snap-in that resides in a Microsoft Management Console. The ELM Console is the primary user interface for the product. The ELM Console is freely distributable throughout your organization. Installing the ELM Console requires MMC 1.2 or later; you can save the ELM Console in MMC 2.0 format when running on Windows XP or Windows Each snap-in can connect to multiple ELM Servers, and the ELM Console snap-in can be co-mingled with other MMC snap-ins to provide single-seat administration. Web Viewer The Web Viewer is an HTTP/XML-based interface to ELM Server Objects. It is a set of COM objects within a set of Active Server Pages that runs under Internet Information Services 5.0 and later. The server side of the Web Viewer is installed using the setup package for ELM. The client side of the Web Viewer is any Javascript/XML-capable Web browser. The latest versions of Netscape and Internet Explorer support both Javascript 1
7 ELM Server Objects and XML and will provide the richest Web Viewer experience. Because the client side is simply a Web browser, most organizations will not have to deploy any software to client machines in order to utilize the Web Viewer. Term Description Agent A system monitored by an ELM Server, or a system that transmits messages to an ELM Server. There are three types of Agents: Service Agents, Remote Agents and Remote IP Agents. Service Agent The Service Agent process (tntagent.exe) and supporting modules. This component executes Monitor Items, collects data, transmits collected data to the ELM Server, and executes the configured Actions for assigned Monitor Items. Remote Agent Service Agents run as a service on the monitored Agent. Service Agents are required in order to monitor or collect data in real-time. Service Agents can only be run on Windows NT, Windows 2000, Windows XP and Windows 2003 computers. Remote Agents are also called Agentless because, unlike a Service Agent, nothing is installed on the system being monitored. Remote Agents fall into two categories: Windows workstations and servers, and TCP/IP-based computers and network devices (IP Agent). The actual monitoring functions for a Remote Agent execute within the ELM Server Process. As a result, Remote Agents cannot be monitored in real-time. In addition, Remote Agents add overhead to the ELM Server process (~10MB per Remote Agent, depending on what Monitor Items are used). IP Agent IP Agents are non-windows workstations and servers (e.g., Unix, Linux, NetWare, etc.) and TCP/IP-based devices (routers, switches, hubs) that send messages to the ELM Server. IP Agents can be used for receiving SNMP traps and TCP and UDP Syslog Messages. Alert A special type of event that can be generated from a Monitor Item or by the Alert Notification Method. Alerts are stored in the TNTAlerts database and displayed in the Alerts container within the ELM Console. By design, all entries in the TNTAlerts database are displayed in the Alerts container. Although you can change what columns are displayed in the Alerts container, you cannot filter or limit the number of Alerts displayed, unless you delete an Alert. Deleting an Alert from the Alerts container also permanently deletes the Alert from the ELM Server database. Event Filters Event Filters are displayed within the Event Filter container within the ELM Console. Event Filters are used to process incoming events to determine whether or not the event should be displayed in an Event View or a Personal View, and whether or not the event should cause a Rule to execute a Notification Method. Event Filters can be used to isolate a single event or specific set of events, or to isolate all events except for a single event or specific set of events. You can create an unlimited number of Event Filters. Event An event can be a single record from a Windows event log, an SNMP trap, a Syslog message or an Alert from an ELM Agent. Event Views Event Views use one or more Event Filters to display some or all events. Events are stored in the TNTEvents table in the ELM Server database and displayed in one or more Event Views. Event Views are created as child objects within the Event Views container in the ELM Console. 2
8 Knowledge Base Articles You can associate one or more Event Filters to filter what events are displayed, as well as limit the number of events displayed. Knowledge Base Articles are used to add notes and comments to Events. The notes, comments and event details that comprise the Knowledge Base Article are stored in the TNTKnowledgeBaseRecords table in the ELM Server database. Knowledge Base Articles are displayed in the Knowledge Base Article container in the ELM Console. Because Knowledge Base Articles are written by administrators/end-users, they represent information that is unique and valuable to your organization. Monitor Item A Monitor Item is the individual thing being monitored. Monitor Items are displayed within the Monitor Item container in the ELM Console. They include an Agent Monitor, an Event Alarm, Event Collector, File Monitor, and the ELM Server Monitor. Notification Methods Notification Methods are used to notify administrators/end-users or take corrective action. Notification Methods are displayed within the Notification Method container of the ELM Console. Personal Views The ELM Server has a rich notification engine that can execute a variety of Notification Methods. You can use beeps and sounds, electronic mail, numeric and alphanumeric pagers, SNMP traps, Syslog messages and scripts as Notification Methods. Personal Views are identical to Event Filters, except that they are tied to the specific administrator/end-user that created them. Unlike Event Views which are shared views, Personal Views are only visible in the ELM Console for the user who created them. Personal Views are created as child objects within the Personal Views container in the ELM Console. You can associate one or more Event Filters to filter what events are displayed, as well as limit the number of events displayed. Reports Reports refer to report objects that perform database queries and return the results in a pre-designed format. The ELM Server includes a report engine that enables administrators/end-users to create reports without requiring any additional software. Reports are displayed in the Reports container within the ELM Console. Reports can be generated both on an ad hoc basis and at periodic intervals, and output to a variety of formats. Rules Rules link Event Filters with Notification Methods. When one or more Event Filters assigned to a Rule are matched, the Notification Method(s) assigned to the Rule is/are executed. Rules are displayed in the Rules container within the ELM Console. Each Rule can have multiple Event Filters assigned to it, and each Rule can trigger multiple Notification Methods. Receivers The ELM Server includes two receivers: an SNMP trap receiver and a Syslog message receiver. The SNMP receiver can collect, filter and archive SNMP traps with and without SNMP Object IDs. The Syslog receiver can receive both TCP and UDP Syslog messages. Other Terms Term Description Actions Actions are a form of notification that is executed by a Monitor Item. As a result, Actions occur outside of the ELM Server's notification engine. 3
9 Quality of Service (QoS) There are four Actions that can be executed: generate Alert, generate application event log entry, send a Network Pop-up Message or execute a script. Quality of Service deals with response times. It is a level of monitoring above general availability. Determining that a critical service or application is available is only one part of proactive monitoring. Ideally, you should also monitor the responsiveness or quality of service of your critical business applications. Wizards Creating new objects in ELM is accomplished through the use of Wizards. Each Wizard takes the administrator/end-user step-by-step through the creation of an object. Wizards are used to reduce the learning curve for ELM and increase usability. Wizards are launched whenever new object creation is invoked from within the ELM Console. At the end of each Wizard is an option to re-run the Wizard to create additional objects, making multiple object creation quick and easy. 4
10 Chapter 2 Installation of ELM Server and ELM Console Installing the ELM Server is a relatively easy and straightforward process. Once you've determined that your system meets the minimum system requirements, you can begin your installation by performing the actual installation of the application. ELM is distributed electronically from TNT Software's Web site ( It is packaged into a self-extracting executable that will launch the setup process when executed: Windows 2003, Windows 2000 and Windows XP, as well as Windows NT computers with the Windows Installer service installed can use the Microsoft Installer package (MSI package). Windows NT computers without the Windows Installer service require the EXE package. You can download the Windows Installer for both NT 4.0 and Windows 2000 from Microsoft. During Setup, the following services (and any services dependent on the following services) will be stopped and restarted: IIS Admin Service SNMP Service SNMP Trap Service ELM Server service (if upgrading only) TNT Agent service (if upgrading only)» To Install the ELM Server: 1. Double-click the MSI or EXE file you downloaded to execute it. The Setup Wizard will launch. 2. Click Next to continue. The License Agreement screen will appear. 3. Select I accept the license agreement and click Next to continue. The ReadMe Information screen will appear. 4. Read the contents of the ReadMe file and click Next to continue. The Select Features screen will appear. 5. Select the feature(s) you want to install. When selecting the Server or Console components, you can use the Browse button to choose the destination folder. Use the Disk Cost button to check available disk space. Click Next to continue. The User Information screen will appear. 6. Enter the Company Name and Serial Number as it appears on your SLA. If this is an evaluation version, enter the Company Name and leave the Serial Number field set to Evaluation. Select the option that says Anyone who uses this computer and click Next to continue. If this is an evaluation version, the expiration date will be displayed when you click Next. If this is a non-eval version, a confirmation dialog will appear when you click Next. 5
11 7. Click Next to continue, and click OK to clear the dialog message that appears. The Service Account Logon screen will be displayed. 8. In the Username field, enter the account you want to use for the service account. This account must have administrative rights on the ELM Server and on all Windows-based Remote Agents. Enter the password for this account in the Password field. 9. Click Next to continue. If the account specified in the preceding step does not already have Log on as a Service rights on the ELM Server, the Setup process will grant this right to the account. 10. If IIS is installed, the Web Site Name screen will appear. If you wish to install the Web Viewer component, leave the Create the ELM Web Site virtual directory on this computer checkbox checked. Leave the default Alias set to EEM31. Select the Default Web Site and click Next to continue. Note: if you do not create the Web Viewer virtual directory during the initial install of ELM, you will need to create the virtual directory manually. 11. The Ready to Install the Application screen will appear. 12. Click Next to continue. Setup will copy the files to the target destination, register its components, install the ELM Server service and launch the Agent Installation Wizard. 13. Click Next to continue. Note: If you are presented with the Upgrade Previous Version dialog box instead of the Agent Installation Wizard, clear all of the checkboxes on this dialog box and click Next to continue. Once the file copy process has completed, the Database Connection Wizard will launch. 14. Click Next to proceed past the Wizard's Welcome screen. The Database Type screen will appear. Using the Database Type dropdown, select the type of database you want to use. 15. Click Next to continue. The next screen depends on what database type you selected: If you select Microsoft Access, the Microsoft Access screen will appear. Select the path and filename for the Access database you want created. By default, a database called ELM.MDB will be created in the ELM Server directory. To accept this default, click Next. To change the database name or location, enter the path and filename you want to use, or use the Browse button to browse for the path. Click Next to continue. If you select Microsoft SQL Server, the Microsoft SQL Server screen will appear. Enter the Computer Name of the SQL Server, the database name and the username and password for an account that has database owner (dbo) rights on the SQL Server database you created. You should also use this option when using Microsoft SQL Server Desktop Engine (MSDE) as your database platform. Click Next to continue. If you select Oracle, the Oracle Database screen will appear. Enter the name of the System DSN you created. Enter the username and password for an account that has database owner (dbo) rights on the Oracle database you created. Click Next to continue. 16. Click Finish to complete the Database Connection Wizard. 17. Click Finish to complete Setup. 6
12 Installing the ELM Console Installing the ELM Console is a relatively easy and straightforward process. Once you've determined that your system meets the minimum requirements for installation, you can begin your installation by performing the actual installation of the application.» To Install the ELM Console: 1. Double-click the file you downloaded to execute it. The Setup Wizard will launch. 2. Click Next to continue. The License Agreement screen will appear. 3. Select I accept the license agreement and click Next to continue. The ReadMe Information screen will appear. 4. Read the contents of the ReadMe file and click Next to continue. The Select Features screen will appear. 5. Select the Server component and choose Entire feature will be unavailable. Make sure just the Console component is selected. 6. Click Next to begin the install process. 7. Click Finish to complete the install process. 7
13 Chapter 3 Agents Creating and managing Agent Objects Agent is the general term used to describe a managed system. There are four classes of Agents: Cluster Agent for Windows NT, Windows 2000 and Windows 2003 clusters Server Agent for Windows NT, Windows 2000 and Windows 2003 Servers Workstation Agent for Windows NT Workstation, Windows 2000 Professional and Windows XP Professional IP Agent for any TCP/IP addressable device/system. With respect to Cluster, Server and Workstation Agents, there are two types: Service Agents code that runs as a service on the monitored system Remote Agents Agentless monitoring, where the ELM Server performs monitoring/collection. IP Agents are always Remote (agentless) Agents. You can monitor, collect data from or receive data from Unix, Linux, NetWare, Cisco and Apple systems, hubs, switches, routers, gateways, etc. using IP Agents. Windows systems can also be IP Agents; however, you will not be able to use Event Collectors, Event Alarms or File Monitors against these systems. Installing Service Agents Service Agents and ELM Servers can have one-to-one or one-to-many relationships. An ELM Server can monitor multiple Service Agents and a Service Agent can be monitored by multiple ELM Servers. Each Service Agent maintains separate configuration, collection set and cache files for each Server that is monitoring it. The Service Agent is comprised of a 32-bit, multithreaded executable called TNTAGENT.EXE, its companion DLLs and its configuration data (TNTAgent.dat). These files exist in the %systemroot%\tntagent on the monitored system. The Service Agent can run in the security context of the LocalSystem, or in a user security context (e.g., using a service account). Service Agents typically consume about 7-15MB of physical memory, and less than.1% of the overall CPU time on the monitored system. The amount of resources actually consumed depend on the number of Monitor Items applied to the Agent, the frequency at which those Monitor Items are executed, and the amount of data generated by or being collected from the monitored system. 8
14 You can use the ELM Console to install Service Agents remotely, or you can install them manually on the target machine. Service Agents are only used for monitoring Windows NT, Windows 2000, Windows 2003, and Windows XP systems; if you are monitoring a computer with an Alpha or RISC processor, a different OS or device that uses TCP/IP, or if you do not wish to install software on the monitored system, you can use a Remote Agent or an IP Agent.» To install a Service Agent: 1. Right-click on the Agents container in the ELM Console and select All Tasks New Agent. The Agent Installation Wizard will launch. If the Welcome dialog is displayed, click Next to continue. 2. From the dropdown, select Service Agent and click Next to continue. 3. Enter the host name, fully-qualified domain name, or IP address of the system you want to monitor. Click the Browse button to browse your network if you are unsure of the computer's name. Click Next to continue. 4. The Logon Account dialog will appear. You can run a Service Agent under a user account, or under the LocalSystem account. Enter the account information and click Next to continue. 5. In the Listen on TCP Port field, enter the TCP port on which you want the Agent to listen. Service Agents communicate with the ELM Server over TCP/IP sockets. By default, Service Agents listen on TCP port You can change the port used by the Agent by selecting an alternative TCP port. Use the Test button to verify that the port is available. Note Once an Agent has been configured to listen on a specific port, you cannot change the port. If you want the Agent to listen on a different port, you will need to remove and re-add the Agent using the new port. 6. Click Next to continue. The copy file process will begin. The Agent executable, companion DLL files and configuration data will be copied to the target computer. Important In order to install a Service Agent, you must have administrative rights on the monitored system. ELM will attempt to install the Service Agent using your current credentials (e.g., the account you're logged on with); if this account does not have administrative rights on the Service Agent, you will be prompted to specify alternate credentials to perform the installation. Another alternative is to use the setup package you downloaded to install the Service Agent. 7. The Description dialog will appear. Enter an optional description for this Service Agent, and click Next to continue. 8. The Agent Categories dialog will appear. Modify the Categories field as desired, or leave the default entries. Click Next to continue. 9
15 9. The Select Monitors dialog will appear. Select the Monitor Items you want applied to this Service Agent. Click Next to continue. Click Finish. 10. Click OK to acknowledge the Agent installation. When prompted to install another Service Agent, click Yes or No, depending on your needs. Installing Service Agents Using Setup Package If the Agent you want to monitor is on the other side of a firewall, in a DMZ environment, or located in an environment that restricts the use of NetBIOS and RPC endpoint ports, you can use the Setup package to install an Agent on the remote system and then use the Agent UI to register the Agent with the ELM Server and select monitor items for the Agent.» To install a Service Agent using Setup: 1. Copy the ELM Setup package to the target computer, and execute the file to begin the install. 2. The Installation Welcome screen will appear. Click Next to continue. 3. The License Agreement screen will appear. Read the license agreement and indicate your acceptance of its terms by selecting I accept the license agreement. Click Next to continue. 4. The ReadMe Information screen will appear. Read the contents of the ReadMe file and click Next to continue. 5. The Select Features screen will appear: Click Server and choose Entire feature will be unavailable. Click Console and choose Entire feature will be unavailable. Click Agent and choose Will be installed on local hard drive. 6. Click Next to continue, and then Next one more time to initiate installation. 7. The Agent executable and support files will be installed. When the installation has completed, the Register Server Wizard will launch. 8. In the Name field, enter the host name, IP address or fully-qualified domain name for the ELM Server you want to register. If desired, click the Browse button to browse the network for the ELM Server you want to register. 9. In the Port field, enter the TCP port on which the ELM Server is listening. By default, ELM Servers listen on the following TCP ports: ELM Enterprise Manager - TCP Port 1251 ELM Log Manager - TCP Port 1351 ELM Performance Manager - TCP Port 1451 Note The name field may already be filled in with an Agent name that contains :EEM. The EEM is a visual cue that indicates the product you are running. ELM Performance Manager users will also see the EEM designation and will need to change to the appropriate descriptor (e.g., ELM or EPM). 10. Click Next to continue. The Select Monitors dialog box will appear. Put a check in the box to the left of each Monitor Item you want to assign to this Agent. You can view the 10
16 properties of any Monitor Item by right-clicking the item and selecting Properties. 11. Click Finish to save the Agent settings and ELM Server registration.» To Uninstall a Service Agent That Was Installed Using Setup: 1. Open the Control Panel and double-click Add/Remove Programs. 2. Select the product you have installed, either: ELM Enterprise Manager ELM Log Manager ELM Performance Manager 3. Click the Change button. 4. If the Service Agent is the only ELM component installed on this system, or if there are other ELM components (e.g., ELM Server or ELM Console) and you want to uninstall everything, select Remove and proceed through the Wizard. If there are other ELM components installed on this system and you do not want to remove them, select Modify and continue through the Wizard. When the component dialog is shown, change the Service Agent from Will be installed on local hard drive to Entire feature will be unavailable. Then, complete the Wizard to remove it. Installing Remote Agents You can monitor Windows NT, Windows 2000, Windows XP and Windows 2003 computers without having to install a Service Agent. You can use a Remote Agent. Instead of running a service on the monitored system, the ELM Server collects and monitors the Agent remotely. Because Agent code is not used on the monitored system, this will add overhead to your network and to the ELM Server. However, this scenario is advantageous when you do not want to install any software on the monitored system in order to keep tabs on it. Remote Agents require that the ELM Server service account has administrative privileges on the system being monitored. In addition, Remote Agents require RPC and NetBIOS connectivity between the ELM Server and the monitored system. Because Remote Agents are remotely monitored by the ELM Server, they cannot be monitored in real-time.» To install a Remote Agent: 1. Right-click on the Agent container in the ELM Console snap-in and select All Tasks New Agent. The Agent Installation Wizard will launch. If necessary, click Next to continue. 2. From the dropdown, select Remote Agent and make sure the IP Agent checkbox is not checked. Click Next to continue. 3. Enter the name or IP address of the system you want to monitor. Click the Browse button to browse your network if you are unsure of the computer's name. Click Next to continue. 4. Modify the Categories field as desired, or leave the default entries. Click Next to continue. 5. Click Next to continue. If there are no monitor items configured, click Finish to complete the Wizard. If there are monitor items, the Select Monitors dialog will appear. In this event, click on each Monitor Item you want applied to this Service Agent. To create a new Monitor Item, right-click in the white space in this dialog and select New Monitor Item. Click Next to continue. Click Finish. 6. Click OK to acknowledge the Agent installation. When prompted to install another Remote Agent, click No. 11
17 The Remote Agent will be added to the list of monitored systems, and the selected Monitor Items for this Remote Agent will be executed according to their settings. 12
18 Installing IP Agents ELM can monitor IP devices using an IP Agent (also known as a Remote IP Agent). The ELM Server can receive SNMP Traps and both TCP-based and UDP-based Syslog messages from IP Agents, as well. To install a Remote IP Agent: 1. Right-click on the Agent container in the ELM Console and select All Tasks New Agent. The Agent Installation Wizard will launch. If necessary, click Next to continue. 2. From the dropdown, select Remote Agent and make sure the IP Agent checkbox is checked. Click Next to continue. 3. Enter the name or IP address of the system you want to monitor. Click the Browse button to browse your network if you are unsure of the computer's name. Click Next to continue. 4. Modify the Categories field as desired, or leave the default entries. Click Next to continue. 5. Click Next to continue. If there are no monitor items configured, click Finish to complete the Wizard. If there are monitor items, the Select Monitors dialog will appear. In this event, click on each Monitor Item you want applied to this Service Agent. To create a new Monitor Item, right-click in the white space in this dialog and select New Monitor Item. Click Next to continue. Click Finish. 6. Click OK to acknowledge the Agent installation. When prompted to install another Agent, click No. The IP Agent will be added to the list of monitored systems. 13
19 Troubleshooting Service Agent Installation Installing a Service Agent is a relatively easy procedure that is usually trouble-free. If you are having problems installing an Agent, some things that you can check are listed below. Does the ADMIN$ share exist on the Agent machine? When installing an Agent from the ELM Server, the ELM Server will attempt to connect to the ADMIN$ share on the Agent machine, so that the Agent executable can be copied to the SYSTEM32 folder on the Agent. If the ADMIN$ does not exist, re-create it. If this is not an option, follow the procedure for manually installing an Agent, which is detailed below. Do you have good name resolution between the ELM Server and Agent? Can you ping the Agent by name from the ELM Server? Can you ping the ELM Server by name from the Agent? Are you able to do a NET VIEW on each system from the other system? ELM can use NetBIOS or host name resolution. Are there any firewalls between the ELM Server and this Agent? Are you able to Telnet from the Agent computer to the appropriate port on the ELM Server? By default, the ELM Log Manager Server listens on TCP Port Does a Netstat -a -p tcp on the ELM Server show it listening on the appropriate port? If you run this command on the Agent, does it show something else listening on port 1253 on the Agent? If the Agent is in a DMZ or a firewall environment, you can use the ELM setup package to install the Agent remotely. Do you have administrative rights on the Agent machine? Only Administrators can connect to the ADMIN$ share and install a new service. When you attempt to install an Agent, ELM will first try to use your existing credentials to authenticate you to the Agent machine. If authentication fails, you will be presented with a Connect As dialog box, which can be used to specify alternate credentials (e.g., local administrator username and password.) Note: the Connect As dialog box does not support blank passwords. If you do not enter a password, the connection will fail. To get around this limitation, go to a command prompt on the ELM Server machine and make a connection to the IPC$ share on the Agent machine. You can use the following syntax: net use \\SERVER\IPC$ /user:abcde\12345 where: SERVER is the name of the Agent machine ABCDE is the name of the domain or machine containing the account you're using is the name of the account with administrative rights Are there any services in a Stop Pending or Start Pending state on the Agent? This may prevent ELM from installing an Agent service. You can use a command-line utility included with ELM to check this. The utility, SM.EXE is a command line utility that can query the Service Control Manager on a local or remote machine. It's usage is: Local machine - SM /dis Remote machine - SM \\SERVER /dis If you see any Start Pending or Stop Pending services, you will need to get them at a stable state (started or stopped) before you can install the Agent service. Have any special security modifications been made to the Agent system? These include things like restrictive registry or NTFS permissions, revoking of user rights assignments, and as previously mentioned, the removal of the ADMIN$ share. If none of these solutions resolves your issue, please contact TNT Software's Product Support Group for assistance. 14
20 Troubleshooting Service Agent Communications If an Agent does not send, or does not appear to be sending, data to your ELM Server(s), there a few things to check to make sure things are installed and configured properly. The easiest path for troubleshooting these situations is to check the basic things first. Is the Agent service running, or is the Agent disabled? The Agent will only monitor, collect and transmit data when the TNT Agent service is running and the Agent is enabled. Has the Agent been configured to collect data? From the ELM Server, double-click the Agent that is not sending data, and look at the Monitor Items tab. Do you still have IP connectivity and good name resolution between the ELM Server and Agent? IP connectivity and healthy name resolution are essential for ELM to operate properly. Have the ELM TCP/IP ports been blocked through a firewall, packet filtering or some other mechanism? By default, the TNT Agent listens on TCP port 1253, and the ELM Log Manager Server listens on TCP Port Try telnetting to the appropriate ports in each direction: - From the ELM Server, try to Telnet to port 1253 on the Agent - From the Agent, try to Telnet to the appropriate port on the ELM Server Once you establish a Telnet session in either direction, press ENTER two times. You should receive version information. If you do not receive this message, or if you are unable to connect to the port, check the following: - On the end that fails, run netstat -a -p tcp at a command prompt. This will show all listening ports and connections. You should see the Agent listening on TCP port 1253 and the ELM Server listening on TCP port 1351, or whatever ports you have configured. If you do not see this entry, restart the application on the failed end (either Agent or ELM Server). Does the Agent Status show a registered ELM Server? From the ELM Server, double-click the Agent and navigate to the Agent Status tab. This will display the Agent's status, which may indicate a problem, such as a failure to execute a monitor item or a failure to communicate with the ELM Server. Is the Agent in cache mode? If the Agent is unable to transmit data to the ELM Server when it has something to send, the Agent will go into cache mode. Each time the Agent has something new to send (e.g., a new event or alert), it checks to see if it can connect to the ELM Server. If it can, it will dump its cache. The Agent Status tab can display whether or not an Agent is in cache mode. Is the ELM Server running on NT Workstation, Windows 2000 Professional or Windows XP? These operating systems have a hard-coded limit of 10 inbound TCP/IP connections. Once there are 10 established connections, no new connections will be able to be established until one or more connections is freed up. You can use the netstat command to count the number of TCP/IP connections in use. The suggested resolution is to upgrade to a Windows Server family product. If none of these solutions resolves your issue, please contact TNT Software's Product Support Group for assistance. 15
21 Chapter 4 Monitor Items Creating and Using Monitor Items Monitor Items are individual items that you want to monitor or collect. For example, to collect event log entries from a Windows NT, Windows 2000, Windows XP or Windows 2003 computer, you would use an Event Collector. To monitor files in the file system, you would use a File Monitor. Generally speaking, you can assign one or more Monitor Items to one or more Agents. ELM Log Manager includes several Monitor Items: Agent Monitor. This is used to monitor an ELM Service Agent. Agent Monitors perform regular heartbeat checks on Service Agents. If the Server Agent does not respond or is slow in responding, a variety of actions and notification options can be triggered. ELM Server Monitor. This is used to enable a Service Agent to monitor availability of the ELM Server. Event Alarm. Event Alarms are used to trigger action and/or notification when an event does or does not occur. Event Alarms can be configured for Windows NT, Windows 2000 and Windows XP Agents. Event Collector. Event Collectors are used to collect events from the event logs on Windows NT, Windows 2000, Windows XP and Windows You can specify the events you want to collect based on a variety of event criteria, including event type, source, event ID, and event details. File Monitor. This is used to monitor non-circular text files on Service Agents. You can monitor individual log files, an entire directory of files, or an entire directory tree of files. SNMP Receiver. The ELM Server can receive SNMP Traps and display them with and without Object IDs as part of the trap messages. Syslog Receiver. The ELM Server can receive Syslog messages from any TCP or UDP-based Syslog client. 16

22 Monitor Item Properties Each Monitor Item has a set of Properties that are associated with it. The actual tabs displayed on the Monitor Item properties dialog box differ depending on which Monitor Item is being examined. Below is a sample Properties dialog for an Event Collector: Tab Event Filter Criteria Agents Test Monitor Schedule Properties Description The Event Filter Criteria is used to provide a mechanism for isolating an event or a set of events. Displays a list of Agents. Checked Agents have this monitor item assigned to them. Used to test the monitor item. Used to set monitor item execution interval and on/off periods. Lists the various internal properties and values for this object. Some Monitor Items also include a checkbox for Default. When checked, this monitor item will automatically be assigned to any new (appropriate) Agents that you create. Monitor Item Best Practices Below are some guidelines for using Monitor Items: Only Service Agents can execute Monitor Items in real-time. For Remote Agents, we recommend a Scheduled Interval of 10 seconds or greater. Disabled Monitor Items do receive some cycles from the ELM Server, so for best performance you should keep the number of disabled Monitor Items to a minimum. Assign multiple similar Monitor Items sparingly. If you assign multiple Event Collectors, you may receive unwanted events, or receive the same events multiple times. Some Monitor Items include the ability to execute Actions. Leverage this for additional management power! When using Remote Agents, the Monitor Items are executed remotely by the ELM Server. You can use the ELM Server s performance object to get metrics on the Monitor Item job queue. 17
23 Creating Monitor Items Event Alarms Event Alarms are used to trigger action and/or notification when an event does or does not occur within a specified time period. Event Alarms can be configured for Windows NT, Windows 2000, Windows 2003, and Windows XP Agents. Unlike the Event Collector Monitor Item which collects events from event logs, the Event Alarm only monitors the log for the presence or absence of events. How To Create an Event Alarm Event Alarms are used to trigger Action and/or Notification when an event is or is not found in the Event Logs on the specified Windows NT, Windows 2000, Windows XP and Windows 2003 computers. You can specify the event(s) you want to look for based on a variety of event criteria, including event type, source, event ID, and event details.» To create an Event Alarm: 1. Right-click on the Monitor Items container in the ELM Console and select All Tasks New Monitor Item. The Create Monitor Wizard will appear. Click Next to continue. 2. Select Event Alarm from the Monitor Type dropdown and click Next to continue. 3. The Event Filter Criteria dialog box will appear. Select the criteria you want to look for, and click Next to continue. The Actions dialog box will appear. 4. The Actions dialog box has two tabs: Events found. Use this tab to select the Action(s) you want taken when one or more matching events are found. Events not found. Use this tab to select the Action(s) you want taken when one or more matching events are not found. 5. Click Next to continue. The Test Monitor Item dialog box will appear enabling you to test the Event Alarm before using it. To do this, select an Agent on from the Agent dropdown and click the Start Test button. 6. Click Next to continue. The Agents dialog box will appear. Check the checkbox for each Service Agent to which you want to apply the Event Collector. 7. Click Next to continue. The Schedule dialog box will appear. On the Occurrence tab, set the frequency at which the matched condition should trigger the specified action. On the Scheduled Interval tab, set the frequency at which you want to execute this Event Collector. Leaving the interval at the default of 1 second will enable you to monitor your event logs in real-time. On the Scheduled Hours tab, configure the hours and days you want this Event Collector active. 8. Click Next to continue. The Name dialog will appear. Enter a Name and Description. 9. Click Finish to save the Event Alarm. 18
24 Event Collector Event Collector Monitor Items are used to collect some or all events from the Agent(s) being monitored. Events can be collected based on any combination of event criteria: Computer Name Event Log Username Event Source Event ID Event Category Event Message When a new event occurs, it will first be checked against the Event Collector Monitor item properties to see if it should be sent to the ELM Server. If the event's type matches one of the selected checkboxes, the event will be received by the ELM Server. If the event type is not one of the selected types, the ELM Server will not receive the event. This is true regardless of whether you are using a Service Agent or a Remote Agent. How To Create an Event Collector Event Collectors are used to collect some or all of the events from the Event Logs on Windows NT, Windows 2000, Windows XP and Windows 2003 computers in real-time or at specified intervals. You can specify the events you want to collect based on a variety of event criteria, including event type, source, event ID, and event details.» To create an Event Collector: 1. Right-click on the Monitor Items container in the ELM Console and select All Tasks New Monitor Item. The Create Monitor Wizard will appear. Click Next to continue. 2. Select Event Collector from the Monitor Type dropdown and click Next to continue. 3. The Event Type dialog box will appear. By default, all event types are checked. If you do not wish to collect events of a specific type, clear the appropriate checkbox(es). 4. The Test Monitor Item dialog box will appear enabling you to test the Event Collector before using it. To do this, select an Agent on from the Agent dropdown and click the Start Test button. 5. Click Next to continue. The Agents dialog box will appear. Check the checkbox for each Service Agent to which you want to apply the Event Collector. 6. Click Next to continue. The Schedule dialog box will appear. On the Scheduled Interval tab, set the frequency at which you want to execute this Event Collector. Leaving the interval at the default of 1 second will enable you to monitor your event logs in real-time. On the Scheduled Hours tab, configure the hours and days you want this Event Collector active. 7. Click Next to continue. The Name dialog box will appear. Enter a Name and Description and click Finish to save the Event Collector. 19
25 ELM Server Monitor An ELM Server Monitor enables Service Agents to perform regular heartbeat checks on the ELM Server. If the ELM Server does not respond or is slow in responding, a variety of actions and notification options can be triggered. You can configure the ELM Server Monitor to restart the ELM Server by putting a check in the Attempt to restart the ELM Server when the heartbeat check fails checkbox. When an ELM Server is shutdown gracefully, a flag is written to the Windows registry on the ELM Server computer: HKLM\Software\TNT Software\<ELM Product>\3.1\Settings\NormalShutdown = 0x (1) A value of 1 indicates a normal shutdown. When the ELM Server service is restarted, this flag (e.g., the NormalShutdown value) is removed from the registry. Before a Service Agent will attempt to restart a stopped ELM Server it will read the registry to see if the flag is present. If the flag exists, the Service Agent will not attempt to restart the ELM Server. If the flag does not exist, the Service Agent will attempt to restart the ELM Server (if configured to do so). Note If you want the Service Agent to restart a stopped ELM Server, the Service Agent must run under a user account with administrative rights on the ELM Server (e.g., rights sufficient to enable it to start a service). In addition, because restarting the ELM Server requires the reading of a registry setting on the ELM Server computer, the Service Agent must have remote access to the ELM Server's registry with the appropriate permissions to determine whether or not the NormalShutdown flag is present. By default, a warning event will be generated if the ELM Server response takes longer than 5 seconds. If the Service Agent and the ELM Server communicate over slow or very busy network links, you should consider increasing this value. To do this, simply change the value in the Warn if slower than seconds from 5 to the desired amount. To generate a warning each time the response is slower than the number of seconds specified, check the box that says Continue to warn after first failure. If you only want to be notified the first time the ELM Server responds slower than the number of seconds specified, uncheck this box. How To Create an ELM Server Monitor An ELM Server Monitor enables Service Agents to perform regular heartbeat checks on the ELM Server. Service Agents assigned this Monitor Item will attempt socket connections at the configured intervals. If the socket connection attempt fails, the Service Agent will look for the presence of the NormalShutdown registry flag to determine whether or not to restart the ELM Server. If the ELM Server does not respond or is slow in responding, a variety of actions and notification options can be triggered.» To create an ELM Server Monitor 1. Right-click on the Monitor Items container in the ELM Console and select All Tasks New Monitor Item. The Create Monitor Wizard will appear. Click Next to continue. 2. Select ELM Server Monitor from the Monitor Type dropdown and click Next to continue. 3. Configure the ELM Server Monitor settings. 20
26 You can have the Service Agent attempt to restart a stopped ELM Server by checking the Attempt to restart ELM Server when heartbeat check fails checkbox. By default, a warning event will be generated if the ELM Server response takes longer than 5 seconds. If the Service Agent and the ELM Server communicate over slow or very busy network links, you should consider increasing this value to 15 or 20 seconds. You may need to experiment with this value to determine the appropriate setting for your environment. To do this, change the value in the Warn if slower than seconds from 5 to the desired amount. To generate a warning each time the response is slower than the number of seconds specified, check the box that says Continue to warn after first failure. If you only want to be notified the first time the Service Agent responds slower than the number of seconds specified, uncheck this box. 4. Click Next to continue. The Monitor Action dialog will appear. When the state, value or condition of a monitored item changes, you can specify what Actions are to be taken. Select the Monitor Action(s) you want to use and click Next to continue. 5. You can test the ELM Server Monitor before using it. To do this, select a Service Agent from the Agent dropdown, select the Action or condition you want to test, and click the Start Test button. When testing the ELM Server Monitor, the Service Agent must be running under a user account with administrative rights on the ELM Server. Note that the test does not actually restart the ELM Server service. 6. Click Next to continue. The Agents dialog box will appear. Check the checkbox for each Service Agent to which you want to apply the ELM Server Monitor. 7. Click Next to continue. The Schedule dialog box will appear. On the Scheduled Interval tab, set the frequency at which you want to execute this ELM Server Monitor. On the Scheduled Hours tab, configure the hours and days you want this ELM Server Monitor active. 8. Give the ELM Server Monitor any desired Name and Description. Leave the Enabled checkbox checked to activate the ELM Server Monitor immediately. If you want this ELM Server Monitor assigned to all newly created Service Agents, then check the box that says Make this item a default selection for new items. 9. Click Finish to save the ELM Server Monitor. File Monitor As the name implies, File Monitors can be used to monitor individual files, an entire directory of files, or an entire directory tree of files. File Monitors can only parse non-circular text files. File Monitor cannot be used to monitor binary files, locked files or circular files (files that overwrite themselves by starting back at the beginning of the file. Note The File Monitor can only be used with Service Agents. It cannot be used with Remote Agents or IP Agents. 21
27 Each File Monitor can include multiple matches; that is, you can look for multiple strings in each file. Each match added to the File Monitor will cause a new subtab for that match to be created under the Actions tab of the File Monitor properties. This enables you to specify different Actions for each match. How To Create a File Monitor To monitor a log file, ASCII file, or text file (or a directory of ASCII or text files), you would use a File Monitor.» To create a File Monitor: 1. Right-click on the Monitor Items container in the ELM Console and select All Tasks New Monitor Item. The Create Monitor Wizard will appear. Click Next to continue. 2. Select File Monitor from the Monitor Type dropdown and click Next to continue. 3. Enter a Name and Description and click Next to continue. 4. The File Monitor Search Definition dialog box will appear. Use the Add button to add a search path. Each File Monitor supports one or more search paths. A search path can be a file or, by using wildcards, a group of files. For example, to search all Internet Information Server logs, use a search path of C:\WINNT\SYSTEM32\LOGFILES\*.LOG, and check the Search Subfolders checkbox. This will cause all log files (HTTP, SMTP, NNTP, and FTP) in all of the subdirectories to be searched for the strings specified in the Add Match dialog box. Click Add for each search path you want to use. 5. Click Next to continue. The Add Match dialog box will appear. Enter the word or string you want to search for. You can click the Insert Variable button to insert a variable in the search string. You can use the asterisk (*) as a wildcard character, a pipe ( ) as an OR operator, an ampersand (&) as an AND operator, and an exclamation point (!) as a NOT operator. For example, to parse a flat file for the word error OR the word failed, use the following example syntax: *error* *failed* 6. Click Add for each string or word you want to search for. Click Next to continue. 7. The Monitor Action dialog box will appear. Configure the following options and click Next to continue. Enable. When this box is checked, the Monitor Item is enabled and will execute as configured. Uncheck this box to disable the Monitor Item. Create New Alert Entry. Selecting this checkbox to cause an Alert to be generated and posted to the Alerts container within the MMC snap-in. Create Application Event Log Entry. Selecting this enables you to cause a customizable event to be logged to the Application log. Use the Variables button to specify any additional variables you want the event to include. Net Send Message. Using this option enables you to send a popup message over the network. The target system must have the Messenger Service (NT/2000/XP/2003) or WinPopUp (Win9x/WinMe) running in order to receive the Net Send Message. Use the Browse button to browse for a target computer, or manually enter the name of the computer to which you want to send messages in the Computer Name field. Run Command. This option provides a mechanism for executing a batch file, running a command line application or launching a script (CScript or WScript). Use the Edit button to create and edit any scripts or command line parameters you want to execute. 8. The Test Monitor Item dialog box will appear enabling you to test the File Monitor before using it. To do this, select an Agent on from the Agent dropdown and click the Start 22
28 Test button. 9. Click Next to continue. The Agents dialog box will appear. Check the checkbox for each Service Agent to which you want to apply the File Monitor. 10. Click Next to continue. The Schedule dialog box will appear. On the Scheduled Interval tab, set the frequency at which you want to execute this File Monitor. Leaving the interval at the default of 1 second will enable you to monitor your event logs in real-time. On the Scheduled Hours tab, configure the hours and days you want this File Monitor active. 11. Click Finish to save the File Monitor. Monitor Item Actions In ELM Log Manager, the Agent Monitor, File Monitor and Event Alarm include the ability to generate notification and/or execute Actions. There are four Actions that can be executed by a Monitor Item: Create a New Alert Entry Create an Application Event Log Entry Send a Network Message Run a command When the state of a monitor item changes, you can specify what actions are to be taken. These actions - also called Notification Methods - are intended to alert an administrator to the monitor item state change, take corrective action, or both. You have four actions that are available to you: Create New Alert Entry. Selecting this checkbox to cause an Alert to be generated and posted to the Alerts container within the Console snap-in. Create Application Event Log Entry. Selecting this enables you to cause a customizable event to be logged to the Application log on the ELM Server. Net Send Message. Using this option enables you to send a popup message over the network. The target system must have the Messenger Service (Windows NT, Windows 2000, Windows 2003, or Windows XP) or WinPopUp (Win9x/WinMe) running in order to receive the Net Send Message. Use the Browse button to browse for a target computer, or manually enter the name of the computer to which you want to send messages in the Computer Name field. Note The Message field that appears on this dialog applies to the above actions. Use the Variables button to specify any additional variables you want the event to include. Run Command. This option provides a mechanism for executing a batch file, running a command line application or launching a script (CScript or WScript). Use the Edit button to create and edit any scripts or command line parameters you want to execute. As illustrated below, Actions occur based on a Monitor Item s result. For example, if an event is not found in the event log, the Event Alarm can send a network popup message to an administrator s workstation. 23
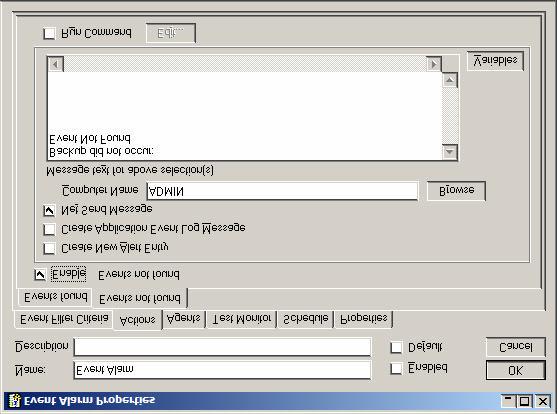
29 24
3.1. Administrator s Guide TNT SOFTWARE. ELM Enterprise Manager. Version
 Version 3.1 TNT SOFTWARE ELM Enterprise Manager Administrator s Guide TNT SOFTWARE ELM Enterprise Manager 3.1 Administrator s Guide Copyright 1997-2003 TNT Software All Rights Reserved 2001 Main Street
Installation Guide. EventTracker Enterprise. Install Guide Centre Park Drive Publication Date: Aug 03, U.S. Toll Free:
 EventTracker Enterprise Install Guide 8815 Centre Park Drive Publication Date: Aug 03, 2010 Columbia MD 21045 U.S. Toll Free: 877.333.1433 Abstract The purpose of this document is to help users install
PROXY Pro Deployment Tool v10.0. User Guide October 2017
 PROXY Pro Deployment Tool v10.0 User Guide October 2017 Table of contents 1. System Requirements...3 2. Target Computer Requirements...4 3. Deployment Tool Operation...5 3.1 Loading a Host Install File...6
KnowledgeSync V6.0 Implementation Guide
 KnowledgeSync V6.0 Implementation Guide Pre-Installllatiion Confiiguratiion Welcome to KnowledgeSync! Welcome KnowledgeSync Active Alerts, the industry s leading Business Activity Monitoring (BAM) technology.
Network Server Suite. v10.3 Installation Guide
 Network Server Suite v10.3 Installation Guide Copyright Copyright HelpSystems, LLC. All rights reserved. www.helpsystems.com US: +1 952-933-0609 Outside the U.S.: +44 (0) 870 120 3148 IBM, AS/400, OS/400,
EventSentry Quickstart Guide
 Contents I Part I About This Guide 2 Part II Overview 3 Part III Installing EventSentry 6 1 Installation with... Setup 7 2 Management Application... 8 3 Configuration... 9 4 Remote Update... 12 5 Heartbeat
Installation Guide Install Guide Centre Park Drive Publication Date: Feb 11, 2010
 EventTracker Install Guide 8815 Centre Park Drive Publication Date: Feb 11, 2010 Columbia MD 21045 U.S. Toll Free: 877.333.1433 Abstract The purpose of this document is to help users install and configure
Installing and Configuring Cisco Unified Real-Time Monitoring Tool
 CHAPTER 2 Installing and Configuring Cisco Unified Real-Time Monitoring Tool You can install Cisco Unified Real-Time Monitoring Tool (RTMT), which works for resolutions 800*600 and above, on a computer
FieldView. Management Suite
 FieldView The FieldView Management Suite (FMS) system allows administrators to view the status of remote FieldView System endpoints, create and apply system configurations, and manage and apply remote
Installing and Configuring Cisco Unified Real-Time Monitoring Tool
 CHAPTER 2 Installing and Configuring Cisco Unified Real-Time Monitoring Tool You can install Cisco Unified Real-Time Monitoring Tool (RTMT), which works for resolutions 800*600 and above, on a computer
Transport Gateway Installation / Registration / Configuration
 CHAPTER 4 Transport Gateway Installation / Registration / Configuration This chapter covers the following areas: Transport Gateway requirements. Security Considerations When Using a Transport Gateway.
Mercury QuickTest Professional. Installation Guide Version 9.0
 Mercury QuickTest Professional Installation Guide Version 9.0 Mercury QuickTest Professional Installation Guide, Version 9.0 This manual, and the accompanying software and other documentation, is protected
Real-Time Monitoring Configuration
 CHAPTER 7 This chapter contains the following information for configuring the Cisco Unified Presence Server Real-Time Monitoring Tool (RTMT). Some options that are available in the current version of the
Xton Access Manager GETTING STARTED GUIDE
 Xton Access Manager GETTING STARTED GUIDE XTON TECHNOLOGIES, LLC PHILADELPHIA Copyright 2017. Xton Technologies LLC. Contents Introduction... 2 Technical Support... 2 What is Xton Access Manager?... 3
Transport Gateway Installation / Registration / Configuration
 CHAPTER 2 Transport Gateway Installation / Registration / Configuration This chapter covers the following areas: Transport Gateway requirements. Security Considerations When Using a Transport Gateway.
Print Audit 6. Print Audit 6 Documentation Apr :07. Version: Date:
 Print Audit 6 Version: Date: 37 21-Apr-2015 23:07 Table of Contents Browse Documents:..................................................... 3 Database Documentation.................................................
Version Installation Guide. 1 Bocada Installation Guide
 Version 19.4 Installation Guide 1 Bocada Installation Guide Copyright 2019 Bocada LLC. All Rights Reserved. Bocada and BackupReport are registered trademarks of Bocada LLC. Vision, Prism, vpconnect, and
AVG Business Edition Remote Administration
 AVG Business Edition Remote Administration User Manual Document revision AVG.02 (1/7/2018) Copyright AVG Technologies CZ, s.r.o. All rights reserved. All other trademarks are the property of their respective
IsItUp Quick Start Manual
 IsItUp - When you need to know the status of your network Taro Software Inc. Website: www.tarosoft.com Telephone: 703-405-4697 Postal address: 8829 110th Lane, Seminole Fl, 33772 Electronic mail: Contact1@tarosoft.com
KYOCERA Net Admin Installation Guide
 KYOCERA Net Admin Guide Legal Notes Unauthorized reproduction of all or part of this guide is prohibited. The information in this guide is subject to change without notice. We cannot be held liable for
Monitoring Windows Systems with WMI
 Monitoring Windows Systems with WMI ScienceLogic version 8.8.1 Table of Contents Introduction 4 Monitoring Windows Devices in the ScienceLogic Platform 5 What is SNMP? 5 What is WMI? 5 PowerPacks 5 Configuring
29 March 2017 SECURITY SERVER INSTALLATION GUIDE
 29 March 2017 SECURITY SERVER INSTALLATION GUIDE Contents 1. Introduction... 2 1.1 Assumptions... 2 1.2 Prerequisites... 2 2. Required setups prior the Security Server Installation... 3 1.1 Create domain
Ekran System v.5.2 Deployment Guide
 Ekran System v.5.2 Deployment Guide Table of Contents About... 6 System Requirements... 7 Program Structure... 9 Deployment Process... 10 Server and Database... 11 About... 11 Database Types Comparison...
Partner Integration Portal (PIP) Installation Guide
 Installation Guide") Partner Integration Portal (PIP) Installation Guide Last Update: 12/3/13 Digital Gateway, Inc. All rights reserved Page 1 TABLE OF CONTENTS INSTALLING PARTNER INTEGRATION PORTAL (PIP)... 3 DOWNLOADING
Partner Integration Portal (PIP) Installation Guide Last Update: 12/3/13 Digital Gateway, Inc. All rights reserved Page 1 TABLE OF CONTENTS INSTALLING PARTNER INTEGRATION PORTAL (PIP)... 3 DOWNLOADING
STATISTICA VERSION 10 STATISTICA MONITORING AND ALERTING SERVER (MAS) INSTALLATION INSTRUCTIONS
 INSTALLATION INSTRUCTIONS") Pre-requisites: STATISTICA VERSION 10 STATISTICA MONITORING AND ALERTING SERVER (MAS) INSTALLATION INSTRUCTIONS 1. The installation of the STATISTICA Monitoring And Alerting Server (MAS) network version
Pre-requisites: STATISTICA VERSION 10 STATISTICA MONITORING AND ALERTING SERVER (MAS) INSTALLATION INSTRUCTIONS 1. The installation of the STATISTICA Monitoring And Alerting Server (MAS) network version
Installation on Windows Server 2008
 USER GUIDE MADCAP PULSE 4 Installation on Windows Server 2008 Copyright 2018 MadCap Software. All rights reserved. Information in this document is subject to change without notice. The software described
KASPERSKY LAB. Kaspersky Administration Kit version 6.0. Administrator s manual
 KASPERSKY LAB Kaspersky Administration Kit version 6.0 Administrator s manual KASPERSKY ADMINISTRATION KIT VERSION 6.0 Administrator s manual Kaspersky Lab Visit our website: http://www.kaspersky.com/
User Manual. Active Directory Change Tracker
 User Manual Active Directory Change Tracker Last Updated: March 2018 Copyright 2018 Vyapin Software Systems Private Ltd. All rights reserved. This document is being furnished by Vyapin Software Systems
Using the SSM Administration Console
 CHAPTER 6 Your user role controls whether you can access the SSM Administration Console. The following information is included in this section: SSM Administration Console Overview, page 6-1 Launching the
KYOCERA Net Admin User Guide
 KYOCERA Net Admin User Guide Legal Notes Unauthorized reproduction of all or part of this guide is prohibited. The information in this guide is subject to change without notice. We cannot be held liable
Using OptiView Console
 Using OptiView Console Introduction The OptiView Console application (also referred to as the application ) provides you with the ability to monitor the performance of your Ethernet enterprise network,
Kaspersky Administration Kit 8.0 REFERENCE GUIDE
 Kaspersky Administration Kit 8.0 REFERENCE GUIDE P R O G R A M V E R S I O N : 8. 0 C R I T I C A L F I X 1 Dear User! Thank you for choosing our product. We hope that this documentation will help you
Installing Sentry-go Quick Monitors, Sentry-go Plus!, Client Tools & Enterprise Reporting
 Installing Sentry-go Quick Monitors, Sentry-go Plus!, Client Tools & Enterprise Reporting 3Ds (UK) Limited, November, 2013 http://www.sentry-go.com Be Proactive, Not Reactive! This guide gives full details
Quick Start Guide TABLE OF CONTENTS COMMCELL ARCHITECTURE OVERVIEW COMMCELL SOFTWARE DEPLOYMENT INSTALL THE COMMSERVE SOFTWARE
 Page 1 of 35 Quick Start Guide TABLE OF CONTENTS This Quick Start Guide is designed to help you install and use a CommCell configuration to which you can later add other components. COMMCELL ARCHITECTURE
Scribe Insight Installation Guide. Version August 10, 2011
 Scribe Insight Installation Guide Version 7.0.2 August 10, 2011 www.scribesoft.com Important Notice No part of this publication may be reproduced, stored in a retrieval system, or transmitted in any form
Acronis Backup & Recovery 11 Beta Advanced Editions
 Acronis Backup & Recovery 11 Beta Advanced Editions Quick Start Guide Table of contents 1 Main components... 3 2 Supported operating systems... 3 3 Where do I install the components?... 3 4 What you need
Getting started with System Center Essentials 2007
 At a glance: Installing and upgrading Configuring Essentials 2007 Troubleshooting steps Getting started with System Center Essentials 2007 David Mills System Center Essentials 2007 is a new IT management
Reporting for Contact Center Setup and Operations Guide. BCM Contact Center
 Reporting for Contact Center Setup and Operations Guide BCM Contact Center Document Number: Document Status: Standard Document Version: 05.01 Date: September 2006 Copyright 2005 2006 Nortel Networks, All
LiNC-NXG for Windows 8 Professional, Windows 7 Professional, Vista Business Edition and XP Professional
 LiNC-NXG for Windows 8 Professional, Windows 7 Professional, Vista Business Edition and XP Professional Installation Guide for LiNC-NXG 33-10067-001 REV: C PCSC 3541 Challenger Street Torrance, CA 90503
WhatsUp Gold 2016 Installation and Configuration Guide
 WhatsUp Gold 2016 Installation and Configuration Guide Contents Installing and Configuring WhatsUp Gold using WhatsUp Setup 1 Installation Overview 1 Overview 1 Security considerations 2 Standard WhatsUp
BCPro Installation Instructions Code No. LIT Software Release 3.0 Issued September 2017
 Code No. LIT-12011910 Software Release 3.0 Issued September 2017 Welcome...2 Summary of Changes...2 Related Documentation...2 Installation Overview...2 Prerequisite Software Checklist for Installation
NETWRIX WINDOWS SERVER CHANGE REPORTER
 NETWRIX WINDOWS SERVER CHANGE REPORTER ADMINISTRATOR S GUIDE Product Version: 4.0 June 2013. Legal Notice The information in this publication is furnished for information use only, and does not constitute
PigCHAMP Knowledge Software. Enterprise Edition Installation Guide
 PigCHAMP Knowledge Software Enterprise Edition Installation Guide PIGCHAMP, LLC Enterprise Edition Installation Guide JUNE 2016 EDITION PigCHAMP Knowledge Software 1531 Airport Rd Suite 101 Ames, IA 50010
Privileged Identity App Launcher and Session Recording
 Privileged Identity App Launcher and Session Recording 2018 Bomgar Corporation. All rights reserved worldwide. BOMGAR and the BOMGAR logo are trademarks of Bomgar Corporation; other trademarks shown are
New Features Guide EventTracker v6.2
 New Features Guide EventTracker v6.2 Publication Date: Aug 04, 2008 EventTracker 8815 Centre Park Drive Columbia MD 21045 www.eventtracker.com The information contained in this document represents the
Kaseya 2. Quick Start Guide. for Network Monitor 4.1
 Kaseya 2 Router Monitor Quick Start Guide for Network Monitor 4.1 June 5, 2012 About Kaseya Kaseya is a global provider of IT automation software for IT Solution Providers and Public and Private Sector
Business Connect Secure Remote Access Service (SRAS) Customer Information Package
 Customer Information Package") Business Connect Secure Remote Access Service (SRAS) Customer Information Package Table of Contents 1.0 Introduction... 1 1.1 Overview... 1 1.2 Scope and Audience... 1 1.3 Design Deliverables... 1 1.4
Business Connect Secure Remote Access Service (SRAS) Customer Information Package Table of Contents 1.0 Introduction... 1 1.1 Overview... 1 1.2 Scope and Audience... 1 1.3 Design Deliverables... 1 1.4
AT&T Core Mobility Integrated Dispatch Console User Guide. Installation Guide. AT&T Integrated Dispatch Console 3.0
 Installation Guide AT&T Integrated Dispatch Console 3.0 October 2016 Table of Content 1. Introduction... 3 1.1. Purpose and Scope... 3 1.2. Terms and Definitions... 3 1.3. About this Manual... 5 1.4. What
User Guide. Version R92. English
 AuthAnvil User Guide Version R92 English October 9, 2015 Agreement The purchase and use of all Software and Services is subject to the Agreement as defined in Kaseya s Click-Accept EULATOS as updated from
Get Started. Document Management 9.7.1
 Get Started Document Management 9.7.1 NOTICE This document and the Sage Timberline Office software may be used only in accordance with the accompanying Sage Timberline Office End User License Agreement.
IMC Network Traffic Analyzer 7.1 (E0301P04) Copyright (c) 2015 Hewlett-Packard Development Company, L.P. All Rights Reserved.
 Copyright (c) 2015 Hewlett-Packard Development Company, L.P. All Rights Reserved.") Network Traffic Analyzer 7.1 (E0301P04) Copyright (c) 2015 Hewlett-Packard Development Company, L.P. All Rights Reserved. Table of Contents 1. What's New in this Release 2. Problems Fixed in this Release
Network Traffic Analyzer 7.1 (E0301P04) Copyright (c) 2015 Hewlett-Packard Development Company, L.P. All Rights Reserved. Table of Contents 1. What's New in this Release 2. Problems Fixed in this Release
Avalanche Remote Control User Guide. Version 4.1
 Avalanche Remote Control User Guide Version 4.1 ii Copyright 2012 by Wavelink Corporation. All rights reserved. Wavelink Corporation 10808 South River Front Parkway, Suite 200 South Jordan, Utah 84095
WhatsUpGold. Getting Started Guide
 WhatsUpGold Premium Edition v.11 Getting Started Guide Welcome to Ipswitch WhatsUp Gold v11 Welcome to WhatsUp Gold v11, the powerful network monitoring solution designed to help you protect your changing
Remote Indexing Feature Guide
 Remote Indexing Feature Guide EventTracker Version 8.2 Publication Date: Sept. 8, 2016 EventTracker 8815 Centre Park Drive Columbia MD 21045 www.eventtracker.com Abstract The purpose of this document is
Microsoft SQL Installation and Setup
 This chapter provides information about installing and setting up Microsoft SQL. Encrypted Database Not Supported, page 1 Install and Setup Microsoft SQL Server, page 1 Database Migration Required for
ForeScout Extended Module for Advanced Compliance
 ForeScout Extended Module for Advanced Compliance Version 1.2 Table of Contents About Advanced Compliance Integration... 4 Use Cases... 4 Additional Documentation... 6 About This Module... 6 About Support
LT Auditor Installation Guide
 LT Auditor+ 2013 Installation Guide Intellectual Property Copyright 2007-2012 Blue Lance, LT Auditor+, and the Report Generator are registered trademarks of Blue Lance, Inc. Microsoft, Windows 2003, Window
User Guide. Version R94. English
 AuthAnvil User Guide Version R94 English March 8, 2017 Copyright Agreement The purchase and use of all Software and Services is subject to the Agreement as defined in Kaseya s Click-Accept EULATOS as updated
How to create a System Logon Account in Backup Exec for Windows Servers
 How to create a System Logon Account in Backup Exec for Windows Servers Problem How to create a System Logon Account in Backup Exec for Windows Servers Solution The Backup Exec System Logon Account (SLA)
Print Manager Plus 2010 Workgroup Print Tracking and Control
 INTRODUCTION: This is intended to assist in the initial installation or evaluation of Print Manager Plus 2010 Workgroup Edition. This will guide you through tracking your printing whether your workgroup
Cisco TelePresence Management Suite Extension for Microsoft Exchange
 Cisco TelePresence Management Suite Extension for Microsoft Exchange Administrator Guide Software version 2.2 D14197.06 February 2011 Contents Contents... 2 Introduction... 4 Pre-Installation Information...
Features - SRM Windows File System Agent
 Page 1 of 53 Features - SRM Windows File System Agent Table of Contents Overview System Requirements - SRM Windows File System Agent Installation Install the SRM Windows File System Agent Install the SRM
NETWRIX GROUP POLICY CHANGE REPORTER
 NETWRIX GROUP POLICY CHANGE REPORTER ADMINISTRATOR S GUIDE Product Version: 7.2 November 2012. Legal Notice The information in this publication is furnished for information use only, and does not constitute
VMware vrealize Operations for Horizon Installation
 VMware vrealize Operations for Horizon Installation vrealize Operations for Horizon 6.4 Installation vrealize Operations for Horizon 6.4 This document supports the version of each product listed and supports
Recent Operating System Class notes 04 Managing Users on Windows XP March 22, 2004
 Recent Operating System Class notes 04 Managing Users on Windows XP March 22, 2004 You log into a system to notify the system who you are. When you log off, any files you have opened are cleaned up, and
Ekran System High Availability Deployment Guide
 Ekran System High Availability Deployment Guide Table of Contents About... 3 System Requirements... 4 Program Structure... 5 Deployment Process... 6 About... 6 Prerequisites... 6 General Prerequisites...
LifeSize Control Installation Guide
 LifeSize Control Installation Guide January 2009 Copyright Notice 2005-2009 LifeSize Communications Inc, and its licensors. All rights reserved. LifeSize Communications has made every effort to ensure
Perceptive TransForm E-Forms Manager
 Perceptive TransForm E-Forms Manager Installation and Setup Guide Version: 8.x Date: February 2017 2016-2017 Lexmark. All rights reserved. Lexmark is a trademark of Lexmark International Inc., registered
Automation Anywhere Enterprise 10 LTS
 Automation Anywhere Enterprise 10 LTS Document Version: 1.3 Installation Guide Date of Publication: 15 th November, 2016 Update(s) to this document edition: Table of Contents 1. Client Prerequisites Processor
WEBSEWSS SINGLE SERVER INSTALLATION INSTRUCTIONS
 2300 East 14th Street Tulsa, Oklahoma 74104 USA Phone: (918) 749-1119 Fax: (918) 749-2217 e-mail: info@statsoft.com WEB: http://www.statsoft.com Notes: WEBSEWSS SINGLE SERVER INSTALLATION INSTRUCTIONS
EventTracker v8.2. Install Guide for EventTracker Log Manager. EventTracker 8815 Centre Park Drive Columbia MD
 EventTracker v8.2 Install Guide for EventTracker Log Manager Publication Date: Jun. 10, 2016 EventTracker 8815 Centre Park Drive Columbia MD 21045 www.eventtracker.com Abstract This guide will help the
Provisioning the K1000 Agent
 Provisioning the K1000 Agent Agent provisioning is the task of installing the K1000 Agent on devices you want to add to K1000 inventory using the Agent. About the K1000 Agent The K1000 Agent is an application
Ekran System v.5.5 Deployment Guide
 Ekran System v.5.5 Deployment Guide Table of Contents About... 6 System Requirements... 7 Program Structure... 10 Deployment Process... 12 Server and Database... 13 About... 13 Database Types Comparison...
Contents. 1 Introduction... 2 Introduction to Installing and Configuring LEI... 4 Upgrading NotesPump to LEI...
 Contents 1 Introduction... Organization of this Manual... Related Documentation... LEI and DECS Documentation... Other Documentation... Getting Started with Lotus Enterprise Integrator... 2 Introduction
Sophos Transparent Authentication Suite Quick Start Guide. Product version: 2.0 Document date: Wednesday, July 05, 2017
 Sophos Transparent Authentication Suite Quick Start Guide Product version: 2.0 Document date: Wednesday, July 05, 2017 The specifications and information in this document are subject to change without
EMS MASTER CALENDAR Installation Guide
 EMS MASTER CALENDAR Installation Guide V44.1 Last Updated: May 2018 EMS Software emssoftware.com/help 800.440.3994 2018 EMS Software, LLC. All Rights Reserved. Table of Contents CHAPTER 1: Introduction
VMware vrealize Operations for Horizon Installation. VMware vrealize Operations for Horizon 6.3
 VMware vrealize Operations for Horizon Installation VMware vrealize Operations for Horizon 6.3 VMware vrealize Operations for Horizon Installation You can find the most up-to-date technical documentation
Inmagic Content Server Workgroup Version 9.00 Installation Notes for New and Upgrade Installations
 Inmagic Content Server Workgroup Version 9.00 Installation Notes for New and Upgrade Installations Revision 2 Thank you for purchasing Inmagic Content Server. This document is intended for the following
Configuring and Managing WAAS Legacy Print Services
 13 CHAPTER Configuring and Managing WAAS Legacy Print Services This chapter describes how to configure and manage the WAAS legacy print services feature that allows WAEs to function as print servers in
VII. Corente Services SSL Client
 VII. Corente Services SSL Client Corente Release 9.1 Manual 9.1.1 Copyright 2014, Oracle and/or its affiliates. All rights reserved. Table of Contents Preface... 5 I. Introduction... 6 Chapter 1. Requirements...
AVG 9.0 Anti-Virus Business Edition
 AVG 9.0 Anti-Virus Business Edition User Manual Document revision 90.6 (30. 4. 2010) C opyright AVG Technologies C Z, s.r.o. All rights reserved. All other trademarks are the property of their respective
VMware vrealize Operations for Horizon Installation. VMware vrealize Operations for Horizon 6.5
 VMware vrealize Operations for Horizon Installation VMware vrealize Operations for Horizon 6.5 You can find the most up-to-date technical documentation on the VMware website at: https://docs.vmware.com/
Sage Installation and System Administrator s Guide. October 2016
 Sage 100 2017 Installation and System Administrator s Guide October 2016 2016 The Sage Group plc or its licensors. All rights reserved. Sage, Sage logos, and Sage product and service names mentioned herein
Diagnostic Manager Advanced Installation Guide
 Diagnostic Manager Publication Date: May 03, 2017 All Rights Reserved. This software is protected by copyright law and international treaties. Unauthorized reproduction or distribution of this software,
Table of Contents. Section 1: DocSTAR WebView v1.0 Requirements & Installation CD... 1 Section 2: DocSTAR WebView v1.
 WebView v1.0 Installation Guide Revision 3 7/29/2003 WebView v1.0 Installation GuG ide Revision 3 7/29/2003 u Introduction Table of Contents Section 1: DocSTAR WebView v1.0 Requirements & Installation
Silk Performance Manager Installation and Setup Help
 Silk Performance Manager 18.5 Installation and Setup Help Micro Focus The Lawn 22-30 Old Bath Road Newbury, Berkshire RG14 1QN UK http://www.microfocus.com Copyright 2004-2017 Micro Focus. All rights reserved.
Scribe Insight Installation Guide. Version August 6,
 Scribe Insight Installation Guide Version 7.7.0 August 6, 2015 www.scribesoft.com Important Notice No part of this publication may be reproduced, stored in a retrieval system, or transmitted in any form
ROCK-POND REPORTING 2.1
 ROCK-POND REPORTING 2.1 Installation and Setup Guide Revised on 09/25/2014 TABLE OF CONTENTS ROCK-POND REPORTING 2.1... 1 SUPPORT FROM ROCK-POND SOLUTIONS... 2 ROCK-POND REPORTING OVERVIEW... 2 INFRASTRUCTURE
NTP Software File Auditor for Windows Edition
 NTP Software File Auditor for Windows Edition An NTP Software Installation Guide Abstract This guide provides a short introduction to installation and initial configuration of NTP Software File Auditor
PROJECTORNET FOR ADMINISTRATORS
 PROJECTORNET FOR ADMINISTRATORS Overview This chapter explains the processes for installing and setting up the ProjectorNet server software. It also lists the information that you, the ProjectorNet Administrator,
Deployment Guide Installing WhatsUp Gold Distributed Edition to Central and Remote Sites
 Deployment Guide Installing WhatsUp Gold Distributed Edition to Central and Remote Sites This guide provides information about installing and configuring WhatsUp Gold Central and Remote Sites. Contents
LABEL ARCHIVE Administrator s Guide
 LABEL ARCHIVE Administrator s Guide DOC-LAS2015_25/05/2015 The information in this manual is not binding and may be modified without prior notice. Supply of the software described in this manual is subject
Installation Manual. Fleet Maintenance Software. Version 6.4
 Fleet Maintenance Software Installation Manual Version 6.4 6 Terri Lane, Suite 700 Burlington, NJ 08016 (609) 747-8800 Fax (609) 747-8801 Dossier@dossiersystemsinc.com www.dossiersystemsinc.com Copyright
Pre-Installation Checklist v5.0
 Pre-Installation Checklist v5.0 November 2010 Table of Contents Introduction 3 Network infrastructure 4 ShareScan Manager PC 5 Devices 7 ecopy Connectors 8 Network Communication 13 Document Management
Ebook : Overview of application development. All code from the application series books listed at:
 Ebook : Overview of application development. All code from the application series books listed at: http://www.vkinfotek.com with permission. Publishers: VK Publishers Established: 2001 Type of books: Develop
Contents. Platform Compatibility. Directory Connector SonicWALL Directory Services Connector 3.1.7
 Directory Connector SonicWALL Directory Services Connector 3.1.7 Contents Platform Compatibility... 1 New Features... 2 Known Issues... 3 Resolved Issues... 5 Overview... 7 About SonicWALL Single Sign-On
ZENworks Service Desk 8.0 Using ZENworks with ZENworks Service Desk. November 2018
 ZENworks Service Desk 8.0 Using ZENworks with ZENworks Service Desk November 2018 Legal Notices For information about legal notices, trademarks, disclaimers, warranties, export and other use restrictions,
NDPS Gateway PS012-02
 NDPS Gateway 2.5 4343-PS012-02 Foreword Welcome NDPS Gateway is software that controls printers and print jobs and checks their status in an NDPS (Novell Distributed Print Services) environment, the newest
ForeScout Extended Module for ArcSight
 Version 2.8 Table of Contents About the ArcSight Integration... 4 Use Cases... 4 Send Endpoint Status, Compliance, or Property Changes from CounterACT to ArcSight... 5 SmartConnector Health and Compliance
Message Networking 5.2 Administration print guide
 Page 1 of 421 Administration print guide This print guide is a collection of system topics provided in an easy-to-print format for your convenience. Please note that the links shown in this document do