Release 14 June 2005 (Dent X Rev. 1 September 29, 2006)
|
|
|
- Kristina Hubbard
- 6 years ago
- Views:
Transcription

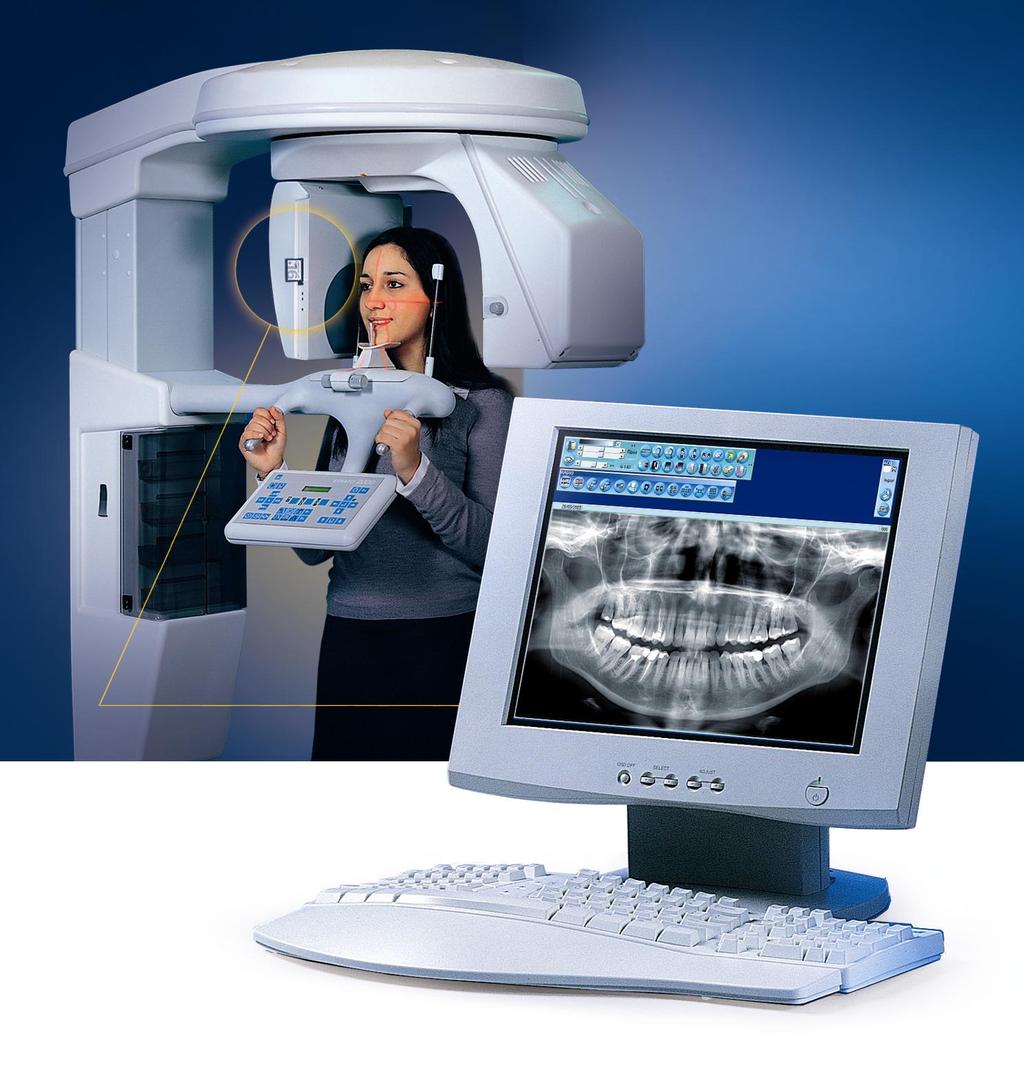
1 DIGITAL PANORAMIC Installation Manual Release 14 June 2005
2
3 Revision history Revision history Rev. Date Page/s Modification description First release All ROTOGRAPH D release DIGITAL PANORAMIC
4 Revision history THIS PAGE IS INTENTIONALLY LEFT BLANK DIGITAL PANORAMIC
5 Contents Contents 1. MINIMUM SYSTEM REQUIREMENTS 3 2. USB2 HUB INSTALLATION STRATO 2000 D USB2 HUB installation ROTOGRAPH D USB2 HUB installation USB2 HUB DRIVER S INSTALLATION USB2 HUB driver s installation Windows XP PANORAMIC DIGITAL DRIVER INSTALL GUIDE RD CALIBRATION FILE FOR DIGITAL PANORAMIC 24 This publication can only be reproduced, transmitted, transcribed or translated into any human or computer language with the written consent of VILLA SISTEMI MEDICALI S.p.a. This manual in English is the original version. i DIGITAL PANORAMIC
6 Contents THIS PAGE IS INTENTIONALLY LEFT BLANK DIGITAL PANORAMIC ii
7 1. MINIMUM SYSTEM REQUIREMENTS NOTE: No system of lower specification than that listed below should be used. It will not allow correct functioning. Motherboard: P4 or equivalent RAM Memory: 512 MB recommended Hard disk: 80 GB Operating system: Windows XP Service Pack 2 Graphic card: 64 MB CD ROM Reader: 24X minimum USB2 port: yes Keyboard and mouse: yes Monitor: High resolution multi sync 32" bts) (CR:400) (Pixel dot pitch.25) Removable hard disk, or other backup system Direct X Image Application Software NOTE: The USB 2 port is strictly required for the functioning of the acquisition. Due to restriction of USB 1 or USB1.1 devices, those devices cannot be connected to the same HUB controller where the Panoramic Board is connected, because the acquired image may be corrupted. 3 DIGITAL PANORAMIC
 must recognise the hardware connected.")
8 2. USB2 HUB Installation 2.1 STRATO 2000 D USB2 HUB installation STRATO 2000 D has two USB 2 HUBs installed to exchange data between the digital panoramic board and the PC and related software. Before starting the operation, the operating system (Windows XP ) must recognise the hardware connected. NOTE: Although not strictly required for latest versions of Windows, we recommend following the procedure indicated hereafter. This procedure must be performed only at the installation. 1. Power off the STRATO 2000 D and, with the USB cable disconnected from the PC and having the superior cover of STRATO 2000 D open, disconnect the two USB cables from the intermediate HUB (refer to following picture). 2. Power on the PC and wait until it finishes the start up procedure; at this point, insert the USB cable into the second HUB (the one located near the base column). Plug in the second end of this cable into the USB port of the PC. 3. Power on the STRATO 2000 D; the operating system of the PC will automatically recognise the new hardware connected; in Windows XP the message that a new hardware has been detected will be shown on the display. The driver's are automatically loaded. DIGITAL PANORAMIC 4
9 5 DIGITAL PANORAMIC


10 4. When the process is finished (message "New hardware loaded..."), plug in the USB cable connecting to the PC into the intermediate HUB. The cable that must be inserted has a squared terminal; leave the rectangular terminal not connected. 5. The operating system will remake the procedure of new hardware detection and drivers loading, as described on point 3 above. 6. At this point, plug in the latest connector; the operating system will detect the digital panoramic board; due to the fact that this hardware is not a standard one, the procedure described in the following pages must be performed. This procedure depends on the operating system installed on the PC; please refer to the appropriate chapter. DIGITAL PANORAMIC 6
 and the PC and related software.")

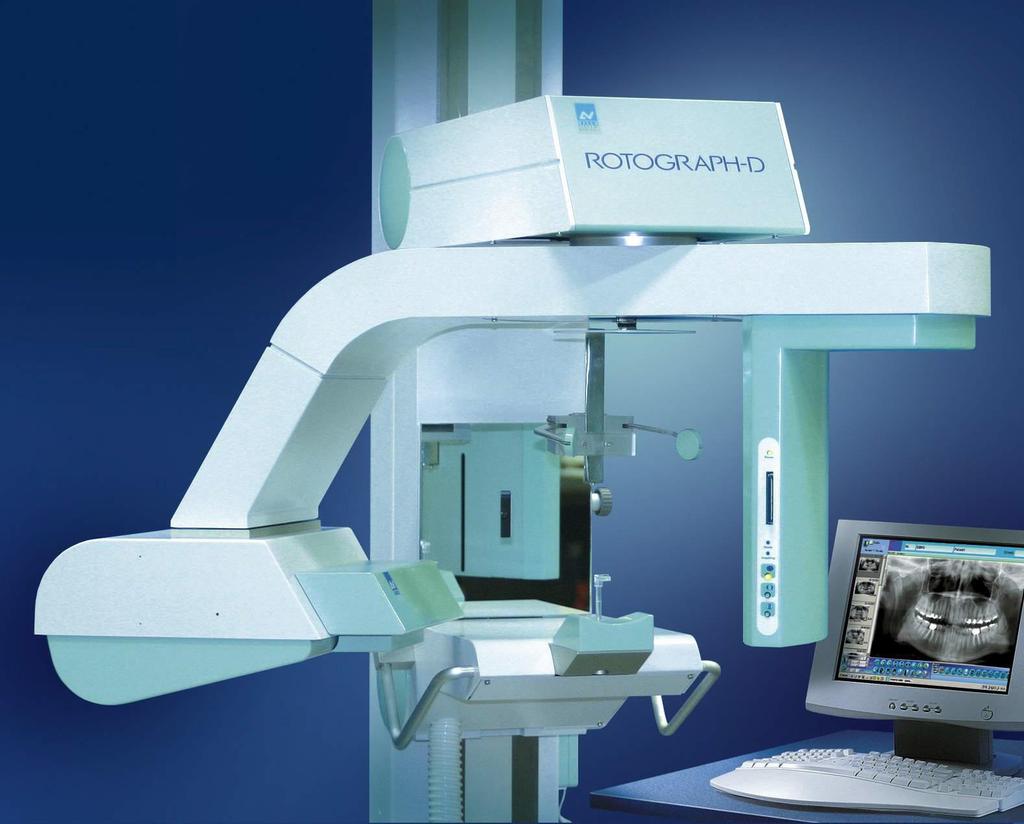
11 2.2 ROTOGRAPH D USB2 HUB installation ROTOGRAPH D has only one USB 2 HUB, located on the rear part of the column. This HUB requires a separate line voltage plug. The HUB is required in order to allow the exchange of information between the Digital Panoramic board (sensor) and the PC and related software. Before starting the acquisition, the operating system (Windows XP ) should recognise the hardware connected. NOTE: Although not strictly required for latest versions of Windows, we recommend following the procedure indicated hereafter. This procedure must be performed only at the installation. 1. Power off the ROTOGRAPH D and disconnect the cable coming from the sensor board (the one coming out from the plastic corrugate tube) from the HUB if already connected. 2. Power on the PC and wait until it finish its start up procedure. Insert the USB 2 cable into the HUB. 3. Power ON the HUB itself, plugging it into the line voltage plug. Wait until the operating system recognises the new hardware. 4. Connect the USB 2 cable coming from the sensor to the proper connector of the HUB and power ON the ROTOGRAPH D. The procedure of "new hardware found" will start automatically. 5. Proceed with the paragraph Error! Reference source not found. or 3, according to the operating system installed on the PC. 7 DIGITAL PANORAMIC


12 3. USB2 HUB driver s installation 3.1 USB2 HUB driver s installation Windows XP The operating system displays the following image, meaning that it had detected new hardware, and asks for the corresponding driver. 1. Select the option "Install from a list or specific location" and click on "Next"; the following windows will be displayed. DIGITAL PANORAMIC 8

13 2. Select "Don't search. I will choose the driver to install". Click on "Next". Be sure to have already the CD on the reader. 9 DIGITAL PANORAMIC


14 3. Select the type of hardware to be installed by clicking on "Universal Serial Bus controllers", then on "Next"; the following windows will be displayed. 4. Click on the tab "Have Disk". DIGITAL PANORAMIC 10

15 5. Click on "Browse"; the following windows will be displayed. 6. Click on "My computer" on the vertical left bar, and search for the driver in the location "D:\Pano_install\Driver_Pano". In this example, the letter D: represents the CD ROM drive, and it is related to the PC in use. Select the file "ow_usb.inf" and click on "Open". 7. The location of the driver should appear on the command line. Click on "OK". 11 DIGITAL PANORAMIC

16 8. Select "DIGITAL PANORAMIC board" and click on "Next"; the following windows will be displayed. 9. This message is a Warning; click on "Continue Anyway". DIGITAL PANORAMIC 12


17 10. Click on "Finish" button to terminate the driver installation. 11. To check if the driver was correctly installed and the unit is functioning, right click on "My Computer", "Properties" and then click on "Device Manager" button. 13 DIGITAL PANORAMIC

18 12. The panoramic is installed in "Universal Serial Bus controllers". Clicking on it, the following window will appear; the "DIGITAL PANORAMIC board" is correctly installed. DIGITAL PANORAMIC 14

19 4. Panoramic Digital Driver Install Guide RD The following steps should be completed on a Windows XP machine with the latest version of ProImage installed. Steps: 1. Insert the Dent X Panoramic Digital Driver Version 3.0 CD. 2. The following window will open after a few seconds: 3. Click on Next. 15 DIGITAL PANORAMIC

20 4. Select I accept the terms in the license agreement. 5. Click on Next. DIGITAL PANORAMIC 16

21 6. Click on Next. 7. Click on Install 17 DIGITAL PANORAMIC


22 8. After a few minutes the following window will be displayed: 9. Click on Finish. 10. Window will close. 11. Connect the Rotograph D (USB 2.0 connection). 12. The Fount New Hardware Wizard window will open. DIGITAL PANORAMIC 18

23 13. Select No, not this time. 14. Click on Next. 19 DIGITAL PANORAMIC


24 15. Click on Next. 16. The following window will open: 17. Click on Continue Anyway. DIGITAL PANORAMIC 20


25 18. Enter D:\Pano Drivers and click on OK. 19. Click in Finish. 20. Verify the following windows message is received: 21 DIGITAL PANORAMIC


26 21. Select Start All Programs AFP Imaging Digital Pan Set System. 22. The following window will open: 23. Chose Rotograph Digital from the drop down menu. 24. Click on OK. 25. Open ProImage and select Edit Preferences Hardware Type Strato Digital. 26. Select File Update Patient. 27. Verify the Select Patient window has the correct icons, as displayed below: DIGITAL PANORAMIC 22

27 28. Close ProImage. 29. Disconnect the Rotograph D. 23 DIGITAL PANORAMIC

28 Program installation for Network Software 5. CALIBRATION FILE FOR DIGITAL PANORAMIC The unit is shipped with a floppy disk or CD; this contains the calibration file for the specific CCD sensor installed on the machine. NOTE: The disk must be kept in a safe place in order to be able to reinstall it in case of system crash. In any case, Dent X will be able to deliver a copy of this file. The small mini CD disk contains a file named "pano_oem_dspr.bmp". This is not an image file, so it cannot be opened by standard image software. This file must be copied, on the PC and the location where to copy it depends on the operating system in use. The copy operation can be performed with the standard Windows procedure, using Explorer. Open Explorer clicking on "Start", "Programs" and locate "Explorer". A double click will start it. The "Copy" and "Paste" procedure can be used to copy the file into the subfolder hereafter specified: Windows XP: copy it on the folder "C:\windows\system32"; to perform this you must be logged in as "System Administrator". DIGITAL PANORAMIC 24
29 Program installation for Network Software 25 DIGITAL PANORAMIC
30

31 Cod _Rev.1 Dent X An AFP Imaging Company 250 Clearbrook Rd. Elmsford, NY Office Fax
EVA/EVA+ Digital Intraoral X-Ray System. Hardware Driver Installation Instructions. for Windows XP and Vista
 EVA/EVA+ Digital Intraoral X-Ray System Hardware Driver Installation Instructions for Windows XP and Vista AFP Imaging Corporation www.afpimaging.com EVA Hardware Driver Installation Instructions These
USB driver and Software Installation. UPS Monitoring and Management Software
 USB driver and Software Installation UPS Monitoring and Management Software LEN.MAN.SOF.143 Rev.1.00/2008 Installing USB driver and Easy-Mon X for LEONICS UPS 1. Installing and uninstalling the USB driver
Procedures to Install Eye Com's ImageMouse and ImageMouse Plus using Windows XP platform
 Procedures to Install Eye Com's ImageMouse and ImageMouse Plus using Windows XP platform 8-08-2005 The ImageMouse runs on the XP platform provided it is set up using NTFS, has the latest XP service pack
Installing TAM Air Assistant Software TM
 Installing TAM Air Assistant Software TM Installation Instructions This document describes how to make a new installation of TAM Air Assistant. TAM Air Assistant is intended to be installed on a PC running
3M Temperature Logger TL20/TL25 - Software Installation Guide
 3M Temperature Logger TL20/TL25 - Software Installation Guide Please follow this procedure to install the TL series software correctly on a personal computer (PC). You have the choice to download the software
Intellisync Lite For NEC Wireless Phones Installation Guide
 Intellisync Lite For NEC Wireless Phones Installation Guide Legal Notice No part of this publication may be reproduced, transmitted, transcribed, stored in a retrieval system, or translated into any computer
KODAK Dental Imaging Software Installation Guide
 CS3000-12 KODAK Dental Imaging Software Installation Guide Notice Carestream Dental, Inc., 2010. No part of this publication may be reproduced, stored in a retrieval system, translated to another language,
INSTALLING THE PS3 XBOX READY SOFTWARE:
 INSTALLING THE PS3 XBOX READY SOFTWARE: 1. Insert the Installation CD to CD-ROM drive and execute Ready_Setup.exe NOTE: If it is the first time for the target USB disk using under this software, the software
Troubleshooting No Drive Icon of DVD CAM Appears on PC
 DVD CAM Software Support Center Troubleshooting No Drive Icon of DVD CAM Appears on PC DZ-MV238E, 230A/E, 208E, 200A/E Windows XP If the DVD CAM drive icon does not appear in My Computer when the DVD CAM
Quick Installation Guide
 Wireless / Fast Ethernet Print Server Series Quick Installation Guide Version 1.1 January. 2006 Insert the CD shipped along with the print server into your CD- ROM drive. The Autorun.exe program should
Lab Determining Data Storage Capacity
 Lab 1.3.2 Determining Data Storage Capacity Objectives Determine the amount of RAM (in MB) installed in a PC. Determine the size of the hard disk drive (in GB) installed in a PC. Determine the used and
SMT107 User Manual User Manual (QCF42); Version 3.0, 8/11/00; Sundance Multiprocessor Technology Ltd. 1999
; Version 3.0, 8/11/00; Sundance Multiprocessor Technology Ltd. 1999") SMT107 User Manual User Manual (QCF42); Version 3.0, 8/11/00; Sundance Multiprocessor Technology Ltd. 1999 Version 1.2 Page 2 of 16 SMT107 User Manual Revision History Date Comments Engineer Version 20/04/01
SMT107 User Manual User Manual (QCF42); Version 3.0, 8/11/00; Sundance Multiprocessor Technology Ltd. 1999 Version 1.2 Page 2 of 16 SMT107 User Manual Revision History Date Comments Engineer Version 20/04/01
Installing LE History Record Reader program software.
 INSTALLATION & OPERATING INSTRUCTIONS FOR THE LE HISTORY RECORD READER These Instructions will inform you on how to install software to use the RS-232/USB Isolator- Adapter and your LE History Record Reader
(restyle 2011) Anatomic programs
 Anatomic programs") Product Data Panoramic X-Ray System with CCD sensor (restyle 2011) Examination programs Panoramic - adult - child - child with deceleration ramp for spine compensation TMJ - open/close mouth (4 views on
Product Data Panoramic X-Ray System with CCD sensor (restyle 2011) Examination programs Panoramic - adult - child - child with deceleration ramp for spine compensation TMJ - open/close mouth (4 views on
LOADING DRIVERS FOR SKYVIEW 2.0 XBEE INTERFACE USB DEVICE ON WINDOWS 8
 LOADING DRIVERS FOR SKYVIEW 2.0 XBEE INTERFACE USB DEVICE ON WINDOWS 8 After you have loaded the Skyview 2.0 software, with the xbee interface plugged in to your USB drive, you try to start the program
User s Manual. PC-Based Measurement Instruments. Setup Guide for Windows Vista IM E. 1st Edition
 User s Manual PC-Based Measurement Instruments Setup Guide for Windows Vista 1st Edition Thank you for purchasing the PC-Based Measurement Instruments, WE7000. This setup guide describes how to install
User s Guide. Creative WebCam NX Ultra
 User s Guide Creative WebCam NX Ultra Information in this document is subject to change without notice and does not represent a commitment on the part of Creative Technology Ltd. No part of this manual
Que! USB Floppy Disk Drive Installation Guide
 Que! USB Floppy Disk Drive Installation Guide status indicator: The status indicator LED lights up to indicate that the floppy disk drive is accessing a floppy disk. disk door: The disk door prevents dust
GP-N100 Utility Software Manual
 System Requirements En Thank you for your purchase of a GP-N100. This manual describes how to use the GP-N100 Utility to download the latest assisted GPS data from Nikon servers to your GP-N100. To ensure
SOFTWARE SETUP GUIDE DIGITAL MULTIFUNCTIONAL SYSTEM
 SOFTWARE SETUP GUIDE DIGITAL MULTIFUNCTIONAL SYSTEM CONTENTS ABOUT THE SOFTWARE BEFORE INSTALLATION INSTALLING THE SOFTWARE CONNECTING TO A COMPUTER CONFIGURING THE PRINTER DRIVER TROUBLESHOOTING Page
Table of Contents. Introduction. 1 Installing Creative WebCam Notebook. 2 Using PC-CAM Center. 3 Creative WebCam Notebook Applications
 User s Guide Creative WebCam Notebook Information in this document is subject to change without notice and does not represent a commitment on the part of Creative Technology Ltd. No part of this manual
CARD PRINTER. INSTALL GUIDE Revision 2.05
 CARD PRINTER INSTALL GUIDE Revision 2.05 Copyright Important: the technical information contained in this manual is property of MATICA System S.r.l. and is secured by copyright. The terms of the license
SOFTWARE INSTALLATION AND USB CONNECTION GUIDE
 SOFTWARE INSTALLATION AND USB CONNECTION GUIDE ENGLISH LYT1197-001A COPYRIGHT 2003 VICTOR COMPANY OF JAPAN, LTD. M4D1 DSC Printed in Malaysia 1003-FO-ID-PJ This document explains the basic information
QUICKBOOKS PRO 2009 INSTALLING QUICKBOOKS PRO AND STUDENT DATA FILES
 QUICKBOOKS PRO 2009 INSTALLING QUICKBOOKS PRO AND STUDENT DATA FILES Installing QuickBooks Pro 2009 Software Before installing the software, verify that your computer meets the following minimum system
Quick Installation Guide TU-S9
 Quick Installation Guide TU-S9 V1 Table of Contents English 1 1. Before You Start 1 2. How to Install 2 Troubleshooting 7 Version 06.24.2010 1. Before You Start Package Contents TU-S9 CD-ROM (Driver) Multi-Language
Quick Start Guide. Quick Start Guide I
 Quick Start Guide Quick Start Guide I II Quick Start Guide Contents of Package The Multi-Converter package contains the following items: > One (1) Multi-Converter Device > One (1) USB Cable > One (1) Installation
Reinstalling the Operating System on the Dell PowerVault 745N
 Reinstalling the Operating System on the Dell PowerVault 745N This document details the following steps to reinstall the operating system on a PowerVault 745N system: 1. Install the Reinstallation Console
RS 422/485 ComProbe. Quick Start Guide
 RS 422/485 ComProbe Quick Start Guide Copyright 2000 2010 Frontline Test Equipment, Inc. All rights reserved. You may not reproduce, transmit, or store on magnetic media any part of this publication in
U3 Encryption Utility User Guide
 Contents 1. U3 ENCRYPTION UTILITY RELEASE NOTES... 2 1.1 FEATURES... 2 1.2 REMARKS... 2 1.3 GENERAL DESCRIPTION OF THE U3 VOICE ENCRYPTION... 3 1.4 CUSTOMIZATION... 5 2. INSTALLING THE U3 & P3 ENCRYPTION
GP1 Programmable Accelerometer Quick Start Guide Version 1.2
 GP1 Programmable Accelerometer Quick Start Guide Version 1.2 1 Before You Begin 1.1 Packing List Please confirm that you received a complete GP1 Programmable Accelerometer kit, you should have received:
PhotoKeeper User s Manual
 PhotoKeeper User s Manual 20071226 20080404 Table of Contents CONGRATULATIONS on your purchase of a Polaroid PhotoKeeper. Please read carefully and follow all instructions in the manual and those marked
Package Contents. System Requirements
 Package Contents DPH-50U D-Link USB VoIP Adapter for Skype CD-ROM with User Guide RJ-11 Phone Cable USB 2.0 Cable If any of the above items are missing, please contact your reseller. System Requirements
Nero ImageDrive Manual
 Nero ImageDrive Manual Nero AG Copyright and Trademark Information The Nero ImageDrive manual and all its contents are protected by copyright and are the property of Nero AG. All rights reserved. This
56K USB Mini Faxmodem
 56K USB Mini Faxmodem Quick Installation Guide #R24.0647.00 rev 1.1 08/06 Contents Installation... 1 Operations...5 Troubleshooting...6 Additional Information...9 Support... 10 English English Installation
esata II PCIe i/e Quick Installation Guide
 Introduction esata II PCIe i/e Quick Installation Guide The esata II PCIe i/e is an ultra high-speed dual channel Serial ATA Generation 2 controller for use in PCI Express enabled systems. Features and
Version 2.1. Installation Guide
 Version 2.1 Installation Guide Rev. D-26/02/2001 Copyright Trademarks This document and the accompanying software package are subject to international copyright laws. No part of this document may be reproduced
LBP-810 Laser Printer
 LBP-810 Laser Printer Getting Started Guide IMPORTANT: Read this manual carefully before using your printer. Save this manual for future reference. Copyright Copyright 2001 Canon Inc. All information in
This installation guide is intended for customers who are installing NMIS for the first time. Included are the recommended hardware specifications
 This installation guide is intended for customers who are installing NMIS for the first time. Included are the recommended hardware specifications and sample screens to guide you through the installation
JUNE 2000 IC136C. USB Card
 USB Card JUNE 2000 IC136C CUSTOMER SUPPORT INFORMATION Order toll-free in the U.S. 24 hours, 7 A.M. Monday to midnight Friday: 877-877-BBOX FREE technical support, 24 hours a day, 7 days a week: Call 724-746-5500
Section 4: Installing the ECC (Epilog Control Center)
") Section 4: Installing the ECC (Epilog Control Center) In This Section Installing the ECC The ECC (Epilog Control Center) provides Job Management features as well as laser control and laser machine configuration
Section 4: Installing the ECC (Epilog Control Center) In This Section Installing the ECC The ECC (Epilog Control Center) provides Job Management features as well as laser control and laser machine configuration
500 Series Installation Guide
 500 Series Installation Guide Revision 1.9 September, 2010 Disclaimer: The specifications in this document are subject to change without notice. All trademarks mentioned in this document are the property
MF9300. Software setup guide
 MF900 Software setup guide 0000 79-0 S INTRODUCTION This manual explains how to install and configure the software that is required for the printer function of the machine. The procedure for viewing the
INSIGHT Installation Instructions
 This is the New Icon that will appear on your computer screen after the INSIGHT v8.1 software is installed. IMPORTANT: These instructions pertain to version 8.1.29. INSIGHT v8.1.29 requires Windows 8,
Troubleshooting No Drive Icon of DVD CAM Appears on PC
 DVD CAM Software Support Center Troubleshooting No Drive Icon of DVD CAM Appears on PC DZ-MV100A/E Windows 2000 Download the USB driver updater, and then update the USB driver with the updater. The USB
PAL Installation Instructions
 PAL Installation Instructions ADMINISTRATOR (NETWORK) INSTALLS These instructions are for PCs that are connected by a network, for the purpose of sharing PAL data and notes. PAL can be installed using
Installation and Setup Guide
 Installation and Setup Guide to Diana SUNDE VDI Cloud Computing Terminal Contents 1 Host PC (or Server) hardware Configuration Requirements...3 2 Installation of vpoint version 1.1.0.10...3 2.1 Installation
DSM PRO. Installation Manual. Copyright November DSM PRO Installation Manual Rev 2 Effective 5/24/05 1
 DSM PRO Installation Manual Copyright November 2003 DSM PRO Installation Manual Rev 2 Effective 5/24/05 1 DSM PRO CONNECTIONS TALKOVER LEVEL TALKOVER LEVEL DISPLAY SPEAKER VOLUME HEADSET VOLUME USB CABLE
USB to VGA/DVI Adapter User s Manual
 USB to VGA/DVI Adapter User s Manual 1 Contents 1. Contents...2 2. Introduction...3 3. Installation Guide...3 PC requirements...3 Installing the USB to VGA/DVI software on Windows Vista...4 Hardware first
Wireless transfer of screening data from ALGO 3i Screener to PC
 Wireless transfer of screening data from ALGO 3i Screener to PC This technical notice provides information on transmitting screening results from your ALGO 3i Newborn Hearing Screener to a personal computer
3M Occupational Health and Environmental Safety 3M E-A-Rfit Validation System. Version 4.4 Software Installation Guide (Full) 1 P age
 1 P age") 3M Occupational Health and Environmental Safety 3M E-A-Rfit Validation System Version 4.4 Software Installation Guide (Full) 1 P age Contents Important Information Read First... 3 Software Installation
3M Occupational Health and Environmental Safety 3M E-A-Rfit Validation System Version 4.4 Software Installation Guide (Full) 1 P age Contents Important Information Read First... 3 Software Installation
UG MCAP II & ecap II Smartware & USB Drivers Installation
 MCAP II & ecap II Smartware & USB Drivers Installation Sept 4, 2008 Copyright 2008 by QEI Inc. ALL RIGHTS RESERVED NOTICE The information in this document has been carefully checked and is believed to
Instructions for Use
 Multilingual version 3.4 Lite version is intended for patient use only; Some physician features are disabled. Instructions for Use Table of Contents 1 Introduction... 1 2 Installing and Starting Software...
INDEX. * All specifications are subject to change without prior notice. v2 November 2005
 INDEX 1. Introduction... 2 Key Features... 2 2. Description of M8U... 3 Front Panel... 3 3. System Requirements... 5 PC... 5 Mac... 5 4. Installation... 6 Hardware Installation... 6 Driver Installation
Install Manual. P2 Software ENGLISH M0509AT5091 -FJ VQT2G26-4
 Install Manual P2 Software M0509AT5091 -FJ ENGLISH VQT2G26-4 Contents Operating Precautions When Using Windows 1. Before Installing................................................... 3 2. Precautions in
Software Installation and Configuration Guide
 High Definition Intraoral Video Camera System Part Number G1000 Intraoral Video Camera System Part Number G5000 Fluorescence Caries Detection Aid System Part Number G4000 Software Installation and Configuration
Contents. Introduction. 1 Installing Creative WebCam Mobile. 2 Using Creative WebCam Mobile as a Web Camera
 Getting Started Creative WebCam Mobile Information in this document is subject to change without notice and does not represent a commitment on the part of Creative Technology Ltd. No part of this manual
DZ-MV350/380 Software Tutorials
 DVD CAM Software Support Center DZ-MV350/380 Software Tutorials How to Install the USB Driver Installing the USB Driver 1. Close any running applications. If any anti-virus software is running, deactivate
USB DRIVER INSTALLATION GUIDE
 USB DRIVER INSTALLATION GUIDE Use these instructions to install the USB and Microsoft ActiveSync synchronization software for your Monarch Pathfinder Ultra Platinum 6039 printer and computer to communicate.
I N S T A L L A T I O N G U I D E
 INSTALLATION GUIDE 1 CONTENTS Introduction... 3 Requirements... 3 What is in the Box... 3 What is on the CD... 3 Driver Installation... 4 Wireshark Installation... 6 Additional Tools Installation... 7
G-RAID 2 Installation Guide
 G-RAID 2 Installation Guide TABLE OF CONTENTS 1. INTRODUCTION 2. SAFETY PRECAUTIONS 3. SYSTEM REQUIREMENTS 4. WHAT S IN THE BOX 5. G-RAID2 OVERVIEW 6. INSTALLING G-RAID2 7. INITIALIZING G-RAID2 7.1 Mac
1. Contents. b. Windows ME
 1. Contents You should have the following items included in your Pocki-Drive order, pictured right: i - Pocki-Drive ii - Lid (attached to the Pocki-Drive) iii - Extension cable iv - Installation CD v -
Installation. Installation 1
 Installation 1 Installation The SP35 printer is easy to install and use. It is also flexible; you can connect and use it in many different ways. Most often, one printer is connected to one PC. However,
User s Guide. Creative WebCam NX
 User s Guide Creative WebCam NX Information in this document is subject to change without notice and does not represent a commitment on the part of Creative Technology Ltd. No part of this manual may be
tiptel 545/570 office tiptel 545/570 SD PC Software and Driver Installation in Windows XP/Windows 7 (32/64 Bit)
") tiptel 545/570 office tiptel 545/570 SD PC Software and Driver Installation in Windows XP/Windows 7 (32/64 Bit) Installation of PC Software 13.04.2011 Please proceed as follows: 1. After inserting the
tiptel 545/570 office tiptel 545/570 SD PC Software and Driver Installation in Windows XP/Windows 7 (32/64 Bit) Installation of PC Software 13.04.2011 Please proceed as follows: 1. After inserting the
Software Package Installation Instructions
 Introduction Novar provides an automatic installation package that involves reading simple, easy-to-follow instructions on each screen and clicking on the appropriate options. This document provides detailed
Introduction This section describes the procedure to update an SN4500 to software version 2.05.
 SN4500 Primary Navigation Display Instructions for update to software version 2.05 Date: September 20, 2012 Regarding: SN4500 software update to version 2.05 Introduction This section describes the procedure
A First-time driver installation for MP3X page 2 B Update MP36/MP35 driver page 5 C Update MP30 driver page 7
 Doc BSL Driver Guide v9 BSL Driver Guide Administrator Privileges Required 42 Aero Camino, Goleta, CA 93117 Tel (805) 685-0066 Fax (805) 685-0067 info@biopac.com www.biopac.com Select a driver installation
Printer Driver Manual. Rev.1.00 DPB Professional Photo Quality printer P5A-F7103
 Printer Driver Manual Rev.1.00 DPB - 6000 Professional Photo Quality printer P5A-F7103 2 Contents 1. Installation of Printer Driver 1. For Windows XP ----------------------------------------------------------------------4
Sun VirtualBox Installation Tutorial
 Sun VirtualBox Installation Tutorial Installing Linux Mint 5 LTS Guest OS By Dennis Berry Welcome to the world of virtualization and Linux. This tutorial is intended to help users who are new to the world
Introduction This document describes the procedure to update an ST3400 to software version 3.07
 ST3400 TAWS Instructions for ST3400 Software Update to 3.07 Date: Regarding: May 24, 2013 (revised) 3.07 Software Release Introduction This document describes the procedure to update an ST3400 to software
Registering Your D1 with the System (Windows 2000)
") Registering Your D1 with the System (Windows 2000) Before You Begin Confirm that your OHCI-compliant IEEE 1394 board or card has been correctly recognized by the system. If the board or card has been correctly
Registering Your D1 with the System (Windows 2000) Before You Begin Confirm that your OHCI-compliant IEEE 1394 board or card has been correctly recognized by the system. If the board or card has been correctly
FIF-10A USB PROGRAMMING INTERFACE
 FIF-10A USB PROGRAMMING INTERFACE The FIF-10A is the Interface Unit which allows cloning of channel data to Vertex Standard transceivers, and/or re-writing of the firmware on some Vertex Standard transceivers,
KODAK Dental Imaging Software Installation Guide for the KODAK1500 Intraoral Camera
 8H7854-01 KODAK Dental Imaging Software Installation Guide for the KODAK1500 Intraoral Camera Notice Carestream Health, Inc., 2009. No part of this publication may be reproduced, stored in a retrieval
USB Personal Video Recorder. USB Hybrid TV Tuner. (USB2.0 / 1.1 PNP TV Capture Box) UAD-880 User s Guide
 UAD-880 User s Guide") USB Personal Video Recorder USB Hybrid TV Tuner (USB2.0 / 1.1 PNP TV Capture Box) UAD-880 User s Guide User s Notice No part of this manual, including the products and software described in it, may be
USB Personal Video Recorder USB Hybrid TV Tuner (USB2.0 / 1.1 PNP TV Capture Box) UAD-880 User s Guide User s Notice No part of this manual, including the products and software described in it, may be
Install Manual. P2 Software ENGLISH
 Install Manual P2 Software M0509KT7033 -PS ENGLISH VQT2G25-6 (E) Contents Operating Precautions............................................ 2 When Using Windows............................................
System Requirements. Package Contents
 System Requirements System Requirements Computer with Windows Vista or XP SP2 PC with 1.3GHz or above; at least 128MB RAM Internet Explorer 6.0 or Netscape Navigator 7.0 and above Existing 10/100 Ethernet-based
User s Guide. Creative WebCam NX
 User s Guide Creative WebCam NX Information in this document is subject to change without notice and does not represent a commitment on the part of Creative Technology Ltd. No part of this manual may be
USER MANUAL for USB Data Link
 Driver Installation Under Win 95 OSR2.1 1.Step1: Double click "My Computer" "System Properties" "Device Manager" Step2: While installing USB Data Link Cable under Windows 95 OSR2.1 mode, make sure "Universal
EMB-CPU03. User s Manual
 EMB-CPU03 User s Manual Windows, Windows2000, Windows NT and Windows XP are trademarks of Microsoft. We acknowledge that the trademarks or service names of all other organizations mentioned in this document
UT163/UT165/UT190 USB Flash Disk Utility
 UT163/UT165/UT190 USB Flash Disk Utility User s Manual Rev. 3.2.4.0 JUNE. 12, 2008 http://www.afatech.com All rights strictly reserved. Any portion of this paper shall not be reproduced, copied, or translated
Getting Started. Here's how to get started using your Zip 250 drive: 1. Unpack the Zip 250 drive and accessories.
 Getting Started IMPORTANT! Before installing or using your Zip 250 drive, read and follow the USB guidelines to ensure reliable performance of your USB devices. Here's how to get started using your Zip
RJ-11 Telephone Cable
 This product can be used with the following operating systems: Windows XP, 2000 DPH-50U VoIP USB Phone Adapter Before You Begin You must have at least the following: Windows XP/2000 Pentium 400MHz or Higher
esata II PCIe i/e Quick Installation Guide
 esata II PCIe i/e Quick Installation Guide Introducing the esata II PCIe i/e The esata II PCIe i/e is an ultra high-speed dual channel Serial ATA Generation 2 controller for use in PCI Express enabled
Using New Features in CDR DICOM 3.5 Software
 Using New Features in CDR DICOM 3.5 Software Schick Technologies, Inc. 30-00 47 th Avenue Long Island City, NY 11101 (718) 937-5765 (718) 937-5962 (fax) PART NUMBER B1051053 REV. Copyright 2004 by Schick
MAXTOR ONETOUCH III MINI EDITION. User s Guide
 MAXTOR ONETOUCH III MINI EDITION User s Guide MAXTOR ONETOUCH III MINI EDITION USER S GUIDE Contents Windows Installation Introduction.................................................... 1 About this Guide...............................................
DIRECTOR EC OFFICE PUBLISHER WITH Prism PLUS PRINTER INSTALLATION GUIDE
 Document Revision: 2/10/2005 DIRECTOR EC OFFICE PUBLISHER WITH Prism PLUS PRINTER INSTALLATION GUIDE DIRECTOR EC OFFICE PUBLISHER -- PC MINIMUM REQUIREMENTS A Pentium 4 or compatible personal computer
Notes on installing and using the OM-USB-5201 and OM-USB-5203 data logging devices
 Notes on installing and using the OM-USB-5201 and OM-USB-5203 data logging devices Thank you for purchasing the OM-USB-5201 or OM-USB-5203 device from Omega Engineering! Please read this sheet to help
Instructions for SN3500 and SN4500 Database Updates. Introduction This document describes the procedure to update the database in an SN3500 or SN4500
 Instructions for SN3500 and SN4500 Database Updates Date: May 24, 2012 Regarding: Database update for the SN3500 and SN4500 Introduction This document describes the procedure to update the database in
REVISIONS * The manual number is given on the bottom left of the back cover.
 REVISIONS * The manual number is given on the bottom left of the back cover. Print Date * Manual Number Revision Apr., 2002 SH (NA) -080270-A First edition Jun., 2002 SH (NA) -080270-B Correction Section
- 15G0078B130 - USB MODULE INSTRUCTIONS FOR ASAC-0/ASAC-1/ASAB
 - 15G0078B130 - USB MODULE INSTRUCTIONS FOR ASAC-0/ASAC-1/ASAB Issued on 15/06/12 R. 01 This manual is integrant and essential to the product. Carefully read the instructions contained herein as they provide
Intellex Digital Video Management System. Installing a CD-RW in Intellex
 Intellex Digital Video Management System Installing a CD-RW in Intellex 2 Intellex Digital Video Management System Notice Copyright The information in this manual was current when published. The manufacturer
DP SATA 6Gb/s PCIe i/e Quick Installation Guide
 DP SATA 6Gb/s PCIe i/e Quick Installation Guide Introducing the SATA 6Gb/s PCIe i/e The DP SATA 6Gb/s PCIe i/e adds 2 SATA 6Gb/s & a PATA connectors to PCIe-equipped computers. Features and Benefits Dual
UPGRADE INSTRUCTIONS
 Version 2.48 or 2.49 & Version 3.48 or 3.49 UPGRADE INSTRUCTIONS System Upgrade Requirements NOTE: Non I-Button: V-Sperm Gold version 3.49 must be installed with SQA-V Gold version 2.49. I-Button: V-Sperm
MISUMI SUPPORT SOFTWARE. RS-Manager. User s Manual C1 / C21 / C22 / P1 EXWM KE114. Ver. 2.00
 MISUMI SUPPORT SOFTWARE RS-Manager User s Manual C1 / C21 / C22 / P1 Ver. 2.00 EXWM14200 KE114 CONTENTS RS-Manager User s Manual Before getting started 1 1. About RS-Manager 2 2. Installing and uninstalling
Site License Installation Guide
 Site License Installation Guide Copyright Texthelp Limited All rights reserved. No part of this publication may be reproduced, transmitted, transcribed, stored in a retrieval system, or translated into
Leica LAS EZ. Release Notes V 1.8.0
 Leica LAS EZ Release Notes V 1.8.0 Leica LAS EZ Release Notes V1.8.0 Abstract This document describes the V 1.8.0 release of the Leica LAS EZ software for Leica educational microscopes and cameras. All
Version 17. Nuclear Medicine Information. New Network User Installation
 400 Apgar Drive, Suite I, Somerset, NJ 08873 P: 800 851 0025 F: 732 356 8746 E: info@ec2software.com Nuclear Medicine Information Version 17 New Network User Installation This installation guide is intended
GP2X USB Accelerometer Quick Start Guide
 GP2X USB Accelerometer Quick Start Guide 1 Getting started 1.1 Installing the Software Before installing the software take a moment and verify that the computer meets the following minimum systems requirements:
Firmware install with Windows XP
 Firmware install with Windows XP Step 1. Go to our website www.midnitesolar.com and Left Click on Firmware. Step 2. Left Click on Download Firmware. Step 3. Read the Notes in red first and then Left Click
Troubleshooting No Drive Icon of DVD CAM Appears on PC
 DVD CAM Software Support Center Troubleshooting No Drive Icon of DVD CAM Appears on PC DZ-MV238E, 230A/E, 208E, 200A/E Windows 98 No Drive Icon of DVD CAM Appears on PC (98) Check that the DVD CAM power