DeploymentManager Ver6.6
|
|
|
- Marshall Wood
- 6 years ago
- Views:
Transcription
1 DeploymentManager Ver6.6 Operation Guide -First Edition- Rev.001
2 Contents Introduction... 4 Target Audience and Purpose... 4 Document Structure... 4 Documentation Guidelines for DeploymentManager Manuals DeploymentManager Basic Concept Operation Flow: From Startup to Scenario Execution Registering Resources on DeploymentManager Adding a Machine Group Registering Managed Machines Registering the Managed Machine on the Web Console Registering by automatic acquisition of Management Machine Information Manually Entering Managed Machine Information and Registering the Machine on DPM Using an Automatic Registration File to Register a Managed Machine Adding a Scenario Group Normal Operation Backup Creating a Scenario Assigning the Scenario Executing the Scenario Checking the Scenario Execution Status Checking the Scenario Execution Results Precautions/Others Restoration Creating a Scenario Assigning the Scenario Executing the Scenario Checking the Scenario Execution Status Checking the Scenario Execution Results OS Installation by Disk Duplication (Windows) Creating a Master Image Setting Up the Master Machine Backing Up the Master Machine (for Recovery) Preparing for Creating the Master Image Backing Up the Master Machine (for OS Installation by Disk Duplication) Restoring the Master Machine Distributing the Master Image Creating a Disk Duplication Data File of the Machine to Duplicate Restoring the Duplication Destination Machine Precautions/Others OS Installation by Disk Duplication (Linux) Creating a Master Image Setting Up the Master Machine Backing Up the Master Machine (for Recovery) Preparing for Creating the Master Image Backing Up the Master Machine (for OS Installation by Disk Duplication) Restoring the Master Machine Distributing the Master Image Creating a Disk Duplication Data File of the Machine to Duplicate Restoring the Duplication Destination Machine Precautions/Others OS Clear Installation (Linux) Creating and Registering an Image Setting up NFS Service Registering an Operating System Creating the Linux Installation Parameter File
3 3.5.2.Creating a Scenario Assign Scenario Executing the Scenario Checking the Scenario Execution Results Precautions/Others Installing Service Packs, HotFixes, Linux Patch Files, and Applications (Scenario Type) Creating and Registering an Image Registering Service Packs, HotFixes, Linux Patch Files, and Applications Creating a Scenario Assigning the Scenario Executing the Scenario Checking the Scenario Execution Results Distributing the BIOS/Firmware Update Floppy Disk Image Creating and Registering an Image Registering the BIOS/Firmware Update Floppy Disk Creating a Scenario Assigning the Scenario Executing the Scenario Checking the Scenario Execution Results Useful Functions Scheduling Performing Operations from DPM Command Line Automatically Registering Packages on Multiple DPM Servers Adding the Package Web Server Setting an Automatic Download Time Checking the Automatic Download Results Installing Service Packs, HotFixes, and Applications (Automatic Update Type) Setting up Automatic Updates Executing Automatic Updates Checking the Automatic Update Execution Results Distributing a File and Executing the Distributed File Storing a File on the Management Server Distributing the File to a Managed Machine and Executing the Distributed File Checking the File Distribution Results and Checking the Execution Result of the Distributed File Executing the File Executing the File on the Managed Machine Checking the Execution Result of the File...88 Appendix A Operating DPM without Using the DHCP Server Registering the New Managed Machine Executing Backup, Restore, or Disk Configuration Check Installing Service Packs, HotFixes, Linux Patch Files, and Applications Appendix B Restoring the Backup Image without the Management Server (Local Restoration) Appendix C Revision History
4 Introduction Target Audience and Purpose This "Operation Guide" is intended for system administrators who operate DeploymentManager (DPM) and explains the actual process flow of the operating procedures after installation of DPM. Document Structure 1 DeploymentManager Basic Concept: Explains the DPM concept. 2 Registering Resources on DeploymentManager: Explains the procedure of registering resources on DPM. 3 Normal Operation: Explains the machine operation. 4 Useful Functions: Explains useful functions of DPM. Appendix Appendix A Operating DPM without Using the DHCP Server Appendix B Restoring the Backup Image without the Management Server (Local Restoration) Appendix C Revision History Documentation Guidelines for DeploymentManager Manuals See "Documentation Guidelines for DeploymentManager Manuals" in First Step Guide. 4
5 1. DeploymentManager Basic Concept 1.1. Operation Flow: From Startup to Scenario Execution To execute the backup function or OS installation by disk duplication for managed machines, it is necessary to register a managed machine on DPM Server. To perform functions, create a "scenario" equivalent to an execution command, assign the scenario on the managed machine, and execute the scenario. The operation flow from startup to scenario execution for each function is described as follows. See Section 3, "Normal Operation" for details of the procedure for each function, When you execute backup, restore, or disk configuration check: (1) Create a Scenario Create a scenario for executing backup/restore. (2) Assign the Scenario Assign the scenario to managed machine. (3) Execute the Scenario Execute the assigned scenario on the managed machine. (4) Check the Scenario Execution Results Check the scenario execution results. When you execute OS installation by disk duplication; OS clear installation; installing service packs, hotfixes, Linux patch files, and applications; and distribution of floppy disk image for BIOS/firmware: (1) Create and Registering an Image Create an image to be distributed, and register the image on DPM Server. (2) Create a Scenario Create a scenario for related function. (3) Assign the Scenario Assign the scenario to managed machine. (4) Execute the Scenario Execute the scenario assigned to the managed machine. (5) Check the Scenario Execution Results Check the scenario execution results. The "managed machine", "scenarios", and "images" are generally called "resources", and each "resource" registered in DPM can be checked by viewing the Operations view on the Web Console. 5
6 2. Registering Resources on DeploymentManager 2.1. Adding a Machine Group To register a managed machine, add the machine group in which the machine to be affiliated. The following describes the procedure to add a machine group. (1) On the Web Console, click Operations in the title bar to switch to the Operations view. (2) In the tree view, click Resource -> Machines. (3) In the Configuration menu, click Add Group. (4) The following screen appears in the main window. Set each item. See Section "Add Machine Group" in Web Console Reference Guide for details. Note the maximum of machine groups and managed machine is as follows. 6
7 Item Upper Limit Total number of machine groups (total number of machine groups including sub-machine groups) 1000 Number of machine group layers 20 Total number of managed machine (total number of managed machine affiliated with all machine groups, including sub-machine groups) To add a sub-machine group, see Section 3.5.3, "Add Sub Group" in Web Console Reference Guide for details. 7
8 2.2. Registering Managed Machines The following describes the procedure to register a managed machine in a machine group. Automatically obtaining and registering the MAC address, UUID, and IP address of the managed machine (Recommended) DPM can automatically obtain the MAC address, UUID, and IP address of the managed machine and detect them by either of the following operations. (DPM registers the machine in a "New Machine" group). - Install DPM Client - Restart the service of DPM Client which is already set - Execute PXE boot (IP address cannot be obtained) A machine registered to a New Machine group can be registered to a machine group on the Web Console. See Section , "Registering by automatic acquisition of Management Machine Information" for details. In the case of ESXi, because you cannot install DPM Client, obtain the MAC address and UUID automatically by executing PXE boot and register the machine. Manually entering and registering managed machine information Manually enter the information (including the MAC address, UUID, and IP address) of the managed machine, register the machine to a specified machine group. See Section , "Manually Entering Managed Machine Information and Registering the Machine on DPM." for details. Using an automatic registration file to register a managed machine If you have already installed DPM Client in the managed machine, you can automatically register the managed machine when DPM Client communicates with DPM Server by creating an automatic registration file (a file that described the destination machine group information and the machine IP address or name) in advance. See Section 2.2.2, "Using an Automatic Registration File to Register a Managed Machine" for details. Using the import function on the Web Console to register a managed machine You can register two or more machines to the specified machine group by creating and importing an import file (a CSV file describes the destination machine group information and the managed machine information) to DPM Server. See Section 3.3.3, "Import Machine Data" in Web Console Reference Guide for details. 8
9 Registering the Managed Machine on the Web Console The following describes how to enter managed machine information and register the machine to a specified machine group on the Web Console Registering by automatic acquisition of Management Machine Information The following describes that DPM can automatically obtain the MAC address, UUID, and IP address of a managed machine and register them to DPM by either of the following operations, and how you register a managed machine on a machine group. Install DPM Client Restart the service of DPM Client which is already set Execute PXE boot (IP address cannot be obtained) <Install DPM Client/Restarting the service of DPM Client, which is already set> By installing DPM Client or restarting the service of DPM Client, which is already set, the MAC address, UUID, and IP address of the managed machine are automatically obtained and a managed machine is registered on a New Machine group. After this, see "Register a managed machine from New Machine to a group" as follows. <Execute PXE boot > (1) Power on the managed machine. (When you register two or more machines, it is recommended that power on each machine one by one, rather than all at same time.) (2) When the managed machine supports PXE boot, OS is started after the machine, which was powered on was registered on new group in DPM Server. However, when you power off after the registration on DPM Server such as that OS is not installed in the managed machine, you can change the configuration in the following file. <DPM Server installation folder>\datafile\forceskip.ini If MAC address is described in this file, OS is started without powering off after the machine of the corresponding MAC address was registered. The default is "*". In this setting, all machines are powered on. By describing to eliminate the MAC address of the managed machine to power off, you can power off after the registration of the managed machine. Example) * 00-0C-29-* The wildcard of "*"and "?" can be used. In the above example, OS of the only MAC address ( *, 00-0C-29-*) are started after registration on DPM Server. In other machines, the following message appears after registration. This computer has been just registered by the management server. Press F8 to view menu. (30) After 30 seconds, the machine is automatically powered off. If you power off immediately, press F8 key and select Power Down from the displayed menu. If you start the machine, press the F8 key and select Local Boot from the displayed menu. 9
10 <Register a managed machine from New Machine to a group> Register a managed machine, which was registered on New Machine by either of the above procedures, to a group. (1) On the Web Console, click Operations in the title bar to switch to the Operations view. (2) In the tree view, click Resource -> Machines -> New Machine. (3) The MAC address, UUID, and IP address of the new machine, which is powered on, appears in the New Machine List group box in the main window. Select the left checkbox of the machine. (When the machine is registered by PXE boot, IP address cannot be obtained. When or after registering the machine to a machine group, be sure to set IP address.) Note you can register two or more machines collectively on the same group by entering two or more checkmarks. (4) Click Add Machine under the Action link. (5) The following screen appears in the main window. Set each item. See Section 3.9.2, "Register New Machine" in Web Console Reference Guide for details. 10
11 11
12 Manually Entering Managed Machine Information and Registering the Machine on DPM The following describes how to enter the managed machine information and register the machine on a specified machine group manually. (1) On the Web Console, click Operations in the title bar to switch to the Operations view. (2) In the tree view, click Resource -> Machines -> Destination machine group for the managed machine. (3) In the Configuration menu, click Add Machine. 12
13 (4) The following screen appears in the main window. Set each item. See Section 3.5.5, "Register Managed Machine" in Web Console Reference Guide for details of the items. 13
14 Using an Automatic Registration File to Register a Managed Machine This section describes how to create a file that define the relationship between a managed machine (with DPM Client installed) and a destination machine group, and use it to register the machine on a specified machine group automatically. There are two setup procedures: specifying the machine name or specifying the IP address. (When both the machine name and the IP address match, DPM prioritizes setup for the machine name.) When a managed machine is automatically registered, all value except those specified in the setup file will be the same as those, which are set at the time the machine, is registered. (Value acquirable by DPM Client is set. All other value is set by default.) See Section 3.5.5, "Register Managed Machine" in Web Console Reference Guide for details. For the machine group as well, all value except those specified in the setup file will be the same (set to default value) as those which at the time the machine group is added. The character string you can specify in each item of the file are the same with the setting for the group on the Web Console. (However, about the destination machine group, "/" can be used, which is a character to separate between group names.) See Section 3.3.1, "Add Machine Group" in Web Console Reference Guide for details, Specify the Machine Name (1) In the folder below, create the file GroupAsName.ini. <DPM Server installation folder>\datafile\ (2) Open the file GroupAsName.ini using a text editor and so on, and enter the machine group information using the format below. Destination machine group;machine name to be registered[;destination machine group default gateway; Destination machine group subnet mask] 14
15 Item Destination machine group (Required) Machine name to be registered (Required) Destination machine group default gateway Destination machine group subnet mask *1 In DPM Ver6.02 or later, the designation method for Destination machine group is changed. (Earlier than DPM Ver6.02) The name of the machine group to which the machine belongs directly. (DPM Ver6.02 or later) The full path of the machine group to which the managed machine will be registered. Therefore, when you use the file created in the version earlier than DPM Ver6.02, change to the full path of the machine group. (If you use the file created in the version earlier than DPM Ver6.02, a machine group is created directly under Machines icon.) Example1) /Group1;ComputerA The managed machine "ComputerA" is registered to the machine group "Group1." (If "Group1" does not exist, the machine group "Group1" will be created in "Subnetwork is same with DPM Server" newly.) Example2) /Group2/Subgroup21;ComputerB; ; The managed machine "ComputerB" is registered to the machine group "Subgroup21" under "Group2". (If "Group2" and "Subgroup21" do not exist, the group is created with "Subnetwork is not same with DPM Server", with the default gateway " " and the subnet mask " ") Specify the IP Address (1) In the folder below, create the file GroupAsIp.ini. <DPM Server installation folder>\datafile\ Description Specify the full path of the machine group to which the managed machine will be registered. Use "/"(slash) to separate between group names. Example) /Group1/Subgroup11 If the machine group of the specified path does not exist, the group is automatically created. In this case, if Destination machine group default gateway and Destination machine group subnet mask are set, these configurations will be set to this created group. (*1) Enter the name of the managed machine to be automatically registered in the machine group. Setting is optional. If you specify both the "Destination machine group default gateway" and "Destination machine group subnet mask": A new machine group will be created with "Subnetwork is not same with DPM Server", and will use the value of "Default Gateway" and "Subnet Mask". If you specify either the "Destination machine group default gateway" or "Destination machine group subnet mask", or neither of them: A new machine group will be created with "Subnetwork is same with DPM Server". 15
16 (2) Open the file GroupAsIp.ini using a text editor and so on, and enter the machine group information using the format below. Destination machine group;ip address to be registered;subnet mask[; Destination machine group default gateway ;Destination machine group subnet mask] Item Description Destination machine group Specify the full path of the machine group to (Required) which the managed machine will be registered. Use "/"(slash) to separate between group names. Example) /Group1/Subgroup11 If the machine group of the specified path does not exist, the group is automatically created. In this case, if Destination machine group default gateway and Destination machine group subnet mask are set, these configurations will be set to this created group. (*1) IP address to be registered Specify the IP address of the managed machines (Required) to be registered automatically in the machine group. Subnet Mask Both one IP address and two or more IP addresses can be specified. See the following example. Destination machine group default gateway Setting is optional. If you specify both the "Destination machine Destination machine group subnet mask group default gateway" and "Destination machine group subnet mask": A new machine group will be created with "Subnetwork is not same with DPM Server", and will use the value of "Default Gateway" and "Subnet Mask". If you specify either the "Destination machine group default gateway" or "Destination machine group subnet mask", or neither of them: A new machine group will be created with "Subnetwork is same with DPM Server". *1 In DPM Ver6.02 or later, the designation method for Destination machine group is changed. (Earlier than DPM Ver6.02) The name of the machine group to which the machine belongs directly. (DPM Ver6.02 or later) The full path of the machine group to which the managed machine will be registered. Therefore, when you use the file created in the version earlier than DPM Ver6.02, change to the full path of the machine group. (If you use the file created in the version earlier than DPM Ver6.02, a machine group is created directly under Machines icon.) Example1) /Group1; The managed machine of the IP address is registered to the machine group "Group1." (If "Group1" does not exist, the machine group "Group1" created with "Subnetwork is same with DPM Server".) 16
 Example3) /Group3/Subgroup31;172.16.0.0;255.240.0.0;172.16.1.1;255.240.0.0 The managed machines of the IP addresses 172.")
17 Example2) /Group2; ; The managed machines of the IP addresses to are registered to the machine group "Group2." (If "Group2" does not exist, the group "Group2" is created with "Subnetwork is same with DPM Server".) Example3) /Group3/Subgroup31; ; ; ; The managed machines of the IP addresses to are registered to the machine group "Subgroup31" under "Group3". (If "Group3" and "Subgroup31" do not exist, the group is created with "Subnetwork is not same with DPM Server", with the gateway " " and the subnet mask " ") 2.3. Adding a Scenario Group The following describes how to add a scenario group. (1) On the Web Console, click Operations in the title bar to switch to the Operations view. (2) In the tree view, click Resource -> Scenarios. (3) In the Configuration menu, click Add Group. (4) The following screen appears in the main window. Set each item. See Section , "Add Scenario Group" in Web Console Reference Guide for details of the items. The following table shows the upper limit for scenario groups and scenarios. Item Upper Limit Total number of scenario groups (total number of scenario groups including sub-scenario groups) 1000 Number of scenario group layers 20 Number of scenarios can be registered per scenario group No limit Total number of scenarios (total number of scenarios affiliated with all scenario groups, including sub-scenario groups) No limit If you add a sub-scenario group, see Section , "Add Sub-scenario Group" in Web Console Reference Guide. 17

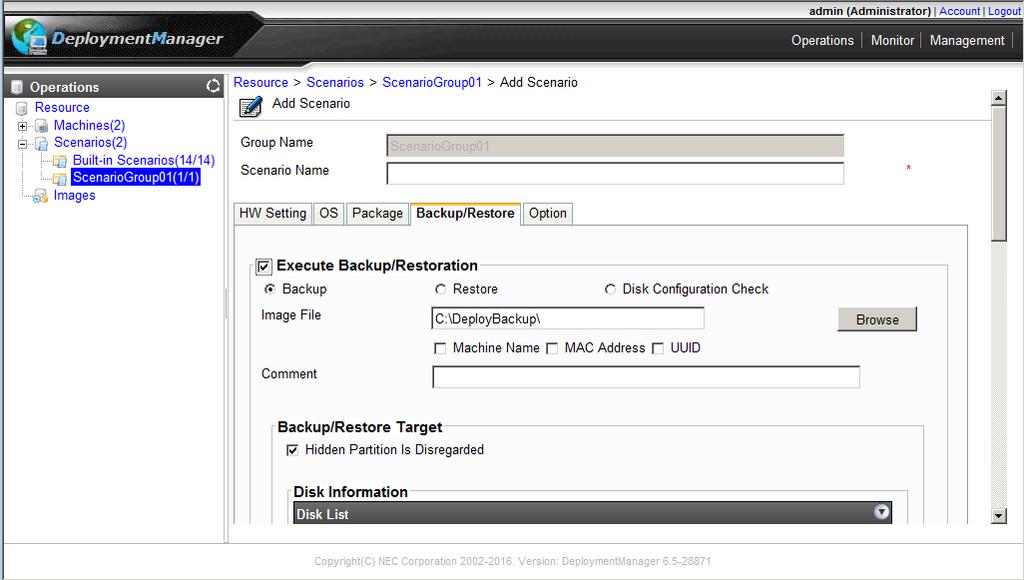
18 3. Normal Operation 3.1. Backup To back up a managed machine, execute a backup scenario on the managed machine. That is, back up the managed machine by performing the operations outlined from Section 3.1.1, "Creating a Scenario" to Section 3.1.5, "Checking the Scenario Execution Results" in that order Creating a Scenario The following describes how to create a scenario. (1) Check the disk/partition number of the backup target. For details on how to check the disk/partition number, see Section 3.2, "Disk Configuration Check Tool" in Tool Reference Guide. When you change the configuration of the disk, which is connected to the managed machine, the disk number may change. When you changed the configuration of the disk, execute disk configuration check and recheck the disk number. (2) On the Web Console, click Operations in the title bar to switch to the Operations view. (3) In the tree view, click Resource -> Scenarios -> Scenario Group. (4) In the Configuration menu, click Add Scenario. (5) The Add Scenario screen appears in the main window. On the Backup/Restore tab, select the Execute Backup/Restoration checkbox, select the Backup option button, and set each item. See Section , "Backup/Restore Tab" in Web Console Reference Guide for details. 18
19 19
 In the tree view, click Resource -> Machines -> Machine Group. (3) The Machine List group box appears in the main window. Click Managed machine to which the scenario is to be assigned.")
20 Assigning the Scenario The following describes how to assign the scenario. (1) On the Web Console, click Operations in the title bar to switch to the Operations view. (2) In the tree view, click Resource -> Machines -> Machine Group. (3) The Machine List group box appears in the main window. Click Managed machine to which the scenario is to be assigned. (4) In the Operation menu, click Assign Scenario. (5) The following screen appears in the main window. Click Browse, select the scenario to apply, and click OK. 20
21 Executing the Scenario The following describes how to execute the scenario. To execute the backup scenario, you need to set up Deploy-OS that corresponds to the machine model of the managed machine before scenario execution. See Section 3.7.2, "Edit Managed Machine" in Web Console Reference Guide for details. If the managed machine power is ON when you execute the scenario, the scenario will not run. If this happens, perform one of the following operations: From the Edit Scenario screen, select the Option tab and, under the Scenario Execution Option Setting group box, select Forced Execution Of A Reboot Is Performed Before Execution. *If the managed machine of Windows is in one of the following states, rebooting cannot be performed even if Forced Execution Of A Reboot Is Performed Before Execution is selected. - The machine is locked by a workstation lock. - The machine is locked by a password-protected screensaver. - The machine is connected from Remote Desktop, Terminal Services, or other remote connection software. - The machine has data currently being edited or an application that will not respond to a shutdown request. Reboot the managed machine manually. Before executing the backup scenario, be sure to check the space in the destination storage of the backup image. If there is not enough space, the backup process will be aborted before completion. When you execute backup, backup data is created as a temporary file. This temporary file is renamed to the image file name specified in the scenario and automatically deleted upon backup completion. Therefore, if there is an already created backup image, you will need disk space for the temporary file in addition to the already created backup image file. If Machine Name, MAC Address, and UUID are not selected on the Backup/Restore tab for the backup scenario, execute the scenario on one managed machine. When the same scenario is executed simultaneously on two or more managed machines, a scenario execution error may occur. When you back up a managed machine with Linux OS installed, MAC address information may be included in the OS network setup file name or setting contents. If you execute backup in this state and then restore the information on another managed machine, the network may not function correctly. When you restore the information on another managed machine, delete the MAC address information before executing backup. See "Precautions/Others" for details of other precautions. 21
 The Machine List group box appears in the main window. Select the checkbox on the left of the Managed machine on which you want to execute the scenario.")
22 (1) On the Web Console, click Operations in the title bar to switch to the Operations view. (2) On the tree view, click Resource -> Machines -> Machine Group. (3) The Machine List group box appears in the main window. Select the checkbox on the left of the Managed machine on which you want to execute the scenario. (4) In the Action menu, select Execute Scenario. (In the Machine List group box in the main window, Scenario Executing is displayed in the Status column corresponding to the managed machine on which the scenario is executed.) Checking the Scenario Execution Status The following describes how to check the scenario execution status. (1) On the Web Console, click Monitor in the title bar to switch to the Monitor view. (2) In the tree view, or in the Monitor Function List group box in the main window, click Scenario Execution List. 22

23 (3) Scenario Execution List group box appears in the main window. Check the scenario execution status. For scenarios including backup/restore, >> appears in the Detail column. Clicking >> displays the following screen, allowing you to check the backup/restore execution status. For screen details, see Section 4.3.2, "Backup/Restore Execute List" in Web Console Reference Guide. 23
24 Checking the Scenario Execution Results The following describes how to check the scenario execution results. (1) On the Web Console, click Monitor in the title bar to switch to the Monitor view. (2) In the tree view, or in the Monitor Function List group box in the main window, click Scenario Execution Result List. (3) Scenario Execution Result List group box appears in the main window. Check the scenario execution results. See Section 4.5, "Scenario Execution Result List Details" in Web Console Reference Guide for the screen, If a scenario execution error occurs, check the message displayed on the screen of the managed machine. For further information about the error, contact your sales or support representative. If the backup ends in the error, the following message appears on the screen of the managed machine: Press 'p' key to poweroff, 'r' key to reboot: To reboot, press r key and then Enter key. To turn the power off, press p key and then Enter key. Even if you press the p key, the power may not turn off completely, depending on the device. In that case, if the following message appears, that is not a problem. Manually turn the power off. flushing ide device : hda (*) system halted. *The character string displayed differs according to the environment Precautions/Others Precaution is as follows. When you changed the partition configuration (deleted or added partition, changed the drive letters and so on) on the managed machine in which two or more HDDs are mounted, execute backup again without fail. If you restore the backup image file before changing its partition configuration to the managed machine after changing the partition configuration, the drive letters might not restored properly. This is because the drive letters are recorded in both the system disk and data disk, and restoring one of the two causes managed data disaccord and reassignment of the drive letters. When the drive letters are not restored properly, use the Disk Management function of Windows and so on to reset the drive letters. When network setting is executed by udev on Linux OS, network does not operate properly after completion of restoration even if the configuration of the restoration destination machine is the same as that of machine, which obtained the backup image. See "The network configuration of the machine is associated with the MAC address." in "Precautions/Others" and set again the network setting. 24
25 3.2. Restoration To restore a backup image on a managed machine, execute a restore scenario on the managed machine. Operate from Section 3.2.1, "Creating a Scenario" to Section 3.2.5, "Checking the Scenario Execution Results" in order Creating a Scenario The following describes how to create a scenario. If Create Verification Data is checked in the Backup Setting group box on the Backup/Restore tab for a backup scenario, it is recommended that you check if the backup image file is invalid (contains damaged data and so on) using the Backup Image File Check Tool before creating the restore scenario. For Backup Image File Check Tool details, see Section 3.4, "Backup Image File Verification Tool" in Tool Reference Guide. (1) Check the disk/partition number of the target to restore. For details on how to check the disk/partition number, see Section 3.2, "Disk Configuration Check Tool" in Tool Reference Guide. When you change the configuration of the disk which is connected to the managed machine, the disk number may change. When you changed the configuration of the disk, execute disk configuration check and recheck the disk number. (2) On the Web Console, click Operations in the title bar to switch to the Operations view. (3) In the tree view, click Resource -> Scenarios -> Scenario Group. (4) In the Configuration menu, click Add Scenario. (5) Add Scenario screen appears in the main window. On the Backup/Restore tab, select the Execute Backup/Restoration checkbox, select the Restore option button, and set each item. See Section , "Backup/Restore Tab" in Web Console Reference Guide for details Assigning the Scenario The following describes how to assign the scenario. (1) On the Web Console, click Operations in the title bar to switch to the Operations view. (2) In the tree view, click Resource -> Machines -> Machine Group. (3) The Machine List group box appears in the main window. Click Managed machine to which the scenario is to be assigned. (4) In the Operation menu, click Assign Scenario. 25

26 (5) The following screen appears in the main window. Click Browse, select the scenario to apply, and click OK Executing the Scenario The following describes how to execute the scenario. To execute the restore scenario, you need to set up Deploy-OS that corresponds to the machine model of the managed machine before scenario execution. See Section 3.7.2, "Edit Managed Machine" in Web Console Reference Guide for details. The restoration processing may not work correctly in the following case. - You backup when "NEC Express " is set on Deploy-OS. - After changing to use other Deploy-OS, you restore by using the backup image. In this case, set "NEC Express " on Deploy-OS once and restore. After that, set the target value on Deploy-OS and obtain the backup image again. Also, in other cases, set Deploy-OS which is suitable for the backup image and the machine model. If the managed machine power is ON when you attempt to execute the scenario, the scenario will not run. If this happens, perform one of the following operations: On the Edit Scenario screen, check on the Forced Execution Of A Reboot Is Performed Before Execution in the Scenario Execution Option Setting group box on the Option tab. * If the Windows managed machine has the following status, the machine cannot be restarted, even if Forced Execution Of A Reboot Is Performed Before Execution is selected. - The machine is locked by a workstation lock. - The machine is locked by a password-protected screensaver. - The machine is connected from Remote Desktop, Terminal Services, or other remote connection software. - The machine has data that is currently being edited or an application that will not respond to a shutdown request. Reboot the managed machine manually. 26

27 DPM executes UDP communication when data is sent by multicast. With UDP communication, in the case such as that a device of a different transmission rate is located on the path, a difference occurs in the volume of data transmitted between the sending side and reception side, sometimes causing data transmission failure. In this case, the time required for scenario completion may increase. (1) On the Web Console, click Operations in the title bar to switch to the Operations view. (2) In the tree view, click Resource - Machines - Machine Group. (3) The Machine List group box appears in the main window. Select the checkbox on the left of the Managed machine on which you want to execute the scenario. (4) In the Action menu, select Execute Scenario. 27
28 In the Machine List group box in the main window, Scenario Executing is displayed in the Status column corresponding to the managed machine on which the scenario is executed. 28
 On the Web Console, click Monitor in the title bar to switch to the Monitor view.")
 The Scenario Execution List group box appears in the main window. Check the machines that are currently executing the restore scenario.")
29 Checking the Scenario Execution Status The following describes how to check the scenario execution status. (1) On the Web Console, click Monitor in the title bar to switch to the Monitor view. (2) In the tree view, or in the Monitor Function List group box in the main window, click Scenario Execution List. (3) The Scenario Execution List group box appears in the main window. Check the machines that are currently executing the restore scenario. For scenarios including backup/restore, >> appears in the Detail column. Clicking >> displays the following screen, allowing you to check the backup/restore execution status. See Section 4.3.2, "Backup/Restore Execute List" in Web Console Reference Guide for details. 29
30 Checking the Scenario Execution Results The following describes how to check the scenario execution results. (1) On the Web Console, click Monitor in the title bar to switch to the Monitor view. (2) In the tree view, or in the Monitor Function List group box in the main window, click Scenario Execution Result List. (3) The Scenario Execution Result List group box appears in the main window. Check the scenario execution results. About the screen, see Section 4.5, "Scenario Execution Result List Details" in Web Console Reference Guide. If a scenario execution error occurs, check the message displayed on the screen of the managed machine. For details about the error, contact your sales or support representative. If the restoring ends in the error, the following message appears on the screen of the managed machine: Press 'p' key to poweroff, 'r' key to reboot: To reboot, press r key and then Enter key. To turn the power off, press p key and then Enter key. Even if you press the p key, the power may not turn off completely, depending on the machine. In that case, if the following message appears, that is not a problem. Manually turn the power off. flushing ide device : hda (*) system halted. *The character string displayed differs according to the environment. 30
31 3.3. OS Installation by Disk Duplication (Windows) To execute OS installation by disk duplication (Windows), create a master image for duplication and the specific information for the destination machine, and restore the master image on the destination machine. That is, perform the operations described in Section 3.3.1, "Creating a Master Image" to Section 3.3.3, "Distributing the Master Image" in that order Creating a Master Image Create a master image as the following. In DPM Ver6.0 or later, reflecting specific information in OS installation by disk duplication can be completed more quickly than the former way (earlier than DPM Ver6.0) and you can speed up the setup of the machine. For Windows Server 2008/Windows Vista or later, the above function is supported. About a disk duplication data file to set up each managed machine, there are a Windows parameter file(express) which can speed up the part of duplication processing and a Windows parameter file of the former way. A disk duplication data file which can be used on each OS is as follows. OS Windows Server 2003 R2/ Windows XP or earlier Windows Server 2008/ Windows Server 2008 R2/ Windows Vista/Windows 7 Windows Server 2012/ Windows 8 or later Windows parameter file(express) Yes Yes Windows parameter file Yes Yes When you use a Windows parameter file(express), you need to use a master image, which was created following the procedure of Windows parameter file(express). In addition, when you use a Windows parameter file, you need to use a master image, which was created following the procedure of the Windows parameter file. (The two types are not compatible.) Be careful not to mistake the file name of the master image in the restore scenario for disk duplication. Also, note the name of the disk duplication data file because the name is the same between Windows parameter file(express) and Windows parameter file. 31
32 Setting Up the Master Machine Set up the master machine for OS installation by disk duplication. (Installing OS, installing drivers, installing service packs, hotfixes, and applications, installing DPM Client and so on) Be sure to use the same machine model and same hardware configuration layout for the master machine as the duplication source and the machine as the duplication destination. For example, if you have a master without a USB keyboard/mouse, and a duplication destination machine with USB keyboard/mouse, after OS installation by disk duplication, a new device may be detected and reboot required. If the startup type of the following service is Manual or Disabled, change the type to Automatic. Remote Registry Service If the start type of the service is not Automatic, it will fail to set IP, DNS, WINS, and other settings during master image distribution to the duplication destination. When setting Windows 7 as the master machine, be sure to change the startup type of the following service to Disabled after stopping the service if it is set to either Automatic or Manual. Windows Media Player Network Sharing Service If you do not do the setting as above, error will occur as follows: - If you use an information file (the Windows parameter file(express)) for disk duplication, an error will occur on the managed machine during delivering master image. - If you use an information file (the Windows parameter file) for disk duplication, an error will occur on the managed machine during executing the Sysprep.bat. Confirm that DPM Client is installed on the drive, which is not affected by reassigning the drive letter. (C drive is recommended.) 32
33 Backing Up the Master Machine (for Recovery) Backup the master machine for recovery of the master machine. See Section 3.1, "Backup" for details of backup procedure Preparing for Creating the Master Image Prepare for creating the master image by either of the following procedures. The procedure when you execute the built-in scenario (only when using Windows parameter file(express)). See "Executing the built-in scenario." The procedure when you execute the tool in the installation media manually. See "Executing the tool in the installation media manually." Be sure to set up the master machine as follows: Join Workgroup For Windows Server 2003 R2/Windows XP or earlier, do not set the Administrator user password Sysprep is used for OS installation by disk duplication. When you execute Sysprep on the same OS repeatedly, be careful about the upper limit of execution. For Windows Server 2008 or earlier, execution is up to three times. The validation period is cleared at the timing of execution of Sysprep until the third execution and 30days will be added afterward. From the forth execution, the error message is shown without clearing the validated period. For details, refer below technical information of Microsoft. KB An error message occurs when you run "Sysprep /generalize" in Windows Vista or Windows 7: "A fatal error occurred while trying to Sysprep the machine." When you use Windows parameter file(express), Sysprep will be executed once in one OS installation by disk duplication. In the case of using Windows parameter file, Sysprep will be executed twice in one OS installation by disk duplication. Therefor you cannot execute OS installation by disk duplication two or more times for the same master image. If you need to execute OS installation by disk duplication two or more times for the same master machine, backup the image before executing Sysprep and restore the image after OS installation by disk duplication. Note Sysprep may have been executed at the time of shipment, depending on the machine. For Windows Server 2012/Windows 8 or later, 1000 times is the upper limit. When you execute OS installation by disk duplication for Windows 8/Windows 8.1/Windows 10 with updating or uninstalling Store Apps for Windows built-in, an error might occur during Sysprep execution. 33
34 DPM Client has the information of IP address for the Management Server, the port used by DPM Server and DPM Client. If DPM Client cannot connect to DPM Server, DPM Client tries to connect to DPM Server with the IP address and the port when starting the service of DPM Client. DPM Client searches the Management Server and gets the information of IP address and the port. A part of the communication sequence of DHCP is used to search the Management Server. (Both when you operate DPM with DHCP server and when you operate DPM without DHCP server) DPM Client uses the port of UDP:68 to receive the data from the Management Server. If DPM Client cannot bind the network by the port of UDP:68, it fails to search the Management Server. DHCP Client with OS standard also uses the port of UDP:68. It is already confirmed that there is no problem with the evaluation result. When DPM Client searches the Management Server in the environment where two or more Management Servers exist, DPM Client obtains the IP address of the Management Server, which responded first. When the machine, which is set with LAN teaming (AFT/SFT/ALB) by Intel PROSet or with LAN teaming by BACS (Broadcom Advanced Control Suite) of Broadcom, is managed, be careful about the following. TCP/IP information of the disk duplication data file cannot be set properly. The scenario may not be completed when the Check the completion of a scenario by the communication with DPM Client checkbox is selected in the detail setting of DPM Server. (See Section , "General Tab" in Web Console Reference Guide for details about the Check the completion of a scenario by the communication with DPM Client checkbox.) To avoid these, remove the configuration of LAN teaming before creating the master image and set LAN manually after the completion of OS installation by disk duplication. When OS installation by disk duplication is completed, log-on screen for Administrator account appears. Executing the built-in scenario. Execute the scenario following the procedure below. (1) On the Web Console, click Operations in the title bar to switch to the Operations view (2) In the tree view, click Resource -> Machines -> Machine Group. (3) The Machine List group box appears in the main window. Click Managed machine to which the scenario is to be assigned. (4) In the Action menu, click Assign Scenario. (5) Assign Scenario screen appears in the main window. Click Browse, select either of the following scenarios under Built-in Scenarios scenario group, and click OK. System_WindowsMasterSetup System_WindowsMasterSetupVM 34
35 When executing OS installation by disk duplication for Windows Server 2012/Windows 8 or later on the virtual machine, OS installation by disk duplication by System_WindowsMasterSetupVM is faster than that by System_WindowsMasterSetup. This is because the configuration of devices is omitted (same as the master machine) when guest OS of duplication destination machine is started at first in the case of System_WindowsMasterSetupVM. However, because the devices are set as the same with the master machine, the image cannot be deployed when the configuration of devices on the guest OS of the virtual machine is different as the description of the following support technical information (/mode:vm) by Microsoft. In addition, you need to operate the machine with DHCP server because you cannot set the fixed IP address. (6) Returns to the Machine List group box in the main window. Select the checkbox in the left column of the Managed machine on which you execute the scenario. (7) In the Action menu, select Execute Scenario. (In the Machine List group box in the main window, Scenario Executing is displayed in the Status column corresponding to the managed machine on which the scenario is executed.) The managed machine searches DPM Server in the network. Even when you changed the IP address of DPM Server after creating the master image, you do not need to recreate the master image. (8) In the Operation menu, select Refresh. Check the Status column is blank and the Power is Off, corresponding to the managed machine on which the scenario is executed. (This is because the processing is also done after Completed Execution was displayed in the Scenario Execution Result List screen.) Executing the tool in the installation media manually Copy Sysprep file to the master machine and execute it following the procedure below. (1) Log on to the master machine by a user with administrator authority. (2) On the master machine, execute either of the following files from Explorer and so on. The disk duplication data file (Windows parameter file(express)) - <Installation media>:\dpm\tools\expresssysprep\windows\copy-expresssysprep.vbs - <Installation media>:\dpm\tools\expresssysprep\windows\copy-expresssysprepvm.vbs The disk duplication data file (Windows parameter file) <Installation media>:\dpm\tools\sysprep\windows\copysysprep.vbs 35


36 If the <OS startup drive>:\sysprep folder exists, the files for OS installation by disk duplication will be overwritten. DPM creates an <OS startup drive>:\dpm_diskcloningtmp folder when OS installation by disk duplication is executed. If a folder of the same name exists, OS installation by disk duplication may not operate properly. When executing OS installation by disk duplication for Windows Server 2012/Windows 8 or later on the virtual machine, OS installation by disk duplication by Copy-ExpressSysprepVM.vbs is faster than that by Copy-ExpressSysprep.vbs. This is because the configuration of devices is omitted (the same with the master machine) when guest OS of duplication destination machine is started at first in the case of Copy-ExpressSysprepVM.vbs. However, the image cannot be deployed to another machine because the configuration of devices is the same with the master machine, as the description of the following support technical information by Microsoft. Also, you need to operate the machine with DHCP server because you cannot set the fixed IP address. (3) The following screen appears. Click OK. The Sysprep folder is created in the OS boot drive of the master machine, and the necessary modules for disk duplication are copied into the folder. (4) For Windows Server 2008/Windows Vista or later, the following screen does not appear. Go to Step (5). In the case of other OS, the following screen appears. Enter the product key used for master machine setup, and click OK. If you use the backup CD-ROM, enter the product key affixed to the machine. 36
.")
37 (5) The following screen appears. Click OK. (6) In case of Windows Server 2008/Windows Vista or later, Steps (6) and (7) are not required. Go to Step (8). In the case of other OS, copy sysprep.exe and setupcl.exe from the \SUPPORT\TOOLS\DEPLOY.CAB folder on the Windows OS CD-ROM to the Sysprep folder created at Step (3). Be sure to copy the files from the CD-ROM of the OS installed on the master machine. (7) Copy netdom.exe from \SUPPORT\TOOLS\SUPPORT.CAB on the Windows OS CD-ROM disk corresponding to the master machine into the \Sysprep\i386\$OEM$\$$\SYSTEM32 folder created at Step (3). Be sure to copy the files from the CD-ROM of the OS installed on the master machine. (8) Edit the information of DPM Server to be connected. Edit the file according to your operating environment. Change the following underlined IP address of DPM Server manages the master machine and save the file. ServerIP= Also, change the following underlined port of DPM Server manages the master machine and save the file. FTUnicastPort=26508 When you use the disk duplication data file (Windows parameter file(express)) <OS startup drive>:\sysprep\express-server.ini When you use the disk duplication data file (Windows parameter file) <OS startup drive>:\sysprep\server.ini Do not change any value except the IP address and the port of DPM Server. If you change them, an error may occur. In OS installation by disk duplication, the managed machine communicates with DPM Server by using the IP address specified at ServerIP and the port specified at FTUnicastPort in the configuration file. About the master image created by DPM Ver6.1 or later, when the managed machine cannot connect to DPM Server by the set ServerIP and FTUnicastPort, the machine searches DPM Server in the network. Therefore, when there was a mistake in the configuration of ServerIP and FTUnicastPort or you changed the IP address and the port of DPM Server after creating the master image, you do not need to re-create the master image. As well, because of the time to search, the time for OS installation by disk duplication 37

 Press R key while pressing Windows logo key on the desktop of the master machine to open Run dialog box. Enter the command below in the Open box, and press Enter key.")
38 may get longer. Specify the port at FTUnicastPort, following the port number set in DPM Server. You can check the port number set in DPM Server in the following file. <TFTP Root Folder>\Port.ini Key name: FTUnicast Default value: (When you upgraded DPM Server from the version earlier than DPM Ver6.1, set ) The default of TFTP root folder is "C:\Program Files (x86)\nec\deploymentmanager\pxe\images". (9) Press R key while pressing Windows logo key on the desktop of the master machine to open Run dialog box. Enter the command below in the Open box, and press Enter key. <OS startup drive>:\sysprep\sysprep.bat For Windows Server 2003 R2/Windows XP or earlier, Sysprep.exe exists in the same folder, however do not execute this Sysprep.exe. When you log on to the master machine (Windows Server 2008/Windows Vista or later) by a user except Administrator, you need to execute this as an administrator. End all running applications, Explorer and so on. (10) The following window appears. Follow the instructions on the screen. Example) When using Windows parameter file(express) on Windows Server 2008 The disk duplication data file (Windows parameter file(express)) Example) When using Windows parameter file on Windows Server The disk duplication data file (Windows parameter file) (11) After Sysprep.bat execution, the power of the master machine automatically turns off. If the master machine restarts, shut the power off by pressing the power switch before the machine obtains an IP address from DHCP server on the POST screen. 38
39 Backing Up the Master Machine (for OS Installation by Disk Duplication) Backup the master machine which was created until the previous section ( , "Preparing for Creating the Master Image"), and create a master image for OS installation by disk duplication. Backup the master machine seeing Section 3.1, "Backup." Under Scenario Execution Option Setting on the Option tab of the backup scenario, check the checkbox of Turn Off Power After Scenario Execution. Be sure to save the file as a backup file different from the file used in Section , "Backing Up the Master Machine (for Recovery)." Restoring the Master Machine To restore the master machine to the state before performing , "Preparing for Creating the Master Image", execute the restore scenario using the backup image which was created in Section , "Backing Up the Master Machine (for Recovery)." For the restore scenario, see Section 3.2, "Restoration." You may delete the backup image file which was created in Section , "Backing Up the Master Machine (for Recovery)" when you do not need it Distributing the Master Image Creating a Disk Duplication Data File of the Machine to Duplicate Use Image Builder to create a disk duplication data file. Prepare a disk duplication data file for each managed machine to which the master machine will be duplicated. Specific information is automatically reflected on each machine using this disk duplication data file. See below for details of the procedure for disk duplication data file. For Windows Server 2003 R2/Windows XP or earlier Create an information file using Image Builder, and create a disk duplication data file based on the created file. See Section , "Creating a Disk Duplication Data File (Windows Server 2003 R2/Windows XP or earlier)" in Tool Reference Guide. The machine after OS installation by disk duplication maintains the paging file setting of the master machine. If you discard this setting, change the item below in the created disk duplication data file. <Folder for Image (C:\Deploy)>\AnsFile\Sysprep\<MAC Address>.inf [Before edit] [Unattended] KeepPageFile="1" [After edit] [Unattended] KeepPageFile="" 39
40 If the setting is other than the above (a space is included and so on), the paging file setting will be maintained. If you execute OS installation by disk duplication using a master image created in the version earlier than DPM Ver5.0, the paging file setting will not be maintained. For Windows Server 2008/Windows Vista or later See "1. Creating a Disk Duplication Data File (Windows parameter file(express))" in Section , "Creating a Disk Duplication Data File (Windows Server 2008/Windows Vista or Later)" in Tool Reference Guide for details of creating disk duplication data file (Windows parameter file(express)). You can create disk duplication data file (Windows parameter file) for Windows Server 2008/Windows Vista/Windows 7. See "2.Creating a Disk Duplication Data File (Windows Parameter File)" in Section "Creating a Disk Duplication Data File(Windows Sever 2008/Windows Vista or Later)" in Tool Reference Guide. When you create the disk duplication data file for Windows Server 2008/Windows Vista or later, set the same OS type as the master machine and set the product key properly. Create one disk duplication data file per each machine which will be duplicated. When the disk duplication file is not created, Sysprep does not operate properly. Disk duplication data file with the same name as MAC address for the managed machine which is registered on DPM Server is used on OS installation by disk duplication, 40
41 Restoring the Duplication Destination Machine Distribute the master image created in Section , "Backing Up the Master Machine (for OS Installation by Disk Duplication)" to the duplication destination seeing Section 3.2, "Restoration." After finishing restoration, the contents of the disk duplication data file of the machine subject to duplication are reflected while the machine is automatically rebooted several times. When you select Transmit Data By Multicast under Multicast Condition Setting on the Backup/Restore tab of the restore scenario, restoration starts at the timing of the number of the managed machine finished the execution preparation becomes the same value as you set on Maximum Targets or exceeds the value you set on Maximum Waiting Time. When you execute restoration on the managed machine exceeds the value set on Maximum Targets, the managed machine executed in excess of Maximum Targets becomes restoration standby state. The managed machine in standby state starts restoration after finishing restoration of the running managed machine when either of the condition of Maximum Targets or Maximum Waiting Time meets or when you click Execute Now on Backup/Restore Execution List screen. When you do not specify Maximum Targets or Maximum Waiting Time, restoration is not automatically started after executing scenario. In that case, click Execute Now on Backup/Restore Execute List screen. See Section 4.3.2, "Backup/Restore Execute List" in Web Console Reference Guide for details of Backup/Restore Execute List screen. Be sure to use the same machine model and same hardware configuration layout for the master machine serves as the duplication source and the machine that serves as the duplication destination. For example, when you create a master without connecting USB keyboard/mouse and USB keyboard/mouse is connected to the duplication destination machine, there is a possibility that USB keyboard/mouse is detected as the new device and restart is required after finishing OS installation by disk duplication. When creating the scenario, note the following: As the Image File on the Backup/Restore tab, use the file backed up in Section , "Backing Up the Master Machine (for OS Installation by Disk Duplication)." In the Scenario Execution Option Setting group box on the Option tab, do not select the Turn Off Power After Scenario Execution checkbox. When the machine, which is set with LAN teaming (AFT/SFT/ALB) by Intel PROSet or with LAN teaming by BACS (Broadcom Advanced Control Suite) of Broadcom, is managed, be careful about the following. TCP/IP information of the disk duplication data file cannot be set. There is a case that the scenario is not completed when the Check the completion of a scenario by the communication with DPM Client checkbox is selected in the configuration of DPM Server. (See Section , "General Tab" in Web Console Reference Guide for details about the Check the completion of a scenario by the communication with DPM Client checkbox.) To avoid these, remove the configuration of LAN teaming before creating the master image and set LAN manually after the completion of OS installation by disk duplication. 41
42 Precautions/Others Precautions are as the following. When you distribute the master image in OS installation by disk duplication, the drive letters are reassigned at the timing OS is reconfigured. According to Microsoft specifications, for the basic disk, the drive letters may be reassigned in the order that disks are recognized in the installation. Example) For Windows XP and Windows Server 2003, the drives are reassigned in the following order, starting with C. (1) Active partition of the fixed disk (2) If there are two or more fixed disks, the first primary partition of each fixed disk (3) Logical drive of the extended partition for the fixed disk. (4) Removable disk (5) Remaining primary partition of the fixed disk (6) Floppy disk (from A:) (7) CD-ROM If partitions are additionally created or drive letters are changed after installing Windows, the drive letters may be changed after disk duplication. Example 1) Before OS installation by disk duplication After OS installation by disk duplication Disk 1 Primary (Active) Primary C: X: Disk 1 Primary (Active) Primary C: D: Example 2) Disk 1 Disk 2 Primary (Active) Primary C: D: Primary E: Disk 1 Disk 2 Primary (Active) Primary C: E: Primary D: In addition, if the letter of drive, on which DPM Client is installed, is changed by the above effect, DPM Client does not work properly. After OS installation by disk duplication, the connection name registered in Network and Dialup Connections might change back to the initial setting. If this occurs, change the connection name manually. Using two or more servers, which was set up by OS installation by disk duplication, you cannot to register NLB (Network Load Balancing) cluster. When you register NLB cluster, GUID (Globally Unique Identifier) of the network adapter is used as the identifier. Duplicated servers have the same network GUID because the network GUID is not changed by Sysprep used in OS installation by disk duplication. Therefore, the NLB Manager recognizes them as the same node and an error occurs. To avoid this problem, you need to recreate the network GUID so that GUID is not duplicated. To recreate the network GUID, delete and then reinstall the network adapter. [Procedure for recreating the network GUID] (1) Delete the network adapter by Device Manager on a server to be registered on NLB cluster (by selecting Start -> Administrative Tools -> Computer Management). (2) Reinstall the network adapter by selecting Start -> Control Panel -> Add Computer. (3) Set the IP address and NLB on Network Properties. 42
43 If you have not prepared a disk duplication data file for the managed machine or if the transmission process of the disk duplication data files fails, the message below appears on the command prompt of the managed machine. OS installation by disk duplication (Normal) The parameter file for this system is not prepared, or failed to be copied. Follow the wizard to setup displayed after reboot. Press any key to reboot. OS installation by disk duplication (Express): The parameter file for this system is not prepared, or failed to be copied. For Windows Server 2008/Windows Vista or later: Close the command prompt with the upper right [x] without pressing any key, and confirm the <OS startup drive>:\sysprep folder. If Express-Server.ini exists, in addition to confirming that the IP address and the port number of DPM Server are correctly saved in Express-Server.ini and the Windows parameter file(express) for the managed machine has been created, shut down the managed machine and distribute the master image again. Confirm the environment again if there are no problems. If Server.ini exists, in addition to confirming that the IP address and the port number of DPM Server is correctly registered in Server.ini and the Windows parameter file for the managed machine has been created, shut down the managed machine and distribute the master image again. Confirm the environment again if there are no problems. Also, in the above each case, confirm the MAC address which is included in the file name of the created Windows parameter file(express) or Windows parameter file is matched with the MAC address with (*) displayed in the Machine Detail screen. For Windows Server 2003 R2/Windows XP or earlier: Perform the setup process manually following the wizard displayed after restarting the system. If you selected Gateway (and Client) Service for Netware or Client Service for Netware under disk duplication data file settings, the Select Netware Logon screen might appear at the logon to Windows. If this happens, the machine automatically logs onto Windows in about 20 minutes, and scenario execution proceeds. Do not perform any operations on the screen. Depending on the OS type, an activation (license authentication) request may appear. If this happens, perform the license authentication procedure following the instructions on the screen. 43
44 3.4. OS Installation by Disk Duplication (Linux) To execute OS installation by disk duplication (Linux), create a master image for duplication and the specific information for the destination machine, and restore the master image on the destination machine. Perform the operations described in Section 3.4.1, "Creating a Master Image" to Section 3.4.3, "Distributing the Master Image" in that order Creating a Master Image Create a master image as follows Setting Up the Master Machine Set up the master machine, which is the source of OS installation by disk duplication (OS installation, driver installation, RPM update, application installation, and so on) Backing Up the Master Machine (for Recovery) Backup the master machine for recovery of the master machine. See Section 3.1, "Backup." for details of the backup procedure Preparing for Creating the Master Image Prepare for creating the master image by either of the following procedures. - The procedure when you execute the built-in scenario, see "Executing the built-in scenario." - The procedure when you execute the tool in the installation media manually, see "Executing the tool in the installation media manually." DPM Client has the information of IP address of the Management Server and the port used by DPM Server and DPM Client. When the service of DPM Client is started, DPM Client tries to connect to DPM Server by IP address and the port that DPM Client has. If DPM Client cannot connect to DPM Server, DPM Client searches the Management Server and gets the information of IP address and the port. The part of the communication sequence of DHCP is used to search the Management Server. (Both when you operate DPM with DHCP server and when you operate DPM without DHCP server) DPM Client uses the port of UDP:68 to receive the data from the Management Server. If DPM Client cannot bind the network by the port of UDP:68, it fails to search the Management Server. DHCP Client of OS standard also uses the port of UDP:68. It is already confirmed there is no problem except dhcpcd of SUSE Linux Enterprise 10. To use the function of searching the Management Server in SUSE Linux Enterprise 10, it is necessary to start DPM Client with the status that dhcpcd is stopped. When you execute OS installation by disk duplication in SUSE Linux Enterprise 10, dhcpcd is necessary. Therefore, be sure to specify IP address of the Management Server not to search the server by seeing "Executing the tool in the installation media manually". In the case except OS installation by disk duplication, if the managed machine does not need dhcpcd, stop dhcpcd. If dhcpcd is necessary, you cannot use the function of searching the Management Server. When DPM Client searches the Management Server in the environment that there are two or more Management Servers, DPM Client obtains the IP address of the Management Server which responded first. 44
45 When the firewall function of the master machine is valid, open the following ports used by DPM Client. Protocol Port number UDP 68 TCP TCP TCP UDP If the NetworkManager daemon is valid, the DNS setting in the disk duplication data file is not reflected. If you set DNS, invalidate the NetworkManager daemon as the following. For Red Hat Enterprise Linux 7 or later. 1) Check the status of NetworkManager. #systemctl status NetworkManager (Example of execution result) Active: active (running) 2) After checking that "Active: active (running)" is displayed in the execution result, execute the following command with root authority and invalidate NetworkManager. #systemctl disable NetworkManager #systemctl daemon-reload #systemctl stop NetworkManager 3) delete/etc/sysconfig/network-scripts/ifcfg-auto_ethernet* file #cd /etc/sysconfig/network-scripts #rm -f ifcfg-auto_ethernet* For Red Hat Enterprise Linux 6 or earlier 1) Check the run level of NetworkManager. #chkconfig --list NetworkManager (Example of execution result) NetworkManager 0:off 1:off 2:on 3:on 4:on 5:on 6:off 2) If any of them is "on" in the above, execute the following command with root authority and invalidate NetworkManager. #chkconfig NetworkManager off In the case of SUSE Linux Enterprise 11 (You can set by the system management tool YaST.) 1) Select YaST->Network Devices->Network Settings and open Network Settings screen. 2) On Global options tab -> Network Setup Method, select Traditional Method with ifup and click OK. For RedHat Enterprise Linux Fail in creating the master image when the below folder does not exist. /etc/sysconfig/network-scripts/ifcfg-ethn (n:device number) For SUSE Linux Enterprise Fail in creating the master image when the below folder does not exist. /etc/sysconfig/network/ifcfg-ethn (n:device number) 45
46 Executing the built-in scenario Execute the scenario following the procedure below. (1) On the Web Console, click Operations in the title bar to switch to the Operations view. (2) In the tree view, click Resource -> Machines -> Machine Group. (3) Machine List group box appears in the main window. Click Managed machine to which the scenario is to be assigned. (4) In the Action menu, click Assign Scenario. (5) Assign Scenario screen appears in the main window. Click Browse, select "System_LinuxMasterSetup" under Built-in Scenarios scenario group, and click OK. (6) Returns to Machine List group box in the main window. Select the checkbox in the left column of Managed machine on which you execute the scenario. (7) In the Action menu, select Execute Scenario. (In the Machine List group box in the main window, Scenario Executing is displayed in the Status column corresponding to the managed machine on which the scenario is executed.) The managed machine searches DPM Server in the network. Even when you changed the IP address of DPM Server after creating the master image, you do not need to recreate the master image. (8) In the Operation menu, select Refresh. Confirm that the Status column is blank and the Power is Off, corresponding to the managed machine on which the scenario is executed. (This is because that the processing is also done after Completed Execution was displayed in the Scenario Execution Result List screen.) Executing the tool in the installation media manually Delete the specific information of the master machine following the procedure below. (1) Log in to the master machine by root. (2) Insert the install media into the DVD-ROM drive. (3) Mount the install media. # mount /mnt/cdrom (4) Change the current directory. # cd /mnt/cdrom/dpm/linux/ia32/bin/linuxrep (5) Execute LinuxRepSetUp. #./LinuxRepSetUp When you execute LinuxRepSetUp, all network settings set up in the current fixed IP address are changed so that they will be obtained from the DHCP server. 46
47 (6) IP address of DPM Server is requested. Enter the IP address and press Enter key. (When you omit entering the IP address, press Enter key without entering anything. DPM Client searches the Management Server automatically. It may take some time to search.) Enter the IP address of the management server. > Please conform to the actual environment In OS installation by disk duplication, the managed machine communicates with DPM Server by using the IP address specified here. About the master image created by DPM Ver6.1 or later, when the managed machine cannot connect to DPM Server by the specified IP address, the machine searches DPM Server in the network. Therefore, when there was a mistake of the IP address or you changed the IP address of DPM Server after creating the master image, you do not need to re-create the master image. Because of the time to search, the time for OS installation by disk duplication may get longer. (7) If you turn the power off, do it manually. The machine will not automatically shut down. Shutdown from the Web Console or by scenario execution is also not possible Backing Up the Master Machine (for OS Installation by Disk Duplication) Back up the master machine for duplication created until the previous section ( , "Preparing for Creating the Master Image"), and create a master image. Backup the master machine seeing Section 3.1, "Backup." Under Scenario Execution Option Setting on the Option tab of the backup scenario, select the Turn Off Power After Scenario Execution checkbox. Be sure to save the file as a backup file that is different from the file used in Section , "Backing Up the Master Machine (for Recovery)." Restoring the Master Machine To restore the master machine to the state before performing , "Preparing for Creating the Master Image", execute the restore scenario using the backup image created in Section , "Backing Up the Master Machine (for Recovery)." For the restore scenario, see Section 3.2, "Restoration" There will be no problem when you delete backup image file which has been created in Section , "Backing Up the Master Machine (for Recovery)." 47
48 Distributing the Master Image Creating a Disk Duplication Data File of the Machine to Duplicate Use Image Builder to create a disk duplication data file. Prepare a disk duplication data file for each managed machine to which the master machine will be duplicated. Specific information is automatically reflected on each machine using this disk duplication data file. For details on how to create a disk duplication data file, see Section 1.4.3, "Creating a Disk Duplication Data File (Linux)" in Tool Reference Guide Restoring the Duplication Destination Machine Distribute the master image to the duplication destination seeing Section 3.2, "Restoration" The machine is automatically rebooted and the contents of the disk duplication data file of the machine are reflected. If you select Transmit Data By Multicast under Multicast Condition Setting on Backup/Restore tab from the restore scenario, restoration begins at the timing of the number of the managed machine which completes the preparation of execution becomes the same value you set as the Maximum Targets or at the timing of the number of the managed machine exceeds the Maximum Waiting Time. Note when restore is executed on managed machine beyond the specified Maximum Targets, the managed machine beyond the Maximum Targets change to a restore standby state. Restoring will be started on the managed machine in a standby state when either of Maximum Targets or Maximum Waiting Time condition is met at the timing that restoring which is running is completed on the managed machine, or if you click Execute Now on the Backup/Restore Execution List screen. If you do not specify the Maximum Targets or Maximum Waiting Time, restoring will not automatically begin after scenario execution. In that case, on the Backup/Restore Execution List screen, click Execute Now to start restoring. For the Backup/Restore Execution List screen, see Section 4.3.2, "Backup/Restore Execute List" in Web Console Reference Guide. When creating the scenario, note the following: As the Image File on the Backup/Restore tab, use the file backed up in Section , "Backing Up the Master Machine (for OS Installation by Disk Duplication)." In the Scenario Execution Option Setting group box on the Option tab, do not select the Turn Off Power After Scenario Execution checkbox. 48
49 Precautions/Others Precautions are as the following. After disk duplication, there are cases the following message may appear or X-Window may not run at Linux OS startup. Could not look up internet address for "Hostname"*. This will prevent GNOME from operating correctly. It may be possible to correct the problem by adding "Hostname"* to the file /etc/hosts. * "Hostname" is a host name of the machine after disk duplication. This is caused by an unregistered hostname in the /etc/hosts file. If this happens, register the hostname in the /etc/hosts file. If the environment uses a fixed IP address, register a line such as follows: Example) servername If the machine obtains an IP address from DHCP, register the hostname with a loopback address as follows: Example) localdomain.localhost localhost servername The network configuration of the machine is associated with the MAC address. In OS installation by disk duplication, the network number (eth) may not be set as intended, and that may result in incorrect network configuration because the MAC address between the master machine and the duplication destination machine is different. The countermeasure for this case is as follows. Red Hat Enterprise Linux Update the settings manually after disk duplication. - Change the MAC address of the "HWADDR" line of the file below to the actual MAC address. Be careful of the relation between MAC address and eth. /etc/sysconfig/network-scripts/ifcfg-ethn (n:device number) - Set the settings so that eth and the IP address are corresponded properly. In the case of Red Hat Enterprise Linux 7 or later, set the setting so that IP address is corresponded properly by seeing the execution result of ip addr show command. SUSE Linux Enterprise Manually update the settings after disk duplication. - Change the MAC address stated in the file below to the actual MAC address. At this time, be careful of the relation between MAC address and eth. /etc/udev/rules.d/30-net_persistent_names.rules - Change the MAC address included in the file below to the actual MAC address. /etc/sysconfig/network/ifcfg-eth-id-xx:xx:xx:xx:xx:xx - Be sure to set the settings so that the IP address stated in the file properly corresponds with the file whose name was changed. Remove the dependency of the MAC address by implementing the following procedure on the master machine. In this case, the PCI Bus ID and eth are linked together. 49
50 (1) Change the file names of the files below to "ifcfg-ethx (actual NIC number)." (If necessary, back up the files in advance.) /etc/sysconfig/network/ifcfg-eth-id-xx:xx:xx:xx:xx:xx Example) Before modification: /etc/sysconfig/network/ -ifcfg-eth-id-11:22:33:44:55:66 (Change to eth0) -ifcfg-eth-id-77:88:99:aa:bb:cc (Change to eth1) -ifcfg-eth-id-dd:ee:ff:00:11:22 (Change to eth2) After modification: /etc/sysconfig/network/ -ifcfg-eth0 (before correction is ifcfg-eth-id-11:22:33:44:55:66) -ifcfg-eth1 (before correction is ifcfg-eth-id-77:88:99:aa:bb:cc) -ifcfg-eth2 (before correction is ifcfg-eth-id-dd:ee:ff:00:11:22) (2) /etc/udev/rules.d/30-net_persistent_names.rules is to be edited. 1) Execute the command below, and check <PCI Bus ID> ethtool -i ethx Example) In the case of the execution result as the following, <PCI Bus ID> is "0000:00:11.0". ethtool -i eth driver: pcnet32 version: 1.31c firmware-version: bus-info: 0000:00: ) Open the following file using a text editor and so on, and change the location of "SYSFS{address}=="<MAC address>" in all ethx lines to BUS=="pci", ID=="<PCI Bus ID>". (If necessary, back up the file in advance.) /etc/udev/rules.d/30-net_persistent_names.rules Example) Before modification:... SUBSYSTEM=="net",ACTION=="add",SYSFS{address}=="00:11:22:33:44:55", IMPORT=="/lib/udev/rename_netiface %k eth0"... After modification:... SUBSYSTEM=="net",ACTION=="add",BUS=="pci",ID=="0000:00:11.0", IMPORT=="/lib/udev/rename_netiface %k eth0" 50
51 3.5. OS Clear Installation (Linux) To execute OS clear installation, install OS to the target machine with installation parameters after creating OS image and installation parameters. Execute from Section 3.5.1, "Creating and Registering an Image" to Section 3.5.5, "Checking the Scenario Execution Results" in order Creating and Registering an Image The following describes the DPM setup and procedure for installing Red Hat Enterprise Linux 7 as an example. The basic operations are the same as supported versions except Red Hat Enterprise Linux 7. About different points from Red Hat Enterprise Linux 7, see "Setup procedure for each version" below. When you execute OS clear installation, do not connect devices such as HDD or an external storage device, which are not the installation targets. The installation may fail. Setup procedure for each version When you install a version except Red Hat Enterprise Linux 7, replace the description of Red Hat Enterprise Linux 7 in the following with the corresponding version. The files required for installation are as follows: Installation ISO file/contents of installation CD of Red Hat Enterprise Linux initrd.img/vmlinuz file (for network installation) Setup parameter file (kickstart file) Boot parameter file (parameter file) Confirm that the machine to be installed runs properly by commercial Red Hat Enterprise Linux package products and installation is possible via the network, and then execute installation. For the Express 5800 series, contact your sales or support representative about Linux distribution information. Red Hat Enterprise Linux 7 Installation ISO file is necessary for installation procedure described in subsequent sections. For Red Hat Enterprise Linux 6 or earlier, use not CD-ROM ISO file but CD-ROM. The number of the installation CD differs per distribution Setting up NFS Service See Appendix C, "Configuring NFS Server" in Installation Guide for the procedure of configuring the NFS Server. About precautions when you configure NFS Server on the machine except the Management Server, see Section 3.5.6, "Precautions/Others." 51
52 Registering an Operating System When you create an NFS shared folder except in <Folder for Image>\exports, you need to register the operating system manually without using Image Builder which is described in the following. For details, see "About Linux Installation" in Section 3.5.6, "Precautions/Others." (1) Log on to the machine, on which Image Builder is installed, by a user with administrator authority. Log on by a user who installed DPM Server when you use Image Builder on the Management Server. (2) From Start menu, select All Programs -> DeploymentManager -> Image Builder. When you log on to the OS by a user except Administrator, you need to execute this as an administrator. (3) Image Builder is launched. Click Registering operating system. 52
\", \"ks\", \"daemon\", and \"pxelinux.*\" are reserved and cannot be registered. Operating System Type initrd.")
53 (4) The following screen appears. Set each item and click OK. Operating System Name 126 characters or less can be entered. Alphanumeric characters and following symbols can be entered. ( ) -. Names such as "Linux", "Linux(gPXE)", "ks", "daemon", and "pxelinux.*" are reserved and cannot be registered. Operating System Type initrd.img/vmlinuz folder CD-ROM source folder (When you select "Red Hat Enterprise Linux 6" or "Red Hat Enterprise Linux7" from "Operating System Type", this item is indicated as Install ISO.) *1 Select the following OS on the list box. RedHat Enterprise Linux 3,4,5/VMware ESX/Citrix XenServer(*1) Red Hat Enterprise Linux 6 Red Hat Enterprise Linux 7 For Red Hat Enterprise Linux 5, specify images\pxeboot folder in the first installation CD directly. For Red Hat Enterprise Linux 6/7, mount ISO file for installation and select "images/pxeboot". Select the folder OS is stored by clicking Browse. Specify CD-ROM drive name. *For Red Hat Enterprise Linux 6/7.select ISO file for installation which includes OS image from Browse. Red Hat Enterprise Linux 3,4/Citrix XenServer is not supported. To create a Linux image file, copy the specified ISO file (for Red Hat Enterprise Linux 5, copy all files subordinate to CD-ROM source folder). In Red Hat Enterprise Linux5, two or more CD-ROMs are involved and thus a message prompting you to copy the next CD-ROM will appear after the first CD-ROM is copied. Insert the CD-ROMs in order, and continue copying. If an overwrite confirmation dialog box appears during this time, select Yes or Yes to All, and proceed. 53


54 (5) Wait until the copy of the vmlinuz/initrd.img files is completed. After the completion of the copy, the following screen appears. For Red Hat Enterprise Linux6 or later, the procedure is complete. For Red Hat Enterprise Linux 5, the following screen appears. When you have installation CD to be registered, change the CD and click Next. There are several Red Hat Enterprise Linux installation CDs. (6) If an overwrite confirmation dialog box appears during the process, click Yes to All. (7) Once all CDs have been copied, the Red Hat CD Image Copy screen appears. Click End. 54

55 Creating the Linux Installation Parameter File A Linux installation parameter file is a file stores all of the items required during Linux installation setup in advance, enabling unattended OS installation. Use Image Builder to create the Linux installation parameter file. For details on how to create the file, see Section 1.4.5, "Creating a Parameter File for OS Clear Installation (Linux)" in Tool Reference Guide. Be sure to set up this file when you execute OS clear installation on Linux. To create a large volume of setup parameter files, see Section 1.4.6, "Batch Creation of Parameter File for OS Clear Installation (Linux)" in Tool Reference Guide Creating a Scenario The following describes how to create a scenario. (1) On the Web Console, click Operations in the title bar to switch to the Operations view. (2) In the tree view, click Resource -> Scenarios -> Scenario Group. (3) In the Configuration menu, click Add Scenario. (4) The following screen appears. Select the OS tab, and set each item. See Section , "OS Tab" in Web Console Reference Guide for details of the items. 55
56 Assign Scenario The following describes how to assign the scenario. (1) On the Web Console, click Operations in the title bar to switch to the Operations view. (2) In the tree view, click Resource -> Machines -> Machine Group. (3) The Machine List group box appears in the main window. Click Managed machine to which the scenario is to be assigned. (4) In the Operation menu, click Assign Scenario. (5) The following screen appears in the main window. Click Browse, select the scenario to apply, and click OK Executing the Scenario The following describes how to execute the scenario. If the managed machine power is ON when you execute the scenario, the scenario will not run. If this happens, perform one of the following operations: On the Edit Scenario screen, select the Forced Execution Of A Reboot Is Performed Before Execution in the Scenario Execution Option Setting group box on the Option tab. Restart the managed machine manually. Before executing the scenario, confirm that a floppy disk is not inserted in the managed machine where installation is to be performed. If a floppy disk is inserted, OS clear installation may fail. (1) On the Web Console, click Operations in the title bar to switch to the Operations view. (2) In the tree view, click Resource -> Machines -> Machine Group. 56
57 (3) The Machine List group box appears in the main window. Select the checkbox on the left of the Managed machine on which you want to execute the scenario. (4) In the Action menu, select Execute Scenario. (In the Machine List group box in the main window, Scenario Executing is displayed in the Status column corresponding to the managed machine on which the scenario is executed.) For details on how to check the scenario execution status, see Section 4.3, "Scenario Execution List" in Web Console Reference Guide Checking the Scenario Execution Results The following describes how to check the OS clear installation scenario execution results. (1) On the Web Console, click Monitor in the title bar to switch to the Monitor view. (2) In the tree view, or in the Monitor Function List group box in the main window, click Scenario Execution Result List. (3) The Scenario Execution Result List group box appears in the main window. Check the Status column corresponding to the managed machine. For details on the Scenario Execution Result List group box, see Section 4.5, "Scenario Execution Result List Details" in Web Console Reference Guide Precautions/Others Linux is installed over a network using pxelinux.bin and an NFS Server. The "pxelinux.bin" is a loader for Linux installation for PXE boot. DPM sends "pxelinux.bin" to the managed machine by network boot, and get ready for the configuration file that "pxelinux.bin" needs. The "pxelinux.bin" requests the configuration file by tftp. There is a case that it requests the configuration file whose name is different from the name of the files DPM got ready. When the requested configuration file is not ready, DPM outputs the following error on the event log. There is no problem for operation. Type:Application Level:Error Source:DeploymentManager 57
58 Event ID:1 Description:The requested file could not be found. file = XX(Requested file path is output.) loserror = 0x You need to prepare the NFS Server separately because DPM does not have NFS function. When you execute OS clear installation on Red Hat Enterprise Linux 6(except 6.4 or later), configure NFS Server on the server except Windows Server 2012/Windows Server 2012R2. See 2.4 "Notes for OS Clear Installation" in Caution Notes and Trouble Shooting Reference Guide for details. DPM provides a folder entitled "exports" under the Folder for Image (which is set up on the Detailed Settings screen). DPM registers Linux OS using Image Builder based on the assumption that the exports folder is an NFS shared folder (shared name: exports). If you install the NFS Server on the same machine as DPM Server, set the folder to the NFS shared folder (shared name: exports) as described in Appendix C, "Configuring NFS Server " in Installation Guide. If you install the NFS Server on a different machine, you will need to copy an installation image (ISO image and the CD contents for Red Hat), an installation kernel (vmlinuz, initrd.img), and a Linux installation parameter file to each folder manually. The procedure is described as follows. (1) Create a Linux installation parameter file The procedure for creating the Linux installation parameter file is the same as that described in Section , "Creating the Linux Installation Parameter File." In this case, you need to change the operating mode to offline mode. Offline mode allows you to create a Linux installation parameter file in any location. In offline mode, the Linux boot parameter file and the Linux setup parameter file are created in the same location. The name of the Linux boot parameter file is the same as the saved Linux setup parameter file, however without the extension. For example, if the Linux setup parameter file is SampleComp1.cfg, the Linux boot parameter file is SampleComp1. The default destination folder is <DPM Server installation folder (C:\Program Files (x86)\nec\deploymentmanager)>\linux\offline. (2) Store the Linux installation parameter file Create the exports folder in any location on the NFS Server and share the folder with NFS (shared name: exports). Create a ks folder under this folder and copy the Linux installation parameter file created at Step (1) to the ks folder. (3) Store the Linux boot parameter file Copy the Linux boot parameter file created at Step (1) to the Folder for Image(C:\Deploy)\AnsFile\Linux on the Management Server. (4) Store the installation kernel (vmlinuz and initrd.img) Create a folder, which has the same name as the boot directory specified for the Linux installation parameter file at Step (1), under <TFTP Root Folder>\pxelinux on the Management Server. Next, copy the installation kernel to the created folder. The default of the TFTP root folder is "C:\Program Files (x86)\nec\deploymentmanager\pxe\images". 58
59 (5) Store the installation image Create a folder under NFS shared folder created at step (2) with the same name as the boot directory specified when created Linux installation parameter file at step (1). Copy the ISO file for installation of Red Hat Enterprise Linux and the images folder in the ISO image. (6) Store DPM Client module Copy the Folder for Image(C:\Deploy)\exports\daemon folder on the Management Server under the NFS shared folder created at Step (2) for each folder. The following conditions are required for the above procedure: The name of the boot directory specified when creating the Linux installation parameter file is the same as the name of the destination folder of the installation kernel. The name of the boot directory specified when creating the Linux installation parameter file is the same as the name of the destination folder of the installation image. The shared name of the NFS shared folder is exports. After the above procedure is executed, the file and folder composition will be as follows. In this example, the DPM Server installation folder is "C:\Program Files (x86)\nec\ DeploymentManager", the DPM Folder for image is "C:\Deploy", the NFS shared folder is "C:\exports", and the boot directory name is "RHEL7". Management Server C:\ Deploy\ AnsFile\ Program Files (x86)\ NEC\ Boot parameter file (3) DeploymentManager\ PXE\ Images\ pxelinuxbin\ RHEL7\ Installation kernel (4) 59
60 NFS Server C:\(Any drive) exports\(nfs shared name: exports) ks\ Installation parameter file (2) RHEL7\ ISO file and images folder (5) daemon\ redhatall\ ia32\ Client service module (6) ia64\ Client service module (6) 60
61 3.6. Installing Service Packs, HotFixes, Linux Patch Files, and Applications (Scenario Type) To install service packs, hotfixes, Linux patch files, and applications, register the installed image on DPM, and distribute and install the registered image on the target machine. Perform the operations outlined from Section 3.6.1, "Creating and Registering an Image" to Section 3.6.5, "Checking the Scenario Execution Results" in that order Creating and Registering an Image Create an image of the service pack, hotfix, Linux patch file, or application to be installed, and register the image on DPM Registering Service Packs, HotFixes, Linux Patch Files, and Applications The following describes how to register service packs, hotfixes, Linux patch files, and applications on DPM. The procedures for registering and modifying service packs, hotfixes, Linux patch files, and applications by using Image Builder are as follows. (1) Log on to the machine Image Builder is installed by a user with administrator authority. When you use Image Builder on the Management Server, log on by the user who installed DPM Server. (2) From Start menu, select All Programs -> DeploymentManager -> Image Builder. Execute as the administrator when you log on to OS by the user except Administrator. (3) Image Builder is launched. Click Package registration/modification. (4) Package registration/modification screen appears. From File menu, select each menu to create/modify package. When creating Windows package -> Create Windows Package See Section "Create Windows Package" in Tool Reference Guide for details. When modifying Windows package -> Modify Windows Package See Section "Modify Windows Package" in Tool Reference Guide for details. When creating Linux package -> Create Linux Package See Section "Create Linux Package" in Tool Reference Guide for details. When modifying Linux package ->Modify Linux Package See Section "Modify Linux Package" in Tool Reference Guide for details. 61
62 For details on how to register service packs, hotfixes, Linux patch files, and applications by using PackageDescriber, see Section 4.3, "Automatically Registering Packages on Multiple DPM Servers", Section 2.2, "Create Package" in Tool Reference Guide, and Section 2.4, "Registration and Deletion on the Package Web Server" in Tool Reference Guide. Registering from the EXPRESSBUILDER CD-ROM With the Express 5800/Blade Server series, NEC ESMPRO Agent, NEC ESMPRO AlertManager and Adaptec Storage Manager-Browser Edition can be registered from the EXPRESSBUILDER CD-ROM according to machine model. This section describes the registration procedure when registration to the DPM by the EXPRESSBUILDER CD-ROM is supported. NEC ESMPRO Agent and NEC ESMPRO AlertManager (1) On the Web Console, confirm that there is no machine executing a scenario. (2) Insert the EXPRESSBUILDER CD-ROM and select NEC ESMPRO from Setup in the Master Control Menu that appears automatically. (3) NEC ESMPRO Setup screen appears. Select Register to DeploymentManager. "ESMPRO/DeploymentManager" may be displayed while registering NEC ESMPRO Agent or NEC ESMPRO AlertManager according to the versions of the EXPRESSBUILDER CD-ROM. In this case, replace "ESMPRO/DeploymentManager" as "DeploymentManager". Registration will not be affected. (4) The Registration in DeploymentManager screen appears. Select the application. If a package with the same name is already registered, a confirmation message of overwrite registration appears. (5) After you have selected the application, a copy complete confirmation screen appears, indicating that registration is completed. Click OK to close the screen. Adaptec Storage Manager-Browser Edition If an Adaptec Storage Manager menu exists in EXPRESSBUILDER, you can register the Adaptec Storage Manager-Browser Edition. (1) On the Web Console, confirm that there is no machine executing a scenario. (2) Insert the EXPRESSBUILDER CD-ROM and select Adaptec Storage Manager from Setup in the Master Control Menu that appears automatically. (3) The Setup Type screen appears. Select Register ASM in DeploymentManager. If a package with the same name is already registered, a confirmation message of overwrite registration appears. (4) The file copy complete confirmation screen appears. Registration is now completed. Click OK to close the screen. 62
63 Creating a Scenario The following describes how to create a scenario. (1) On the Web Console, click Operations in the title bar to switch to the Operations view. (2) In the tree view, click Resource -> Scenarios -> Scenario Group. (3) In the Configuration menu, click Add Scenario. (4) The Add Scenario screen appears in the main window. Select the Package tab, and set each item. See Section , "Package Tab" in Web Console Reference Guide for details of the items. 63
 In the tree view, click Resource -> Machines -> Machine Group. (3) The Machine List group box appears in the main window. Click Managed machine to which the scenario is to be assigned.")
64 Assigning the Scenario The following describes how to assign the scenario. (1) On the Web Console, click Operations in the title bar to switch to the Operations view. (2) In the tree view, click Resource -> Machines -> Machine Group. (3) The Machine List group box appears in the main window. Click Managed machine to which the scenario is to be assigned. (4) In the Operation menu, click Assign Scenario. (5) The following screen appears in the main window. Click Browse, select the scenario to apply, and click OK. 64
65 Executing the Scenario The following describes how to execute the scenario. If the managed machine is in one of the following states during scenario execution, the managed machine will not be able to shut down even if the Restart After Applying or Turn Off Power After Scenario Execution checkbox is selected. The machine is locked by a workstation lock. The machine is locked by a password-protected screen saver. The machine is connected to Remote Desktop, Terminal Services, or other remote connection software. There are data, which is being edited, or an application, which does not respond to the shutdown request on the machine. * For details of the item Restart After Applying, see Section , "Package Tab" in Web Console Reference Guide also, for details of the item Turn Off Power After Scenario Execution, see Section , "Option Tab" in Web Console Reference Guide. If you execute the scenario on two or more managed machines, be sure that the number of the machine does not exceed the value specified on Machines for Simultaneous Execution. If the number exceeds the value, change the value specified. See Section , "Network Tab" in Web Console Reference Guide for details. DPM executes UDP communication for data sending by multicast. On UDP communication, there is a possibility that data cannot be transferred properly due to difference of data between sending side and receiving side when devices of different transfer rate are on the same path. If this happens, the amount of time until scenario completion might increase. When an executable file generates descendant processes (executable file->child process-> grandchild process), DPM recognizes the completion of the scenario after the executable file and all the child processes finish. The finish of the grandchild process is not monitored. Also, when the executable file is a script file such as bat or sh, DPM recognizes the completion of the scenario after the executable file finishes. The finish of the child and grandchild processes is not monitored. If you install RUR (revision up release) module for Express 5800 Series by DPM, you need to log on to the target machine by an arbitrary user and execute the scenario without running screen saver. When the machine is locked even if you logged on, or screen saver is started during the installing, the automatic installing cannot be continued in some cases. 65
66 A managed machine before rebooting can execute 100 scenarios specified under Execute At Next Startup under Execution Timing Setting on the Package tab of the scenario file. If you execute 101 or more scenarios, reboot the managed machine. Rebooting allows you to execute another 100 scenarios. If you specified an application to be installed at the same time as a service pack, hotfix, or Linux patch file, the service pack, hotfix, or Linux patch file will first be applied followed by application installation. You can skip a countdown message by the following operation on the managed machine. For Windows OS A countdown dialog box appears on the managed machine. Click Execute Immediately. For Linux OS A countdown message appears on the console of the managed machine.(in the case of Red Hat Enterprise Linux 7or later, a countdown message appears, only when the console is already launched.) Execute /usr/local/bin/depcancel on the console. In SUSE Linux Enterprise, in the environment, that X-Windows is not launched (run level 3), a message of two lines may appear. This message does not affect operations. (1) On the Web Console, click Operations in the title bar to switch to the Operations view. (2) In the tree view, click Resource -> Machines -> Machine Group. (3) The Machine List group box appears in the main window. Select the checkbox on the left of the Managed machine on which you want to execute the scenario. (4) In the Action menu, select Execute Scenario. (In the Machine List group box in the main window, Scenario Executing is displayed in the Status column corresponding to the managed machine on which the scenario is executed.) 66
67 If you selected Transmit Data By Multicast under Multicast Condition Setting on the Package tab, the scenario begins when the number of ready managed machine is the same as the value set under Maximum Targets or when the value set under Maximum Waiting Time is exceeded. There is no function for immediately executing the scenario on a machine that is in a waiting state. Note when scenario is executed on managed machines beyond the specified Maximum Targets, a scenario execution error occurs on the managed machine that exceed the Maximum Targets and attempt to execute the scenario. If this happens, select Remove Error in the Operation menu to clear the scenario execution errors. Then, adjust the Maximum Targets value to an appropriate value, and execute the scenario. For details on how to check the scenario execution status, see Section 4.3, "Scenario Execution List" in Web Console Reference Guide Checking the Scenario Execution Results The following describes how to check the scenario execution results. (1) On the Web Console, click Monitor in the title bar to switch to the Monitor view. (2) In the tree view, or in the Monitor Function List group box in the main window, click Scenario Execution Result List. (3) The Scenario Execution Result List group box appears in the main window. Check the Status column corresponding to the managed machine. For details on the Scenario Execution Result List group box, see Section 4.5, "Scenario Execution Result List Details" in Web Console Reference Guide. If the scenario is not completed within 120 minutes, the time-out occurs and a scenario execution error results. 67
68 3.7. Distributing the BIOS/Firmware Update Floppy Disk Image To distribute an image of the BIOS/firmware update floppy disk, register the image to be distributed in DPM, and distribute the registered image to the target machine. That is, perform the operations outlined from Section 3.7.1, "Creating and Registering an Image" to Section 3.7.5, "Checking the Scenario Execution Results" in that order Creating and Registering an Image Create an image of the BIOS/firmware update floppy disk to be distributed, and register the image in DPM as follows Registering the BIOS/Firmware Update Floppy Disk The size is limited to the floppy disk capacity (1.44MByte). You can also distribute and execute an original tool, which can be started up as a floppy disk, by DPM. The following describes how to register a floppy disk image on DPM by Image Builder. (1) Prepare a floppy disk to execute BIOS and firmware updates automatically. Insert the disk into the floppy disk drive of the machine on which Image Builder is installed to register the image on DPM. (2) Log on to the machine, on which Image Builder is installed, by a user with administrator authority. Log on by a user who installed DPM Server when you use Image Builder on the Management Server. (3) From Start menu, select All Programs -> DeploymentManager -> Image Builder. When you log on to the OS by a user except Administrator, you need to execute this as an administrator. 68


69 (4) Image Builder is launched. Click Creating Floppy Disk Image/Registering EFI application. When you start Image Builder and click a menu item for the first time, the following dialog box appears. Read the contents of the agreement and click I Accept. 69
 The following screen appears. Enter the image file name and click OK.")

70 (5) The following screen appears. Select Creating Floppy Disk Image and click OK. (6) The following screen appears. Enter the image file name and click OK. Image File Name 8 characters or less can be entered. Alphanumeric characters and the following symbols can be entered.. _ - (7) A confirming screen appears. Confirm the floppy disk is inserted, and click OK. 70
 On the Web Console, click Operations in the title bar to switch to the Operations view. (2) In the tree view, click Resource -> Scenarios -> Scenario Group.")

71 (8) The following confirmation appears. Click OK Creating a Scenario The following describes how to create a scenario. (1) On the Web Console, click Operations in the title bar to switch to the Operations view. (2) In the tree view, click Resource -> Scenarios -> Scenario Group. (3) In the Configuration menu, click Add Scenario. (4) The Add Scenario screen appears in the main window. Select the HW Setting tab, and set each item. See Section , "HW Settings Tab" in Web Console Reference Guide for details, Assigning the Scenario The following describes how to assign the scenario. (1) On the Web Console, click Operations in the title bar to switch to the Operations view. (2) In the tree view, click Resource -> Machines -> Machine Group. (3) The Machine List group box appears in the main window. Click Managed machine to which the scenario is to be assigned. (4) In the Operation menu, click Assign Scenario. 71

72 (5) The following screen appears in the main window. Click Browse, select the scenario to apply, and click OK Executing the Scenario The following describes how to execute the scenario. If the managed machine power is ON when you execute the scenario, the scenario will not run. If this happens, perform one of the following operations: From the Edit Scenario screen, select the Option tab and, under the Scenario Execution Option Setting group box, select Forced Execution Of A Reboot Is Performed Before Execution. *If the managed machine of Windows is in one of the following states, rebooting will not be performed even if Forced Execution Of A Reboot Is Performed Before Execution is selected. - The machine is locked by a workstation lock - The machine is locked by a password-protected screensaver - The machine is connected from Remote Desktop, Terminal Services, or other remote connection software - The machine has data that is currently being edited or an application that will not respond to a shutdown request Reboot the managed machine manually. When the version of BIOS to be distributed is the same as the version of BIOS installed on the managed machine, BIOS installation may stop before completion. If this happens, a scenario execution error will not occur until a DPM time-out occurs. Before executing the scenario, be sure to check the version of BIOS to be distributed. (1) On the Web Console, click Operations in the title bar to switch to the Operations view. (2) In the tree view, click Resource -> Machines -> Machine Group. (3) The Machine List group box appears in the main window. Select the checkbox on the left of the Managed machine on which you want to execute the scenario. 72
73 (4) In the Action menu, select Execute Scenario. (In the Machine List group box in the main window, Scenario Executing is displayed in the Status column corresponding to the managed machine on which the scenario is executed.) For details on how to check the scenario execution status, see Section 4.3, "Scenario Execution List" in Web Console Reference Guide. 73
74 Checking the Scenario Execution Results The following describes how to check the scenario execution results. (1) On the Web Console, click Monitor in the title bar to switch to the Monitor view. (2) In the tree view, or in the Monitor Function List group box in the main window, click Scenario Execution Result List. (3) The Scenario Execution Result List group box appears in the main window. Check the Status column corresponding to the managed machine. For details on the Scenario Execution Result List group box, see Section 4.5, "Scenario Execution Result List Details" in Web Console Reference Guide. 74
75 4. Useful Functions 4.1. Scheduling DPM allows you to execute a scenario or perform power management operations (power ON or shutdown) on a specified date and at a specified time on managed machines. Set up the schedule in the Scenario Setting group box or the Power Management Schedule group box on either of the screens below. Assign Scenario screen (See Section 3.8.3, "Assign Scenario" in Web Console Reference Guide for details.) Add Machine screen (See Section 3.5.5, "Register Managed Machine" in Web Console Reference Guide for details.) You can also set up a schedule for executing the scenario collectively for managed machines of the machine group. See Section 3.6.1, "Group Batch Execution" in Web Console Reference Guide for details Performing Operations from DPM Command Line DPM Command Line allows you to view client information, execute a scenario and so on without performing operations from the Web Console. For details on how to use Command Line, see Section 4, "DPM Command Line" in Tool Reference Guide Automatically Registering Packages on Multiple DPM Servers To install multiple DPM Servers, you can commonly manage the packages to be registered on each DPM Server by using the Package Web Server. About configuration of multiple Management Servers, see Section 2.1.5, "System Configuration" in First Step Guide. Register the Package Web Server on the Management Server. The registered package is downloaded from the Package Web Server to the Management Server. For details on how to set up the Package Web Server, see Appendix B, "Configuring the Package Web Server" in Installation Guide. 75
76 Adding the Package Web Server You cannot change the package download settings during automatic downloading. If multiple Package Web Servers are registered, automatic downloading is performed in the order of server ID, not in the order in which the servers were added. The priority order is Numbers -> Letters. Example)Server ID download order #1:0PackWS #2:ABCD ->the server ID lastly added #3:AD #4:APackWS #5:BPackWS #6:packWS ->the server ID firstly added You can automatically download packages from the Package Web Server by registering the Package Web Server on multiple Management Servers. The following describes the procedure for adding the Package Web Server to the Management Server. (1) On the Web Console, click Management in the title bar to switch to the Management view. (2) In the tree view, or in the Management Function List group box in the main window, click DPM Server icon. (3) The Configuration menu for DPM Server icon appears. Click Package Download Setting. (4) The Package Web Server group box appears. Click Add. 76
77 (5) The following screen appears in the main window. Set each item. See Section , "Add a Package Web Server" in Web Console Reference Guide for details of the items. For details of editing and deleting the Package Web Server, see Section "Edit the Package Web Server" and Section , "Delete the Package Web Server" in Web Console Reference Guide. 77
 On the Web Console, click Management in the title bar to switch to the Management view.")
78 Setting an Automatic Download Time The following describes setting procedure to download packages from the Package Web Server to the Management Server automatically. (1) On the Web Console, click Management in the title bar to switch to the Management view. (2) In the tree view, or in the Management Function List group box in the main window, click DPM Server icon. (3) The Configuration menu for DPM Server icon appears. Click Package Download Setting. (4) The following screen appears in the main window. Select the Download Automatically checkbox. See Section 2.7.3, "Package Download Setting" in Web Console Reference Guide for details. When the specified time arrives, the Management Server automatically refers to the Package Web Server and downloads updated packages. 78
79 Checking the Automatic Download Results The following describes the procedure to confirm download results after packages have been downloaded. (1) When you click Management on the title bar of the Web Console, it will switch to the Management view. (2) In the tree view, or in the Management Function List group box in the main window, click DPM Server icon. (3) The Configuration menu for DPM Server icon appears. Click Package Download Setting. (4) The Package Web Server group box appears in the main window. Check the Latest Download Information. The Latest Download Information indicates whether downloading succeeded or failed, and the latest download time. For Latest Download Information details, see Section 2.7.3, "Package Download Setting" in Web Console Reference Guide. The packages downloaded from the Package Web Server are stored in the Folder for Image. The default Folder for Image is C:\Deploy. See Section , "General Tab" in Web Console Reference Guide for Folder for Image details, If you have multiple Management Server and delete a package automatically downloaded from the Package Web Server, note the following: You can delete a package by the function to delete registered data of either PackageDescriber or Image Builder (*1). However, if you delete the package by Image Builder, the deletion is temporary, and the package will be downloaded again from the Package Web Server when the next automatic download time arrives. For this reason, to delete the package completely, use PackageDescriber. The package will be deleted the next time automatic download is executed. *1 You can delete the package from the Management Server with Image Builder. You can delete the package from the Package Web Server with PackageDescriber. 79
80 4.4. Installing Service Packs, HotFixes, and Applications (Automatic Update Type) To install service packs, hotfixes, and applications using the automatic update type, register the image for the installation target to DPM and set the settings for automatic update in the managed machine. The automatic update process is executed in accordance with the timing of registered image properties or the contents of automatic update setting for the managed machine. When the timing at which the automatic update is to be executed arrives, the managed machine checks from the Management Server. If there is a package that has not been applied among those that should be applied, the managed machine requests distribution. The Management Server that receives the request distributes the package that has not been applied. The automatic update is executed under any of the following timing or conditions. Automatic update Timing When a package with the urgency of highest is downloaded from the Package Web Server to the Management Server. When the Package registration/modification window is closed after registering a package of highest urgency with Image Builder. When the time of the managed machine reaches the specified automatic update time. When automatic update is issued from Web Console. Condition When there is a newly registered machine The package to be automatically updated is applied under the following conditions. Package to be Automatically updated Condition The package is an OS package supported by the automatic update function in the managed machine (Linux is not supported). The package urgency is high or highest. The package is a service pack with the major version, minor version, or ID information entered. The package is HotFix with the MS number or ID information entered. The package is an application with the display name or ID information entered. See Section 1.5, "Package Registration/Modification" in Tool Reference Guide and Section 2.2, "Create Package" in Tool Reference Guide for details of the package creation procedure. 80

81 Setting up Automatic Updates The automatic update time, maximum number of machines for automatic update, maximum transfer rate, and the automatic update function at machine startup for the managed machine can be set as follows. The settings is the default when you add group. Setting for the group and the managed machine already exist should be performed individually. (1) When you click Management on the title bar of the Web Console, it will switch to the Management view. (2) In the tree view, or in the Management Function List group box in the main window, click DPM Server icon. (3) The Configuration menu for DPM Server icon appears. Click Automatic Update Setting. (4) The following screen appears in the main window. Set the settings for automatic update. For automatic update setting details, see Section 2.7.4, "Automatic Update Setting" in Web Console Reference Guide. 81

82 Executing Automatic Updates After receiving the package, the managed machine applies the package based on the specified application timing. The application timing can be set in the Application Timing on the Automatic Update Setting screen. During the automatic update, the icon for automatic update status is displayed on the task tray of the managed machine. For details on the automatic update statuses displayed in the task tray, see Section 3.3, "Automatic Update Status Display Tool" in Tool Reference Guide. Depending on the package automatically updated, the machine may be required to reboot. Be careful when you specify the application timing except Show confirmation as the application timing. When the distributed packages include a package that requires rebooting after installation When the distributed packages include a package that requires exclusive application and other packages In the above cases, the managed machine needs to be rebooted several times. When the timing for rebooting arrives, the following screen appears and the machine is rebooted after 30-second countdown. Click Reboot immediately to reboot the managed machine. Click Cancel to cancel rebooting and apply the package at the next startup. 82
83 When the status of the managed machine is either of the following, the automatic update cannot be executed. See Section 3.7.1, "Machine Status" in Web Console Reference Guide for details about the status. Status - Scenario Executing - Scenario Execution Stop - Remote Power ON Error - Setting Automatic Update Time Power - Off Also, if the following functions are being executed for the managed machine, the automatic update cannot be executed. These statuses are not displayed in the Status column. File Distribution File Execution File Deletion Obtaining the information of File/Folder List screen When you execute a scenario during automatic update, a scenario execution error occurs. Execute the scenario after the automatic update is completed. While running the automatic update, you cannot execute File Distribution, File Execution, File Deletion or obtaining the information in File/Folder List screen. Execute them after the automatic update is completed. Following settings for automatic update support only Windows Vista or later Do not execute Automatic Update while logon Wait for log off Specified Specify Execute Time Checking the Automatic Update Execution Results The following describes how to check the automatic update execution results. (1) On the Web Console, click Monitor in the title bar to switch to the Monitor view. (2) In the tree view, or in the Monitor Function List group box in the main window, click Automatic Update Result List. (3) The Automatic Update Result List group box appears in the main window. Select the managed machine to be automatically updated, and click Detail ( ) icon. 83
84 (4) The following screen appears. Check the automatic update execution results. See Section 4.7, "Automatic Update Result List Details" in Web Console Reference Guide for details of the automatic update result list Distributing a File and Executing the Distributed File You can distribute files on the Management Server to an arbitrary folder on the managed machine. Also, you can change the setting of access permission and you can execute the distributed file when distributing files. When the relevant file is required for the file to execute, compress the execute file and the relevant file into zip file and then distribute the zip file. In this case, specify the execution file in the zip file the relative path in the zip file for Execute File Name(In zip file) On the managed machine, after extracting the zip file to the temporary folder, execute the specified execute file and delete the temporary folder after execution. Use "/" as the delimiter character for the file path. You can distribute only a single file to the managed machine. You cannot distribute two or more files or a folder. 84
85 Storing a File on the Management Server Store the file, which will be distributed to the managed machine, in an arbitrary folder (the folder which is not redirected) on the Management Server Distributing the File to a Managed Machine and Executing the Distributed File The following describes the procedure to distribute a file and the procedure to execute file after distribution on the Management Server to the managed machine on the Web Console. (1) On the Web Console, click Operations in the title bar to switch to the Operations view. (2) In the tree view, click Resource icon -> Machines icon -> Machine Group icon. (3) The Machine List group box appears in the main window, and then click the name of the Machine to which you distribute the file. (4) The Operation menu for the managed machine will be displayed, and then click File Operation. (5) The following screen appears in the main window. Set each item. See Section , "File Distribution" in Web Console Reference Guide for details of each item, 85
86 Checking the File Distribution Results and Checking the Execution Result of the Distributed File The following describes the procedure to check the file distribution result and the result after distribution. (1) On the Web Console, click Monitor in the title bar to switch to the Monitor view. (2) In the tree view, click Monitor icon -> File Operation Result List icon. Alternatively, in the Monitor Function List group box in the main window, click File Operation Result List. (3) File Operation Result List group box appears in the main window. Check the result of the file distribution and the result of execute after distribution. See Section 4.9, "File Operation Result List Details" in Web Console Reference Guide for details of the result list Executing the File Execute a file on the managed machine, which exists on the managed machine. Also, you can specify the parameter when executing the file. When the two or more files are compressed into one zip file, you can execute the arbitrary one file. In this case, specify the execution file in the zip file the relative path in the zip file for Execute File Name(In zip file) After extracting the zip file to the temporary file, execute the file you specified on Execute File Name(In zip file)and delete the temporary file after execution Executing the File on the Managed Machine The following describes the procedure to execute the file on the managed machine on the Web Console. (1) On the Web Console, click Operations in the title bar to switch to the Operations view. (2) In the tree view, click Resource icon -> Machines icon -> Machine Group icon. (3) The Machine List group box appears in the main window, and then click the name of the Machine to which you distribute the file. (4) The Operation menu for the managed machine will be displayed, and then click File/Folder List. (5) Select a file to execute from File/Folder List screen and click File Execution. (6) The following screen appears in the main window. Set each item. See Section , "File Execution" in Web Console Reference Guide for details of each item, 86
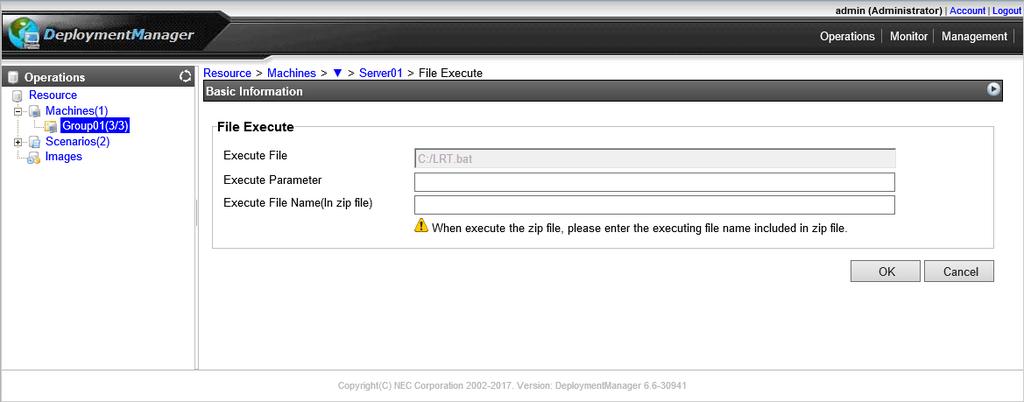
87 87
88 Checking the Execution Result of the File The following describes the procedure to check the result of file execution. (1) On the Web Console, click Monitor in the title bar to switch to the Monitor view. (2) In the tree view, click Monitor icon -> File Operation Result List icon. Alternatively, in the Monitor Function List group box in the main window, click File Operation Result List. (3) The File Operation Result List group box appears in the main window. Check the execution result of the file. See Section 4.9, "File Operation Result List Details" in Web Console Reference Guide for details of the result list. 88

89 Appendix A Operating DPM without Using the DHCP Server This chapter describes the procedure and the note, which are necessary for each function when you operate DPM without DHCP server. The procedure and the note which are not described in this chapter about functions are the same as when you operate DPM with DHCP server. About set up procedure of the Management Server as advance preparation and the list of functions that you can use, see Appendix B, "For Customers Who Do Not Install a DHCP Server" in First Step Guide. Registering the New Managed Machine Although DPM cannot detect a new machine by the network boot, DPM can detect it automatically by DPM Client. If the machine can communicate with the Management Server, the New Machine icon automatically appears in the tree view when DPM Client is installed. DPM Client installation is required. See Section 2.2, "Installing DPM Client" in Installation Guide. 89
DeploymentManager Ver6.3
 DeploymentManager Ver6.3 Operation Guide -First Edition- Rev.001 Contents Introduction... 4 Target Audience and Purpose... 4 Document Structure... 4 DeploymentManager Manual Organization... 4 Documentation
DeploymentManager Ver6.1
 DeploymentManager Ver6.1 Operation Guide -Third Edition- Rev.001 Contents Introduction... 3 Target Audience and Purpose... 3 Document Structure... 3 DeploymentManager Manual Organization... 3 Documentation
DeploymentManager Ver6.5
 DeploymentManager Ver6.5 Tool Reference Guide - Second Edition - Rev.001 Contents Introduction... 4 Target Audience and Purpose... 4 Document Structure... 4 Documentation Guidelines for DeploymentManager
DeploymentManager Ver6.2
 DeploymentManager Ver6.2 First Step Guide -First Edition- Rev.001 Contents Introduction... 4 Target Audience and Purpose... 4 Document Structure... 4 DeploymentManager Manual Organization... 4 Documentation
DeploymentManager Ver6.1
 DeploymentManager Ver6.1 First Step Guide -Third Edition- Rev.001 Contents Introduction... 4 Target Audience and Purpose... 4 Document Structure... 4 DeploymentManager Manual Organization... 4 Documentation
DeploymentManager Ver6.5
 DeploymentManager Ver6.5 First Step Guide -First Edition- Rev.001 Contents Introduction... 4 Target Audience and Purpose... 4 Document Structure... 4 DeploymentManager Manual Organization... 4 Documentation
DeploymentManager Ver6.3
 DeploymentManager Ver6.3 First Step Guide -First Edition- Rev.001 Contents Introduction... 4 Target Audience and Purpose... 4 Document Structure... 4 DeploymentManager Manual Organization... 4 Documentation
DeploymentManager Ver6.5
 DeploymentManager Ver6.5 Installation Guide -First Edition- Rev.001 Contents Introduction... 4 Target Audience and Purpose... 4 Document Structure... 4 Documentation Guidelines for DeploymentManager Manuals...
DeploymentManager - product introduction - Aug 30,2016 NEC Corporation
 DeploymentManager - product introduction - Aug 30,2016 NEC Corporation Operations Management Is Time Consuming Does operations management cost you time and effort with increasing numbers of machines? Would
DeploymentManager Ver6.3
 DeploymentManager Ver6.3 Installation Guide -Second Edition- Rev.001 Contents Introduction... 4 Target Audience and Purpose... 4 Document Structure... 4 DeploymentManager Manual Organization... 4 Documentation
DeploymentManager Ver6.1
 DeploymentManager Ver6.1 Installation Guide -Third Edition- Rev.001 Contents Introduction... 4 Target Audience and Purpose... 4 Document Structure... 4 DeploymentManager Manual Organization... 4 Documentation
Farstone TotalDeploy User Guide
 Farstone TotalDeploy User Guide 1 Introduction to TotalDeploy...3 1.1 Overview...3 1.1.1 What is TotalDeploy...3 1.1.2 Who needs TotalDeploy?...3 1.1.3 TotalDeploy infrastructure...3 1.2 What you can do
DeploymentManager Ver6.2
 DeploymentManager Ver6.2 Installation Guide -First Edition- Rev.001 Contents Introduction... 4 Target Audience and Purpose... 4 Document Structure... 4 DeploymentManager Manual Organization... 4 Documentation
DeploymentManager Ver6.3
 DeploymentManager Ver6.3 Installation Guide -First Edition- Rev.001 Contents Introduction... 4 Target Audience and Purpose... 4 Document Structure... 4 DeploymentManager Manual Organization... 4 Documentation
Kaseya 2. User Guide. Version 1.0
 Kaseya 2 Imaging & Deployment User Guide Version 1.0 August 16, 2011 About Kaseya Kaseya is a global provider of IT automation software for IT Solution Providers and Public and Private Sector IT organizations.
DeploymentManager. NEC Corporation 2nd IT Software Division/ IT Network Global Solutions Division. September 28, 2012
 DeploymentManager - product introduction - NEC Corporation 2nd IT Software Division/ IT Network Global Solutions Division September 28, 2012 Operations Management Is Time Consuming Does operations management
RoadRunner 24AP(i+) Recovering Tool Instructions
 Recovering Tool Instructions") RoadRunner 24AP(i+) Recovering Tool Instructions Ver. 1.0 Follow these instructions if your modem do not boot. If you have questions or problems using this modem build in recovering tool, please contact
RoadRunner 24AP(i+) Recovering Tool Instructions Ver. 1.0 Follow these instructions if your modem do not boot. If you have questions or problems using this modem build in recovering tool, please contact
Bridge Cable User s Guide
 Bridge Cable User s Guide Table of Contents Overview -------------------------------------------------------------------- 2 Driver Installation --------------------------------------------------------
Dell Flexible Computing Solutions: Deploying On-Demand Desktop Streaming
 Dell Flexible Computing Solutions: Deploying On-Demand Desktop Streaming Product Group November 2007 Dell White Paper November 2007 Contents Introduction... 3 Overview... 4 Planning the Deployment... 5
DeploymentManager - product introduction - NEC Corporation System Software Division / Americas and Global Platform Division
 DeploymentManager - product introduction - NEC Corporation System Software Division / Americas and Global Platform Division April 26, 2013 Operations Management Is Time Consuming Does operations management
LevelOne FNS bay/1usb Soho NAS. User s Manual
 LevelOne FNS-1000 1- bay/1usb Soho NAS User s Manual Table of Contents Introduction... 2 The FNS-1000 NAS Server... 2 FNS-1000 Features... 2 Package Contents... 2 System Requirements... 2 Disclaimer...
DeploymentManager - product introduction - NEC Corporation System Software Division / Americas and Global Platform Division
 DeploymentManager - product introduction - NEC Corporation System Software Division / Americas and Global Platform Division October 31, 2013 Operations Management Is Time Consuming Does operations management
EXPRESSCLUSTER X Integrated WebManager
 EXPRESSCLUSTER X Integrated WebManager Administrator s Guide 10/02/2017 12th Edition Revision History Edition Revised Date Description 1st 06/15/2009 New manual 2nd 09/30/2009 This manual has been updated
DeploymentManager - product introduction - NEC Corporation 2nd IT Software Division/ IT Network Global Solutions Division
 DeploymentManager - product introduction - NEC Corporation 2nd IT Software Division/ IT Network Global Solutions Division September 1, 2011 Operations Management Is Time Consuming Does operations management
Nortel Media Application Server 5.1. Installation NN
 NN44450-300 Document status: Standard Document issue: 01.03 Document date: 15 October 2008 Product release: Release 5.1 Job function: and Commissioning Type: Technical document Language type: English All
Device Manager. Managing Devices CHAPTER
 2 CHAPTER This chapter describes how to perform routine device management tasks using the Administrator Console. It provides information on managing the devices within your Cisco VXC Manager environment.
How to install the software of ZNS8022
 How to install the software of ZNS8022 1. Please connect ZNS8022 to your PC after finished assembly. 2. Insert Installation CD to your CD-ROM drive and initiate the auto-run program. The wizard will run
DeploymentManager Ver6.5
 DeploymentManager Ver6.5 Caution Notes and Trouble Shooting Reference Guide - Second Edition - Rev.001 Contents Introduction... 4 Target Audience and Purpose... 4 Document Structure... 4 Documentation
ExpressCluster X Integrated WebManager
 ExpressCluster X Integrated WebManager Administrator s Guide 09/30/2009 Second Edition Revision History Edition Revised Date Description First 06/15/2009 New manual Second 09/30/2009 This manual has been
Getting Started with the Deployment Console and Deploying the Clients Per PXE Network Booting using their MAC address. Quick Guide
 Getting Started with the Deployment Console and Deploying the Clients Per PXE Network Booting using their MAC address Quick Guide Deployment Manager 2 Quick Guide 1 Introduction...3 1.1 Installing the
NEC PowerMate 2000 Series Release Notes. Contents
 NEC PowerMate 2000 Series Release Notes Contents Applications... 3 Installing Applications in the Correct Order... 3 Installing NEC SNMP Agent... 3 Uninstalling the NEC SNMP Agent or LANDesk Client Manager...
Document Number ECX-Exchange2010-HD-QMG, Version 1, December 2015 Copyright 2015 NEC Corporation.
 EXPRESSCLUSTER X for Windows Quick Migration Guide for Microsoft Exchange Server 2010 Migration from a single-node configuration to a three-node hybrid disk cluster Version 1 NEC EXPRESSCLUSTER X 3.x for
NEC ESMPRO Manager Ver.6 Setup Guide
 Front Cover NEC ESMPRO Manager Ver.6 Setup Guide Chapter 1 Setup for Managed Component integrated EXPRESSSCOPE Engine 3 Chapter 2 Setup for Managed Component integrated BMC excluding EXPRESSSCOPE Engine
UBDR GOLD VERSION 3.0 USER GUIDE
 UBDR GOLD VERSION 3.0 USER GUIDE UBDR Gold Version 3.0 User Guide The software described in this guide is furnished under a license agreement and may be used only in accordance with the terms of the agreement.
SWP-0036 AFHCAN Telehealth Cart Imaging and Software Configuration. Revision: 1. Effective Date: 1/4/2011
 Software Procedure SWP-0036 AFHCAN Telehealth Cart Imaging and Software Configuration Revision: 1 Effective Date: 1/4/2011 Alaska Native Tribal Health Consortium Division of Health Information & Technology
Lab - Connect to a Router for the First Time
 Introduction In this lab, you will configure basic settings on a wireless router. Recommended Equipment A computer with Windows installed An Ethernet NIC installed Wireless router Ethernet patch cable
Installation and Setup Guide
 Installation and Setup Guide to Diana SUNDE VDI Cloud Computing Terminal Contents 1 Host PC (or Server) hardware Configuration Requirements...3 2 Installation of vpoint version 1.1.0.10...3 2.1 Installation
DeploymentManager Ver6.6
 DeploymentManager Ver6.6 Caution Notes and Trouble Shooting Reference Guide - First Edition - Rev.001 Contents Introduction... 4 Target Audience and Purpose... 4 Document Structure... 4 Documentation Guidelines
NET Control & NET User. User Manual. Rogev computers
 NET Control & NET User User Manual Rogev computers http://www.rogev.co.il Content 1. System Requirement... 3 1-1 Magic card... 3 1-2 Windows operating system... 3 1-3 Client computers... 3 1-4 Master computer...
XL-NAS-400SA. User s Guide
 XL-NAS-400SA User s Guide Table of Contents Chapter 1 Hardware devices 1.1 1.2 1.3 Accessories and XL-NAS-400SA at a glance LCD message and light indicators Hardware installation Chapter 2 Initial setup
VIRTUALIZATION MANAGER ENTERPRISE EDITION GETTING STARTED GUIDE. Product: Virtual Iron Virtualization Manager Version: 4.2
 VIRTUALIZATION MANAGER ENTERPRISE EDITION GETTING STARTED GUIDE This manual provides a quick introduction to Virtual Iron software, and explains how to use Virtual Iron Virtualization Manager to configure
RTE for WIN32. Installation Manual (Rev.7.0) Midas lab
 Midas lab") Midas lab REVISION HISTORY Date Revision Chapter Explanation of revision March 11,2000 4.0 RTE4W32 Ver.5.0 (First edition) January 10,2002 4.1 Add Windows XP support (RTE4W32 Ver.5.05) October 29,2002
Midas lab REVISION HISTORY Date Revision Chapter Explanation of revision March 11,2000 4.0 RTE4W32 Ver.5.0 (First edition) January 10,2002 4.1 Add Windows XP support (RTE4W32 Ver.5.05) October 29,2002
Document Number ECX-Exchange2010-Migration-QSG, Version 1, May 2015 Copyright 2015 NEC Corporation.
 EXPRESSCLUSTER X for Windows Quick Start Guide for Microsoft Exchange Server 2010 Migration from a single-node configuration to a two-node mirror disk cluster Version 1 NEC EXPRESSCLUSTER X 3.x for Windows
Super USB. User Manual. 2007, March
 Super USB User Manual 2007, March Windows98 Driver Install/Uninstall Driver Install: 1. Execute Win 98 UFD driver, then restart PC. 2. Plug Super USB into an available USB port. A new Removable Disk drive
VMware Mirage Web Management Guide. VMware Mirage 5.9.1
 VMware Mirage Web Management Guide VMware Mirage 5.9.1 VMware Mirage Web Management Guide You can find the most up-to-date technical documentation on the VMware Web site at: https://docs.vmware.com/ The
EasyMP Network Updater Operation Guide
 EasyMP Network Updater Operation Guide Contents Introduction to EasyMP Network Updater... 5 EasyMP Network Updater Features... 5 Setting Up EasyMP Network Updater for the First Time... 6 Installing the
Comodo Network Center Software Version 1.1
 Comodo Network Center Software Version 1.1 User Guide Guide Version 2.3.112311 Comodo Security Solutions 1255 Broad Street STE 100 Clifton, NJ 07013 Table of Contents Comodo Network Center - Introduction...
8 MANAGING SHARED FOLDERS & DATA
 MANAGING SHARED FOLDERS & DATA STORAGE.1 Introduction to Windows XP File Structure.1.1 File.1.2 Folder.1.3 Drives.2 Windows XP files and folders Sharing.2.1 Simple File Sharing.2.2 Levels of access to
VI-CENTER EXTENDED ENTERPRISE EDITION GETTING STARTED GUIDE. Version: 4.5
 VI-CENTER EXTENDED ENTERPRISE EDITION GETTING STARTED GUIDE This manual provides a quick introduction to Virtual Iron software, and explains how to use Virtual Iron VI-Center to configure and manage virtual
How to Restore a Windows System to Bare Metal
 This article refers to the Barracuda Backup Legacy Release firmware or newer, except where noted. Bare metal recovery allows you to restore a complete Microsoft Windows system, including data, settings,
EasyMP Multi PC Projection Operation Guide
 EasyMP Multi PC Projection Operation Guide Contents 2 About EasyMP Multi PC Projection Meeting Styles Proposed by EasyMP Multi PC Projection........ 5 Holding Meetings Using Multiple Images................................
Express5800/R120d-1M, R120d-2M
 NEC Express Server Express5800 Series Express5800/R120d-1M, R120d-2M EXP291, EXP292 Installation Guide (Windows) Model Number: R120d-1M N8100-1794F R120d-2M N8100-1793F Chapter 1 Installing Windows Chapter
LAN Driver Installation Guide (Broadcom v17.2/qlogic T7.12)
") LAN Driver Installation Guide (Broadcom v17.2/qlogic T7.12) Target OS : Windows Server 2008 x86 Windows Server 2008 x64 Windows Server 2008 R2-1 - Contents 1. Preface... 3 1.1. The target server... 3 1.2.
LAN Driver Installation Guide (Broadcom v17.2/qlogic T7.12) Target OS : Windows Server 2008 x86 Windows Server 2008 x64 Windows Server 2008 R2-1 - Contents 1. Preface... 3 1.1. The target server... 3 1.2.
NEC ESMPRO Manager Ver.6 Setup Guide
 NEC ESMPRO Manager Ver.6 Setup Guide Chapter1 Setup for Managed Component in which EXPRESSSCOPE Engine 3 is integrated Chapter2 Setup for Managed Component in which a BMC excluding EXPRESSSCOPE Engine
Deployment Guide: Routing Mode with No DMZ
 Deployment Guide: Routing Mode with No DMZ March 15, 2007 Deployment and Task Overview Description Follow the tasks in this guide to deploy the appliance as a router-firewall device on your network with
Server / Desktop Edition. Quick Start Guide. (Second Edition;Feb. 29, 2016 )
") Server / Desktop Edition Quick Start Guide (Second Edition;Feb. 29, 2016 ) 2016 Copyright NetJapan, Inc. All Rights Reserved. The software and the related documentation are proprietary products of NetJapan,
Server / Desktop Edition Quick Start Guide (Second Edition;Feb. 29, 2016 ) 2016 Copyright NetJapan, Inc. All Rights Reserved. The software and the related documentation are proprietary products of NetJapan,
2 Bay 3.5 HDD SATA NAS Media Server Setting...20 Bonjour...21 TorrentFlux Maintenance...25 Disk Utility...25 RAID Setting...
 Table of contents 1. Overview of the 2 Bay NAS...3 1.1 Introduction...3 1.2 System Requirement...3 1.3 Hardware Installation...3 1.4 Setup the client PC and 2 Bay NAS...3 1.4.1 Setup network configuration
Installation and Setup Guide
 Installation and Setup Guide to Diana SUNDE VDI Cloud Computing Terminal 1 1 Hardware Configuration of Host PC (Server)----------------------------------------------------3 2 The Installation of vpoint
Creating a 2 node virtual SQL Server 2008 Cluster Configuration Using Windows 2003 MSCS
 Creating a 2 node virtual SQL Server 2008 Cluster Configuration Using Windows 2003 MSCS Reference No: Date: 10/08/2010 File Name: Creating a 2 node SQL Server 2008 Cluster Configuration using Windows 2003
VMWare Workstation Installation. Microsoft Windows Server 2008 Enterprise with Service Pack 2
 VMWare Workstation Installation Microsoft Windows Server 2008 Enterprise with Service Pack 2 Starting Vmware Workstation Go to start menu and start VMware Workstation program. *Note: The following instructions
PARALLELS SERVER 4.0 FOR MAC BARE METAL EDITION README
 PARALLELS SERVER 4.0 FOR MAC BARE METAL EDITION README February 18, 2010 1999-2010 Parallels Holdings, Ltd. and its affiliates. All rights reserved. This document provides the first-priority information
NEC Express5800 Series
 NEC Express5800 Series NEC Express5800/120Rf-1,120Rh-2 Operation Manual For Microsoft Windows Server 2003, Standard x64 Edition / Microsoft Windows Server 2003, Enterprise x64 Edition Note: Microsoft and
EasyMP Network Updater Operation Guide
 EasyMP Network Updater Operation Guide Contents Introduction to EasyMP Network Updater... 5 EasyMP Network Updater Features... 5 Setting Up the Software for the First Time... 6 Installing the Software...
Epson Projector Management Operation Guide
 Epson Projector Management Operation Guide Contents Introduction to Epson Projector Management... 5 Epson Projector Management Features... 5 Setting Up the Software for the First Time... 7 Installing
Intel Entry Storage System SS4000-E
 Intel Entry Storage System SS4000-E Software Release Notes January 2007 Storage Systems Technical Marketing Engineering Document Revision History Intel Entry Storage System SS4000-E Document Revision History
NCOM SERIAL DEVICE SERVER 1XX SERIES USER S MANUAL
 NCOM SERIAL DEVICE SERVER 1XX SERIES USER S MANUAL 2017-07-07 Edition Titan Electronics Inc. Web: www.titan.tw Contents 1. INTRODUCTION... 4 1.1 Key Features... 5 1.2 Specifications... 6 2. PANEL LAYOUT
EasyMP Network Updater Operation Guide
 EasyMP Network Updater Operation Guide Contents Introduction to EasyMP Network Updater... 5 EasyMP Network Updater Features... 5 Setting Up EasyMP Network Updater for the First Time... 6 Installing the
Talon FAST User Guide. Date Version Author Comments. November 15, Jaap van Duijvenbode Final Release
 Talon FAST 2.0.1 User Guide Date Version Author Comments November 15, 2012 2.0.1 Jaap van Duijvenbode Final Release 1 TABLE OF CONTENTS Talon FAST 2.0.1 User Guide... 1 Table of Contents... 2 1. Introduction
TABLE OF CONTENTS. PRELIMINARY SETUP REQUIREMENTS... 1 Minimum Hardware/Software Requirements...1
 Worldspan RemoteLink Setup and Configuration Procedures for Worldspan Go! SM Static IP Address TABLE OF CONTENTS PRELIMINARY SETUP REQUIREMENTS... 1 Minimum Hardware/Software Requirements...1 REQUIRED
Full System Restore Manually Run Cmd Prompt
 Full System Restore Manually Run Cmd Prompt Xp To start System Restore from Command Prompt or Run dialog, type rstrui.exe and press Enter. Windows XP, System Restore, Restoration Complete. Click OK. This
Table of Contents. 1 Introduction. 2 Wireless Configurations. 3 Setting Up your LAN Administrator Station
 Table of Contents 1 Introduction About Avaya Wireless 1-1 About Avaya Wireless Tools 1-2 About Avaya Wireless Access Points 1-5 About This User s Guide 1-6 About Icons used in this Document 1-7 On-line
NEC PowerMate 8100 Series Release Notes
 NEC PowerMate 8100 Series Release Notes The PowerMate 8100 Series Release Notes provide up-to-date information on installing the applications that come with your computer. These notes also provide additional
LevelOne FPS-9021/FPS User Manual. Mini Printer Server w/parallel (USB2.0) Port V
 Port V") LevelOne FPS-9021/FPS-9022 Mini Printer Server w/parallel (USB2.0) Port User Manual V1.0.0-0601 CONTENTS 1. INTRODUCTION...1 1.1 Product Introduction... 2 1.2 Product Package... 3 1.3 Network Printing
LevelOne FPS-9021/FPS-9022 Mini Printer Server w/parallel (USB2.0) Port User Manual V1.0.0-0601 CONTENTS 1. INTRODUCTION...1 1.1 Product Introduction... 2 1.2 Product Package... 3 1.3 Network Printing
EXPRESSCLUSTER X SingleServerSafe 3.3 for Windows. Installation Guide. 01/29/2016 3rd Edition
 EXPRESSCLUSTER X SingleServerSafe 3.3 for Windows Installation Guide 01/29/2016 3rd Edition Revision History Edition Revised Date Description 1st 02/09/2015 New manual 2nd 04/20/2015 Corresponds to the
Administrators Guide. Wyse Device Manager Release Issue: PN: Rev. L
 Administrators Guide Wyse Device Manager Release 4.8.5 Issue: 042511 PN: 883885-01 Rev. L Copyright Notices 2011, Wyse Technology Inc. All rights reserved. This manual and the software and firmware described
ExpressCluster X SingleServerSafe 3.2 for Windows. Installation Guide. 2/19/2014 1st Edition
 ExpressCluster X SingleServerSafe 3.2 for Windows Installation Guide 2/19/2014 1st Edition Revision History Edition Revised Date Description First 2/19/2014 New manual Copyright NEC Corporation 2014. All
NS312 User Guide. Version 1.0. SilverStone Technology Co., Ltd.
 NS312 User Guide Version 1.0 SilverStone Technology Co., Ltd. http://www.silverstonetek.com support@silverstonetek.com 1 Index SilverStone NS312 Introduction... 4 First time Hardware Installation.... 4
Broadband Router DC-202. User's Guide
 Broadband Router DC-202 User's Guide Table of Contents CHAPTER 1 INTRODUCTION... 1 Broadband Router Features... 1 Package Contents... 3 Physical Details...3 CHAPTER 2 INSTALLATION... 5 Requirements...
ProLiant Cluster HA/F500 for Enterprise Virtual Array Introduction Software and Hardware Pre-Checks Gathering Information...
 Installation Checklist HP ProLiant Cluster F500 for Enterprise Virtual Array 4000/6000/8000 using Microsoft Windows Server 2003, Enterprise Edition Stretch Cluster May 2005 Table of Contents ProLiant Cluster
Online Help StruxureWare Data Center Expert
 Online Help StruxureWare Data Center Expert Version 7.2.7 What's New in StruxureWare Data Center Expert 7.2.x Learn more about the new features available in the StruxureWare Data Center Expert 7.2.x release.
C A S P E R TECH EDITION 10 USER GUIDE
 TM C A S P E R TM TECH EDITION 10 USER GUIDE Copyright and Trademark Information Information in this document is subject to change without notice. Federal law prohibits unauthorized use, duplication, and
VMware Mirage Web Management Guide
 VMware Mirage Web Management Guide Mirage 5.7 This document supports the version of each product listed and supports all subsequent versions until the document is replaced by a new edition. To check for
Connection to the OS32C
 Connection to the This section describes how to connect a PC with the configuration software and the. The configuration software is connected to the via Ethernet. An Ethernet cable with an M12, 4-pin connector
Cisco UCS C-Series. Installation Guide
 Installation Guide UPDATED: 04 October 2018 Copyright Notices Copyright 2002-2018 KEMP Technologies, Inc. All rights reserved. KEMP Technologies and the KEMP Technologies logo are registered trademarks
PARAGON INFRASTRUCTURE PACKAGE
 PARAGON Technologie GmbH, Systemprogrammierung Heinrich-von-Stephan-Str. 5c 79100 Freiburg, Germany Tel. +49 (0) 761 59018201 Fax +49 (0) 761 59018130 Internet www.paragon-software.com E-mail sales@paragon-software.com
Device Set-Up. User s Guide
 Device Set-Up User s Guide Contents About this Product... iii Trademarks... iv 1 Getting Started 1.1 System Requirements... 1-1 1.2 Overview of Functions... 1-2 2 Software Installation 2.1 OpenAPI settings...
Oscilloscope System Recovery
 Instructions Oscilloscope System Recovery The oscilloscope application (firmware) runs on a Microsoft Windows platform. While the instrument is designed to operate reliably for many years, the loading
LevelOne Broadband Routers
 LevelOne Broadband Routers FBR-1100TX FBR-1400TX FBR-1401TX FBR-1700TX User's Guide TABLE OF CONTENTS CHAPTER 1 INTRODUCTION... 1 Features of your LevelOne Broadband Router... 1 Package Contents... 4
Lesson 1: Preparing for Installation
 2-2 Chapter 2 Installing Windows XP Professional Lesson 1: Preparing for Installation When you install Windows XP Professional, the Windows XP Professional Setup program allows you to specify how to install
Veritas System Recovery 18 Management Solution Administrator's Guide
 Veritas System Recovery 18 Management Solution Administrator's Guide Documentation version: 18 Legal Notice Copyright 2018 Veritas Technologies LLC. All rights reserved. Veritas and the Veritas Logo are
Sun VirtualBox Installation Tutorial
 Sun VirtualBox Installation Tutorial Installing Linux Mint 5 LTS Guest OS By Dennis Berry Welcome to the world of virtualization and Linux. This tutorial is intended to help users who are new to the world
Configure Windows Server 2003 Release 2 Server Network File Share (NFS) as an authenticated storage repository for XenServer
 as an authenticated storage repository for XenServer") Summary This document outlines the process to perform the following tasks. 1. Configure Windows Server 2003 Release 2 Server Network File Share (NFS) as an authenticated storage repository for XenServer.
Summary This document outlines the process to perform the following tasks. 1. Configure Windows Server 2003 Release 2 Server Network File Share (NFS) as an authenticated storage repository for XenServer.
Application Notes for Ardence Desktop Edition with Avaya Interaction Center Issue 1.0
 . Avaya Solution & Interoperability Test Lab Application Notes for Ardence Desktop Edition with Avaya Interaction Center Issue 1.0 Abstract These Application Notes describe the configuration steps required
Acronis Backup & Recovery 11 Beta Advanced Editions
 Acronis Backup & Recovery 11 Beta Advanced Editions Quick Start Guide Table of contents 1 Main components... 3 2 Supported operating systems... 3 3 Where do I install the components?... 3 4 What you need
I m InTouch Installation Guide for the DSL/Cable environment with a Linksys router Models: BEFSRU31, BEFSR41 V.2, BEFSR11
 I m InTouch router configuration p. 1 I m InTouch Installation Guide for the DSL/Cable environment with a Linksys router Models: BEFSRU31, BEFSR41 V.2, BEFSR11 Note: Different models may vary slightly
How To Force Restore A Computer That Won Boot Up After System
 How To Force Restore A Computer That Won Boot Up After System If your computer won't start up normally, you may need to use a disk repair utility This can occur after an improper shutdown, forced restart,
Table of Contents. D-Link SharePort Plus... 4 Introduction...4 System Requirements...4 Features...5. Installation... 6
 Table of Contents D-Link SharePort Plus... 4 Introduction...4 System Requirements...4 Features...5 Installation... 6 SharePort Plus Utility... 11 Utility Overview... 11 Device Server View... 12 Utility
Veritas System Recovery Disk Help
 Veritas System Recovery Disk Help About recovering a computer If Windows fails to start or does not run normally, you can still recover your computer. You can use the Veritas System Recovery Disk and an
VMware Mirage Web Manager Guide
 Mirage 5.3 This document supports the version of each product listed and supports all subsequent versions until the document is replaced by a new edition. To check for more recent editions of this document,
Windows Server 2003 { Domain Controller Installation and Configuration}
 Windows Server 2003 { Domain Controller Installation and } Benedikt Riedel MCSE + Messaging www.go-unified.com www.siemens.com/open Benedikt.riedel@siemens.com Start up the prepared Windows Server 2003