My Easy Prints Software Manual
|
|
|
- Emery Tucker
- 6 years ago
- Views:
Transcription


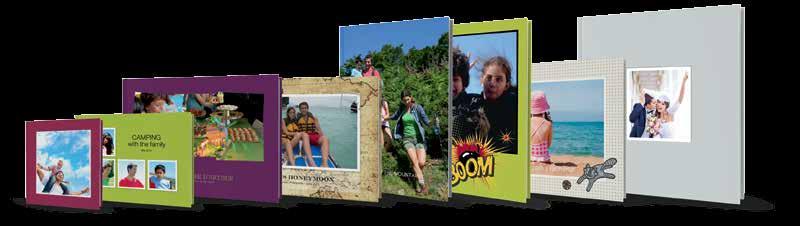
1 My Easy Prints Software Manual online photo books, posters, greeting cards and photo products
2 My Easy Prints Software Manual A. The Application 1 - Installation page Auto Update page Creat a New Project page Open an Existing Project page 7 B. Product Design Window page 8 1. Basic Functionality page Page Styles page Autoflow page 11 C. The Library 1. Frames page Masks page The Scrapbook page 12 D. Your Pictures 1. Adding Pictures page Managing Pictures page Managing Items In The Page page 17 E. Typography 1. Text Engine Controls page 24 2
3 F. The Inspector 1. Item/Shape Tab page Picture Tab page Text Tab page Measurements Tab page Page Background Tab page The Toolbar page 30 G. Saving Your Product 1. Saving Your Product page Closing The Product page Creating Proofs page 31 H. Order process 1. Flight Check page Online Order Workflow page Sending Orders page Additional Information page 35 3

4 A. The Application 1- Installation The proper installation of the application will launch according to your operating system Mac OS X On Mac OS X, expand the.dmg file and drag and drop the application folder into the Applications folder shortcut within the window. This will place the application into the applications folder of the machine. A shortcut to the application can then be placed in the Dock or on the Desktop Windows Double click on the installer file. Select the language to be used during the install. Then click the next button on the following window. Choose the install locations; on Windows XP, the default location is good. However on Vista/Windows 7, we recommend that you do not install inside the program files folder due to permission issues. Once you have selected the location you wish to use click next. Choose the folder name for the Start Menu and click Install. Once the installation process is complete click Finish to end the installation Internet License Key Make sure that the folder containing the My Easy Prints application has a license key file (file with the extension.lkey). If not, you should re-install the application. Do not hesistate to contact us in case any problem. 2. Auto Update If auto update has been selected and updates are available you will be asked if you wish to download the updates. You can then select the items to be downloaded and click Install. After the download has finished, you can click the Finish button to continue. 4


5 3. Create a new project 3.1. Choose Category The Category is a container that holds multiple Product Types. The available Product Types are: - Photo books - Portfolios - Calendars - Posters - Greeting cards 5
6 3.2. Choose Product Type A Product Type is a container that hold multiple Products of the same Category. The Product Types are divided by themes, hold products of variable sizes, layouts and covers that have the same design and library options. Product Types can only consist of configurations of the same Category; i.e. multiple photo book configurations, or multiple calendars. You can read more information about each Product Type by clicking on the button More information 6

7 3.3. Choose Product A Product has a specific theme, and a defined size, layout, cover type, and library options. You can read more information about each Product Type by clicking on the button More information 4. Open an existing project The Open an Existing Project window allows you to continue creating, duplicate, delete and edit projects. To duplicate a project: Highlight the project in the list you wish to duplicate, Select the duplicate button Set a unique Project Name Click Save and your new project will be saved A project that has already been ordered will not be editable and will open as a View Only document. 7
, i.e. the line on which the page will be cut.")
8 B. Product Design Window If you want your images to cross over a side of the page or to be full page, make sure to have them bleed outside the red line(trim Line), i.e. the line on which the page will be cut. 8

9 The black line is the Spine Line, i.e. the line which separates left and right pages. For an optimized layout, be keen on placing your items far enough from that line, and more importantly, not to have any face cut on the spine. The red line is the Trim Line, i.e. the line on which the page will be cut. Everything outside the red line will be removed. For an optimized layout, be keen on placing your items in the safe zone, around 1 cm away from the red line. 9

10 1. Basic Functionality The Product Design window is the environment where product layouts are built and where you create your projects. The window is split into several key areas, each with a specific use: 1. Page Design Area The Page Design Area is the space where you create the design and fill in the template. 2. Page Previews The Page Preview pane sits at the top of the window and shows a preview thumbnail of every page. 3. Toolbar The Toolbar allows easy access to some of the common functions within the application. 4. Pictures List The Pictures List sits at the left-hand side of the window and shows the pictures that are currently loaded within the application. 5. Library The Library pane sits at the bottom of the window and contains the Page Styles, Masks, Backgrounds, Frames and Scrapbook items that are available for both this product and all products. 6. Inspector The Inspector pane sits at the right-hand side of the window and contains the controls that allow objects to be manipulated. The Inspector is split into several tabs that appear above the controls. Each individual control will be covered later on in this manual. 10
11 2. Page Styles Page styles are predesigned templates that you can drag onto a page and use to create your product Adding New Page Styles (where applicable) To modify the appearance of picture boxes, add an image to work with and apply the formatting, i.e. drop shadow, vignettes, masks, frames, scrapbook etc. When applicable (in certain Product Types only), add the page style to the Library by clicking one option from the drop down list. Note: Once a category has been entered for a page style, additional page styles can be added to the category by selecting it from the drop down list in the Save As Page Style window. The page style for pages can only be created on a numbered page. Building the style on the cover page can then only be saved as a cover. Layouts created on a spread can be saved to the left page, right page or the entire spread as a page style; whereas, layouts created on a single page can only be saved as a single page style. It is important that you remember this, otherwise you may have to copy your design onto a different page before saving it as an opposite page style. Page styles are not restricted to the side from which they are saved; page styles created on the left hand page can be placed normally on the right hand page Adding New Cover Styles (where applicable) For covers, create the page style as described above, and then save the cover style (in certain Product Types only). You only have one save option. Depending on the set up of the cover type, this may be a spread or single pages Using Page Styles A page style can be added to the page by dragging it from the library onto the page. Any pictures that are currently on the page will be rearranged according to the new page style. 3. Autoflow The autoflow button can be used to automatically add images into pages. My Easy Prints will use the available page styles to randomly flow images. The wizard always flows by picture order. 11
12 C. The Library 1. Frames (where applicable) Frames are transparent PNG s with an alpha channel which when applied to a picture create an ornamental framing effect. To access the frames within the library simply click the Frames Tab (in certain Product Types only). A frame can be added to a picture box or shape simply by dragging it from the library onto the item. A frame will always scale to fit the box exactly and will never resize proportionally. If you wish to remove a frame you can either drag the frame named None onto the item or right-click the item and select the Remove Frame option from the menu. 2. Using Masks (where applicable) A mask can be added to a picture box or shape simply by dragging it from the library onto the item (in certain Product Types only). A mask will always scale to fit the box exactly and will never resize proportionally. When a mask is added to an item, the background colour of the masked area can be changed via the Colour option in the first tab of the Inspector. If you wish to remove a mask you can either drag the mask named None onto the item or right-click the item and select the Remove Mask option from the menu. It is possible to flip and invert a mask assigned to a picture box. The mask can be flipped either vertically or horizontally within the picture box. Right Click a picture box with a mask and select the mask sub menu. 3. The scrapbook (where applicable) The Scrapbook stores pictures (such as clip art) that can be used when creating your project (in certain Product Types only). Scrapbook Clippings are collections of picture boxes, text boxes and shapes have been grouped together to make more sophisticated items. 12


13 D. Your Pictures 1. Adding pictures To populate the Pictures List, simply click the Add button and you the options will appear in a drop down list. The Picture Library width can be expanded by either double clicking on the edge of the library, or by dragging it to your desired width Computer This selects files from your computer either choose a folder or add individual pictures. A window will open asking you to select the folder that contains your pictures. Select the folder and click the Select button. This will then scan the folder, create thumbnails of the pictures and then display them in the Pictures window. The original images are not affected during this process. For individual picture files you can select either a single or multiple files to load into the picture list Facebook This feature is implemented through a custom browser that allows your Facebook account to be accessed directly from My Easy Prints Adding Pictures from Finder/Explorer From the Mac OS X Finder / Windows Explorer pictures can be dragged directly into My Easy Prints software. 2. Managing pictures 2.1. Categorising Pictures Pictures within the library can be categorised into groups by clicking the picture settings icon and selecting Categorise from the drop down list. Pictures can be categorised by: Folder Name Date Created Date Modified Picture Orientation Picture Usage Once pictures have been categorised, a heading is placed above each category within the library. Clicking on the heading expands/collapses each category. Clicking the Cross icon removes the category from the library. 13


14 2.2. Sorting Pictures Pictures can be sorted within the library, whether they are categorised or not. This can be done by selecting the Settings icon and selecting Sort from the drop down list. Pictures can be sorted by: Filename Date Created Date Modified Picture Orientation Picture Usage Rating Pictures can also be sorted Ascending or Descending Rating Pictures Pictures can be given a rating by you by right-clicking on a picture within the library and selecting My Rating from the menu. Pictures are rated by selecting stars, with five stars being the highest rating. If the pictures in the library have been given ratings, you can determine whether or not to show the rating below each picture. To turn this feature on or off click the Settings icon and from the drop down menu and toggle the Show My Rating on or off. Pictures can also be sorted by their rating as described earlier Show Dimensions The dimensions of images in the picture list will be displayed in the measurement units selected within the Preferences. This can be turned on/off within the settings menu by un-ticking Show Dimensions Changing A Pictures Orientation Orientation can be changed by right clicking on its thumbnail and selecting the required angle from the Rotate sub-section in the menu. 14


15 If an individual picture needs to be removed from the list it can be done by right clicking on its thumbnail and selecting the Remove Picture from the menu. To remove all thumbnails from the list, click Clear Picture List from the Settings menu. My Easy Prints supports: RGB JPEG, CMYK JPEG, Gray scale JPEG, RGB TIFF, CMYK TIFF, Grayscale TIFF and PNG images Adding Pictures Onto The Page To add a picture to the page, drag-and-drop it directly onto the page at the required location or drag-and-drop it into an existing picture box. When the picture can be dropped, a blue outline will appear highlighting where the image will be placed. When an image is placed on the page, it will retain it s original proportions and be displayed in its entirety. If an image is dragged into a picture box, the image will be scaled to fit the frame and would be cropped. My Easy Prints will intelligently judge the size of the image in comparison to the image frame to determine the best scaling. When a picture from the Pictures List has been used a red star appears over the thumbnail, with a number of how many times the image has been used is in the product. 15


16 Users can track where their pictures have been used. This is done by right clicking on the thumbnail, and selecting Picture Usage from the menu. Note: If the application cannot find pictures while opening an existing project or an order the prompt below will display. Clicking the Find Pictures button will open up a new window showing each picture that cannot be located. The window allows you to select the new location of the picture file or an alternative picture file. When a picture is updated the software automatically updates all other uses of the picture within the project / order and will attempt to find other missing pictures within the new location. If a picture within a picture box cannot be found it is replaced with a low-res thumbnail version of the picture. It is then possible to update it by using the Find Picture option available within the context menu that appears when rightclicking the picture box. Additional picture box properties can be modified via the Inspector. More information can be found later on in this manual. 16

17 2.7. Cropping Pictures A picture can be cropped by moving the cursor so that it appears over picture and then double-clicking. When the Crop Picture window is displayed you can manipulate the area of the picture that is to be displayed. Be careful not to make the visible area too small, or else the resolution of the image would be too low for a quality print. You will receive a red warning triangle if the DPI drops below the level set within the Product layout settings. You can also manipulate the cropping and zooming of an image directly from the page layout by dragging the picture whilst holding Control and Alt to zoom and Alt by itself to drag to reposition the image Straighten Horizon The Crop window also has two options within it to allow images to be straightened. Straighten Horizon is a slider and an entry field that allows the angle to be set between and degrees. This option can be used to straighten an image that is skewed or where the camera has been tilted In this example the angle of the image by default is tilted Set the angle to straighten the image so it is no longer titled Resizing a picture The scaling and cropping of the picture will change depending on the picture box size. By default, items will be resized proportionally but this can be changed per item by un-checking the Constrain Proportions option within the Inspector. 3. managing Items in The Page 3.1. Adding New Items Onto The Page To add empty picture boxes, text boxes, and various shapes select the required option from the Insert menu, or use one of the following keyboard accelerator keys: Rectangle Picture Box Command / Control + Shift + B Oval Picture Box Command / Control + Shift + O Text Box Command / Control + Shift + T 3.2. Selecting Items On The Page To select an item on the page you can simply position the cursor over the item and left-click; this will automatically de-select any other selected items. 17

18 To select multiple items you can hold down the Shift key before clicking the left mouse button. To de-select an item that is already selected hold down the Shift key and then click the left mouse button. To select all items on the page select the Select All option from the Edit menu Moving Items On The Page To move an item on the page, select the item and drag it on the page. To lock the item in the direction you first move while dragging, hold down the Shift key before dragging the items. You can also move items via the cursor keys, holding the Shift key down to move in larger steps Resizing Items On The Page To resize an item on the page select it, click on one of the grab handles that surround it and pull the cursor to change the size of the item Resizing a text box If you are resizing a text box, the text will re-flow automatically to take into account the new text box size. If the text overflows the box, the text box will turn red and display a small marker in the corner. This will also be detected during the pre-flight checking of the product Deleting Items From The Page (where applicable) Select the items and press the Delete key on your keyboard; or, Select the items on the page and select the Delete option from the Edit menu; or, Select the items, right-click and select the Delete option from the context menu Fitting Items To Select an item, right-click and then select one of the options from the Fit context menu. 18 Fit To Page: This option will resize the item so that it fills the entire page it is located on.

19 Fit To Spread: This option will resize the item so that it fills the entire spread it is located on. Fit Picture To Box: This option will change the picture s crop so that it will best fit the picture box. Fit Box To Picture: This option will change the size of the picture box so that it will best fit the picture. Fit Box To Picture And Centre: This option will change the size of the picture box so that it will best fit the picture and it will keep the centre of the picture box position the same Fit Box To Picture And Centre: This will automatically apply the effect Fit Box To Picture And Centre to a picture box. This effect can then be saved in a page style. Any image dropped into the empty picture box with this option checked will automatically have this effect applied. This is useful for proof book products Aligning Items On The Page Right click on an item and selecting the required option from the Align context menu. Align Top: This option is available when more than one item is selected and allows the top edges to be aligned. If any of the items contain a border, then the alignment will not take into account the border when determining the top-most edge. Align Left: This option is available when more than one item is selected and allows the left edges to be aligned. If any of the items contain a border then the alignment will not take into account the border when determining the left-most edge. Align Bottom: This option is available when more than one item is selected and allows the bottom edges to be aligned. If any of the items contain a border then the alignment will not take into account the border when determining the bottom-most edge. Align Right: This option is available when more than one item is selected and allows the right edges to be aligned. If any of the items contain a border then the alignment will not take into account the border when determining the right-most edge. Align Centre: This option is available when more than one item is selected and allows items to be aligned both vertically and horizontally at the same time. Align Vertical Centre: This option is available when more than one item is selected and aligns the top sides of the selected shapes. 19
 vertically on the page. Align Horizontal Page Centre: This option centres the selected item(s) horizontally on the page.")
20 Align Horizontal Centre: This option is available when more than one item is selected and aligns the left sides of the selected shapes. Align Vertical Page Centre: This option centres the selected item(s) vertically on the page. Align Horizontal Page Centre: This option centres the selected item(s) horizontally on the page. Align Horizontal Spread Centre: If the product is a spread this option centres the selected items(s) horizontally across the spread. Space Items: To evenly space items on a page, select the items to be spaced, right click and select the Space Items option from the Align/Space menu. The option allows you to specify the horizontal and vertical space between items, or from the left edge, centre or right edge of the first item. To choose the distance between items on a page, choose the Space Items from the context menu and enter the measurements between items Arranging Items On The Page My Easy Prints allows you to change the order in which items appear on top of each other by right-clicking on an item and selecting the required option from the Arrange context menu. 20 Send To Back: This sends the selected item to the back of the page and behind any other items that it may currently be on top of. The item will always remain above any background that may have been assigned to the page. Send Backwards: This sends the selected item further back in the z-order. You can use this option to step the item backwards, ordering the items in the desired manner. The item will always remain above any background that may have been assigned to the page. Bring To Front: This brings the selected item to the front, placing it on top of any items that it may be behind. Bring Forward: This brings the selected item forward one step in the z-order. Note: If non-printable items have been added to a page, the item s z-order will only be changed within the printable items layer or the non-printable items layer depending on the type of object selected. More information on nonprintable items can be found later on in this manual.


21 3.9. Duplicating Items On The Page To duplicate items, select them on the page, select Copy from the Edit menu and then Paste from the Edit menu. The duplicated items will appear on the page ready to be re-positioned Swapping pictures To move pictures between picture boxes, click and hold on the selected picture for 1 second without moving the mouse. At this point a thumbnail will appear and you can drag-and-drop the picture into another picture box. If the other picture box contains a picture, the pictures will be swapped Locking Items On The Page To help prevent items from being moved accidentally, it is possible to lock them. To lock and image right-click the item on the page and select the Lock option from the menu. To un-lock an item, right click the item on the page and select the Unlock option from the menu Grouping Items To group items, select multiple items then right click and select the Group option from the menu. To un-group items, right click and select Ungroup in the menu. 21

22 3.13. Undo-ing Previous Actions To undo an action either: Select the Undo option from the Edit menu, Use the keyboard shortcut Command / Ctrl + Z or, Select the undo tool on the toolbar. To redo the action: Select the Redo option from the Edit menu, Use the keyboard shortcut Command / Ctrl + Shift + Z or, Selecting the redo tool on the toolbar. The undo and redo functions can step back and forward many times and can also step across several pages. Note: If a page is inserted, a page is deleted, or if pages are re-arranged then the undo history is cleared Magnifying The Page Layout To increase the magnification of the page on-screen: Select the Zoom In option from the View menu, Use the keyboard shortcut Command / Ctrl + (plus) or Click the zoom in tool on the toolbar. When the page has been zoomed in you can use the scrollbars to move around the page or hold down the Space key and pan the page by clicking and dragging the mouse. For the maximum zoom you can select the option from the View menu, by holding down the Shift key and clicking the zoom in tool on the toolbar and under Mac OS X using the keyboard shortcut Command + Shift + (plus). You can decrease the magnification of the page on-screen by selecting Zoom Out from the View menu, by using the keyboard shortcut Command / Ctrl + (minus) or by selecting the zoom out tool on the toolbar. To zoom out to the minimum zoom you can select Minimum Zoom from the 22


23 View menu, by holding down the Shift key and clicking the zoom in tool on the toolbar and under Mac OS X using the keyboard shortcut Command + Shift + (minus) Locating A Picture On The Disk To locate where a picture is located on a disk, either right-click on it s thumbnail in the Pictures List, or right-click on the picture on the page and select the Show In Finder / Show In Windows Explorer option Open in External Picture Editor Right click on the picture and select Open in external picture editor. This will open your default picture editor. Defining The External Picture Editor Path The path to the external picture editor can be defined within the Preferences menu. The path must be a link to the application file of your selected program (not the desktop shortcut). For example: C:\Program Files\Adobe\Adobe Photoshop CS6\Photoshop.exe Or, Macintosh HD: Applications: Adobe Photoshop: Adobe Photoshop.app Note: Any changes made to the image will be reflected in My Easy Prints after a refresh of the image or page. 23
.")
24 E. Typography The features available in My Easy Prints text engine allow the ability to: Edit text inline (i.e. directly on the page). Support bi-directional scripts such as Arabic. Freely rotate text boxes with the ability to edit the text inline at any angle. Select fonts by their family and style. Enter fractional font sizes (e.g.: 10.5 point). Implement features such as: - Text Width (i.e.: text stretching) - Text Skewing (horizontal and vertical) - Strikethrough, Small Caps, Superscript and Subscript (Note: Small Caps, Superscript, and Subscript are emulated and do not use any font specific features). Perform text stroking with a separate colour and weight (glow effects and outlining). Change the spacing between characters, paragraphs and to change the baseline position. Justify the text fully (both vertically and horizontally) and to distribute the text horizontally. Display the text in different directions such as top-to-bottom columns and bottom-to-top columns. 1. Text Engine Controls 1.1. Text editing options A separate tab within the Inspector controls the text options. When a text box is double-clicked the Inspector automatically changes to the text tab so that the text editing options are automatically available to you Fonts The font used in the selected text box. The available font options are: Font Family - the type of font to be used for the selected text Font Style the available styles are listed for that particular font family Font Size - the font size for the text selected Note: My Easy Prints Portfolio text engine does not support Font Fallback. If a font is not available the operating system will not swap with an alternative font. Underline Underline any text within the text box Strikethrough Strikethrough text within the text box Superscript Makes the text smaller and set slightly above the normal line of text Subscript Makes the text smaller and set slightly below the normal line of text. Small Caps Capitalises the text at the same height and width as lowercase letters of the selected font family. Text Width Performs stretching of the text. The default value is 100% and the text can be stretched between 10%-400% from its original setting using the slider 24
25 Skew X ory Skews the text based on the X co-ordinates. The default value is 0 degrees and it can be skewed between -45 to 45 degrees. Skews the text based on the Y co-ordinates. The default value is 0 degrees and it can be skewed between -45 to 45 degrees Outline Applies a border around the text. The border size defaults to 0.1 when ticked on and can be increased up to a size of 50. You can also change the colour settings of the border. Note: This can be used to create a glow effect by placing identical text boxes one on top of the other and applying a coloured border to the text box on the bottom layer 1.4. Spacing Margin Size To specify how much space there is between the edge of the text box and the text within it. This value is set to 0 by default and can be increased up to 100. This setting is applied to the whole text box. Character Spacing To increase the spacing between characters on a selected line of text. The default setting is set to 0 and this can be altered to between -50 and 50 Paragraph Alters the paragraph spacing between a selected line of text and the paragraph below. The default value for this is 0. The value can be changed between -200 and 200. Baseline Alters the baseline of a selected line of text. The default baseline value is set to 0 and can be changed to between -500 and Direction & Alignment Controls the ability to display the text in different directions such as top-tobottom columns and bottom-to-top columns. The available options are: Horizontal left to right Vertical top to bottom left to right Vertical top to bottom right to left Vertical bottom to top left to right Vertical bottom to top right to left Overflowing Text Boxes Overflowing text boxes are displayed with a red border and an error triangle when not editing. Text Box Bounds My Easy Prints will clip the text drawing to the text box bounds meaning that part of the text / effect may not appear. This can be addressed by using the Margin control within the Inspector to offset the position of the text within the text box. 25

26 F. The Inspector Options to alter item appearance can be accessed via the Inspector on the main window. The Inspector, by default, is split into several tabs with each tab covering a different category. 1. Item / Shape Tab The Item / Shape tab contains the controls that affect the basic shape and appearance of an item Shape To change the basic shape of the item to a square / rectangle, circle / oval or polygon. If the item is a text box or a line then its shape cannot be changed. Sides If the shape is a polygon, the number of sides, ranging from 3 to 10, can be set either by dragging the slider or by inputting the value into the field next to the slider. Angle If the shape is a polygon, the angle of the polygon can be set either by rotating the dial control or by inputting an angle between 0 and 359 degrees. Corner If the shape is a square / rectangle it is possible to round the corners of the item either by dragging the slider or by inputting a value between 0 and 100. Colour To change the colour of the text box, line or shape choose from the drop down list or use the system s colour picker control by selecting Other from the drop down menu. If the item is a picture box containing a mask or has Zoom Lock switched off, the background colour can be changed. More information on these options can be found later in this manual. Opacity The opacity of an item can be set from 10 to 100, with 10 being almost transparent and 100 being solid. If the object is a shape that has a border applied, the opacity can be set to 0 in order to create a hollow shape Border / Line To define the style of a line or a shape s border select the item and tick the box next to border. Size The size of the border or thickness of a line can range from 1 to 40, with 40 being the thickest border. Colour To change the colour of the border or line, choose from the drop down list or use the system s colour picker control by selecting Other from the drop down menu. Opacity The opacity can range from 10 to 100, with 100 being solid Drop Shadow This enables a drop shadow effect on the item. The options below allow you to dictate how this appears: Offset How far away from the item you wish the drop shadow to appear. This value can range from 0 to 200 and can be controlled by dragging the slider or inputting the value into the field next to the slider. 26
27 Angle Defines the direction of the drop shadow. For example, a value of 180 would cast the shadow directly below the item. The angle can be entered either by rotating the dial control or by inputting a value between 0 and 359 into the field. Blur A value of 0 will define a sharp (non-blurred) shadow, whereas the maximum value of 8 will define a very blurred / hazy shadow. The blur can be entered either by dragging the slider or inputting the value into the field next to the slider. Colour The drop shadow colour can be changed to either one of the standard colours or a custom colour via the Other option within the drop down list. Expand Expands the size of the drop shadow. This can be used to create a glow effect around the item if the offset is also set to 0. A value of 0 means no expansion while a value of 50 means maximum expansion. Opacity The opacity of the drop shadow can be set from 10 to 100, with 10 being almost transparent and 100 being solid. Tip: You can also use the drop shadow option to create a border effect outside of the main border by setting the offset to 0, the blur level to 0 and increasing the expand value. 2. picture Tab The Picture tab on the Inspector allows you to manipulate the picture within a picture box. From here, you can define the orientation, colour mode and apply a vignette. These options apply to the box, not the picture currently within the box. This means that if you set a picture box s colour mode to be Sepia, any picture placed into that picture box will be displayed in Sepia Orientation The Orientation section of the tab allows the orientation of the picture within the picture box to be controlled. Angle Controls the angle that can be selected from the drop down list (0, 90, 180 or 270 degrees). Flip Vertical Ticking this checkbox flips the picture vertically within the picture box. Flip Horizontal Ticking this checkbox flips the picture horizontally within the picture box Picture Enhancement The Auto-Enhance checkbox enables automatic colour enhancements for the selected image. Ticking Remove Red Eye enables automatic removal of the red eye effect caused by flash photography. Mode My Easy Prints supports three colour modes: Original, Sepia, and Black and White (de-saturate). Choosing Sepia or Black and White will change the appearance of the picture within the picture box, while choosing Original will return the picture to it s original colour. 27

28 Brightness The brightness of the picture within the picture box can be controlled using the slider or by inputting the required value into the field to the right of the slider. Values lower than 0 will make the picture darker, while values higher than 0 will make the picture lighter. A value of 0 will return the picture to it s original brightness. Contrast The contrast level of the picture within the picture box can be controlled using the slider or by inputting the required value into the field to the right of the slider. Values lower than 0 will reduce the amount of contrast, while values higher than 0 will increase the amount of contrast. A value of 0 will return the picture to its original contrast setting Vignette A vignette can be applied to the picture by ticking this checkbox. The vignette has several different options available: Shape Can be set to a square / rectangle or circle / oval by selecting the required option from the drop down list. Size This value can be in the range of 0 to 40, with 40 being the thickest border and 0 being no border. Blur Blur can be added by dragging the slider or inputting the value into the field next to the slider; a value of 0 will define a sharp (non-blurred) edge, whereas the maximum value of 8 will define a very blurred / hazy edge. Colour From the drop down list or by clicking Other, you can change colours by selecting from the system colour picker. A value of None here will make the vignette transparent, allowing you to blend the edges of the picture into the page background. Tip: You can also use the vignette option to create an inside border effect by setting the shape to a rectangle and the blur level to 0. This can be used to create multiple borders by using the border control and the drop shadow border tip. 3. Text Tab See the Typography section (page 24). 4. Measurements Tab The Measurements tab on the Inspector allows you to manipulate the position and size of an item. The co-ordinates will be displayed in either millimetres or inches depending on the setting within the application preferences Position To set the exact X and Y co-ordinates of an item on the page. Typing a < or > before the positional will offset the position by the amount (e.g. >50 will increase the position by 50). Typing a % after the size will make the new position a percentage of the original (e.g. 10% will make the position 10% of its original position). Typing a plus or minus, or < or > before the position and a % after the position will increase or decrease the position by the percentage (e.g. +10% or >10% will 28
.")
29 increase the position by 10%). Note: Within Application Preferences you can choose the Ruler Origin to start from Print Area or Print Area + Bleed Size To set the exact height and width of an item on the page. Typing a plus or minus before the size will offset the size by the amount (e.g. +50 will increase the size by 50). Typing a % after the size will make the new size a percentage of the original size (e.g. 10% will make the size 10% of its original size). Typing a plus or minus before the size and a % after the size will increase or decrease the size by the percentage (e.g. +10% will increase the size by 10%). Constrain Proportions If this option is ticked then the item will always be resized proportionally to its original size. If this is un-ticked then the size can be resized freely. This option is enabled by default for new items but can be changed within the application preferences. If typing the new size into the Inspector to change the height or width of an item, the application will scale the other dimension proportionally if the Constrain Proportions checkbox is ticked for the item. If the other dimension is out of bounds the item s size will revert to it s original size Offset Defines the vertical and horizontal position of the picture within the picture box. When a picture is cropped, panned or zoomed these settings are set automatically. To set these manually: Crop: Double-click the picture and slide the outer edge to where you want to crop; or on the selected picture hold down Ctrl+Alt and drag the picture. Pan: Within the crop window, drag the image this will show the faded area that will be lost; or when the picture box is selected, hold down the Alt key while dragging the picture within the picture box. Zoom: Follow step one to enlarge a particular area of the picture. Scale Controls the magnification of the picture within the picture box. Zoom Lock Controls if a picture can be dragged outside the bounds of the picture box. The default for all picture boxes is for this option to be enabled, meaning that the edges of the picture will always touch the edges of the picture box. If this option is un-ticked, the picture can be scaled or moved freely within the picture box. This allows advanced positioning within the picture box, however it can cause problems with coloured edges appearing around the picture if it is not used correctly. Note: The properties of multiple items can be changed at one time. For example, if you have three picture boxes selected you can apply the same border or size to them at the same time. Some of the options may not be available depending on the items that you have selected at the time. An example of this would be three picture frames, one of which already has a border applied. The options controlling the border would be disabled as one of the selected items already has this assigned. Angle The rotation value can be changed by dragging the dial control or by inputting 29

30 a value between 0 and 359 into the field to the right. 5. Page Background Tab The Page Background tab on the Inspector allows you to change the background colour of the pages. This tab will show a different number of controls depending on the product configuration and the current page. Single page There will only be the option to change the background colour of that page. Spread Both left and right page background colours can be changed independently. Front or back cover There will only be the option to change the background colour of that cover. Combined front and back cover There will be the options to change the background colour of the front cover, back cover and spine. 6. The Toolbar The Toolbar is the area between the Page Design and Page Previews areas. It contains quick action buttons for the following functions: Undo Zoom Out Redo Zoom In Save Previous Page Add Picture Box Next Page Add Text Box Preview Autoflow Shopping Cart (My Easy Prints Designer only) Undo Allows the last edit to be stepped back, up to a maximum of 150 times. Redo Allows you to step forward through edits. Save Allows the user to save the current project, during the building/editing of the product or project. 30
31 G. Saving Your Product 1. Saving Your Product The product can be saved at any time by selecting the Save option from the File menu, by using the keyboard shortcut Command / Ctrl + S or by selecting the save tool on the toolbar. My Easy Prints will auto-save the product to prevent data loss if a crash occurs; Auto-save will not remember the status of undo / redo. The auto-save occurs under the following conditions: - Every 5 minutes if a change has been made - Every 50 changes made by you These settings are fixed and cannot be changed. The auto-save creates a temporary copy of the data within the project / order folder. When you perform a save the auto-save data will be deleted. If the software crashes the last autosave data will be used when the project / order is re-opened but you will be able to close it without saving if you need to go back to the last saved version. Note: When the auto-save is performed there will be a very short pause while the data is saved to disk, you are not notified there is an auto-save occurring. 2. Closing The Product The product can be closed at any time by: Selecting the Close option from the File menu; or using the keyboard shortcut Command / Ctrl + W. When closing a product you will be prompted to save if any changes have been made since it was last saved. 3. Creating Proofs Before ordering, it is a good idea to check the project and create proofs of the project. This will ensure that the project will print as expected. To create proofs, go to the File menu and select Create Proofs. The proof settings window then opens. The software will check all the pages and pictures and display any problems on the Flight Check Results Window. The checks will show: Any picture that cannot be located, Any picture whose quality might not be good enough, Text boxes that contain too much text, Text boxes that contain fonts that cannot be located, Empty picture boxes, Empty text boxes Empty pages. Select the output format, (the available options are JPEG, TIFF, Single Page or Multi-Page PDF), and choose whether you wish to proof all pages or a selection. Click on the bottom right hand select button to choose the output location. Please note that the proofs are created within a folder as 72dpi images (JPEG or TIFF) or raster PDF s. Once you have selected the location and name of the proof folder click the Save button. You are returned to the Create Proofs window. Once you are happy with the settings, click the OK button. 31


32 H. Order process Once the project is finished and you are happy with the proofs, then the project can be ordered from the License. To do this you can click on the shopping cart icon on the tool bar or from the File menu select Order. 1. Flight Check Once the project is ordered, the software will run the flight check to show an area that might be a problem and displays the results if there are any problems. If the flight check only shows yellow error icons, you can click OK to continue, or, cancel the order and return to the project to fix the problems. If there are issues that remain unresolved, then a further window appears to ask if you are should you wish to continue. If the flight check displays red error icons, the order cannot be placed until the problems are resolved Red error message circumstances: Missing Pictures Can occur if a picture s locations has moved, or the picture has became incompatible or if the picture has been edited outside of My Easy Prints in such a way that its dimensions have changed. Overflowing Text Missing Font Missing Mask Missing Application Or Product Scrapbook Picture / Background Missing Application Or Product Mask 32

33 1.2. Yellow error message circumstances: Empty Picture Box Empty Page Empty Text Box Low Quality Picture Low Quality Background Picture Low Quality Background Mask Low Quality Picture Mask Low Quality Shape Mask To solve the problem you can right-click the picture box and select the Update Picture Box option from the context menu. Alternatively, a different picture can be dropped into the picture box. 2. Online Order Workflow When the online order workflow for My Easy Prints Shopping Cart is initiated My Easy Prints first connects to orders.myeasyprints.com. The result should be that a new browser window is opened on top of My Easy Prints. The interface explains the next steps. When the progress window initially appears the Help button will be disabled so that you do not immediately click it. After a few seconds (by which time the browser window should have appeared) the Help button will become enabled. If you click the Help button a prompt will appear instructing you what should have happened and giving you an option to copy the URL manually into a browser window. If you attempt to cancel the order workflow within My Easy Prints you are prompted with the following message. 33
34 2.1. My Easy Prints Shopping Cart Multiline Ordering We support the option for end users to add projects into a shopping cart before ordering. This allows you to order multiple projects as the same time. Each project will be treated as a line item but as part of the same order number Add To Cart Process In order for you to add a project to your shopping cart, you must choose the order button within the My Easy Prints window. You will then be presented with the option Add To Shopping Cart. Once you click this option you will be taken back to the main screen where you can access your shopping cart The shopping cart will display a list of projects that have been added to the cart with their current status. Projects that are marked as Ready To Order will be grouped together as one order. In the online shopping cart these orders will each be represented as a line item, allowing you to configure options such as components differently for each project ordered Payment orders.myeasyprints.com will open on your default browser. You will first need to sign in or create an account. Once done, you will be led to the shopping cart to complete your order. You may choose from the shopping cart: - your choice of paper (glossy, satin or premium) - your choice of cover (soft or hard cover) - your choice of cover lamination (glossy or matte) - your choice of stand color for calendars - your choice of page backs for calendars - any additional available option You will choose the delivery mode you favor: - one of Librairie Antoine s branch (free) - home delivery via LibanPost You will also choose the payment mode you favor: - credit or debit card through Bank Audi s payment gateway - cash at CashUnited/Moneygram (you shall pay before your ordered is processed) - my easy card (Prepaid / gift card): these are available at any Librairie Antoine branch. You will enter your the card code in the Gift Card field and click on Redeem. The card s amount will be added to your account. Any remaining value will stay on your account and is not refundable Post Payment After the order has been completed on orders.myeasyprints.com through the shopping cart, you will return to My Easy Prints. If the speed test button is clicked a progress window will appear showing the status of the speed test. After the speed test has finished the main window will update with an estimate of the upload time. 34
35 3. Sending Orders 3.1. Uploading Orders If the upload order option is selected you will be prompted with some additional information. After all relevant options have been selected My Easy Prints will prepare the data and then upload it to the server. Note: The globe symbol to represent the point at which the order is uploading Once uploaded you will be prompted with a message informing you that your order has been successfully uploaded to the server Sending Orders Via Mail/Post If the option to send the order via mail is selected you will be prompted with some additional information. If running on Mac OSX, My Easy Prints will attempt to detect if a CD / DVD burner is available on the computer. If one is available you will be given the choice if you want to burn your files directly or if they wish to save them to disk. On Windows you can save to disk. You will not be able to burn directly to a CD/DVD from My Easy Prints. If the option to save to disk is selected you will be prompted with some additional information. My Easy Prints will next prompt you asking them where their order data should be saved. My Easy Prints will prepare the data and save it to disk. A completion message is displayed informing you your save was successful. This contains the mailing defined address. If the option to burn to CD / DVD is selected, My Easy Prints will prepare the data and then display the disc burning window allowing you to burn your order to disc. After the disc burning process has been completed you will be prompted to confirm that the disc burned correctly before finishing the order workflow. NOTE: The option to burn directly to CD / DVD is currently only available under Mac OS X. This is due to the lack of a consistent API within the Microsoft Windows operating system. 4.Additional Support All information within this manual is correct at the time of publication. For additional support queries please contact us at: info@myeasyprints.com or Call us on (Monday to Friday from 9:00 am to 5:00 pm) 35

36 myeasyprints.com is a product by -scope Ateliers
hdalbum User Designer Guide Collect Create Share Designer V 1.2
 hdalbum User Designer Guide 2017 Collect Create Share Designer V 1.2 Table of Contents Contents Welcome to the hdalbum Designer... 2 Features... 2 System Requirements... 3 Supported File Types... 3 Installing
User Guide Version 3.2.1
 User Guide Version 3.2.1 www.thephotobookclub.com.au September 2012 1 Contents Introduction... 4 1.1 PhotobookClub Cool Tools... 6 1.2 Copyright and Content... 6 1.3 Privacy Policy... 6 2.0 Downloading
KODAK Software User s Guide. Software Version 9.0
 KODAK Create@Home Software User s Guide Software Version 9.0 Table of Contents 1 Welcome to KODAK Create@Home Software Features... 1-1 Supported File Formats... 1-1 System Requirements... 1-1 Software
Keynote 08 Basics Website:
 Website: http://etc.usf.edu/te/ Keynote is Apple's presentation application. Keynote is installed as part of the iwork suite, which also includes the word processing program Pages and the spreadsheet program
To learn how to use Focus in Pix:
 Welcome To learn how to use Focus in Pix: Step-by-step guide Visit www.focusinpix.com/quick-guide for a quick overview of Focus in Pix software. You will also find many tips and tutorials on our site.
L E S S O N 2 Background
 Flight, Naperville Central High School, Naperville, Ill. No hard hat needed in the InDesign work area Once you learn the concepts of good page design, and you learn how to use InDesign, you are limited
CPM-200 User Guide For Lighthouse for MAX
 CPM-200 User Guide For Lighthouse for MAX Contents Page Number Opening the software 2 Altering the page size & Orientation 3-4 Inserting Text 5 Editing Text 6 Inserting Graphics 7-8 Changing the Colour
ADOBE ILLUSTRATOR CS3
 ADOBE ILLUSTRATOR CS3 Chapter 2 Creating Text and Gradients Chapter 2 1 Creating type Create and Format Text Create text anywhere Select the Type Tool Click the artboard and start typing or click and drag
What is Publisher, anyway?
 What is Publisher, anyway? Microsoft Publisher designed for users who need to create and personalize publications such as marketing materials, business stationery, signage, newsletters and other items
Target Photobooks user guide
 Target Photobooks user guide Table of Contents Target Photobooks user guide...1 How to use this manual...4 Purpose of the manual...4 Bookmarks...4 Tips...4 Further support...4 Welcome to the Target Photobooks
Numbers Basics Website:
 Website: http://etc.usf.edu/te/ Numbers is Apple's new spreadsheet application. It is installed as part of the iwork suite, which also includes the word processing program Pages and the presentation program
A QUICK TOUR OF ADOBE ILLUSTRATOR CC (2018 RELEASE)
") A QUICK TOUR OF ADOBE ILLUSTRATOR CC (2018 RELEASE) Lesson overview In this interactive demonstration of Adobe Illustrator CC (2018 release), you ll get an overview of the main features of the application.
A QUICK TOUR OF ADOBE ILLUSTRATOR CC (2018 RELEASE) Lesson overview In this interactive demonstration of Adobe Illustrator CC (2018 release), you ll get an overview of the main features of the application.
KODAK Software User s Guide
 KODAK Create@Home Software User s Guide Table of Contents 1 Welcome to KODAK Create@Home Software Features... 1-1 Supported File Formats... 1-1 System Requirements... 1-1 Software Updates...1-2 Automatic
Keynote Basics Website:
 Keynote Basics Website: http://etc.usf.edu/te/ Keynote is Apple's presentation application. Keynote is installed as part of the iwork suite, which also includes the word processing program Pages. If you
Microsoft Office Publisher
 Microsoft Office 2007- Publisher Opening Microsoft Publisher Using the Start Menu, click on All Programs and navigate to the Microsoft Office folder. Click on Microsoft Office Publisher 2007. Choosing
Microsoft PowerPoint 2013 Beginning
 Microsoft PowerPoint 2013 Beginning PowerPoint Presentations on the Web... 2 Starting PowerPoint... 2 Opening a Presentation... 2 File Tab... 3 Quick Access Toolbar... 3 The Ribbon... 4 Keyboard Shortcuts...
Adobe Indesign for Beginner - Session Structure
 Adobe Indesign for Beginner - Session Structure Hour 01 Introduction to Indesign Indesign Workspace Hide / show palettes Dock / float palettes Group / ungroup palettes Stack / unstack palettes Save / load
User Manual Version 1.1 January 2015
 User Manual Version 1.1 January 2015 - 2 / 112 - V1.1 Variegator... 7 Variegator Features... 7 1. Variable elements... 7 2. Static elements... 7 3. Element Manipulation... 7 4. Document Formats... 7 5.
A new clients guide to: Activating a new Studio 3.0 Account Creating a Photo Album Starting a Project Submitting a Project Publishing Tips
 Getting Started With Heritage Makers A Guide to the Heritage Studio 3.0 Drag and Drop Publishing System presented by Heritage Makers A new clients guide to: Activating a new Studio 3.0 Account Creating
A Step-by-step guide to creating a Professional PowerPoint Presentation
 Quick introduction to Microsoft PowerPoint A Step-by-step guide to creating a Professional PowerPoint Presentation Created by Cruse Control creative services Tel +44 (0) 1923 842 295 training@crusecontrol.com
The American University in Cairo. Academic Computing Services. Word prepared by. Soumaia Ahmed Al Ayyat
 The American University in Cairo Academic Computing Services Word 2000 prepared by Soumaia Ahmed Al Ayyat Spring 2001 Table of Contents: Opening the Word Program Creating, Opening, and Saving Documents
User's Guide Album Express 7
 User's Guide Album Express 7 www.spc-international.com Index 1.0 2.0 Introduction Getting started and System Requirement 2.1 3.0 How to set the Preference of Album Express Workflow of Album Express 4.0
Convert any PC into Photobooth
 Convert any PC into Photobooth www.dgflick.com Table of Contents Table of Contents... 1 1.0. Introduction... 2 2.0. System Requirements... 3 3.0. Opening the Toolbox Getting Started... 4 3.1. Registration...
4 TRANSFORMING OBJECTS
 4 TRANSFORMING OBJECTS Lesson overview In this lesson, you ll learn how to do the following: Add, edit, rename, and reorder artboards in an existing document. Navigate artboards. Select individual objects,
USER MANUAL Table of Contents Slide 00 of 66
 USER MANUAL 1.5 www.dgflick.com Table of Contents Slide 00 of 66 Table of Contents Table of Contents... 1 1.0. Getting Started... 2 1.1. What is Video Xpress Suite?... 3 1.2. System Requirements to Run
Exercise III: Creating a Logo with Illustrator CS6
 Exercise III: Creating a Logo with Illustrator CS6 Project 1: Creating Logos with the Shape Tools Now that we have some experience with Illustrator s tools, let s expand our goal to create a logo, web
SETTINGS AND WORKSPACE
 ADOBE ILLUSTRATOR Adobe Illustrator is a program used to create vector illustrations / graphics (.ai/.eps/.svg). These graphics will then be used for logos, banners, infographics, flyers... in print and
Publisher 2016 Foundation SAMPLE
 Publisher 2016 Foundation Publisher 2016 Foundation Microsoft Publisher 2016 Foundation - Page 2 2015 Cheltenham Group Pty. Ltd. All trademarks acknowledged. E&OE. No part of this document may be copied
14. Using Illustrator CC with Other Adobe Applications
 14. Using Illustrator CC with Other Adobe Applications Lesson overview In this lesson, you ll learn how to do the following: Place linked and embedded graphics in an Illustrator file. Place multiple images
YEARBOOK EDITION USER GUIDE. a service provided by
 YEARBOOK EDITION USER GUIDE a service provided by Pixami User Guide Table of Contents Chapter 1 Introduction... 1 Basic Steps to Creating a Yearbook...1 User Login...2 Navigation Header...2 Main Dashboard....3
Adobe Flash CS4 Part 1: Introduction to Flash
 CALIFORNIA STATE UNIVERSITY, LOS ANGELES INFORMATION TECHNOLOGY SERVICES Adobe Flash CS4 Part 1: Introduction to Flash Fall 2010, Version 1.0 Table of Contents Introduction...3 Downloading the Data Files...3
MSP Yearbooks Quick Start Guide
 MSP Yearbooks Quick Start Guide March 2017 Contents Quick Start Guide 1 Introduction 1.1 Welcome to MSP Yearbooks 1 1.2 Help at your fingertips 1 2 Before you start... 2.1 Security settings information
Keyboard Shortcuts. Command Windows Macintosh
 S00ILCS5.qxp 3/19/2010 1:11 AM Page 477 Keyboard Shortcuts k Adobe Illustrator CS5 If a command on a menu includes a keyboard reference, known as a keyboard shortcut, to the right of the command name,
Microsoft Office. Microsoft Office
 is an office suite of interrelated desktop applications, servers and services for the Microsoft Windows. It is a horizontal market software that is used in a wide range of industries. was introduced by
Creating a Focus in Pix Poster
 Creating a Focus in Pix Poster www.focusinpix.com Focus in Pix is FREE software provided by Cornerstone Copy Center. Select from the many pre-designed templates specially created for graduation posters,
Microsoft Publisher 2010 Tecumseh District Library
 1 Microsoft Publisher 2010 Tecumseh District Library by Anne Keller, Teen Services Librarian 2 Microsoft Publisher 2010 Microsoft Publisher is a powerful desktop publishing program that can create posters,
Publisher 2010 Foundation. Publisher 2010 Foundation Level SAMPLE
 Publisher 2010 Foundation Publisher 2010 Foundation Level Microsoft Publisher 2010 Foundation - Page 2 1995-2012 Cheltenham Courseware Pty. Ltd. All trademarks acknowledged. E&OE. No part of this document
9 Using Appearance Attributes, Styles, and Effects
 9 Using Appearance Attributes, Styles, and Effects You can alter the look of an object without changing its structure using appearance attributes fills, strokes, effects, transparency, blending modes,
Create ruler guides. Create a ruler guide
 Create ruler guides Ruler guides are different from grids in that they can be positioned freely on a page or on a pasteboard. You can create two kinds of ruler guides: page guides, which appear only on
Sending image(s) to report Click Send Snapshot on any screen in Dolphin3D and choose the Send to Report option
 to report Click Send Snapshot on any screen in Dolphin3D and choose the Send to Report option") Dolphin 3D Reports Sending image(s) to report Click Send Snapshot on any screen in Dolphin3D and choose the Send to Report option Creating a report step by step 1. Generate the desired images in Dolphin3D
Dolphin 3D Reports Sending image(s) to report Click Send Snapshot on any screen in Dolphin3D and choose the Send to Report option Creating a report step by step 1. Generate the desired images in Dolphin3D
QUICK LOGO D E S I G N E R. User Manual
 QUICK LOGO D E S I G N E R User Manual Table Of Contents 1. Quick Logo Designer Overview 2. Logo Creation Methods 2.1 Create from Templates 2.2 Create a New Logo from Scratch 5 5 3. Creating and Saving
PART I GravoStyle5-Laser Introduction
 PART I GravoStyle5-Laser Introduction I. INTRO GravoStyle 5 Laser is designed is a component of GravoStyle5 for use with the Gravograph/New Hermes and other manufacturer Laser Engravers. Combined with
USER MANUAL. User Manual-3.0
 USER MANUAL User Manual-3.0 Greeting Card Xpress User Manual CONTENTS 1. Hello 1.1 Introduction 1.2 System Requirements MAC System Windows System 2. Opening the Tool Box Getting Started 2.1 Registration
Drawing shapes and lines
 Fine F Fi i Handmade H d d Ch Chocolates l Hours Mon Sat 10am 6pm In this demonstration of Adobe Illustrator CS6, you will be introduced to new and exciting application features, like gradients on a stroke
Microsoft Publisher 2013 Foundation. Publisher 2013 Foundation SAMPLE
 Microsoft Publisher 2013 Foundation Publisher 2013 Foundation Microsoft Publisher 2013 Foundation - Page 2 2013 Cheltenham Group Pty. Ltd. All trademarks acknowledged. E&OE. No part of this document may
Learning to use the drawing tools
 Create a blank slide This module was developed for Office 2000 and 2001, but although there are cosmetic changes in the appearance of some of the tools, the basic functionality is the same in Powerpoint
Xyron Wishblade Software Manual (PC)
") Xyron Wishblade Software Manual (PC) Provided By http://www.mybinding.com http://www.mybindingblog.com Xyron Wishblade Create & Cut Software Manual Section 1 Getting Started with Tool Bars 2 Standard Tool
Xyron Wishblade Software Manual (PC) Provided By http://www.mybinding.com http://www.mybindingblog.com Xyron Wishblade Create & Cut Software Manual Section 1 Getting Started with Tool Bars 2 Standard Tool
Publisher 2016 Foundation. North American Edition SAMPLE
 Publisher 2016 Foundation Publisher 2016 Foundation North American Edition Microsoft Publisher 2016 Foundation - Page 2 2015 Cheltenham Group Pty. Ltd. All trademarks acknowledged. E&OE. No part of this
- Is the process of combining texts and graphics layout to produce publications e.g. cards,
 DESKTOP PUBLISHING (DTP) - Is the process of combining texts and graphics layout to produce publications e.g. cards, newspapers, catalogues etc. - A special DTP software is always used. PURPOSE OF DTP
Microsoft PowerPoint 2010 Beginning
 Microsoft PowerPoint 2010 Beginning PowerPoint Presentations on the Web... 2 Starting PowerPoint... 2 Opening a Presentation... 2 File Tab... 3 Quick Access Toolbar... 3 The Ribbon... 4 Keyboard Shortcuts...
Designer Reference 1
 Designer Reference 1 Table of Contents USE OF THE DESIGNER...4 KEYBOARD SHORTCUTS...5 Shortcuts...5 Keyboard Hints...5 MENUS...7 File Menu...7 Edit Menu...8 Favorites Menu...9 Document Menu...10 Item Menu...12
Parashar Technologies PageMaker 7.0
 PageMaker 7.0 INTRODUCTION PageMaker 7.0 is one of the best and popular Desktop Publishing Designing Program developed by Adobe Corporation in USA. It is specially used in page designing. Today is popular
On the Web sun.com/aboutsun/comm_invest STAROFFICE 8 DRAW
 STAROFFICE 8 DRAW Graphics They say a picture is worth a thousand words. Pictures are often used along with our words for good reason. They help communicate our thoughts. They give extra information that
CHAPTER 01 - INTRODUCTION
 Chapter 01, Introduction to MS PowerPoint 2007 CHAPTER 01 - INTRODUCTION PowerPoint is presentation software that helps you create a slide show presentation and supplements, such as handouts and speaker's
Adobe Photoshop Sh S.K. Sublania and Sh. Naresh Chand
 Adobe Photoshop Sh S.K. Sublania and Sh. Naresh Chand Photoshop is the software for image processing. With this you can manipulate your pictures, either scanned or otherwise inserted to a great extant.
FACULTY AND STAFF COMPUTER FOOTHILL-DE ANZA. Office Graphics
 FACULTY AND STAFF COMPUTER TRAINING @ FOOTHILL-DE ANZA Office 2001 Graphics Microsoft Clip Art Introduction Office 2001 wants to be the application that does everything, including Windows! When it comes
What s New in My Memories Suite 9?
 What s New in My Memories Suite 9? New Project Types Social Media - Facebook, Instagram, Pinterest, Twitter, Google Plus Print Products - Canvas, Metal, Posters, Mug, Mousepad, Water Bottle Photos Enhancements
Adobe Illustrator CC 2018 Tutorial
 Adobe Illustrator CC 2018 Tutorial GETTING STARTED Adobe Illustrator CC is an illustration program that can be used for print, multimedia and online graphics. Whether you plan to design or illustrate multimedia
Acrobat X Professional
 Acrobat X Professional Toolbar Well Page Navigations/Page Indicator Buttons for paging through document Scroll Bar/box page indicator appears when using the scroll button to navigate. When you release
Xyron Wishblade Software Manual (Mac)
") Xyron Wishblade Software Manual (Mac) Provided By http://www.mybinding.com http://www.mybindingblog.com Xyron Wishblade Create & Cut Software Manual Section 1 Getting Started with Tool Bars 2 Standard
Xyron Wishblade Software Manual (Mac) Provided By http://www.mybinding.com http://www.mybindingblog.com Xyron Wishblade Create & Cut Software Manual Section 1 Getting Started with Tool Bars 2 Standard
Press-Ready Cookbook Page Guidelines
 Press-Ready Cookbook Page Guidelines table of contents These instructions are for all pages of your cookbook: Title Page, Special Pages, Table of Contents, Dividers, Recipe Pages, etc. WHAT IS PRESS-READY?
Introduction to Microsoft Office PowerPoint 2010
 Introduction to Microsoft Office PowerPoint 2010 TABLE OF CONTENTS Open PowerPoint 2010... 1 About the Editing Screen... 1 Create a Title Slide... 6 Save Your Presentation... 6 Create a New Slide... 7
Adobe InDesign CS6 Tutorial
 Adobe InDesign CS6 Tutorial Adobe InDesign CS6 is a page-layout software that takes print publishing and page design beyond current boundaries. InDesign is a desktop publishing program that incorporates
Microsoft PowerPoint 2007 Beginning
 Microsoft PowerPoint 2007 Beginning Educational Technology Center PowerPoint Presentations on the Web... 2 Starting PowerPoint... 2 Opening a Presentation... 2 Microsoft Office Button... 3 Quick Access
Word 2010 Beginning. Technology Integration Center
 Word 2010 Beginning File Tab... 2 Quick Access Toolbar... 2 The Ribbon... 3 Help... 3 Opening a Document... 3 Documents from Older Versions... 4 Document Views... 4 Navigating the Document... 5 Moving
PUBLISHER 2016 LINDA MUCHOW ALEXANDRIA TECHNICAL AND COMMUNITY COLLEGE 1601 JEFFERSON STREET, ALEXANDRIA, MN 56308
 PUBLISHER 2016 LINDA MUCHOW 320-762-4539 LINDAC@ALEXTECH.EDU ALEXANDRIA TECHNICAL AND COMMUNITY COLLEGE 1601 JEFFERSON STREET, ALEXANDRIA, MN 56308 Table of Contents Publisher Environment... 3 Rulers...
Basic Concepts. Launching MultiAd Creator. To Create an Alias. file://c:\documents and Settings\Gary Horrie\Local Settings\Temp\~hh81F9.
 Page 1 of 71 This section describes several common tasks that you'll need to know in order to use Creator successfully. Examples include launching Creator and opening, saving and closing Creator documents.
Microsoft Word
 OBJECTS: Shapes (part 1) Shapes and the Drawing Tools Basic shapes can be used to graphically represent information or categories. The NOTE: Please read the Objects (add-on) document before continuing.
Adobe Premiere Pro CC 2015 Tutorial
 Adobe Premiere Pro CC 2015 Tutorial Film/Lit--Yee GETTING STARTED Adobe Premiere Pro CC is a video layout software that can be used to create videos as well as manipulate video and audio files. Whether
StitchGraph User Guide V1.8
 StitchGraph User Guide V1.8 Thanks for buying StitchGraph: the easy way to create stitch layouts for hardanger and other complex embroidery stitch types. StitchGraph is intended to allow you to create
SETTING UP A. chapter
 1-4283-1960-3_03_Rev2.qxd 5/18/07 8:24 PM Page 1 chapter 3 SETTING UP A DOCUMENT 1. Create a new document. 2. Create master pages. 3. Apply master pages to document pages. 4. Place text and thread text.
Introduction To Inkscape Creating Custom Graphics For Websites, Displays & Lessons
 Introduction To Inkscape Creating Custom Graphics For Websites, Displays & Lessons The Inkscape Program Inkscape is a free, but very powerful vector graphics program. Available for all computer formats
Picasa Basics Website:
 Website: http://etc.usf.edu/te/ Picasa is a free photo management program from Google that can be used to organize and manage all of the images you have stored on your computer. Picasa also allows you
Publisher 2013 Foundation SAMPLE
 Publisher 2013 Foundation Publisher 2013 Foundation Microsoft Publisher 2013 Foundation - Page 2 2013 Cheltenham Group Pty. Ltd. All trademarks acknowledged. E&OE. No part of this document may be copied
Quick Guide for Photoshop CC Basics April 2016 Training:
 Photoshop CC Basics Creating a New File 1. Click File > New 2. Keep Default Photoshop Size selected in the Preset drop-down list. 3. Click OK. Showing Rulers 1. On the Menu bar, click View. 2. Click Rulers.
9 ADVANCED LAYERING. Lesson overview
 9 ADVANCED LAYERING Lesson overview In this lesson, you ll learn how to do the following: Import a layer from another file. Clip a layer. Create and edit an adjustment layer. Use Vanishing Point 3D effects
Create a Cool Vector Robot Character in Illustrator
 Create a Cool Vector Robot Character in Illustrator In this tutorial, we will use various tools and techniques to create a simple vector robot character and learn the basic of Adobe Illustrated. With this
User Guide. DrawAnywhere.com: User Guide
 DrawAnywhere.com: User Guide DrawAnywhere.com is an online diagramming & flow charting application with the look & feel of a desktop application! User Guide http://www.drawanywhere.com August, 2007 Table
Using SymPrint to Make Overlays, Templates & More...
 Welcome to SymPrint SymPrint is an easy-to-use tool for creating communication overlays, worksheets, classroom activities and more using a modern toolbar and common-sense interface modeled after the programs
PRESENCE. RadEditor Guide. SchoolMessenger 100 Enterprise Way, Suite A-300 Scotts Valley, CA
 PRESENCE RadEditor Guide SchoolMessenger 100 Enterprise Way, Suite A-300 Scotts Valley, CA 95066 800-920-3897 www.schoolmessenger.com Contents Contents... 2 Introduction... 3 What is RadEditor?... 3 RadEditor
IN DESIGN. A review of the overview
 IN DESIGN A review of the overview InDesign Review GETTING STARTED: Start by clicking the InDesign icon in your dock. Wait for InDesign to load. Click on Create New Document If resuming work, find your
How to...create a Video VBOX Gauge in Inkscape. So you want to create your own gauge? How about a transparent background for those text elements?
 BASIC GAUGE CREATION The Video VBox setup software is capable of using many different image formats for gauge backgrounds, static images, or logos, including Bitmaps, JPEGs, or PNG s. When the software
Part 1: Basics. Page Sorter:
 Part 1: Basics Page Sorter: The Page Sorter displays all the pages in an open file as thumbnails and automatically updates as you add content. The page sorter can do the following. Display Pages Create
ezimagex2 User s Guide Version 1.0
 ezimagex2 User s Guide Version 1.0 Copyright and Trademark Information The products described in this document are copyrighted works of AVEN, Inc. 2015 AVEN, Inc. 4595 Platt Rd Ann Arbor, MI 48108 All
Table of Contents. Yearbook Pro End User Guide 2
 Yearbook Pro End User Guide 2 Table of Contents 1 Introduction...5 1.1 What s new for the 2016-17 School Year?...5 1.2 Configuration and Preparation...6 1.3 Software and System Requirements...6 1.4 The
OnPoint s Guide to MimioStudio 9
 1 OnPoint s Guide to MimioStudio 9 Getting started with MimioStudio 9 Mimio Studio 9 Notebook Overview.... 2 MimioStudio 9 Notebook...... 3 MimioStudio 9 ActivityWizard.. 4 MimioStudio 9 Tools Overview......
SMART Meeting Pro 4.2 personal license USER S GUIDE
 smarttech.com/docfeedback/170973 SMART Meeting Pro 4.2 personal license USER S GUIDE Product registration If you register your SMART product, we ll notify you of new features and software upgrades. Register
Step 1: Create A New Photoshop Document
 Snowflakes Photo Border In this Photoshop tutorial, we ll learn how to create a simple snowflakes photo border, which can be a fun finishing touch for photos of family and friends during the holidays,
Work with Shapes. Concepts CHAPTER. Concepts, page 3-1 Procedures, page 3-5
 3 CHAPTER Revised: November 15, 2011 Concepts, page 3-1, page 3-5 Concepts The Shapes Tool is Versatile, page 3-2 Guidelines for Shapes, page 3-2 Visual Density Transparent, Translucent, or Opaque?, page
Keys for selecting tools
 Keys for selecting tools Use these shortcuts in the Tools panel. In most cases, you can momentarily switch tools by holding down the keyboard shortcut for the tool. Selection tool V V Rotation tool W W
EssEntial indesign skills Brought to you By InDesign
 10 EssEntial indesign skills Brought to you By InDesignSkills 10 Essential InDesign Skills by InDesignSkills www.indesignskills.com Copyright 2014 Illustration: Henry Rivers Contents In this ebook you
Premiere Pro Desktop Layout (NeaseTV 2015 Layout)
") Premiere Pro 2015 1. Contextually Sensitive Windows - Must be on the correct window in order to do some tasks 2. Contextually Sensitive Menus 3. 1 zillion ways to do something. No 2 people will do everything
Premiere Pro 2015 1. Contextually Sensitive Windows - Must be on the correct window in order to do some tasks 2. Contextually Sensitive Menus 3. 1 zillion ways to do something. No 2 people will do everything
Krita Vector Tools
 Krita 2.9 05 Vector Tools In this chapter we will look at each of the vector tools. Vector tools in Krita, at least for now, are complementary tools for digital painting. They can be useful to draw clean
button Double-click any tab on the Ribbon to minimize it. To expand, click the Expand the Ribbon button
 PROCEDURES LESSON 1: CREATING WD DOCUMENTS WITH HEADERS AND FOOTERS Starting Word 1 Click the Start button 2 Click All Programs 3 Click the Microsoft Office folder icon 4 Click Microsoft Word 2010 1 Click
HAPPY HOLIDAYS PHOTO BORDER
 HAPPY HOLIDAYS PHOTO BORDER In this Photoshop tutorial, we ll learn how to create a simple and fun Happy Holidays winter photo border! Photoshop ships with some great snowflake shapes that we can use in
Copyright Notice. Trademarks
 Copyright Notice All rights reserved. No part of this publication may be reproduced, stored in a retrieval system, or transmitted in any form or by any means, electronic, mechanical, photocopying, recording,
How to Prepare Your Cards for Press Using Scribus
 How to Prepare Your Cards for Press Using Scribus This Tutorial is Divided into Sections: 1. What is Scribus? 2. What Do I Need to Get Started? 3. Setting Up Your Scribus Document 4. Creating Master Pages
DESKTOP PUBLISHING FOR PRINT PRODUCTION PRACTICAL
 DESKTOP PUBLISHING FOR PRINT PRODUCTION PRACTICAL M Scheme By, A.Paramasivam, Lecturer (SS) S.Marimuthu, Lecturer Department of Printing Technology Arasan Ganesan Polytechnic College Sivakasi Ex.No. 1
Picture Package and Custom Package
 Picture Package and Custom Package How to create custom layouts in the Print module By Martin Evening Picture Package and Custom Package In addition to the Single Image/Contact Sheet options, there is
User Guide Belltech Systems, LLC
 User Guide Belltech Systems, LLC http://www.belltechsystems.com May, 2006 1. Introducing Belltech CaptureXT 2. Installation and Uninstallation Installation Running the Application Uninstallation 3. User