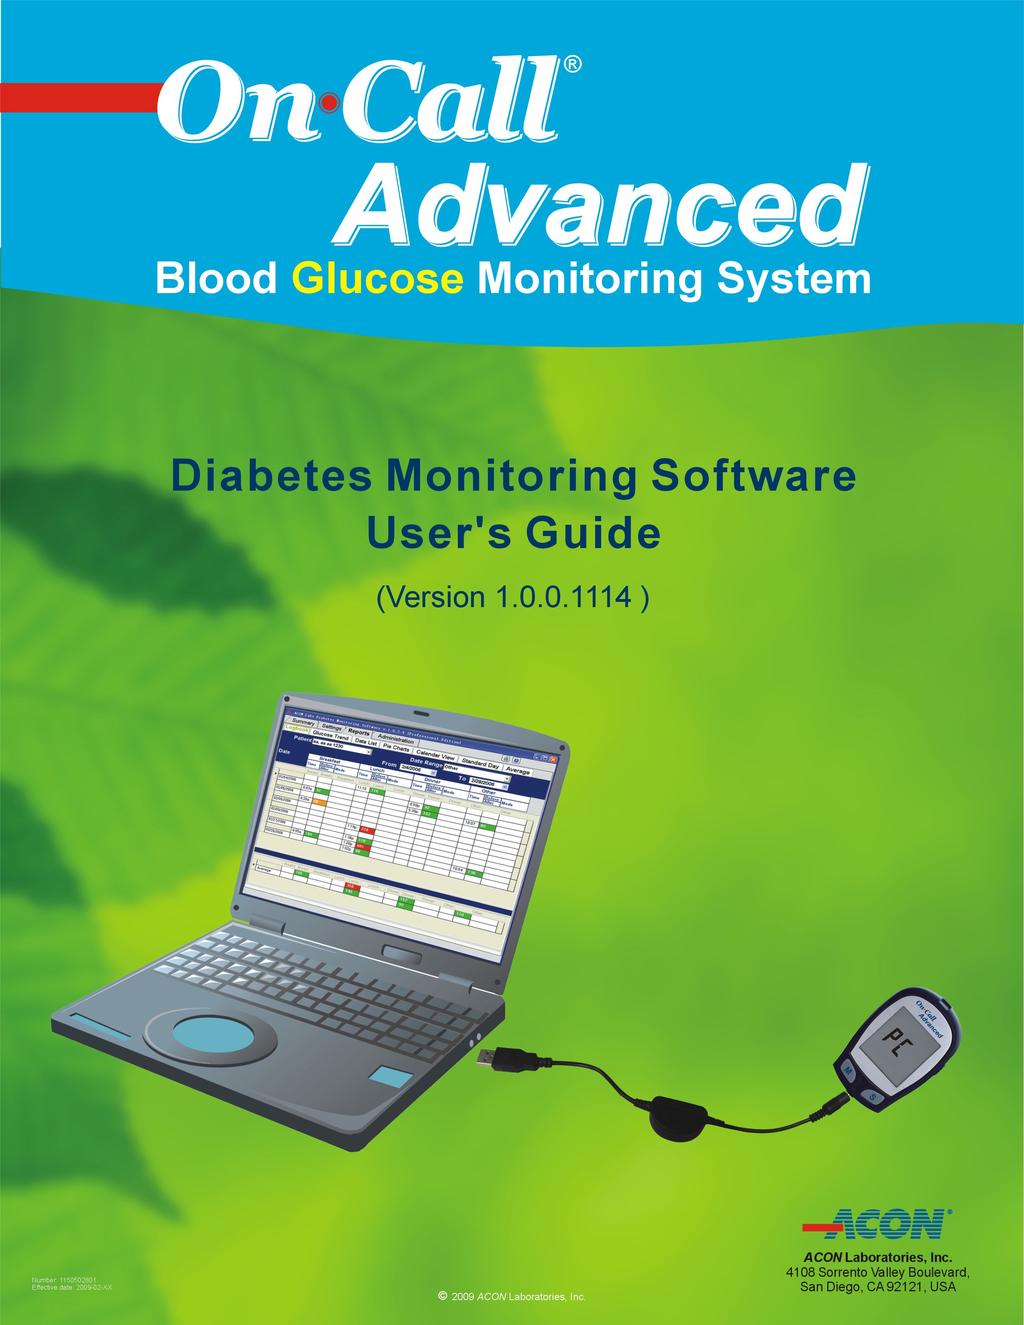
Table of Contents. On-Call Advanced Diabetes Data Management Software V1.0 User s Manual
|
|
|
- Delilah Garrison
- 5 years ago
- Views:
Transcription
1
2 Table of Contents Installation Instructions...2 Starting On-Call Advanced Diabetes Data Management Software...5 Main Windows...6 Patient Setup...6 Patient Info...7 Target Levels...8 Time Slot...9 Preference Setup...9 Serial Port...10 Download Readings...10 Reports...12 Print Reports...12 Data List Report...12 Logbook Report...14 Glucose Trend Report...15 Standard Day Report...16 Pie Chart Report...17 Average Day Report...18 Average Week Report...19 Administration (Professional Edition Only)...20 Updating Provider Information...21 Adding a New Provider...21 Deleting a Provider...22 Changing the Provider Password...22 Changing the User Management System Password...23 System Requirements...23 Page 1 of 23


3 Installation Instructions Insert the CD provided in the Diabetes Monitoring Software Kit into the CD drive of your computer. The installation should start automatically. If the installation process does not start automatically, navigate to the CD drive and double click Setup on the installation CD. The InstallShield Wizard will start as shown below. Click Next>. In the installation process shown below, you will be requested to enter your User Name and Company Name. You can install the software for the current user, or for all users on the computer. By default, the software will be installed for all users. The License Agreement will be displayed as shown below. If you agree with the contents, click the accept option and click Next>. Page 2 of 23


4 During the installation process you will be requested to select Home Edition or Professional Edition. Home Edition: Choose this version if the software will be used by only one person. Professional Edition: Choose this version for healthcare professionals with multiple providers and patients. This has all the features of the Home Edition, but supports more than one patient, each with his or her own set of results. This version includes security features to allow different access levels for multiple users. The Setup screen will be displayed as shown below. It is recommended to not change any of the default settings. Page 3 of 23


5 Before the files are installed, the Current Settings screen will display information about the installation. Review the screen and Click Next> to continue with the installation. Click <Back to modify any of the information. The following screen will display the progress of the installation. Page 4 of 23


6 When installation is complete, the following screen will be displayed. Click Finish to complete the installation process. Starting On-Call Advanced Diabetes Data Management Software Once the On-Call Advanced Diabetes Data Management software has been installed, an Acon DMS Pro icon will appear on your computer desktop. Double click the icon to start the application. For the Professional Edition Note: The following screens are displayed on the Professional version only. If this is the first time startup for the software, the Security Settings screen will appear showing the Provider as Guest, Guest. Provider settings are described in the section Administration (Professional version Only). Select the User Management System tab. A screen asking to enter and confirm a UMS management password will be shown. This password will be used to set up and Page 5 of 23
 on page 19.")

7 manage Providers, and their passwords for entering glucose data. Enter and confirm the new password for the UMS management password, than click Ok. A screen showing the default Guest, Guest : Provider will be shown as in the section Administration (Professional Edition Only) on page 19. Please refer to this section for adding a Provider and patients. After adding or editing a Provider, closing the window will exit the application. Restart the application by double clicking the Acon DMS Pro icon as before. The Data Management System tab will appear at startup. Select the Provider (the default is Guest, Guest with no password), enter the Provider Password as shown below and click Ok. To change your provider password, see Administration, on page 19. Main Windows The On-Call Advanced Diabetes Data Management Software home screen contains three main program functions, Patient Setup, Meter (Download Reading) and View Report. Patient Setup Patient Setup lets you create, change or delete diabetes profile data. You have three ways to enter Patient Setup: click in the main window, click in the toolbar, or select Patient Setup from the Patient Menu. Page 6 of 23


8 Patient Info Complete the Patient Info by entering First Name, Last Name and Middle Name, Date of Birth and Gender. For the Professional Edition If you want to add another patient with profile data, click the Add button. Complete all patient Info by entering the appropriate data in each field provided If you want to update the patient information, first select the patient name from the Patient pull down menu. Once the desired patient is selected, the related information will be shown. After editing the information, click Save to save the modifications. To delete patient profile data, select the patient name from the Patient pull down menu. Page 7 of 23

9 Click Delete to delete the patient s data from database. Click Cancel to keep the previous patient settings. Click on Change Provider Password to change provider password. Enter the old Password in the first field. Enter a new Password in the second field, and confirm the new password by entering it again in the Confirm New Password field. Click Ok. Target Levels Blood glucose target levels can be set for High, Low and Hypoglycemic values. The default normal levels are between mmol/l ( mg/dl). Input the target levels given by your health care provider which are most appropriate for you. Target levels are color coded, and are reflected in the Summary and Report pages. In mmol/l In mg/dl Page 8 of 23

10 Time Slot On-Call Advanced Diabetes Data Management Software uses meal slots to organize data for reports. The window below shows the start and end times for 7 meal slots. Start and end times are set for the following meal slots: Before Breakfast, After Breakfast, Before Lunch, After Lunch, Before Dinner, After Dinner and Night. Click Save to save any settings which have been changed. Preference Setup Preference Setup sets the active Com Port and Measurement Units. There are two ways to enter Preference Setup:. Click in the toolbar, or select Preference Setup from the Preference menu. Page 9 of 23

11 Serial Port Select the Serial (COM) Port the Glucose Meter will use to download data. Units: Select the preferred Glucose Measurement Units to be used for the Glucose data, either mmol/l or mg/dl. Autosearch COM Port: Click Autosearch COM Port to search the available COM ports in your computer system from COM1 to COM9 automatically. If an On-Call Advanced meter or an On-Call Plus meter is connected to an available COM port and the meter is in the data transfer mode, this COM port will be found. Click Save to save any changed preferences. Click Cancel to go back to the previous preferences. Download Readings Download Readings transfers data from a connected meter to the software database. There are three ways to get to Download Readings: click in the main window, click in the toolbar, or select Meter Communication from the Meter pull down menu. Page 10 of 23


12 Before downloading readings from a glucose meter to the PC, you must first establish communication between the PC and the meter. Note: For the Professional Edition, first select the desired patient from the Patient pull down menu before transferring meter readings. Connecting a meter to PC For On-Call Advanced Blood Glucose Meter Press M and S buttons together to enter the data transfer mode. PC will appear on the display when the meter enters the data transfer mode. Install the USB to RS232 Cable to USB port. Plug the audio jack into the meter. Select the meter type from the Meter Type pull down menu. For On-Call Plus Blood Glucose Meter Press the S button and hold for 2 seconds to enter the data transfer mode. PC will appear on the display when the meter enters the data transfer mode. Connect the meter to the serial port of your computer with the supplied serial adapter cable. Page 11 of 23

13 Select the meter type from the Meter Type pull down menu. Transferring Meter readings Once the meter is connected to the PC, click Download in the Download Reading screen, or select Download Readings from the Meter menu. Clear Meter When readings have been transferred to the PC database, click Clear to delete all the glucose readings from the meter memory. Reports Several report views are available, including Data List, Log Book, Glucose Trend, Standard Day, Pie Chart, Average Day and Average Week. When different report views are selected, the selected date range will remain the same. There are three ways to view the report: click in the main window, click in the toolbar, or select your desired report from the Report menu. Print Reports Reports can be printed by clicking in the toolbar. Note: For the Professional Edition, select the desired patient from the Patient pull down menu to view the report. Data List Report Data List is a listing of all glucose data that has been downloaded for a given patient and time period. To generate a Data List Report select the Data List tab. The report will be generated based on the settings of the previously viewed report. Page 12 of 23


14 Note: For Professional Edition only first select the desired patient from the Patient pull down menu. Select a predefined date range from the Date Range pull down menu. A custom date range can be entered in the From and To date fields. Page 13 of 23

15 The Data List Report will be generated for the current patient and selected dates. See the example above for format. The values are color coded based on the Target Levels. Red levels are above target levels Yellow levels are below target levels Blue values are hypoglycemic readings Green values are values that are within target levels Gray values are invalid or control readings The Data List Report can be exported to Microsoft Excel. To export this list into an Excel spreadsheet: Click on in the toolbar. A Save As dialog box will open. Select the location where you want to save the Excel Export file, enter a filename and click Save. Logbook Report The Logbook Report prints out a table of the glucose data based on the selected Date, Time and Time Slot. To generate the Logbook Report: Select the Logbook tab. The report will be generated based on the settings of the previously viewed report. Page 14 of 23

16 Note: For Professional Edition only, first select the desired patient from the Patient pull down menu. To change the report settings select a predefined date range from the Date Range pull down menu or provide a custom date range in the From and To date fields. The Logbook Report will be generated for the selected patient and dates. See the example above. The average of all data in the selected Time Slot is listed in data fields at the bottom of the report. The values are color coded based on the target levels: Red levels are above target levels Yellow levels are below target levels Blue values are hypoglycemic readings Green values are those values within limits Glucose Trend Report The Glucose Trend Report prints out a trend line graph of Glucose data over a selected period of time for a given Time Slot. The target levels and time slot are indicated with a color coded area and line. To generate a Glucose Trend Report select the Glucose Trend tab. The report will be generated based on the settings of the previously viewed report. Page 15 of 23

17 Note: For Professional Edition only, select the desired patient from the Patient pull down menu. To change the report settings, select a predefined date range from the Date Range pull down menu or provide a custom date range in the From and To date fields. The Glucose Trend Report will be generated for the selected patient and dates. See example above. The Green area indicates within target, and the Blue line indicates Hypo levels. The Orange, Azure and Purple lines are trend lines for before meal, after meal and night. Standard Day Report The Standard Day Report is a scatter graph of the glucose readings for given times of day. To generate a Standard Day Report select the Standard Day tab. The report will be generated based on the settings of the previously viewed report. Page 16 of 23

18 Note: For Professional Edition only, select the desired patient from the Patient pull down menu. To change the report settings, select a predefined date range from the Date Range pull down menu or provide a custom date range in the From and To date fields. The Standard Day Report will be generated based on the patient and date criteria. See example above. The Red, Yellow and Blue lines indicate target levels. Pie Chart Report The Pie Chart Report provides the percentage of glucose readings for a given time slot in a pie chart format. The pie charts are color coded based on the target levels. To generate a Pie Chart Report, select the Pie Charts tab. The report will be generated based on the settings of the previously viewed report. Page 17 of 23

19 Note: For Professional Edition only, select the desired patient from the Patient pull down menu. To change the report settings, select a predefined date range from the Date Range pull down menu or provide a custom date range in the From and To date fields. The Pie Chart Report will be generated based on the selected patient and dates. See example above. The Pie Charts are color coded based on the user-defined Target Levels. Red levels are above target levels. Yellow levels are below target levels. Blue values are hypoglycemic readings. Green values are values that are within the target levels. Average Day Report The Average Day Report is a bar graph depicting the average glucose readings (Before and After) for each day of the week and Time Slot over a selected time period. To generate an Average Day Report select the Average Day Report tab. The report will be generated based on the settings of the previously viewed report. Page 18 of 23

20 Note: For Professional Edition only, select the desired patient from the Patient pull down menu. To change the report settings select a predefined date range from the Date Range pull down menu or provide a custom date range in the From and To date fields. The Average Report will be generated based on the selected Patient, Time Slot and Date. Average Week Report The Average Week Report is a bar graph depicting the average glucose readings (Before and After) for a week and Time. To generate an Average Week Report select the Average Week Report tab. The report will be generated based on the settings of the previously viewed report. Page 19 of 23

21 Note: For Professional Edition only, select the desired patient from the Patient pull down menu. To change the report settings, select a predefined date range from the Date Range pull down menu or provide a custom date range in the From and To date fields. The Average Week Report will be generated based on the selected Patient, Time Slot and Date. Administration (Professional Edition Only) The Data Management System and User Management System tabs are only available if the Professional Edition was installed, allowing Provider information to be added or deleted and passwords changed. If the Home Edition was installed, these tabs will not appear. Double click the Acon DMS Pro icon to start the application. The screen below will be shown asking for a password. Select the User Management System tab and enter the User Management System password to show the initial Provider screen below. Page 20 of 23


22 Updating Provider Information To edit data for an existing Provider select the desired provider from the Provider Pull Down Menu. Make the necessary updates in the Provider Info fields. There are no required fields. A unique combination of Last Name and First Name for each provider must be used. Click Save to save the edited information, Cancel to cancel all changes. Note: Changes to the default provider can be made but it cannot be deleted. Adding a New Provider To add a new Provider, click Add. The Provider fields will be blank and the new Provider information can be added. A password should be entered for the new Provider in the Password field and again in the Confirm Password field to confirm. Page 21 of 23
 cannot be deleted. Caution: Deleting a Provider will remove all patient data associated with the Provider from the database.")
23 Click Save to save the new Provider information. This Provider will now be available in the Provider pull down menu based on the Provider Last Name, First Name. Deleting a Provider Note: The default provider (Guest, Guest) cannot be deleted. Caution: Deleting a Provider will remove all patient data associated with the Provider from the database. To delete a Provider, select the Provider to be deleted from the Provider pull down menu. Click Delete. A Delete Confirmation dialog box will open with the First Name and Last Name of the Provider to be deleted. Click OK to delete the provider. The Provider will be deleted and can no longer be selected from the Provider pull down menu when logging onto the application. Changing the Provider Password Click on Change Provider Password to show the Change Password dialog box. Page 22 of 23

24 Enter the old Provider Password in the Old Password field. Enter the new Provider password in the New Password field, and again in the Confirm New Password field. Click Ok to save the new Provider password. Changing the User Management System Password Click on Change UMS Password to show the Change Password dialog box. Enter the old UMS password in the Old Password field. Enter the new UMS password in the New Password field, and again in the Confirm New Password field. Click Ok to save the new UMS password. System Requirements Please note the following minimum requirements for your computer to use the Diabetes Monitoring Software: Operating System: Windows Vista Business, Home Basic, or Home Premium, Windows XP Professional or XP Home, Windows2000 Processor: Pentium 4-class processor or equivalent Memory: 512MB Hard Disk Space: 70 MB (depends on amount of data to be managed Connection Port: Available RS pin serial port or a USB port (USB to Serial port adapter accessory is available) Display: 800x600 minimum Drive: CD-ROM drive Page 23 of 23
Table of Contents. 1. Intended Use Overview Materials Required System Requirements User Mode 4
 Table of Contents 1. Intended Use.. 3 2. Overview.. 3 2.1 Materials Required. 3 2.2 System Requirements. 3 2.3 User Mode 4 3. Installation Instructions.. 5 3.1 Installing the On Call Diabetes Management
User s Guide. Health Management System. Version 4.2.1
 Software and User s Guide Version 4.2.1 Health Management System Version 4.2.1 Health Management System User s Guide ART23867-101_Rev-A.indd 1 Contents Table of Contents Preface... v Overview of the FreeStyle
Tremblay Harrison Inc Dufferin St Toronto, ON M6H 3M Version 1.2
 Tremblay 1684 Dufferin St Toronto, ON M6H 3M1 1 866 829-7926 Version 1.2 Introduction The EZ Health Oracle Diabetes Management System is a personal computer (PC) software application that allows users
User Guide. Diabetes Management Software Version Display meter readings. View a variety of reports. Personalize meter settings
 User Guide Display meter readings View a variety of reports Personalize meter settings Store multiple users Diabetes Management Software Version 3.01 For use with all contour blood glucose monitoring systems
ARK Care Advance Diabetes Management System
 ARK Care Advance Diabetes Management System Healthcare Professional User Manual P/N AC025-00 Rev. 01/18 Page 1 of 48 Contents 1.0 Getting Started 1.1 Healthcare Professional User Manual Introduction 1.2
PT Data Management Software User s Guide
 PT Data Management Software User s Guide For data transfer to a Personal Computer (PC). For professional in vitro diagnostic use only. INTENDED USE These instructions define the format and timing for data
User Guide. Diabetes Management Software Version Display meter readings. View a variety of reports. Personalise meter settings
 User Guide Display meter readings View a variety of reports Personalise meter settings Store multiple users Diabetes Management Software Version 3.01 For use with all Bayer s CONTOUR blood glucose monitoring
SmartLog User's Manual
 V 1.0.x PGZ1E3004 REV5 03/2014 SmartLog User's Manual 2014 i-sens. All rights reserved. Microsoft Windows is registered trademarks of Microsoft Corporation. All other products are the registered trademarks
GlucoManager TM Software. User s Guide
 GlucoManager TM Software User s Guide 1 Table of Contents Preface... 6 Software Overview... 6 Intended Use... 7 Purpose and Scope... 7 Computer Requirements... 8 Technical Support... 9 1. Introduction...
SmartLog User's Manual. V 2.1.x PGZ1E3004 REV10 11/2015
 V 2.1.x PGZ1E3004 REV10 11/2015 SmartLog User's Manual 2015 i-sens. All rights reserved. Microsoft Windows, Mac OS X are registered trademarks of Microsoft Corporation and Apple Inc. All other products
HCP Quick Start Guide Version 1.0
 LibreView HCP Quick Start Guide Version 1.0 June 2015 Numera 1511 3rd Avenue Suite 808 Seattle, WA 98101 Main Phone: 206.876.1200 Customer Support US: 1-855- 786-4263 www.libreview.com Table of Contents
GLOOKO FOR PATIENTS QUICK START GUIDE
 GLOOKO FOR PATIENTS QUICK START GUIDE September 2018 Version IFU-0008 02 Contents Intended Use... 3 Warnings... 3 1. How to Start Using Glooko... 4 1.1. Device Compatibility... 4 MeterSync Blue... 4 Glooko
Cholesterol Management Software User s Guide
 Cholesterol Management Software User s Guide For data transfer to a Personal Computer (PC). For professional and self-testing in vitro diagnostic use only. INTENDED USE These instructions define the format
Instructions for Use
 Multilingual version 3.4 Lite version is intended for patient use only; Some physician features are disabled. Instructions for Use Table of Contents 1 Introduction... 1 2 Installing and Starting Software...
1) Installing Bluetooth software for Windows (A) Place installation CD into PC and setup should launch automatically.
 Installing Bluetooth software for Windows (A) Place installation CD into PC and setup should launch automatically.") 1) Installing Bluetooth software for Windows (A) Place installation CD into PC and setup should launch automatically. If setup does not launch, use Windows Explorer to navigate to the appropriate CD- ROM
1) Installing Bluetooth software for Windows (A) Place installation CD into PC and setup should launch automatically. If setup does not launch, use Windows Explorer to navigate to the appropriate CD- ROM
Software Operations Manual
 Software Operations Manual Version 5.0 System Requirements PC with 1GHz or higher, Intel Pentium Processor or compatible Microsoft Windows XP Professional or Vista Business Edition Microsoft.NET framework
Blood Glucose Management Software User manual Name: DiaLife Mini
 Blood Glucose Management Software User manual Name: DiaLife Mini A9-1 of 23 User Manual I. INTRODUCTION... 3 II. SOFTWARE INSTALLATION... 6 III. START TO USE... 17 IV. TROUBLE SHOOTING... 22 A9-2 of 23
Requirements Instructions Configuring Cat ET to use the Wireless CA3 Radio... 12
 Getting Started Table of Contents INTRODUCTION... 2 PC, COMMUNICATION HARDWARE, AND CABLE REQUIREMENTS... 3 SETTING UP THE COMMUNICATION ADAPTER 3... 5 Requirements... 5 Configuring Cat Electronic Technician
Mobile App Help File
 Mobile App Help File Contents 2 Contents Introduction... 4 OneTouch Reveal mobile app... 4 Supported Devices and System Requirements...4 Apple Legal Notice...4 Bluetooth Trademark...4 Intended Use...4
JPRO Fleet Service Portal User s Guide
 JPRO Fleet Service Portal User s Guide 1 System Requirements Supported Operating Systems Windows 2000 Windows XP Hardware Requirements Minimum: 128 MB RAM, 2 GB HD, Pentium II, 1024 x 768 monitor Recommended:
Boxed messages as shown below need your special attention. Read them carefully.
 Introduction Thank you for choosing MEQNET WINDRIVER for Lactate Pro TM 2. This Operating Manual explains how to use this software in order to obtain blood lactate data stored in lactate analyzers manufactured
UPGRADE INSTRUCTIONS
 Version 2.48 or 2.49 & Version 3.48 or 3.49 UPGRADE INSTRUCTIONS System Upgrade Requirements NOTE: Non I-Button: V-Sperm Gold version 3.49 must be installed with SQA-V Gold version 2.49. I-Button: V-Sperm
GP-N100 Utility Software Manual
 System Requirements En Thank you for your purchase of a GP-N100. This manual describes how to use the GP-N100 Utility to download the latest assisted GPS data from Nikon servers to your GP-N100. To ensure
Batch Eligibility Long Term Care claims
 DXC Technology Provider Electronic Solutions software lets Connecticut Medical Assistance Program providers verify patient s eligibility and submit and correct claims for services all electronically. The
IMPORTANT. Registration Settings: SERIAL NUMBER: COMPUTER ID: REGISTRATION NUMBER:
 IMPORTANT Registration Settings: SERIAL NUMBER: COMPUTER ID: REGISTRATION NUMBER: Once you have your TALITY software functioning properly copy your phone system settings onto this page and save it for
EDS Attn: EDI Unit P.O. Box 2991 Hartford, CT
 EDS Provider Electronic Solutions software lets Connecticut Medical Assistance providers verify patient s eligibility and submit and correct claims for services all electronically. The software makes submitting
Software for glucose data management. Manual
 Software for glucose data management Manual Table of contents Fundamentals...2 Icons...3 Home Page...5 Data transfer...7 Print-outs...7 Import/Export...8 Patient...13 Glycaemia...16 List of results...16
Mission Lipid Data Management Software User s Guide
 Mission Lipid Data Management Software User s Guide V1.0 September 2018 Table of Contents 1. Overview...1 1.1 About the Mission Lipid Data Management Software...1 1.2 System Requirements...1 1.3 Materials
AFP Digital
 Installation Guide AFP Digital Installation Guide Page 2 Contents Overview...... 3 System Requirements... 5 Installing the EVA Hardware Driver... 6 AFP Digital Installation... 14 Installing AFP Digital
ProjectorNetTM Adapter Quick Start Guide
 ProjectorNetTM Adapter Quick Start Guide Adapter networking 1. Quick Start The ProjectorNet Adapter kit contains the following items: ProjectorNet Serial to Ethernet Adapter Cable Adapter, ProjectorNet
To complete this activity, you will need the following files:
 CHAPTER 1 Windows XP More Skills 12 Move Data Between Windows You can open several application windows at the same time; they do not need to be files created by the same program. Having more than one window
Wireless transfer of screening data from ALGO 3i Screener to PC
 Wireless transfer of screening data from ALGO 3i Screener to PC This technical notice provides information on transmitting screening results from your ALGO 3i Newborn Hearing Screener to a personal computer
SMARTLOG. User's Manual V 2.4
 SMARTLOG User's Manual V 2.4 PGZ1E3004 REV12 08/2017 SmartLog User's Manual 2017 i-sens. All rights reserved. Microsoft Windows, Mac OS X are registered trademarks of Microsoft Corporation and Apple Inc.
ATX Document Manager. User Guide
 ATX Document Manager User Guide ATX DOCUMENT MANAGER User Guide 2008 CCH Small Firm Services. All rights reserved. 6 Mathis Drive NW Rome, GA 30165 No part of this manuscript may be copied, photocopied,
Magic Card Professional
 Magic Card Professional User Manual Table of Contents System Requirements... 2 1. Installation... 3 2. Magic Card Settings... 5 2.1 Set Protection... 6 2.2 Set Parameters... 8 2.3 Password... 10 2.4 CMOS
2. create the workbook file
 2. create the workbook file Excel documents are called workbook files. A workbook can include multiple sheets of information. Excel supports two kinds of sheets for working with data: Worksheets, which
Omron Health Management Software Ver 1.3 User s Help Manual. Copyright Omron Healthcare Co., Ltd. World Rights Reserved
 Omron Health Management Software Ver 1.3 User s Help Manual Copyright 2006-2010 Omron Healthcare Co., Ltd. World Rights Reserved IM-HMS-HEM-SOFT-IT2-04-06/2010 TABLE OF CONTENTS Before Using the Software
QL-500 QL-560 QL-570 QL-650TD QL-1050
 QL-500 QL-560 QL-570 QL-650TD QL-1050 Software installation guide English LB9153001 A Introduction Features P-touch Editor Printer Driver P-touch Address Book (Windows Only) Makes it easy for anyone to
Installing ProjectSpec from the ProjectMatrix DVD
 Installing ProjectSpec from the ProjectMatrix DVD System Requirements Operating System: Windows 2000, XP (Home or Pro) or Vista (32-bit version) Software: AutoCAD 2004 through 2009 (ProjectMatrix's policy
Quick Start Guide Vodafone Mobile Connect USB Stick
 Quick Start Guide Vodafone Mobile Connect USB Stick Welcome 2 What can I do with it? 3 Set up your USB Stick 4 Run the software 5 Configuration 6 Make a connection 7 USB Stick status 7 Other settings 8
DISCLAIMER Whilst every effort has been made
 PUBLISHED BY Gallagher Group Limited Kahikatea Drive, Private Bag 3026 Hamilton, New Zealand www.gallagherams.com Copyright Gallagher Group Limited 2011. All rights reserved. Patents Pending. MyScale Pro
Data Manager Installation and Update Instructions
 Data Manager Installation and Update Instructions These instructions describe how to update or install Data Manager desktop software from YSI s website. Failure to follow these instructions may cause you
MoCo SMS Suite User s Manual
 MoCo SMS Suite User s Manual - 1 - Chapter 1: Setting & Starting Up MoCo... 5 1.1 Hardware Setup... 5 1.1.1 USB GSM modem... 5 1.1.2 USB GSM Modem Driver Installation for Win2000/Win2003... 6 1.1.3 USB
APP USER GUIDE. Sugar.IQ with Watson
 APP USER GUIDE TM TM Sugar.IQ with Watson Introduction Thank you for choosing Medtronic as your diabetes management partner. The Sugar.IQ app is a diabetes personal assistant application (app) developed
APP USER GUIDE Sugar.IQ with Watson
 APP USER GUIDE Sugar.IQ with Watson TM TM Introduction Thank you for choosing Medtronic as your diabetes management partner. The Sugar.IQ app is a diabetes personal assistant application (app) developed
EXPRESS. Users Guide. Version 3.5
 EXPRESS Users Guide Version 3.5 Table of Contents 1 System Overview... 3 2 System Requirements... 3 3 Contents in ECMTUNE System Box... 3 4 Installation Information... 4 5 Registration Information... 7
Thermal Transient Test
 Thermal Transient Test Installation and Operating Manual 2705-A De La Vina Street Santa Barbara, California 93105 Telephone (805) 682-0900 www.designconsultants.cc Hardware Installation Installation 1.
Wired / Wireless IR IP Camera ICA-108 / ICA-108W. Quick Installation Guide
 Wired / Wireless IR IP Camera ICA-108 / ICA-108W Quick Installation Guide Table of Contents Chapter 1. Introduction... 3 1.1 Before Installation... 3 1.2 System Requirements... 3 1.3 Package Content...
1. Installing the Drivers for Windows
 For Ralink chipset products, please kindly refer to the following steps. 1. Installing the Drivers for Windows 1. Power on your PC, let the operating system boot up completely, and login as needed. 2.
Fleet Manager 2002 Professional Network Configuration Guide
 Handling a complex world. Fleet Manager 2002 Professional Network Configuration Guide Overview The VDO Fleet Manager Professional utilises an advanced three-tier client-server model and is designed to
Stentura Protégé/élan Cybra Wireless Communication
 Stentura Protégé/élan Cybra Wireless Communication Release: March, 2007; September, 2006 Copyright 2007, Stenograph, L.L.C. All Rights Reserved. Printed in U.S.A. No part of this publication may be reproduced,
Install Manual. P2 Software ENGLISH M0509AT5091 -FJ VQT2G26-4
 Install Manual P2 Software M0509AT5091 -FJ ENGLISH VQT2G26-4 Contents Operating Precautions When Using Windows 1. Before Installing................................................... 3 2. Precautions in
INSTALLING THE PS3 XBOX READY SOFTWARE:
 INSTALLING THE PS3 XBOX READY SOFTWARE: 1. Insert the Installation CD to CD-ROM drive and execute Ready_Setup.exe NOTE: If it is the first time for the target USB disk using under this software, the software
3M Occupational Health and Environmental Safety 3M E-A-Rfit Validation System. Version 4.4 Software Installation Guide (Full) 1 P age
 1 P age") 3M Occupational Health and Environmental Safety 3M E-A-Rfit Validation System Version 4.4 Software Installation Guide (Full) 1 P age Contents Important Information Read First... 3 Software Installation
3M Occupational Health and Environmental Safety 3M E-A-Rfit Validation System Version 4.4 Software Installation Guide (Full) 1 P age Contents Important Information Read First... 3 Software Installation
Part # Quick-Start Guide. SpeedStream 4200 Modem PPPoE Modem Router
 Part # 007-0-00 Quick-Start Guide SpeedStream 00 Modem PPPoE Modem Router Before you begin, Verify that the following items came with your DSL kit: Step > Install Line Filters 7 SpeedStream Device Documentation
OptionPower 3.2. for Office 2007 STARTUP GUIDE. Interactive Audience Response Systems
 OptionPower for Office 2007 3.2 STARTUP GUIDE Interactive Audience Response Systems OptionPower for Office 2007 3.2 STARTUP GUIDE 2008 Option Technologies Interactive This document is the copyrighted and
Monitor Application for Panasonic TDA
 Monitor Application for Panasonic TDA MAP Demo Getting Started Version 1.0 G3 NOVA Communications SRL 28 Iacob Felix, Sector 1, Bucharest, ROMANIA Phone: +1 877 777 8753 www.g3novacommunications.com 2005
Thank you for purchasing Qwizdom Remotes.
 Thank you for purchasing Qwizdom Remotes. Now that you ve received your set, you re probably thinking, What do I do now? We have prepared this quick-start guide to help you get up and running with your
Data setting software MEXE02
 HM-40143 Data setting software MEXE02 OPERATING MANUAL Before Use Thank you for purchasing an Oriental Motor product. This operating manual describes product handling procedures and safety precautions.
LE840/LE850. Network Tool Manual Technical Reference
 LE840/LE850 Network Tool Manual Technical Reference Table of Contents INTRODUCTION 1 SUPPORTED PRINTERS... 1 FEATURES... 1 NOTATION... 1 USAGE LIMITATION OF THE PRODUCT... 2 SCREENS USED IN THIS DOCUMENT...
Outlook to Mac Mail. Installation Guide. Overview Migration Software System Requirements Application Loading...
 Overview... 3 01 Migration Software... 3 01 System Requirements... 3 01 Application Loading... 3 02 Software Installation... 3 03 PC Install from Download Link... 3 03 Migration Process on the Old PC...
Installing the Kurzweil 3000 Web License From the WEBSITE
 1 Installing the Kurzweil 3000 Web License From the WEBSITE Go to the following website: https://www.kurzweiledu.com/k3000-previousdownloads.html, and download the Kurzweil 3000 Version 14 Web License
MW-260 Mobile Printer
 Software Guide MW-260 Mobile Printer Before using this printer, be sure to read this User's Guide. We suggest that you keep this manual in a handy place for future reference. Microsoft, Windows, Windows
PhotoStress Analysis System Software Installation Guide For PSCalc, Instacal and Video Drivers
 PhotoStress Analysis System Software Installation Guide For PSCalc, Instacal and Video Drivers 1. Instacal installation: Insert the CD called PhotoStress Plus InstaCal CD shown below: The CD will not automatically
MedCheck App User Guide for Blood Glucose Monitor
 MedCheck App User Guide for Blood Glucose Monitor Sign Up Select User in first screen after app has been installed and opened for first time. Click Register in login page, enter details to register. Click
Top Producer for Palm Handhelds
 Top Producer for Palm Handhelds Quick Setup Top Producer Systems Phone number: 1-800-830-8300 Email: support@topproducer.com www.topproducer.com Fax: 604.270.6365 Top Producer for Palm handhelds Quick
DATA RECORDING SOFTWARE FOR PC
 DATA RECORDING SOFTWARE FOR PC (FE-700 Optional Kit) This application software is used for collecting data of date, time, depth, draft, latitude, longitude, speed and course from the Navigational Echo
9936A LogWare III. User s Guide. Revision
 9936A LogWare III User s Guide Revision 850701 Table of Contents 1 Introduction...1 1.1 Symbols Used... 1 1.2 Conventions... 1 1.3 What is LogWare?... 1 1.4 License Agreement... 2 1.5 Requirements...
UNIVERSAL SOFTWARE. Universal Software. Data Sheet
 Universal Software Data Sheet System Requirements: The minimum requirements for using the Software are: 1). Windows XP/Vista/7 2). A minimum of 512 MB RAM 3). 1 GB of hard disk space 4). Microsoft Office
TROVIS-VIEW 4 Software TROVIS Operating Instructions EB 6661 EN. Electronics from SAMSON
 TROVIS-VIEW 4 Software TROVIS 6661 Operating Instructions Electronics from SAMSON EB 6661 EN Edition January 2015 Definition of signal words DANGER! Hazardous situations which, if not avoided, will result
XN120 PC Pro with Quick Installer Guide Rev 1.2 (September 2005)
") This guide explains the PC programming tool with Quick Installer for the XN120 Telephone System. There is also a separate guide (991425-5 PCPro Getting Started Guide) that explains the operation of PCPro
This guide explains the PC programming tool with Quick Installer for the XN120 Telephone System. There is also a separate guide (991425-5 PCPro Getting Started Guide) that explains the operation of PCPro
Operating Instructions
 Operating Instructions (For User Setup) Digital Colour Imaging Systems Model No. DP-C406 / C306 / C266 Table of Contents Installation Overview General Installation Overview...2 Installation Installing
Physical Activity Analysis Software PAAS Personal Operation Manual Suzuken Company Limited JAPAN
 Physical Activity Analysis Software PAAS Personal Operation Manual Suzuken Company Limited JAPAN 1 Index Request to the Users 1 System Requirement 1 Install The Software 2 Uninstall The Software 7 Quick
LogBook/300 Stand-alone, Intelligent PC-based, Data Acquisition System
 QUICK START LogBook/300 Stand-alone, Intelligent PC-based, Data Acquisition System LogBook/300 461-0940 rev 3.0 *324586C-01* 324586C-01 Measurement Computing 10 Commerce Way Norton, MA 02766 (508) 946-5100
Contents. Installing the Driver...4. Motic Images Plus 2.0 ML Precise Calibration Capturing Images and Video...18
 Contents Installing the Driver...4 Motic Images Plus 2.0 ML...13 Precise Calibration...13 Capturing Images and Video...18 Taking Measurements...20 Customizing Your Settings...21 Adding Sound to Your Files...23
2015 Optima Healthcare Solutions Page 2
 Viewing Documents Logging into Rehab Optima 1. To log onto Rehab Optima, go to www.rehaboptima.com. To place an icon on your desktop for future use, right click in the light blue box and choose create
To complete this database, you will need the following file:
 CHAPTER 2 Access More Skills 13 Create a Multiple Items Form A multiple items form displays records in rows and columns in the same manner as a datasheet. A multiple items form provides more formatting
USB DVR Starter Guide
 USB DVR Starter Guide You must install the software bundled on the Install CD before connecting the USB DVR to the computer. 1 Install the software Connect the USB DVR to 2 the computer. This guide explains
Bose ControlSpace Designer Software. User Guide
 Bose ControlSpace Designer Software User Guide 2005 Bose Corporation. No part of this work may be reproduced, modified, distributed or otherwise used without prior written permission. Contents Introduction
Ansur Index 2XL. Users Manual. Plug-In
 Ansur Index 2XL Plug-In Users Manual April 2010, Rev. 1 2010 Fluke Corporation. All rights reserved. All product names are trademarks of their respective companies. Table of Contents Chapter Title Page
DriveWizard Plus Instruction Manual
 DriveWizard Plus Instruction Manual To properly use the product, read this manual thoroughly. MANUAL NO. TOEP C730600 20C Table of Contents Safety Symbols and Markings...4 Manual Overview...5 Related Manuals...5
2009 Electronics for Imaging, Inc. The information in this publication is covered under Legal Notices for this product.
 GA-1310 Welcome 2009 Electronics for Imaging, Inc. The information in this publication is covered under Legal Notices for this product. 45085373 5 May 2009 WELCOME 3 WELCOME This Welcome document provides
Data editing software EZED3
 HL-17149 Data editing software EZED3 OPERATING MANUAL Thank you for purchasing an Oriental Motor product. This Operating Manual describes product handling procedures and safety precautions. Please read
MyDataZone User s Manual
 MyDataZone User s Manual MyDataZone is a DataTraveler Secure tool that enables you to create and access a user defined password-protected area called a Privacy Zone, on your DataTraveler Secure drive.
USB driver and Software Installation. UPS Monitoring and Management Software
 USB driver and Software Installation UPS Monitoring and Management Software LEN.MAN.SOF.143 Rev.1.00/2008 Installing USB driver and Easy-Mon X for LEONICS UPS 1. Installing and uninstalling the USB driver
DTVaultLock User s Manual
 DTVaultLock User s Manual DTVaultLock is a DataTraveler Vault tool that enables you to create and access a user defined password-protected area called a Privacy Zone, on your DataTraveler Vault drive.
AUA DuoConnect for Notebooks. Installation Guide
 R AUA-1422 DuoConnect for Notebooks Installation Guide In this Booklet What s in the Kit 2 System Requirements 2 Installation Overview 3 Step 1: Inserting the Adapter 3 Step 2: Installing the Device Drivers
INSTALLATION AND USER GUIDE
 INSTALLATION AND USER GUIDE Introduction 1 Introduction About 6140 Agent Portal Mitel Networks 6140 Agent Portal allows an agent to receive call information via a number of different applications that
How to Use imageprograf Firmware Update Tool (Version or later) (Mac OS) Canon Inc.
 (Mac OS) Canon Inc.") How to Use imageprograf Firmware Update Tool (Version 24.00 or later) (Mac OS) Canon Inc. 1. Introduction 1.1 imageprograf Firmware Update Tool Features The imageprograf Firmware Update Tool (hereinafter
How to Use imageprograf Firmware Update Tool (Version 24.00 or later) (Mac OS) Canon Inc. 1. Introduction 1.1 imageprograf Firmware Update Tool Features The imageprograf Firmware Update Tool (hereinafter
Installing USB-to-Serial Adapter Drivers for Use with A-Track
 Installing USB-to-Serial Adapter Drivers for Use with A-Track Version 4.3 A-Track can be connected to an NCE Power Cab or Smart Booster system by using the NCE USB Interface unit, or can be connected to
USB-MIDI Driver installation and settings...1 Windows XP users... 1
 Installation Guide Table of Contents USB-MIDI Driver installation and settings...1 Windows XP users... 1 Installing the KORG USB-MIDI Driver... 1 Allowing driver installation without a digital signature...
A Guide to Installing OLI Software
 A Guide to Installing OLI Software OLI Systems delivers a comprehensive suite of tools designed to help you analyze complex aqueous and multi-solvent electrolyte solution chemistry, thermo-physical properties,
CipherLab Workstation Setup (Windows 7/8/10)
") CipherLab Workstation Setup (Windows 7/8/10) These installation instructions will step you through setting up the CipherLab docking cradle and device, as well as installing the drivers and software used
CipherLab Workstation Setup (Windows 7/8/10) These installation instructions will step you through setting up the CipherLab docking cradle and device, as well as installing the drivers and software used
Acronis Backup & Recovery 11 Beta Advanced Editions
 Acronis Backup & Recovery 11 Beta Advanced Editions Quick Start Guide Table of contents 1 Main components... 3 2 Supported operating systems... 3 3 Where do I install the components?... 3 4 What you need
The following steps will allow you to install and quickly begin using DevCom2000:
 QUICK START DevCom2000 uses Device Descriptions (DDs) to access data stored in the memory of the smart field device. These DDs are developed by the manufacturer for their products and, in turn, distributed
CONSOLIDATED LABORATORY SERVICES
 TABLE OF CONTENTS 2 INTRODUCTION 3 LOGIN 4 DESKTOP 5 TEST RESULTS 6 Basic Features 12 Advanced Features 16 TEST ORDERS Coming Soon 17 ACTIVITY REPORTS 17 Trace Accession 18 Activity Report 19 ADMINISTRATOR
EX700i Print Server/Integrated Fiery Color Server. Welcome
 EX700i Print Server/Integrated Fiery Color Server Welcome 2011 Electronics For Imaging, Inc. The information in this publication is covered under Legal Notices for this product. 45099409 22 June 2011 WELCOME
Quick Start. Chapter. In This Chapter:
 Chapter Quick Start In This Chapter: Getting to Know Windows.... - Installation of irectsoft 6.... - Getting Started.... -8 Welcome to irectsoft00.... - Begin Editing a Program.... -4 Establish the Communication
Chapter 3 Operating instructions
 Chapter 3 Operating instructions Summary This chapter describes the how to control and navigate through the TVR 30 s menus and options. Content Control interfaces 10 Controlling the TVR 30 10 Front panel
LE840/LE850. Printer Setting Tool Manual Technical Reference
 LE840/LE850 Printer Setting Tool Manual Technical Reference Table of Contents 1. INTRODUCTION 1 SUPPORTED PRINTERS... 1 FEATURES... 1 OUTLINE OF THE FUNCTIONS... 2 NOTATION... 2 SCREENS USED IN THIS DOCUMENT...