DWG-Based Revit Architecture to Autodesk 3ds Max 9 Workflow
|
|
|
- Baldric Gregory
- 5 years ago
- Views:
Transcription


1 Autodesk White Paper DWG-Based Revit Architecture to Autodesk 3ds Max 9 Workflow
2 Contents Overview... 4 Workflow... 4 Foundation... 5 Layer Control from Revit Architecture... 6 Standards... 7 Creating an Export Layer Standard... 7 Exporting Layers... 8 Setting Options... 8 Layer and Property Overrides Naming and Saving the DWG File Improving Performance of DWG Files and Reducing File Size Section Detail Detail Level Visibility Settings Importing DWG Files into 3ds Max File Link Versus Import Import Options Geometry Options Include Group Advanced File Link Settings for DWG Files Materials Customizing Presets Best Practices View Summary Info Use Select by Name Dialog Box Use Select Similar Command Explore Your Scene Using the Layer Manager Explore Materials Using the Material Editor Do Most of the Design Work in Revit Architecture Refine Objects in 3ds Max Review Materials in Revit Architecture Verify That a Material Is a Bitmap Instead of a Procedural Image Common Challenges
3 Geometry Comes in Without Materials Geometry Looks Wrong in the Viewport Geometry Renders Incorrectly Materials Are Missing Textures Geometry Displays Textures Incorrectly Geometry Is Split into Too Many Objects Material Definitions and Assignments Are Lost on Reload Object Translation into 3ds Max New in Autodesk 3ds Max
4 Overview This white paper is for architects, designers, engineers, and visualization specialists who need to move data from Revit Architecture software into Autodesk 3ds Max software for visualization. Revit Architecture has quickly become an industry leader for creating building information models, and 3ds Max software has been a leading application for architectural visualization for more than a decade. As architectural firms move from traditional 2D-based computer-aided design (CAD) drafting workflows to creating building information models in Revit Architecture, it is important to be able to effectively move data from Revit Architecture to 3ds Max for advanced visualization. This document describes the workflow for transferring files from Revit Architecture 2008 to Autodesk 3ds Max 9 Extension 1. 1 It focuses on the methodology for successfully moving 3D scene meshes from Revit Architecture into 3ds Max complete with material assignments. It outlines the layer control options and techniques that affect how objects are translated, discusses common challenges, and offers tips and tricks to address those challenges. It defines strategies for when to link a file and when to break the link through bind or import. For more information about Revit Architecture, visit For more information about 3ds Max, visit Workflow The architecture community has adopted Revit Architecture with breathtaking speed. During this initial period of acceptance, users have developed a wide range of workflows. Some users model in 3D and construct every piece of furniture ready for export to 3ds Max. Other users adopt a modified approach, using both 3D elements and 2D symbols. Some users include AutoCAD or AutoCAD Architecture 2008 software in their workflow. To facilitate data transfer and reduce downstream errors, it is recommended that you do as much as possible in Revit Architecture to prepare the data for transfer before moving the file to 3ds Max for visualization. 1 On August 6, 2007, Autodesk 3ds Max 2008 was announced. Autodesk anticipates that 3ds Max 2008 will be available in English in October This white paper will be revised at that time to reflect product enhancements. Autodesk 3ds Max 2008 contains several new features that are relevant to architects, designers, and visualization specialists visualizing Revit Architecture data in 3ds Max. For more information, visit 4
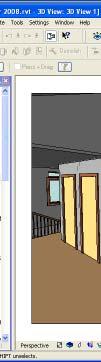
5 Foundation Revit Architecture is a design tool that brings intelligence to the 2D and 3D objects in a scene. Because it is purpose-built for building information modeling (BIM), any change you make anytime, anywhere is automatically coordinated throughout your project. Designs and documentation stay coordinated, consistent, and complete. This alone makes it easy for users to work as much as possible within a building information model.. Once a building has been modeled in Revit Architecture, it is important to establish a 3D view. The 3D view is key in exporting to a 3D DWG file. In other words, if you export a plan view of your building, you get a 2D DWG file, but if you look at the same model from a 3D view, you get a 3D DWG file. This is the opposite of the behavior in 3ds Max, where a 3D DWG file is exported regardless of the view. Also, a camera view from Revit Architecture constructs a camera object in the DWG file. The other important difference is that there are no layers in Revit Architecture, so you need to determine how layers are constructed from Revit Architecture objects. The Export options allow layers to be created based on line width and color, or based on a simple table of names. By changing the name of the layer, you can directly manage what objects appear on which layer. This process is time consuming but provides a certain amount of control. The choice between exporting as a polymesh or as an ACIS solid is listed in the Revit Architecture Export Options panel. The geometry created by solid export is generally better constructed than the geometry from the polymesh export. The vertices are more likely welded, and the face normals unflipped. If you export as polymesh, Revit Architecture runs up against a 32K limit on faces within the DWG format, so it tends to split the file into many small objects, sometimes creating single-face objects. Some users perform the intermediary step of taking the 3D DWG file into AutoCAD to do further layer manipulation or object creation. If you are comfortable with modeling in AutoCAD and with the layer organization tools, this step does allow for custom control of the layer organization through the selective exploding of blocks. It is more practical, however, to move files straight from Revit Architecture into 3ds Max. The primary data transfer tools are the export options from Revit Architecture and import options in 3ds Max. Transferring files raises several challenges, including 3ds Max object organization, geometry issues such as coplanar faces and flipped normals on mirrored surfaces, material and map translation, and the possibility of losing material assignments during reload. 5


6 Layer Control from Revit Architecture Here are the steps to control the layer standards and settings and then export to DWG format. You can follow along step by step in Revit Architecture, with the model included with this white paper. 1. From the File menu, choose Import/Export Settings>Export Layers DWG/DXF to launch the Export Layers dialog box. Here for every object, both model and annotation are assigned an AutoCAD layer, and color. These objects (and their subcategories) are mapped as shown. In the following example, doors are assigned to the AutoCAD layer A-DOOR and it is on color 1. 6


7 Standards The assignments are made automatically based on the American Institute of Architects (AIA) standard. You can change the standard by clicking the Standard button. To change the standard, select a different standard from the Export Layers Standard dialog box. Creating an Export Layer Standard 2. You can edit the list to your liking and then save it as your own standard. Save it using a descriptive name such as Revit 2 Max standard. Revit 2 Max export layer file. 7

 you want to export to.")
8 . This creates a text (.txt) file that can be reused to map the same settings later. If you have several users creating design visualizations, it is recommended that you save this text file to a central location, such as a common server, so everyone can have access to the export standards. Exporting Layers 3. To export the file after choosing the layer standard and settings, from the File menu, choose Export>CAD Formats. 4. In the Save as Type field, click the drop-down arrow, and choose the type of DWG file (2007, 2004, or 2000) you want to export to. Although older file formats such as 2004 DWG are available, it is good practice to try the latest file format first. AutoCAD 2008 is recommended as a starting point for the transfer of data to 3ds Max. Setting Options 5. Next, click the Options button to launch the Export Options dialog box. 8
 field at the bottom of the dialog box provides the option to export as polymesh or as an ACIS solid. 6. Click the drop-down arrow and select either polymesh or solid.")
9 Here you can choose between polymesh and ACIS solid, as well as set the layers and properties overrides. The Solids (3D Views Only) field at the bottom of the dialog box provides the option to export as polymesh or as an ACIS solid. 6. Click the drop-down arrow and select either polymesh or solid. If you export as a polymesh, the 3D shape is made up of multiple 2D polygons that are joined together to form the 3D shape. This is often called face-based or meshed geometry. If you choose to export as an ACIS solid, in this format each 3D shape is a 3D shape. It does not consist of polymesh objects; however, certain objects from Revit Architecture still export as a polymesh even though the ACIS solid option is selected. An example of an object that exports as a polymesh is the site topography. 3ds Max 2008 has new code relating to ACIS solids, so this is the best choice. A common problem is using created in-place families onto a thin face. This can cause coplanar faces in the imported geometry, which can result in odd rendering artifacts and viewport object display problems. These objects can appear as if they are right on top of each other. For more information, see Common Challenges later in this document. Tip: If you have problems with imported geometry, try another DWG file type, polymesh, or solid combination. Sometimes the problems that appear using one import algorithm disappear when you use another. So if you are exporting as DWG 2007 and solids, try exporting as DWG 2004 and polymesh to get a different mesh generation that may correct translation problems. 9
10 Layer and Property Overrides The other area to consider is the layer and properties selector. When you export a view from a Revit Architecture model to a DWG file, every model category is assigned a layer within the AutoCAD DWG file. (These are mapped as listed in the Export Layer settings.) The object styles assigned in the Revit Architecture project control how these settings are sent to a DWG file. Objects that have been changed via the Visibility/Graphics dialog box are view specific and are considered overridden in the export. The Layers and Properties field yields the following three options: Category BYLAYER, Overrides BYENTITY Any changes to an element in Revit Architecture are placed onto the same layer that has been assigned to the object in the export settings, but the overrides are still applied to that object (linetype, lineweight, color). Example: You have two doors; one of them has been overridden to be blue/dashed lines. Both doors are exported to the same layer, but the overridden door has its layer color and linetype mapped to blue and dashed. All Properties BYLAYER, No Overrides Any changes made to overridden objects are ignored on export. All color, line type, and line weight changes are forced to follow the object styles of the project. Example: You have two doors, one of them has been overridden to be blue/dashed lines. Both doors are exported to the same layer, with the settings that have been established in the export settings. The blue and dashed lines do not translate. 10

11 All Properties BYLAYER, New Layers for Overrides Any objects that have not changed go to the layer defined in the export settings. Every object that has been overridden is assigned a unique layer. This process dramatically increases the number of layers that are created in the DWG file and is not recommended for export to 3ds Max. Example: You have two doors; one of them has been overridden to be blue/dashed lines. Each door is exported to its own unique layer with its own unique color and linetype. Choose the Layers and Properties field, and select an override type. Unless circumstances dictate otherwise, No Overrides is probably the best choice. Naming and Saving the DWG File 7. You can choose to have a file name assigned automatically, or you can select Manual to create a name. Adding Revit2Max or something similar to the file name may help with organization of DWG files. 8. Click Save to export the layers to DWG format. Improving Performance of DWG Files and Reducing File Size A 3D view of the Revit Architecture model can have a lot of geometry, especially in large projects. A good way to improve performance is to limit the amount of information that is exported to DWG format. When exporting, consider the following tasks to limit the amount of the model that is exported. 11

12 Section Detail Section boxes can be turned on in a 3D view s properties. By turning on a section box, you are cropping the model and reducing the amount of information that is sent. Objects that are outside the section box are ignored when the file is exported. This helps with especially large models when the desired scene is only a small part of the larger model. For example, if you are rendering the entry to a 20-story office building, you only need to send a view of the entry and not include the other 18 floors of the model. Note: Crop regions do not affect the boundaries of objects exported from a 3D view as they do in 2D views. See the Revit Architecture Help section on best practices with section boxes. Detail Level The detail level of the view can also control the amount of data that is sent. Some objects have a lot more information in a fine detail level as opposed to a coarse detail level. Some objects may behave differently at other detail settings. A cabinet in the three detail levels: coarse, medium, and fine. Visibility Settings Objects that are turned off in visibility graphics do not export to the DWG file. If your model contains a lot of objects that are not important to the scene, it is recommended that you turn their visibility off. For example, if you are doing an interior rendering, you could turn off the roof or structural foundation objects things that are typically seen on the exterior. Of course, you can hide objects once they have been imported into 3ds Max as well. 12
13 Importing DWG Files into 3ds Max Two options are available for bringing in the DWG file from Revit Architecture. You can use import or you can use file link. Substantial improvements have been made to file link in 3ds Max 9 and 3ds Max 2008 to improve the reliability and accuracy of data import from Revit Architecture. File Link Versus Imort The difference between file link and import is simple: Import brings the DWG file into 3ds Max as a scene file. This scene file has no connection with the DWG files once the import has been made. Changes made to the DWG file after import do not affect the 3ds Max scene. File link is the opposite. File link brings the DWG file into the scene but maintains a connection to the linked DWG file. If the DWG file is updated, then the scene can be updated by reloading the DWG file. The same code is used to translate the DWG file into 3ds Max objects for both import and file link, so the quality of the transfer is the same. If you expect the project to experience significant revisions, it is recommended that you use file link. If you are visualizing an approved project, it is probably safe to import instead. If you find that you have linked the file but want to break the link, you can use the Bind option to sever the connection. Alternatively, if you need to update an imported, you can selectively delete a particular layer or object, and then import just that layer or object again. This method lets you manually duplicate the file link functionality on an imported file. Note that file link does not give you the same freedom as import. If you import a DWG file, the geometry comes in as editable mesh objects, which can easily be attached together, grouped, or otherwise manipulated. Using file-linked geometry limits your ability to reorganize using the Group or Attach command. To link a file in 3ds Max, from the File menu, choose File Link Manager. To perform an import in 3ds Max, from the File menu, choose Import. Import Options Whether you use file link or import, you can select from key options that affect the object translation from Revit Architecture to 3ds Max. These options are determined by the presets in the File Link Manager. To access these options, do the following: 13


14 1. From the File menu, choose File Link Manager. 2. Select a preset and click Modify. Or you can click Copy, and then click New to create a new preset. 14
15 Geometry Options The Basic tab provides several options: Weld For 3ds Max to correctly extrude polylines, the segments need to be joined. Weld takes all vertices within a certain distance from each other and welds them into a single vertex. If you are importing ACIS solids from Revit Architecture, you can turn this off because the geometry should already be welded. If you are importing polymeshes, however, you may need to use the Weld option. Weld Threshold This setting determines how close two or more vertices need to be in order to be welded. If this distance is set to zero, only coincident vertices (multiple vertices at the same location) are welded. If this distance is too large, pieces of your geometry appear to collapse. The default value is generally the appropriate weld threshold, but examine your geometry once it is in your 3ds Max scene. If you see differences between the geometry in Revit Architecture and 3ds Max, the weld threshold might be too high. On the other hand, if your see gaps in your renderings, or if geometry has apparent normal problems, you can clean it up by increasing the weld threshold. Experimentation is required for best results. These settings apply only if you are using the Weld check box. If you are importing Revit Architecture solids only, ignore this value. Auto-Smooth 3ds Max objects are generally made of faces or polygons. All these faces and polygons have smoothing information associated with them, which the renderer uses to try to smooth over edges. Two faces with the same smoothing group appear blended together in the viewport or rendering. Two faces that do not share a smoothing group display a rendered edge. The Auto-Smooth option introduces smoothing groups based on the angle between faces. If this option is turned off, the model appears faceted and curved walls look irregular. You can always add smoothing later by applying an Auto-Smooth modifier to objects as needed. Smooth-Angle This setting determines the threshold for the smoothing assignments. All adjacent faces with an angle less than or equal to this value are given the same smoothing group. The default angle is 15 degrees. The same options are available during import on the Geometry tab under Geometry Options. 15

16 Import Options dialog box. 16


17 Generally, you do not need to use the other options on this tab when importing a Revit Architecture file. You should know, however, about the following: Unify Normals Every face has a direction, an inside, and an outside. If you are using Microsoft DirectX drivers, face normals that point away from the camera (inside faces) are displayed as black in the viewport. In earlier versions of 3ds Max, these faces disappeared from view because of the Backface Cull setting. When rendering in 3ds Max, face normals facing away from the camera do not render. Sometimes, if DWG vertices are not welded, face normals get flipped. The Unify Normals function attempts to readjust the normals to follow a logical direction. For Revit Architecture DWG files, do not select this check box. You can always flip normals individually with an Edit Mesh or Edit Poly modifier applied to individual objects. Curve Steps Every curved spline in 3ds Max has several line segments inserted between vertices. This is called interpolation on editable spline objects and is generally set to six on lines you create in 3ds Max. Curve Steps similarly inserts straight line segments into curved lines created from DWG lines. This defines the number of steps and so influences how smooth the curves appear. Do not select this option unless you are seeing curved walls that do not appear curved enough. Surface Deviation for 3D Solids Historically, this setting has caused problems when importing mechanical files from the Autodesk Inventor software application. If this setting is too large, objects that were nicely curved in the CAD file are no longer nicely curved in 3ds Max. Reducing to a very small value will curve the objects but increase the mesh density. If you are exporting to ACIS solids from Revit Architecture, this setting has an effect on the quality of the curved surfaces. Decrease the value to a very small amount (0.01 or 0.001) and import. Repeat the process experimentally to get the balance between acceptable curvature and mesh density. Surface deviation for 3D solids:.005 on left 1.0 on right. 17
18 Include Group The Include group has a few important choices for Revit Architecture users: External References You definitely want to include external references in the DWG file, if you need the xref geometry for the visualization. Most CAD drawings are built up by inserting drawings within drawings, called xrefs. If this setting is not selected, you will not be able to import the complete model. This setting is selected by default. Views and Cameras If this option is selected, the Revit Architecture cameras will be imported. If it is not selected, then no Revit Architecture cameras will appear. Select this option if it is important to render a view that has already been determined in Revit Architecture. It is better to create cameras directly in 3ds Max. Note that the cameras that imported from Revit Architecture are more prone to clipping and redraw issues. It is more practical to use cameras generated from 3ds Max. Lights This setting has no effect on importing of Revit Architecture lights. Even if it is turned on, and if you have made Revit Architecture light objects, the geometry will import but not the lights. You have to add 3ds Max lights to the light fixtures to get the illumination you had in Revit Architecture. If you turn this setting off, the light fixtures still import as geometry. Make your choices, and then go to the Advanced tab. 18

19 Advanced File Link Settings for DWG Files The options discussed in the previous sections are the basic controls that address object creation at the face and vertex level. In addition, key controls that address object organization are found on the Advanced tab when using file link presets. When you import, these controls are found on the Geometry tab as shown earlier. The settings here are the primary tools to control how 3ds Max creates objects from the DWG file. You can tell 3ds Max to make objects based on entity, color, or layer. Layer Everything on a single layer becomes a single object. Layer, Blocks as Node Hierarchy Everything on a single layer becomes a single object, except that blocks that have been inserted into the layer become separate objects linked as children to the layer parent object. Usually this creates a layer parent object that is actually just a dummy node without any geometry. 19
20 Note that this is the best choice when working with 2004 or 2000 DWG files, since this is older code of the same vintage. Layer, Blocks as Node Hierarchy, Split by Material Same as above, with the addition that when there are different materials applied, the objects are further split into more linked objects by material. Note that this is the default and the code that has received the most recent work. This is the best choice for 2007 DWG and when exporting Revit Architecture data using ACIS solids. With this option, however, it is important to note that it may create more individual objects in the scene. The benefit is that material assignment is relatively easy because you do not have to think about multi-object or sub-object materials. The downside is that it makes for long lists in the Select Objects dialog box. Entity Every individual CAD entity becomes an object. This option increases the number of objects in the scene, making the scene more cumbersome to work with. Entity, Blocks as Node Hierarchy Every individual CAD entity becomes an object, and every block is created as a child linked to the parent. This option has the same problems as Entity in that it makes the scene file larger than necessary. Color Everything that has a certain AutoCAD color becomes a single object. It is possible to use this option to control object creation in 3ds Max. If you want to try this, simply define the color in the Layer Standards dialog box you can use up to 256 colors. It s time consuming to do this, but it could pay off if you want certain results. It is important to note that blocks are still treated as separate objects. If you have multiple blocks in the scene, this option will not reduce the number of objects coming into 3ds Max from Revit Architecture. In addition, the blocks will not be linked in a hierarchy, which makes it awkward to work with the scene. 20

21 Materials Many users want to assign materials to their scenes in 3ds Max. If you have material assignments on the Revit Architecture objects, you need to understand the controls regarding their import. When using file link, you ll find two check boxes located on the Advanced tab of the Presets dialog box: Use Scene Material Definitions This setting tells 3ds Max the materials that are in the DWG file to be replaced with materials of the same name in 3ds Max. It assumes that you have materials with exactly the same names as those coming from Revit Architecture. These names are case-sensitive; they must be exactly the same as the incoming nomenclature. The new 3ds Max objects created from the import replace the material definitions that come from the Revit Architecture applied materials with those already in the 3ds Max scene. If there are no materials with the same name, or if this option is not selected, then materials created in Revit Architecture are automatically created as materials in 3ds Max. Note: Procedural textures on materials are lost when converted to 3ds Max objects. Bitmap textures, however, are retained. As is the case with 3ds Max files, the DWG file carries pointers to these bitmaps but does not contain the bitmaps themselves. If you are sharing the DWG file, it is recommended that you send the maps as well. 21
22 Use Scene Material Assignments on Reload You must select this check box the first time you link the Revit Architecture file into your 3ds Max scene. If selected, when you reload the file, you will not lose the material assignments you have created in 3ds Max. The exception is if the geometry has changed. For those objects you lose the material assignments. For all other geometry, the material assignments are preserved. Here is an example: You link a model of a house. A stone wall that runs along the driveway needs some material help you create a stone pattern with a bump and get it just how you want it, with some nice bump mapping. You also put some mahogany wood on the front door. You save your work and go home. The next day when you open the file, you are alerted that the DWG file has been changed a designer has increased the width of the front door. When you reload the file, the mahogany is gone from the door, but the stone on the wall is intact. If the geometry is being replaced, the material assignment will be lost. For the rest of the scene objects, however, the material assignments are maintained. Note: These options are not selected by default. Probably the most common mistake that novice users make is to lose their material assignments. The workaround is to understand how the settings work and select them when necessary. Customizing Presets This section reviews how to customize presets: Make your choices for Derive Primitive By. Select Use Scene Material Definitions. Select Use Scene Material Assignments on Reload. Click Save. This saves the modified preset. Note that it does not yet actually select the preset for use. To complete the file link operation do the following: Go to the Attach tab. Click the Files button. Browse to the DWG file you want to import and doubleclick its name in the list. On the Attach tab, see if the preset you saved appears in the Preset field. If it does not appear there, click the drop-down arrow and select it. If you need to rescale the file, click the Rescale button, and then select the incoming units to match your DWG file. It s generally better to avoid any kind of rescaling if you can help it. Only resort to this if you are linking several different files together that have been drawn at different scales. Click Select Layers to Include. In the dialog box that appears you see a list of the layer names note that all the names now have 3D in front of the layer name as it appeared in the Layer Settings dialog box in Revit Architecture. It s a good idea to look at these carefully and skip any ones you will not need. If you have been careful with your 22

23 layer management in Revit Architecture, this should not be difficult. Click in the list to skip layers you do not need, and then click OK. Click Attach This File. This dialog box explains where you can download object enablers. Generally these are trivial objects that do not affect your visualization of the Revit Architecture file. However, if something is missing, the object enabler could be required. 3. Click Yes to link the file. Now, wait for the file to be created. You should see a message: Linking AutoCAD Drawing in the prompt area with a progress meter. If this meter hangs for few minutes, be patient. If you wait half an hour and it is still hung, then you probably have a problem with the DWG file or you have Unify Normals and Weld on when you do not need them. Press Esc to exit the process. Once the file comes into 3ds Max, you should see it in the viewports. If you do not, press the H key and see if there are any objects listed in the scene. If you do not see any objects listed, go to the Display panel and make sure that the Geometry category is selected. If you still do not see any objects, go back to Revit Architecture and try again using a different type of DWG file or solids instead of polymesh. 23
24 Best Practices Get to know the file you have just imported. There are several ways to understand what is what in your file. View Summary Info The Summary Info dialog box is a good way to learn about the objects in the imported file: 1. From the File menu, choose Summary Info. 2. Under Scene Totals you can see how many objects are in your scene, as well as how many lights, cameras, shapes, and more. 3. Under Mesh Totals you can see how many vertices and faces are in the scene. It s good to have some idea of how many polygons you are pushing around in the viewport. It is best if you have fewer than 50,000 polygons. If you have a million or more, maybe you do not need all of them for your visualization. If, however, you need to visualize a large scene, the 64-bit version of 3ds Max makes it easier. 4. In the lower half of the dialog box, scroll through the Summary Info table. Here you see a detailed list of every object in the scene, complete with statistics. You can quickly locate any high-polygon objects that have increased the size of your file. You can also see the names of all the materials and bitmaps associated with each object. Use Select by Name Dialog Box It s also recommended that you look at the file via the Select Objects dialog box. Here you see the list of objects that have come into your scene. It is okay to have many objects; you can select many objects at the same time and easily apply or adjust materials for all of them. Even if you have 85 roof objects, you can select them all by typing Roof in the Name field and then assign a material to all of them with a single click. 24

25 Use Select Similar Command Note: Select Similar is available only to 3ds Max 9 subscription members who have the Productivity Booster installed. Right-click any object in the 3ds Max viewport, and then choose Select Similar. All objects in the scene that are in the same Revit Architecture family are selected. This feature makes it easy to select all roof elements or all window panes, for example. Designed to work with both native objects and imported geometry, Select Similar uses metadata to determine the similarities between objects. Tip: To explore your scene, right-click any object, choose Select Similar, and then isolate the selection (Alt+Q) for a quick visual check of similar objects. After you choose Select Similar, you can add modifiers to all objects at once. You can also add a modifier to a single object, and then use Paste Instanced to apply the same modifier to each object individually. A MapScaler modifier is handy for mapping different roof slopes. 25

26 If you click planar geometry (single-sided polygons) that is facing away from the camera, you will not be able to select it. Adding a Shell modifier lets you select it by clicking it in the viewport. Adding a Push modifier makes it scale a little bigger in all directions. Add an Xform modifier to scale the geometry in any one axis. Explore Your Scene Using the Layer Manager A good way to explore your scene is to do the following: 1. Display the Layer toolbar if it s not already available. 2. Look at the different layer names; it is likely that you have fewer layers than objects. 3. Select each layer, and then select the objects in the layer using the Select Objects in Current Layer button on the Layer toolbar. 4. Press Alt+Q to enter Isolate Selection mode. 5. Click Zoom Extents Selected to see the selected layer objects in all four viewports. This is a great way to see whether any objects have strayed onto incorrect layers. You will be surprised how often you find a tree on the windows layer or a piece of furniture on the wall layer. 26
27 6. If you find misplaced objects, move them to the correct layer using the tools on the Layer toolbar. Once you understand all the geometry in the scene, check out the materials as well. Explore Materials Using the Material Editor You can use the Material Editor review all the materials used in the scene. 1. Go to the Material Editor. 2. Choose Get Material. 3. In the material map browser, choose Browse from Scene to see a list of all materials in the scene. 4. If you clear Show Materials and just select Show Maps, you can see a list of all the bitmaps used in the scene. If you have a long list of materials and a short list of bitmaps, you probably have a file that has a lot of procedural textures. Plan on adding a lot of bitmaps to the textures. Do not forget the bump maps. Do Most of the Design Work in Revit Architecture It is a good idea to keep most of the modeling and make most of your changes in Revit Architecture. If you make changes and later resave the DWG file to import into 3ds Max, the project changes update in 3ds Max. The material assignments made to objects before receiving the updated file are retained. However, any changes made to the project in 3ds Max are not loaded back into Revit Architecture. If you construct any new geometry in 3ds Max, you could link it back into Revit Architecture, but it will not have the intelligence found in native Revit Architecture objects. 27
28 Refine Objects in 3ds Max The following objects require some adjustment once you have imported them into 3ds Max: Decals Decals do not import into 3ds Max. The boundary of the decal does come across, but the bitmap images do not render. They need to be placed and adjusted in 3ds Max. RPC Objects Same as decals, the RPC objects (people) come into 3ds Max, but they do not render. Once again you must place and modify them in 3ds Max. Lighting Objects When you work with lighting fixtures in Revit Architecture, they have some basic lighting effects attached to them. The shape geometry of the lights comes across; however, the lighting effects do not. When you use this workflow, you need to add the required lighting effects in 3ds Max. Review Materials in Revit Architecture There are two ways to create and assign materials in Revit Architecture: using an assigned bitmap or adding procedural mapping to the texture. If the texture uses bitmaps, then 3ds Max can render the materials on the assigned surfaces of the objects. If the texture is procedural, 3ds Max changes the material down to its most basic color. It assigns the shading color assigned by Revit Architecture, and ignores any procedural bumps or procedural maps applied to the texture in Revit Architecture. To help with the export of materials to 3ds Max, use materials with bitmap textures whenever you can. 28


29 Verify That a Material Is a Bitmap Instead of a Procedural Image 1. In Revit Architecture, access the Materials dialog box. 2. Click the AccuRender Texture button. You are now in the Material Editor. 3. To check if the image is procedural or a bitmap, first select the desired material. 29


30 4. Right-click the material, and choose Edit. If the procedures area on the left shows anything other than Base, this material uses procedures. Unacceptable Unacceptable Acceptable 30


31 5. On the Maps tab, check to see whether there are any procedural bumps. These do not transfer either. If there are no procedural maps or bumps, you can edit or assign another bitmap by going to the Maps tabs and either editing or assigning a file to this material. 31


32 6. On the Maps tab, browse to the correct image on your computer. 7. Click OK. 8. When you exit the Material Editor area, it asks if you want to save changes. Click Save As, and save your changes to the user library. (The default libraries are read only.) 32

33 Now you have a bitmap material with no procedural maps or bumps. Common Challenges This section reviews some of the most common challenges in moving data from Revit Architecture to 3ds Max, along with suggested workarounds. Geometry Comes in Without Materials It is possible that you lost the materials through the options of Derive Primitives By. Material assignments are lost when you choose Layer, Color or Entity (as opposed to any of the Blocks as Node Hierarchy options). The material IDs are still intact. Either reassign the materials in 3ds Max, or link the file again using a different Derive Primitives By choice. Geometry Looks Wrong in the Viewport Sometimes imported Revit Architecture files appear as if they have coplanar faces. Try rendering to see whether the problem is only in the viewport. If so, it is probably because Backface Culling is not selected. Select all the objects and choose Object Properties and then select Backface Culling. It that does not correct the problem, if could be a viewport display driver z-sorting issue changing to OpenGL or Software can confirm whether that s the problem. Sometimes Revit Architecture geometry comes in looking like it s been crushed. If it looks like that, check the Weld Threshold and Surface Deviation settings. These should both be very small numbers, such as Occasionally these fields change to display larger numbers (such as 6.3), which crumples Revit Architecture objects into a handful of polygons and makes RPC entourage tires look less than round, for example. Geometry Renders Incorrectly Sometimes the Revit Architecture files display what seem to be faces that are missing textures or that have smoothing problems. You can try to select the object, isolate it, and render it in 3ds Max. When you can clearly see the problem, try adding an Edit Poly 33


34 modifier to the object. That may clear the problem immediately, as it reconfigures the geometry. Sometimes, however, the Edit Poly modifier further corrupts the mesh. If so, delete the Edit Poly modifier and try an Edit Mesh modifier. If the Edit Mesh modifier does not distort the mesh, render to see if the problem still exists. If it does, try using the Cut tool to cut across any long, skinny edges, and then rerender. You can also use other vertex editing and mesh editing methods, such as moving vertices or chamfering edges, to reduce these problems. Usually you can use one of these methods to remove rendering issues with the geometry. Where there is a problem, try selecting the polygon and deleting it, just to see whether coplanar faces are causing the difficulty. Here s what it looks like in the viewport. Something does not look right in this rendering. Rendering problem and edged face mode in the viewport. 34


35 Add an Edit Poly modifier. The mesh is retesselated and the rendering is fixed. Let s look at another example. The right front of the house also shows trouble:. Here is the viewport display. The image renders like this. 35


36 Edit Poly modifier does not help. It collapses the mesh even further. Add an Edit mesh and then make some cuts. Most of the problems have been resolved. 36
37 Materials Are Missing Textures If you are using Revit Architecture materials that include procedural textures, these are lost on import. Go back to Revit Architecture and replace the procedurals with bitmaps. Or you can do this in 3ds Max. If you do it in 3ds Max, you need to work out correct methods to make sure the texture tiling, angle, offset, and so forth are correct for the design. Real-world scale can be useful here if you know the real-world proportions that a bitmap texture represents, you can click Real World Scale and enter those values. See earlier in this document for tips on how to use Revit Architecture materials with bitmaps. Geometry Displays Textures Incorrectly The 3ds Max Map Scaler modifier almost always works to fix mapping issues, especially for roofs and other angled surfaces. Tip: If you have to manually adjust the scale value on the map scalar, you can use a trick to get the right size. Suppose you need to make ceiling tiles. Build a piece of geometry to match the proportions of the ceiling tile, and then change the scale value on the map scalar until the proportions of the texture visually match the scale of the geometry. Then hide the measuring object. Geometry Is Split into Too Many Objects Revit Architecture polymesh geometry tends to get split into lots of small objects if you choose Split by Material, which is the new default setting for import or file link. Here are some suggested workarounds. Either you can manage the large number of objects, accepting that you have them all, or you can control the number of objects. You can select large numbers of objects by selecting by layer using the Layer toolbar or Layer Manager. Creating named selection sets works as well. Tip: Use Multiple DWG linking to control the number of objects. You can have good control over the number of objects by following this simple method. The key is to use the file link feature s ability to link multiple DWG files into the same scene. Rather than linking everything in a single DWG file, link multiple files using the One Object setting in the Derive Primitive By drop-down menu. So if you want all the roof objects to be a single object, link just the roof layer, and choose One Object. You can then link all the window glass as a single object. Although you lose all the material assignments by doing this, it s easy enough to have another file with all the materials, and then bring in the materials from the other file. A different approach is to link using the Split by Material option, and then break the link by choosing Bind. If the object is bound to the scene, you can then use the Group or Attach command to reduce the scene object complexity. If you need to update these 37
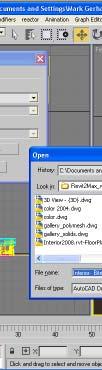
38 objects, you have to delete them and use file link or merge to bring in their replacements. File link has a selective reload option that can also address this problem. Again, it really is not a problem to have thousands of objects as long as you have good tools for selecting them. And it is probably better to do that so that you can keep the materials and mapping that come from Revit Architecture intact. Material Definitions and Assignments Are Lost on Reload You must choose Use Scene Material Assignments on Reload on the Advanced tab in the Presets Options dialog box before you link a file into the program for the first time. As long as you have done this, when you reload the DWG file, the material assignments you change in 3ds Max are unaffected by the geometry update. The exception is the changed geometry itself, which loses its material assignments. In that case, you must reassign materials in 3ds Max. Similarly, you should select Use Scene Material Definitions if you are importing materials from Revit Architecture and then modifying them in 3ds Max. If you are substituting textures for procedurals, or creating mental ray rendered materials from Revit Architecture materials, you need to select this option before you reload your file. Otherwise, all your material edits are replaced with the original Revit Architecture materials. If this happens, you can load the edited materials from the previously saved 3ds Max file, using Browse From Material Library and then changing the Files of Type from.mat to.max. 38
39 Object Translation into 3ds Max Generally, the following behaviors occur when exporting polymeshes from Revit Architecture into 3ds Max 9. When exported as ACIS solids, the geometry created is less prone to exhibiting the coplanar faces, missing faces, and other rendering issues (flipped normals on mirrored objects). Revit Architecture Objects Walls Floors Roofs Doors Windows Stairs Handrails Casework Columns Curtain Walls Panels Mullions 3ds Max Objects Polymesh wall becomes three objects and includes set of two very close faces. Become two objects and includes set of two very close faces. Become two objects and includes set of two very close faces. Become three objects and includes nonrendering spline. Frame and mullion are separated. Become two objects: stringer, risers. Become multiple objects with same name. Becomes three objects and includes nonrendering spline object. Become two objects, one invisible dummy. Become multiple objects. Panels are broken into numerous glass and glazing objects. Broken into multiple objects, but a single panel can hold multiple instanced objects. Broken into multiple objects, but a single mullion Render Issues Renders okay. Delete duplicate object if needed. Apply Edit Poly or Edit Mesh modifier to correct missing faces. Renders okay. Delete duplicate object if needed. Apply Edit Poly or Edit Mesh modifier to correct missing faces. Renders okay. Delete duplicate object if needed. Add Map Scaler modifier for UVW Mapping control. None None None None Add renderable Spline modifier if preferred. None None None None 39
40 Revit Architecture Objects Electrical Fixtures RPCs People 3ds Max Objects object can hold multiple instanced mullions. Become two objects, one nonrendering dummy. None Render Issues Become two objects, one nonrendering dummy. People do not render. Replace with RPC people in 3ds Max. Cars/Site Van becomes five objects. None Trees Import as spline objects. Adding renderable spline modifier allows splines to render, but no texture planes come across. Better to substitute RPC trees in 3ds Max. Furniture Light Fixtures Becomes three objects, one nonrendering. Become multiple objects linked to nonrendering parent. None The light properties do not come across. The geometry does. Add 3ds Max lights. None Plumbing Become multiple objects. Fixtures Cameras Become 3ds Max cameras. If you have problems with clipping and navigation, replace with a new 3ds Max camera. Views Become 3ds Max cameras. Same as above. 40
41 DWG-BASED REVIT ARCHITECTUREE TO AUTODESK 3DS MAX 9 WORKFLOWW New in Autodesk 3ds Max 2008 On August 6, Autodesk 3ds Max 2008 was announced. Autodesk anticipates that 3ds Max 2008 will be available in English in October This white paper will be revised at that time to reflect product enhancements. Autodesk 3ds Max 2008 contains several new features relevant to architects, designers, and visualization specialist visualizing Revit Architecture data in 3ds Max: Viewing and Handling of Large Scenes 3ds Max 2008 software delivers new viewport technology and optimizations that result in vastly improved interaction with even the largest, most complex scenes, that is, those with tens of thousands of objects. Common tasks and operations selection, material assignment, transform, grouping, cloning, and many more are now significantly faster, making 3ds Max 2008 the nimblest, most streamlined version of the software to date. Plus, a new Scene Explorer makes managing large scenes and nteracting with hundreds, or even thousandss of objects far more intuitive. Review/mental ray Workflow With the release of 3ds Max Autodesk unveils Review. This powerful new toolset supports iterative rendering workflows by delivering interactivee previewing of shadows, the 3ds Max sun/sky environment, and Architectural and Design material settings. Based on the latest game-engine technology, Review gives you the instant visual feedback you need to iterate rapidly. This release also delivers many new, timesaving 3ds Max/ mental ray software workflow features, including sky portal lightingg options, a camera-based interfacee for exposure settings, and improvements to such popular mental ray functionality as ambient occlusion. Interoperability and Compatibility Deeper support for DWG files results in faster, more accurate importing of data from other popular Autodesk applications such as Revit Architecture 2008 and AutoCAD 2008 software. There are also new features, such as Select Similar, that facilitate selecting imported data and applying new materials according to Revit Architecture families and architectural styles. Furthermore, 3ds Max 2008 is the first full release of the software officially compatible with Microsoft Windows Vista 32-bit and 64-bit operating systems and the Microsoft DirectX 10 platform. Autodesk, AutoCAD, Autodesk Inventor, DWG, Inventor, Revit, and 3ds Max are registered trademarks or trademarks of Autodesk, Inc., in the USA and/or other countries. mental ray is a registered trademark of mental images GmbH licensed for use by Autodesk, Inc. All other brand names, product names, or trademarks belong to their respective holders. Autodesk reserves the right to alter product offerings and specifications at any time without notice, and is not responsible for typographical or graphical errors thatt may appear in this document Autodesk, Inc. All rights reserved. 41
Importing and Exporting FilesChapter1:
 Importing and Exporting FilesChapter1: Chapter 1 You can use Revit Architecture to import and export various file types, including AutoCAD and AutoCAD Architecture DWG files to use as design aids. You
Importing and Exporting FilesChapter1:
 Importing and Exporting FilesChapter1: Chapter 1 You can use Revit Architecture to import and export various file types, including AutoCAD and AutoCAD Architecture DWG files to use as design aids. You
Chief Architect X Update Notes
 Chief Architect X3.4.2.7 Update Notes February 2, 2011 1 GENERAL NOTES This is a list of the changes made to Chief Architect X4 in the 13.1.2.3, 13.2.0.49, 13.3.2.20, 13.4.1.22 and 13.4.2.7 program updates.
Lesson 11. Polygonal Spaceship
 11 Polygonal Spaceship In this lesson, you will build and texture map a polygonal spaceship. Starting with a polygonal cube, you will extrude facets until you have a completed ship. You will then be able
Mastering Autodesk 3ds Max 2013
 Mastering Autodesk 3ds Max 2013 Harper, J ISBN-13: 9781118129715 Table of Contents Introduction? xxi Chapter 1? Getting to Know Autodesk? 3ds Max? 2013??? 1 Introducing the New 3ds Max 2013 Features????
Max scene used to generate the image from the second pdf in this tutorial.
 Tutorial covers creating vector drawings from a 3ds max scene and methods for compositing these drawings back into a rendering. Rendering set up is based of the lighting set up from the mental ray/skylight/mr
Or select Reset button under the application button (3ds Max symbol top left of screen)
") 3ds Max Notes 1. Starting 3ds Max file Open 3ds Max If Welcome to 3ds Max menu appears then select New Empty Scene Or select Reset button under the application button (3ds Max symbol top left of screen)
3ds Max Notes 1. Starting 3ds Max file Open 3ds Max If Welcome to 3ds Max menu appears then select New Empty Scene Or select Reset button under the application button (3ds Max symbol top left of screen)
GstarCAD Complete Features Guide
 GstarCAD 2017 Complete Features Guide Table of Contents Core Performance Improvement... 3 Block Data Sharing Process... 3 Hatch Boundary Search Improvement... 4 New and Enhanced Functionalities... 5 Table...
Visualization Insider A Little Background Information
 Visualization Insider A Little Background Information Visualization Insider 2 Creating Backgrounds for 3D Scenes Backgrounds are a critical part of just about every type of 3D scene. Although they are
Effective Collaboration using Autodesk Revit Structure and Autodesk Building Systems
 AUTODESK REVIT STRUCTURE AUTODESK BUILDING SYSTEMS Effective Collaboration using Autodesk Revit Structure and Autodesk Building Systems This white paper explains how structural engineers using Autodesk
Autodesk REVIT (Architecture) Mastering
 Mastering") Autodesk REVIT (Architecture) Mastering Training details DESCRIPTION Revit software is specifically built for Building Information Modeling (BIM), empowering design and construction professionals to bring
Autodesk REVIT (Architecture) Mastering Training details DESCRIPTION Revit software is specifically built for Building Information Modeling (BIM), empowering design and construction professionals to bring
Known Issues Autodesk Revit Building 9.1
 AUTODESK REVIT BUILDING 9.1 & 9 Known Issues Autodesk Revit Building 9.1 Windows 2000 Operating System If you are installing Revit Building 9.1 on a computer running Windows 2000, you must first run the
Change it. Change everything.
 AUTODESK REVIT BUILDING Change it. Change everything. Autodesk Revit Building. It s just a better way of working. In Autodesk Revit Building every schedule, drawing sheet, 2D view, and 3D view is a direct
Caustics - Mental Ray
 Caustics - Mental Ray (Working with real caustic generation) In this tutorial we are going to go over some advanced lighting techniques for creating realistic caustic effects. Caustics are the bent reflections
3ds Max Cottage Step 1. Always start out by setting up units: We re going with this setup as we will round everything off to one inch.
 3ds Max Cottage Step 1 Always start out by setting up units: We re going with this setup as we will round everything off to one inch. File/Import the CAD drawing Be sure Files of Type is set to all formats
Virginia Western Community College ARC 221 Architectural CAD Applications Software I
 Virginia Western Community College ARC 221 Architectural CAD Applications Software I Prerequisites CAD 241 Course Description Teaches the principles and techniques of architectural drawing practices through
AB Fine-Tune Your Autodesk Revit Models for Autodesk 3ds Max
 AB5115 - Fine-Tune Your Autodesk Revit Models for Autodesk 3ds Max Pierre-Felix Breton Product Designer Autodesk Media and Entertainment Class Audience Autodesk 3ds Max users and Revit users who want to
Creating Specific Views and Match Lines
 Creating Specific Views and Match Lines As you can see, the Autodesk Revit Architecture platform is all about the views. In fact, by using Revit, not only are you replacing the application you use for
CET Designer 8.5 Release Notes
 CET Designer 8.5 Release Notes November 20, 2017 News & Changes Implementations from our User Poll Following our user poll earlier this Fall, we are proud to share with you that three of the alternatives
ARCHITECTURE & GAMES. A is for Architect Simple Mass Modeling FORM & SPACE. Industry Careers Framework. Applied. Getting Started.
 A is for Architect Simple Mass Modeling One of the first introductions to form and space usually comes at a very early age. As an infant, you might have played with building blocks to help hone your motor
Autodesk Viz Render Illuminated Speaker; Charles Busa
 December 2-5, 2003 MGM Grand Hotel Las Vegas Autodesk Viz Render Illuminated Speaker; Charles Busa BD3-3 Autodesk Viz Render Illuminated This course is an introduction to the new Autodesk VIZ Render. Learn
Revit Architecture 2015 Basics
 Revit Architecture 2015 Basics From the Ground Up Elise Moss Authorized Author SDC P U B L I C AT I O N S Better Textbooks. Lower Prices. www.sdcpublications.com Powered by TCPDF (www.tcpdf.org) Visit
3 Polygonal Modeling. Getting Started with Maya 103
 3 Polygonal Modeling In Maya, modeling refers to the process of creating virtual 3D surfaces for the characters and objects in the Maya scene. Surfaces play an important role in the overall Maya workflow
Using Autodesk Ecotect Analysis and Building Information Modeling
 Autodesk Ecotect Analysis 2010 Using Autodesk Ecotect Analysis and Building Information Modeling This document helps you to get the most from Autodesk Ecotect Analysis software and building information
Chief Architect X10 New Feature List
 PRODUCTIVITY Saved Plan Views. Create and save multiple plan views (similar to saved cameras). Each view retains Layer Set, Annotation Set and Active Defaults. Open multiple Plan Views in Windows or Tabs,
Revit 2018 Architecture Certification Exam Study Guide
 ELISE MOSS Autodesk Autodesk Certified Instructor Revit 2018 Architecture Certification Exam Study Guide Certified User and Certified Professional SDC P U B L I C AT I O N S Better Textbooks. Lower Prices.
User Interface Revit s user interface is adaptive, changing based on your selections and views. options. Room Tag Split Elements
 NU REVIT TUTORIAL Instructor: David Snell, AIA LEED AP BD+C Tutorial 1: 2016-01-25 Page 1 of 8 User Interface Revit s user interface is adaptive, changing based on your selections and views. Application
Troubleshooting Views
 . Table of Contents Troubleshooting Views... 4 Problems that can occur with views... 4 Process to troubleshoot view display problems... 4 Tips and Tricks for solving view problems... 9 Family creation
SpaceClaim Professional The Natural 3D Design System. Advanced Technology
 SpaceClaim Professional The Natural 3D Design System SpaceClaim Professional is the 3D productivity tool for engineers who contribute to the design and manufacture of mechanical products across a broad
Creating a New Plan File
 1 Tutorial NAME Creating a New Plan File 2 The first step in creating your own design is to open and name a new plan file. 1. From the MENU BAR, select File, New Plan. 2. From the MENU BAR, select File,
Never Digitize Again! Converting Paper Drawings to Vector
 December 2-5, 2003 MGM Grand Hotel Las Vegas Never Digitize Again! Converting Paper Drawings to Vector Felicia Provencal GD42-3L How many hours have you spent hunched over a digitizing board converting
An Approach to Content Creation for Trainz
 An Approach to Content Creation for Trainz Paul Hobbs Part 6 GMax Basics (Updates and sample files available from http://www.44090digitalmodels.de) Page 1 of 18 Version 3 Index Foreward... 3 The Interface...
CHAPTER 1 COPYRIGHTED MATERIAL. Getting to Know AutoCAD. Opening a new drawing. Getting familiar with the AutoCAD and AutoCAD LT Graphics windows
 CHAPTER 1 Getting to Know AutoCAD Opening a new drawing Getting familiar with the AutoCAD and AutoCAD LT Graphics windows Modifying the display Displaying and arranging toolbars COPYRIGHTED MATERIAL 2
(Note: Gray text needs verification) 3DS Max - Merge native MAX files (Same or earlier version). Must select from list.
 3DS Max - Merge native MAX files (Same or earlier version). Must select from list.") Importing (Note: Gray text needs verification) 3DS Max - Merge native MAX files (Same or earlier version). Must select from list. 1. Geometry All 3D object and 2D shapes merge as do associated modifiers.
Importing (Note: Gray text needs verification) 3DS Max - Merge native MAX files (Same or earlier version). Must select from list. 1. Geometry All 3D object and 2D shapes merge as do associated modifiers.
Fundamentals. Autodesk SDC. Better Textbooks. Lower Prices. Schroff Development Corporation. Supplemental Files
 Autodesk 3ds Max Design 2012 Fundamentals Supplemental Files SDC PUBLICATIONS Schroff Development Corporation Better Textbooks. Lower Prices. www.sdcpublications.com Tutorial files on enclosed CD Table
Interior. Exterior. Daylight
 Interior Exterior Daylight Page 2 ElumTools is a fully-integrated lighting calculation Add-in for Autodesk Revit authored by Lighting Analysts, Inc. The growth of BIM (Building Information Modeling) software
COMPUTER AIDED ARCHITECTURAL GRAPHICS FFD 201/Fall 2013 HAND OUT 1 : INTRODUCTION TO 3D
 COMPUTER AIDED ARCHITECTURAL GRAPHICS FFD 201/Fall 2013 INSTRUCTORS E-MAIL ADDRESS OFFICE HOURS Özgür Genca ozgurgenca@gmail.com part time Tuba Doğu tubadogu@gmail.com part time Şebnem Yanç Demirkan sebnem.demirkan@gmail.com
Autodesk Fusion 360: Render. Overview
 Overview Rendering is the process of generating an image by combining geometry, camera, texture, lighting and shading (also called materials) information using a computer program. Before an image can be
AutoCAD 2009 Tutorial
 AutoCAD 2009 Tutorial Second Level: 3D Modeling Randy H. Shih Oregon Institute of Technology SDC PUBLICATIONS Schroff Development Corporation www.schroff.com Better Textbooks. Lower Prices. AutoCAD 2009
S206E Lecture 3, 5/15/2017, Rhino 2D drawing an overview
 Copyright 2017, Chiu-Shui Chan. All Rights Reserved. S206E057 Spring 2017 Rhino 2D drawing is very much the same as it is developed in AutoCAD. There are a lot of similarities in interface and in executing
Chief Architect X Update Notes
 Chief Architect X9.2.0.39 Update Notes March 23, 2017 1 General Notes This is a list of the changes made to Chief Architect X9 in the 19.2.0.39, 19.1.0.47 and 19.0.3.50 program update. 2.1 Program Overview
Managing Content with AutoCAD DesignCenter
 Managing Content with AutoCAD DesignCenter In This Chapter 14 This chapter introduces AutoCAD DesignCenter. You can now locate and organize drawing data and insert blocks, layers, external references,
Autodesk Revit MEP 2013
 Autodesk Revit MEP 2013 This document was last updated on March 22th, 2012. The following are Known Issues with this release: Assemblies When an assembly view is rotated, the crop region does not rotate
Autodesk 3ds Max Design 2013 Fundamentals
 Autodesk 3ds Max Design 2013 Fundamentals Supplemental Files SDC P U B L I C AT I O N S Schroff Development Corporation Better Textbooks. Lower Prices. www.sdcpublications.com Tutorial files on enclosed
CHAPTER 1 COPYRIGHTED MATERIAL. Finding Your Way in the Inventor Interface
 CHAPTER 1 Finding Your Way in the Inventor Interface COPYRIGHTED MATERIAL Understanding Inventor s interface behavior Opening existing files Creating new files Modifying the look and feel of Inventor Managing
SketchUp Tool Basics
 SketchUp Tool Basics Open SketchUp Click the Start Button Click All Programs Open SketchUp Scroll Down to the SketchUp 2013 folder Click on the folder to open. Click on SketchUp. Set Up SketchUp (look
Architectural Visualization Workflow in Autodesk Building Design Suite 2013
 Architectural Visualization Workflow in Autodesk Building Design Suite 2013 Marvi Basha TU Graz Class Summary - What is Arch-Viz? - Revit vs. 3Ds Max - Workflow - Post Production Class Summary - What is
Lesson 1 Parametric Modeling Fundamentals
 1-1 Lesson 1 Parametric Modeling Fundamentals Create Simple Parametric Models. Understand the Basic Parametric Modeling Process. Create and Profile Rough Sketches. Understand the "Shape before size" approach.
Because After all These Years I Still Don t Get it!
 BILT North America 2017 Westin Harbour Castle Toronto August 3-5 Session 3.2 Shared Coordinates: Because After all These Years I Still Don t Get it! Class Description In an effort to reveal the system
Exercise Guide. Published: August MecSoft Corpotation
 VisualCAD Exercise Guide Published: August 2018 MecSoft Corpotation Copyright 1998-2018 VisualCAD 2018 Exercise Guide by Mecsoft Corporation User Notes: Contents 2 Table of Contents About this Guide 4
Home Designer Update Notes
 Home Designer 17.3.2.2 Update Notes October 14, 2015 1 General Notes This is a list of the changes made to Home Designer 2016 in the 17.3.2.2, 17.3.1.1, 17.3.0.25, 17.2.0.69, 17.1.2.2, 17.1.1.3, and 17.1.0.51
Revit 2017 Architecture Certification Exam Study Guide
 ELISE MOSS Autodesk Autodesk Certified Instructor Revit 2017 Architecture Certification Exam Study Guide Certified User and Certified Professional SDC P U B L I C AT I O N S Better Textbooks. Lower Prices.
An Introduction to Autodesk Revit Massing, Surface Divisions, and Adaptive Components
 An Introduction to Autodesk Revit Massing, Surface Divisions, and Adaptive Components Chad Smith KarelCAD, Australia AB2463-L As the Revit massing tools become more polished and robust, users are becoming
Animation Basics. Learning Objectives
 Animation Basics Learning Objectives After completing this chapter, you will be able to: Work with the time slider Understand animation playback controls Understand animation and time controls Morph compound
Home Designer Update Notes
 Home Designer 18.3.2.2 Update Notes October 28, 2016 1 General Notes This is a list of the changes made to Home Designer 2017 in the 18.3.2.2, 18.3.1.2, 18.3.0.47, 18.2.1.2, 18.2.0.42, and 18.1.1.4 program
A set of annotation templates that maybe used to label objects using information input in the data model mentioned above.
 AUTOCAD MAP 3D 2009 WHITE PAPER Industry Toolkits Introduction In today s world, passing of information between organizations is an integral part of many processes. With this comes complexity in a company
Autodesk Conceptual Design Curriculum 2011 Student Workbook Unit 2: Parametric Exploration Lesson 1: Parametric Modeling
 Autodesk Conceptual Design Curriculum 2011 Student Workbook Unit 2: Parametric Exploration Lesson 1: Parametric Modeling Overview: Parametric Modeling In this lesson, you learn the basic principles of
Technical What s New. Autodesk Vault Manufacturing 2010
 Autodesk Vault Manufacturing 2010 Contents Welcome to Autodesk Vault Manufacturing 2010... 2 Vault Client Enhancements... 2 Autoloader Enhancements... 2 User Interface Update... 3 DWF Publish Options User
Getting Along: Coordinating Architectural and Structural Design with Autodesk Revit Structure
 11/30/2005-8:00 am - 9:30 am Room:N. Hemispheres (Salon A2) (Dolphin) Walt Disney World Swan and Dolphin Resort Orlando, Florida Getting Along: Coordinating Architectural and Structural Design with Autodesk
ISSUE #4 / SPRING 2017
 REVIT PURE PRESENTS PAMPHLETS ISSUE #4 / SPRING 2017 CAD revitpure.com Copyright 2017 - BIM Pure productions WHAT IS THIS PAMPHLET? Revit Pure Pamphlets are published 4 times a year by email. Each edition
Character Modeling COPYRIGHTED MATERIAL
 38 Character Modeling p a r t _ 1 COPYRIGHTED MATERIAL 39 Character Modeling Character Modeling 40 1Subdivision & Polygon Modeling Many of Maya's features have seen great improvements in recent updates
Revit Architecture Syllabus Total duration: 80 hours (Theory 40 Hours + Lab 40 Hours)
") Faculty Start Date End Date No of Students Revit Architecture Syllabus Total duration: 80 hours (Theory 40 Hours + Lab 40 Hours) Introduction About BIM Introduction to Autodesk Revit Architecture Revit
Faculty Start Date End Date No of Students Revit Architecture Syllabus Total duration: 80 hours (Theory 40 Hours + Lab 40 Hours) Introduction About BIM Introduction to Autodesk Revit Architecture Revit
Chapter 1. Introduction to Autodesk Revit Architecture Learning Objectives
 Chapter 1 Learning Objectives Introduction to Autodesk Revit Architecture 2012 After completing this chapter, you will be able to: Understand the basic concepts and principles of Revit Architecture 2012.
REVIT IMPLEMENTATION
 REVIT IMPLEMENTATION This one sheet is my first attempt at putting down in one place a list of Revit specific items that need to be addressed as an office migrates into Revit. I realize that each firm
NU REVIT TUTORIAL. Page 1 of 7
 NU REVIT TUTORIAL Instructor: David Snell, AIA LEED AP BD+C Tutorial 2: 2016-02-01 Page 1 of 7 Annotations All functions contained in the Annotate tab create 2D view specific elements. These elements will
Top Productivity Tips for AutoCAD 2009
 Top Productivity Tips for AutoCAD 2009 Jonathan Christie Course Summary: Find out how to apply new and existing AutoCAD power tools and watch your drafting productivity improve. Learn how to re-use design
Update Enhancement List
 AUTODESK REVIT 2013 Update Enhancement List Improvements made in Update 3 build (20130531_2115): Improves stability when using Hardware Acceleration, Graphics Mode. Improves stability when opening projects
What's New in Autodesk Revit Structure 2013? Rebecca Frangipane - KJWW Engineering Consultants
 Rebecca Frangipane - KJWW Engineering Consultants SE1485 This class will cover the new features for Autodesk Revit Structure 2013 software. We will examine new features for creating and manipulating parts,
Advanced Tips for Better Translation Autodesk Revit 2010 IES
 Advanced Tips for Better Translation Autodesk Revit 2010 IES IES Worldwide Support Series A. Chan and M. Farrell What is a gbxml? When you click on Set Model Properties, even though you are doing it within
WORKFLOW OF EXPORTING REVIT MODELS TO UNITY
 WORKFLOW OF EXPORTING REVIT MODELS TO UNITY 2016 by Penn State CIC Research Group. All rights reserved May 26, 2014 NOTE: THIS WORKFLOW IS FOR USERS WHO USE REVIT 2016 AND ABOVE, AND 3DS MAX 2016 AND ABOVE.
1st Point. 2nd Point. hold shift & drag along Y. Splines
 Splines STEP 1: open 3DS Max _ from the Command Panel under the Create tab click on Shapes (note: shapes are really Splines) _ under Object Type click on Ellipse STEP 2: Expand the Keyboard Entry tab type
ARCH_ _COMP-PRAC REVIT SYLLABUS
 ARCH_4605-5605_COMP-PRAC REVIT SYLLABUS The Revit Portion of Computational Practice is divided into 3-Parts: Part 1 Classes 01-06 [RE&EM] Revit Essentials & Existing Models Part 2 Classes 07-12 [RF&AC]
DWG/DXF Export. Some attribute values in blocks weren't exporting correctly.
 DesignCAD 3D Max 20.1 Release Notes Nov. 9, 2010 DesignCAD 3D Max 20.1 introduces the following fixes and changes: DWG/DXF Export. Sometimes arcs and elliptical arcs, when exported to dwg or dxf format,
What's New GRAITEC Advance PowerPack 2016
 What's New GRAITEC Advance PowerPack 2016 Table of contents WELCOME TO GRAITEC POWERPACK FOR REVIT... 5 NEWS... 6 Managers... 6 1: Family Manager... 6 BIM Connect... 7 1: Compliancy with Autodesk Revit
The first fully-integrated Add-in lighting software for Autodesk Revit
 Page 1 The first fully-integrated Add-in lighting software for Autodesk Revit Introduction The growth of BIM (Building Information Modeling) software is exploding and in many architectural design and engineering
Multi-Discipline Project Coordination with Autodesk Revit. Jim Stoneberger Avatech Solutions Neal O Neill Avatech Solutions
 Multi-Discipline Project Coordination with Autodesk Revit Jim Stoneberger Avatech Solutions Neal O Neill Avatech Solutions Origins Internal Origin, (0,0,0 in Revit) Revit does have an internal Origin point
BIM - ARCHITECTUAL INTRODCUTION TO CLASSES
 BIM - ARCHITECTUAL INTRODCUTION TO CLASSES INTRODUCTION Classes can be broadly thought of as categories for objects. They can control visibility much like layers can, but they also have an intricate system
CET Designer 9.5 Release Notes
 CET Designer 9.5 Release Notes Important Notices Starting from this release, CET Designer is only available in a 64-bit version. For computers with damaged graphics drivers or a graphics unit that does
AutoCAD DWG Drawing Limitations in SAP 3D Visual Enterprise 9.0 FP03
 AutoCAD DWG Drawing Limitations in SAP 3D Visual Enterprise 9.0 FP03 AutoCAD Import Limitations The following is a list of AutoCAD features that will not give an expected viewable when using SAP 3D Visual
All In the Family: Creating Parametric Components In Autodesk Revit
 All In the Family: Creating Parametric Components In Autodesk Revit Matt Dillon D C CADD AB4013 The key to mastering Autodesk Revit Architecture, Revit MEP, or Revit Structure is the ability to create
The power of BIM for structural engineering. Autodesk Revit. Structure
 The power of BIM for structural engineering. Autodesk Revit Structure Improve Efficiency, Accuracy, and Coordination Concurrent modeling for structural design, analysis, and coordinated documentation Building
Architecture Engineering Training courses : Course BIM Architecture Diploma Revit Architecture 3D Max Vasari Navis Works Photoshop For Architects
 Architecture Engineering Training courses : Course BIM Architecture Diploma Revit Architecture 3D Max Vasari Navis Works Photoshop For Architects BIM ARCHITECTURAL DIPLOMA ( Design and visualization ):
EDSL Guide for Revit gbxml Files
 EDSL Guide for Revit gbxml Files Introduction This guide explains how to create a Revit model in such a way that it will create a good gbxml file. Many geometry issues with gbxml files can be fixed within
AUTODESK FUSION 360 Designing a RC Car Body
 AUTODESK FUSION 360 Designing a RC Car Body Abstract This project explores how to use the sculpting tools available in Autodesk Fusion 360 Ultimate to design the body of a RC car. John Helfen john.helfen@autodesk.com
Best Practices for Loading Autodesk Inventor Data into Autodesk Vault
 AUTODESK INVENTOR WHITE PAPER Best Practices for Loading Autodesk Inventor Data into Autodesk Vault The most important item to address during the implementation of Autodesk Vault software is the cleaning
Building Information ModelingChapter1:
 Chapter 1 Building Information ModelingChapter1: Building information modeling (BIM) is an integrated workflow built on coordinated, reliable information about a project from design through construction
Top 10 Reasons to Upgrade from AutoCAD 2000 to AutoCAD 2008
 AUTOCAD 2008 Top 10 Reasons to Upgrade from AutoCAD 2000 to AutoCAD 2008 Everyday Tools Are Better Than Before AutoCAD 2008 software has all your favorite tools, but now they re better than ever. You ll
To change the shape of a floating toolbar
 Modifying toolbars You can change the size of toolbar buttons and reposition, add, or delete toolbar buttons. You can also change the toolbar name and turn tooltips on and off. An important item to note-
Introduction. There are two basic ways to apply more than one texture to one object:
 Introduction For recent versions of Trainz, gmax will not handle the standards for new material types and options such as Specular and Bump or Normal mapping. The Trainz forum has published techniques
How-To Guide SAP 3D Visual Enterprise Author 8.0 Document Version: How To Work with Textures
 How-To Guide SAP 3D Visual Enterprise Author 8.0 Document Version: 1.0-2014-07-04 Document History Document Version Description 1.0 First version Document History 2014 SAP AG or an SAP affiliate company.
ICDAS 3ds Max Design & 3ds Max
 ICDAS 3ds Max Design & 3ds Max 2016.0 2016.0 C:\ICDAS\MANUAL\3ds Max Design\ICDAS 3ds Max Design & 3ds Max 2016.0, 2 ICDAS 2015-06-01 2014-06-01 2013-06-01 Dear user Welcome to 3ds Max Design and 3ds Max.
Elise Moss Revit Architecture 2017 Basics From the Ground Up SDC. Better Textbooks. Lower Prices.
 Elise Moss Revit Architecture 2017 Basics From the Ground Up SDC P U B L I C AT I O N S Better Textbooks. Lower Prices. www.sdcpublications.com Powered by TCPDF (www.tcpdf.org) Visit the following websites
Interior space in daylight Elsevier Inc. All rights reserved.
 Interior space in daylight Bonus Chapter 1 Day Lighting an Interior Space 1.1 Introduction In this chapter, you will learn about lighting an interior scene while you work on the lighting for the living
Piping & Instrumentation Diagrams
 Page 1 Piping & Instrumentation Diagrams Preface Using This Guide What's New? Getting Started Entering the Workbench Setting up Working Units and Grid Placing Components Routing a Piping Line or I & C
What s New Topics in 3.5.1: 1. User Interface 5. Reference Geometry 2. Display 6. Sketch 3. livetransfer 7. Surface / Solid 4. Scan Tools 8.
 ]^ New Release Turning Measured Points into Solid Models What s New Topics in 3.5.1: 1. User Interface 5. Reference Geometry 2. Display 6. Sketch 3. livetransfer 7. Surface / Solid 4. Scan Tools 8. Measure
Design Review: Fundamentals
 Design Review: Fundamentals Understanding Autodesk Design Review Autodesk Design Review improves team collaboration and communication by using design information the way it is intended to be used by the
Dynamic Blocks in AutoCAD 2006
 AutoCAD 2006 Dynamic Blocks in AutoCAD 2006 Part 1 of 3: Dynamic Block Overview and Quick-Start Tutorial In AutoCAD 2006 software, you can now create blocks that are intelligent and flexible. This exciting
AutoCollage 2008 makes it easy to create an AutoCollage from a folder of Images. To create an AutoCollage:
 Page 1 of 18 Using AutoCollage 2008 AutoCollage 2008 makes it easy to create an AutoCollage from a folder of Images. To create an AutoCollage: 1. Click on a folder name in the Image Browser. 2. Once at
Back to Flat Producing 2D Output from 3D Models
 Back to Flat Producing 2D Output from 3D Models David Cohn Modeling in 3D is fine, but eventually, you need to produce 2D drawings. In this class, you ll learn about tools in AutoCAD that let you quickly
Autodesk Revit 6. Preview Guide. Contents
 Autodesk Revit 6 Preview Guide Contents Contents... 1 Welcome to Autodesk Revit... 3 About This Guide... 3 Autodesk Revit Terms... 3 What s New for 6.0... 4 Multi-user Element Borrowing... 4 Design Options...