Installation Procedures
|
|
|
- Bryce Neal
- 5 years ago
- Views:
Transcription
1 Installation Procedures
2 HELPSTAR 2009 Installation Procedures Contents Part 1 Deployment Server and Database Setup... 3 Part 2 Web Portal Installation Part 3 Database Administration Tool Part 4 Attachment Functionality Part 5 StarWatch Service Part 6 Business Rules Engine Part 7 Network Audit Engine Installation & Configuration Client Audit Add In Installation & Configuration Part 8 Importing Users from Active Directory Part 9 System Configuration System for SMTP/POP System for MAPI System using Groupwise System using IMAP/SMTP Additional Resources

3 Part 1 Deployment Server and Database Setup Deployment Server Installation Prerequisites: Microsoft.Net Framework 3.5 is required for the installation of HelpSTAR When installing HelpSTAR components from another machine, you will either be prompted to download the required setup files from the Internet or to use setup files from a location on the network. Ensure that SQL Server is installed prior to the installation. Supported versions are: o SQL Server 2005 (Express, Standard, Workgroup or Enterprise Edition) o SQL Server 2008 o 64 Bit versions are supported During installation of SQL Server, note the mode selected for authentication (Windows Authentication or SQL). If using SQL authentication, the SA password will be required to create the HelpSTAR database. Deployment Server: 1. On the server that will be hosting the HelpSTAR 2009 application, run the evaluation file. 2. When prompted, enter the installation password. Click OK. 3
.")
4 3. To proceed with the installation, review and accept terms of the license agreement. Click Next to proceed. 4. Specify the location in which HelpSTAR 2009 Deployment Server files will reside. A default location will be provided (C:\HelpSTAR\). This can be altered by clicking on the Browse button. Click Next. 4

5 5. A confirmation will appear upon successful completion of the Deployment Server installation. Click Finish to proceed with the HelpSTAR Windows Client installation. 5
. 2. Enter the name of the database server. 3.")
6 Database Setup for SQL Authentication: 1. Upon completion of the Deployment Server installation, the HelpSTAR database setup will begin. A prompt to Add ODBC Database Source Name will appear (as shown below). 2. Enter the name of the database server. 3. Select With SQL Server authentication using a default login for the authentication mode on the database server. 4. Click on OK when all information has been entered. 5. Enter the SA password when prompted to do so. Click OK. At this point, data source information can also be edited by clicking on Edit. 6
7 6. The database setup will proceed. A prompt confirming database creation has been completed will appear. 7. Click on OK to exit the database setup. 8. Upon completion, you will be prompted to activate HelpSTAR. Click on OK to proceed. 9. Enter your user and company information. This user will be added as the first Power User in HelpSTAR. 7


8 Database Setup for Windows Authentication: 1. Upon completion of the Deployment Server installation, the HelpSTAR database setup will begin. A prompt to Add ODBC Database Source Name will appear (as shown below). 2. Enter the name of the database server. 3. Select the With Windows NT Authentication using the network login ID option. You will be prompted to select a group to be authenticated to the database. 4. Click on OK when the user or group has been selected. 8
9 5. The database setup will proceed. A prompt confirming database creation has been completed will appear. 6. Click on OK to exit the database setup. 7. Upon completion, you will be prompted to activate HelpSTAR. Click on OK to proceed. 8. Enter your user and company information. This user will be added as the first Power User in HelpSTAR. 9

10 Windows Client: 1. Upon completion of activation, you will be prompted to install HelpSTAR s Windows Client. 2. Specify if Microsoft.Net Framework 3.5 setup files should be used from a location on the network or downloaded from the Internet. Click Yes to proceed with the framework installation. 10

11 3. Specify the location in which HelpSTAR 2009 client files will reside. A default location will be provided (C:\Program Files\). This can be altered by clicking on the Browse button. Click Next. 4. A confirmation will appear upon successful completion of the Windows Client installation. 11
12 Notes: Upon completion of the installation of the Windows Client, you will be prompted to select other HelpSTAR components for installation. The installation will proceed to install components. You will also have the option to install components later using the instructions outlined in the following sections. It is recommended that you download Microsoft.Net Framework 3.5 locally to the HelpSTAR server. (Example: C:\temp). When the Windows client or any HelpSTAR component is installed from another machine, the framework set up files will be available locally from the HelpSTAR server. If the setup files are not present on the HelpSTAR server, an attempt will be made to download directly from the Internet. This may cause a delay in installation. Some features of the HelpSTAR Windows Client Interface require the use of the Attachments functionality. It is recommended to run the Attachments installation prior to launching the HelpSTAR Windows Client. 12
13 Part 2 Web Portal Installation Web Portal Installation Prerequisites: Microsoft.Net Framework 2.0 is required for this installation. Internet Information Services 5.1, 6.0 or 7.0 must be installed prior to running this installation. A domain user account will be required during installation. Ensure that the domain user account has a password that does not expire. Note: Instructions provided below presume that the Web server and the database server reside on the same domain. Web Portal Installation: 1. On the server that will host HelpSTAR s Web Portal, navigate to the HelpSTAR Deployment Server folder (\HelpSTAR\HLPSTRCS\). 2. Click on the Install.exe file. 3. Check the Web Portal option and then click Next. 4. Specify the location in which HelpSTAR 2009 Web Portal files will reside. A default location will be provided (C:\HSNET\). The location can be altered by clicking on the Browse button. Click Next. 5. Select the Web Site under which the IIS Virtual Directory will be created. 6. Enter the name of the Virtual Directory you wish to create. 13

14 7. Specify the Web address where the Web Portal will reside. Options include: IP address of the Web server. Machine name of the Web server. All host header names inside the Web site. Other such as another IP address or URL that points to the Web server. 8. Click Next when finished with the above entries. 9. On this screen, you will be prompted to select the following options: Login Page Language a) Select the languages that should be made available to the users of the Web portal. b) Select the default language presented to the end users on the Web portal. Active Directory If users have been imported from Active Directory, selecting this option allows you to set a login bypass for the Web interface. This allows a user to automatically login into the Web portal interface using the same login used for the machine they are currently logged in to. Items Visible to End Users specify the fields available to end users when logging a new request. 14

15 10. Click Next when finished with the above options. 11. Specify the domain user account being used for the Web portal. Click Next to complete the installation. 15
16 12. A confirmation will appear upon successful completion of the HelpSTAR Web Portal installation. 16
. 2.")
17 Part 3 Database Administration Tool The HelpSTAR Database Administration Tool allows you to: Backup and Restore the HelpSTAR database. Start or Stop the SQL Server Agent. Switch the Authentication Mode for HelpSTAR. 1. On the server in which you want to install the Database Administration Tool, navigate to the HelpSTAR Deployment Server folder (\HelpSTAR\HLPSTRCS\). 2. Click on the Install.exe file. 3. Check the Database Administration Tool option and click Next. 4. Specify the location in which Database Administration Tool files will reside. A default location will be provided (C:\HelpSTAR\HLPSTRCS). This location can be altered by clicking on the Browse button. In the location specified, the subfolder \Modules\DBAdmin will be created. Click Next. 17
18 5. A confirmation will appear upon successful completion of the HelpSTAR Database Administration Tool installation. 18

19 Part 4 Attachment Functionality HelpSTAR s Attachment Functionality allows users to add files to any of HelpSTAR s objects. 1. Navigate to the HelpSTAR Deployment Server folder (\HelpSTAR\HLPSTRCS\). 2. Click on the Install.exe file. 3. Check the Attachments option and click Next. 4. Specify the location in which Attachment files will be stored. The options for Attachment storage are: Windows Folder A default location will be provided (C:\HelpSTAR\HLPSTRCS) if selecting to store attachments in a Windows folder. The subfolder \Modules\Attachments will be created in this folder. This option will only be available if running the Attachments installation from the machine hosting the database. The location can be altered by clicking on the Browse button. In Database This option is not available if using SQL 2005 Express as your backend database. Database attachments are only available in the HelpSTAR 2009 Enterprise Edition. 5. Click Next when the storage location has been selected. 19

20 6. A confirmation will appear upon successful completion of HelpSTAR s Attachments Functionality installation. Notes Regarding Attachments Storage: For the HelpSTAR 2009 Enterprise edition, when running the Installation from the SQL server you are given the option of storing attachments in a Windows folder or in the database. If you run the Installation from any other machine, only the option to store attachments in the database is enabled. If you elect to store Attachments in the SQL database then they will be included whenever you back up or move your database. However, the size of your database will increase proportionately with the use of attachments. If you elect to store Attachments in the \Attachments folder then they will not affect the size of your HelpSTAR database. However, to preserve these attachments you must ensure that this folder is continually backed up. If using SQL Server 2005 Express, the database option is enabled and storage for attachments must be in a Windows folder. 20
21 Part 5 StarWatch Service HelpSTAR s StarWatch service is a background component that is required for many of the monitoring activities that affect workflow. These activities include generating alerts, automatic updates, processing incoming/outgoing s, request scheduling and Active Directory import/synchronization. HelpSTAR StarWatch Installation Prerequisites: A domain user account will be prompted for the installation of the HelpSTAR StarWatch service. This service will run under this user account. If using the MAPI protocol, the user entered should be the user associated with the mail account. 1. On the server in which you want to install the StarWatch Service, navigate to the HelpSTAR Deployment Server folder (\HelpSTAR\HLPSTRCS\). 2. Click on the Install.exe file. 3. Check the StarWatch Service option and click Next. 4. Specify the location in which StarWatch Service files will reside. A default location will be provided (C:\HelpSTAR\HLPSTRCS). The location can be altered by clicking on the Browse button. In the location specified, the subfolder \Modules\StarWatch will be created in this folder. Click Next. 21

22 5. Specify the domain user under which the StarWatch service should be running. 6. A confirmation will appear upon successful completion of the StarWatch Service installation. 22
23 Part 6 Business Rules Engine HelpSTAR s Business Rules Engine is a required service for the use of HelpSTAR s Business Rules functionality. 1. On the server in which you want to install the Business Rules Engine, navigate to the HelpSTAR Deployment Server folder (\HelpSTAR\HLPSTRCS\). 2. Click on the Install.exe file. 3. Check the Business Rules Engine option and click Next. 4. Specify the location in which Business Rules Engine files will reside. A default location will be provided (C:\HelpSTAR\HLPSTRCS). The location can be altered by clicking on the Browse button. In the location specified, the subfolder \Modules\RuleService will be created. Click Next. 5. If using NT authentication, you will be prompted to specify the domain account that this service will be run under. 23
24 6. A confirmation will appear upon successful completion of the Business Rules Engine installation. 24
25 Part 7 Network Audit Engine Installation & Configuration Using the Network Audit Service, you can remotely collect detailed hardware and software information about the machines on the networks you manage. This information is automatically stored in the HelpSTAR database. Network Audit Engine Installation Prerequisites: The Network Audit Engine must be run as a domain user that has administrative rights on the machines being audited. If Windows Authentication is used, this domain administrator must be authenticated to the database. Network Audit Engine Installation: 1. On the server in which you want to install the Network Engine, navigate to the HelpSTAR Deployment Server folder (\HelpSTAR\HLPSTRCS\). 2. Click on the Install.exe file. 3. Check the Network Audit Engine option and click Next. 4. Specify the location in which Network Audit Engine files will reside. A default location will be provided (C:\HelpSTAR\HLPSTRCS). The location can be altered by clicking on the Browse button. In the location specified, the subfolder \Modules\AuditService will be created. Click Next. 25


26 5. You will be prompted to specify the domain account that this service will be run under. 6. A confirmation will appear upon successful completion of the Network Audit Engine installation. 26
27 Client Audit Add In Installation & Configuration Prerequisites: In order for the Client Audit Add In to perform on each of the workstations in which it is installed, the following prerequisites must be met: Notes: The HelpSTAR Audit Service must be installed on the application server. The user logged into the workstation must be a local administrator on the machine and must be able to connect directly with the HelpSTAR database. Microsoft.Net Framework 2.0 is installed locally on the machine to be audited. The Client Audit Add In service does not have to be installed on the machine hosting the HelpSTAR Audit Engine Service. In order for the Client Audit Add In to perform at scheduled intervals, a discovery schedule must be configured. 1. On the machine in which the Client Audit Add In service will be installed, navigate to the following location on the HelpSTAR Deployment server: \HelpSTAR\HLPSTRCS\Install\ 2. Launch the file hsauditclientcs.exe. Click Next when prompted. 27
28 3. Microsoft.Net Framework 2.0 is required for the Client Audit Add In. If not already installed, you will be prompted to install the framework. Click on Yes to continue. 4. Specify the location in which the Client Audit Add In files will reside. A default location will be specified (C:\HelpSTAR\HLPSTRCS). The location can be altered by clicking on the Browse button. Click Next when complete. 28

29 5. A confirmation prompt will appear upon successful completion of the Client Audit Add In Installation. 29

30 Once installed the service must be started in order for the add in to audit at a configured schedule. This can be found in the services consoles as shown below: 30


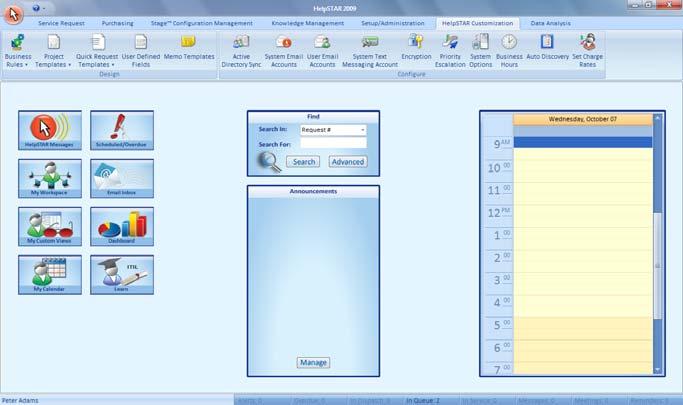
31 Part 8 Importing Users from Active Directory If your organization has implemented Active Directory Services, HelpSTAR can be configured to import groups of users and related fields from Active Directory. Active Directory Tips Prior to starting the Active Directory import, determine how users should be imported from Active Directory. For example, determine if users should be split into departments or groups based on their Organizational Units or if they should be imported to a single department for now. A unique identifier is the field that HelpSTAR will look for when importing distinct users. Select a unique identifier that will have unique values in Active Directory. For example, name or would be good fields in which to import users as these fields are rarely duplicated. Import Settings: 1. In HelpSTAR, click on Active Directory Sync icon on the HelpSTAR Customization Tab. The following screen will appear: 2. Select the Domain Type: Trusted Domain (LDAP) or Forest (Global Catalog). 31


32 3. Select how you would like users to login to HelpSTAR. Note that if Active Directory authentication is selected, HelpSTAR will automatically log the user in as the user they have logged into the machine as. 4. To import from specific Organizational Units or Groups in Active Directory and import users to departments based on their Organization Unit, perform the following: Click on the Edit button in the Import Users from the following Active Directory Groups/Unit section. Your Active Directory Tree Structure will appear. Select the desired Organizational Units, Groups or Containers and then click OK. Once a specific Organization Unit has been selected, you can select a specific department to import users to. Double click on the blank Select Department field next to the Organization Unit added. Options available are: a) Create a New Department (based on the Organization Unit name) b) Select a previously added department in HelpSTAR. 32


33 Field Mappings: If you want to import data regarding users other than name into HelpSTAR, perform the following: 1. Click on the Field Mapping tab. The following screen will appear: 2. Click on Add button in the Map ADS fields to HelpSTAR User Fields section. The following prompt will appear: 3. Select the field to be filled in from the HelpSTAR drop down box. 4. Select the field to be imported from Active Directory in the ADS drop down box. 5. Click OK when complete. 6. Add additional fields if necessary. 7. In the Default Department section, select a department that users will be associated with if their department field in Active Directory is not populated. 33


34 Schedule/Import Now To import users immediately or to configure a scheduled interval to import users, select the Scheduled/Import Now tab. The following screen will appear: To import users immediately, click on the Import Now button as shown below: To schedule a regular interval in which users should be imported, configure a desired schedule in the Import Schedule section as shown below: 34
35 Part 9 System Configuration System allows HelpSTAR to process incoming requests, send reply messages, notify requesters of updates to their open requests and send outgoing request details. You can add multiple accounts so that users can submit requests to different addresses. For example, all received by your helpdesk, itsupport@yourorganization.com, will be processed by HelpSTAR. System Prerequisites: MAPI Ensure that there are no s in the inbox of the mail account being used for System . As soon as System is started, all s in the inbox will be processed. To configure System , you must be logged into the machine with the HelpSTAR StarWatch service installed as the user attached to the mailbox. The user attached to the mailbox must be a local administrator for the machine where StarWatch is installed. Groupwise Outlook and an Outlook connector for Groupwise must be installed and configured on the machine where the HelpSTAR StarWatch Service is installed. A password must be set for the mailbox in Groupwise and must be stored in a Groupwise profile. Upon launching Outlook, you will not be prompted for a password if a password has been configured correctly in a Groupwise profile. System settings for the Groupwise should be configured using the same user account that is given the run as privileges for the HelpSTAR StarWatch service. Lotus Notes (IMAP) Lotus Notes should be configured to allow either an IMAP or POP3 connection from the server where the HelpSTAR StarWatch service is installed. IMAP or POP3 must be enabled on the mail server. Lotus Notes must be configured to allow SMTP connections for sending outgoing mail from HelpSTAR. System settings for Lotus Notes should be configured using the same user account that is given the run as privileges for the HelpSTAR StarWatch service. 35
36 System for SMTP/POP3 1. Open the server s Services console (Start > Run > Type in Services.msc > Press Enter). 2. Stop the HelpSTAR StarWatch Service. 3. In HelpSTAR, click on System Account on the HelpSTAR Customization tab. The following window will appear: 36

37 4. Click on the Add button to add a mail account used for System . The following window will appear: 5. Select the POP3/SMTP option in the Mail Server Type section. 6. In the Account Information section, enter the settings for the mail account. 7. In the Server Information section, enter in the details for the mail server. If your mail server employs SSL authentication, check the Enable SSL option when entering the POP3 and SMTP servers. 8. In the Properties section, if you want a copy of failed messages be sent to you or another user; enter an address for notifications. 9. To ensure settings are correct, click on Test Account Settings. If successfully connected, a prompt will appear saying Successfully Connected to Mail Account. 10. When settings have been entered and verified, click on Save to save settings and exit this window. You will return to the original window. 37
38 11. In the System Account Monitoring Status section, check Enable to start System In the Scanning Interval & Alert section, specify the time interval in which System should scan for incoming s. 13. Click on Finish to save settings. 14. Return to your Services console and start the HelpSTAR StarWatch Service. 38
39 System for MAPI 1. Open the server s Services console (Start > Run > Type in Services.msc > Press Enter). 2. Stop the HelpSTAR StarWatch Service. 3. In HelpSTAR, click on System Account on the HelpSTAR Customization tab. The following window will appear: 39
40 4. Click on the Add button to add a mail account used for System . The following window will appear: 5. Select the MAPI option in the Mail Server Type section. 6. In the Account Information section, enter the settings for the mail account. 7. In the Server Information section, enter in the details for the mail server. 8. In the Properties section, if you want a copy of failed messages be sent to you or another user; enter an address for notifications. 9. To ensure settings are correct, click on Test Account Settings. If successfully connected, a prompt will appear saying Successfully Connected to Mail Account. 10. When settings have been entered and verified, click on Save to save settings and exit this window. You will return to the original window. 11. In the System Account Monitoring Status section, check Enable to start System . 40
41 12. In the Scanning Interval & Alert section, specify the time interval in which System should scan for incoming s. 13. Click on Finish to save settings. 14. Return to your Services console and start the HelpSTAR StarWatch Service. 41
42 System using Groupwise 1. Open the server s Services console (Start > Run > Type in Services.msc > Press Enter). 2. Stop the HelpSTAR StarWatch Service. 3. In HelpSTAR, click on System Account on the HelpSTAR Customization tab. The following window will appear: 42
43 4. Click on the Add button to add a mail account used for System . The following window will appear: 5. Select the Groupwise option in the Mail Server Type section. 6. In the Account Information section, enter the settings for the mail account. 7. In the Server Information section, enter in the details for the mail server. 8. In the Properties section, if you want a copy of failed messages be sent to you or another user; enter an address for notifications. 9. To ensure settings are correct, click on Test Account Settings. If successfully connected, a prompt will appear saying Successfully Connected to Mail Account. 10. When settings have been entered and verified, click on Save to save settings and exit this window. You will return to the original window. 11. In the System Account Monitoring Status section, check Enable to start System . 43
44 12. In the Scanning Interval & Alert section, specify the time interval in which System should scan for incoming s. 13. Click on Finish to save settings. 14. Return to your Services console and start the HelpSTAR StarWatch Service. 44
45 System using IMAP/SMTP 1. Open the server s Services console (Start > Run > Type in Services.msc > Press Enter). 2. Stop the HelpSTAR StarWatch Service. 3. In HelpSTAR, click on System Account on the HelpSTAR Customization tab. The following window will appear: 45

46 4. Click on the Add button to add a mail account used for System . The following window will appear: 5. Select the IMAP/SMTP option in the Mail Server Type section. 6. In the Account Information section, enter the settings for the mail account. 7. In the Server Information section, enter in the details for the mail server. 8. In the Properties section, if you want a copy of failed messages be sent to you or another user; enter an address for notifications. 9. To ensure settings are correct, click on Test Account Settings. If successfully connected, a prompt will appear saying Successfully Connected to Mail Account. 10. When settings have been entered and verified, click on Save to save settings and exit this window. You will return to the original window. 11. In the System Account Monitoring Status section, check Enable to start System . 46

47 12. In the Scanning Interval & Alert section, specify the time interval in which System should scan for incoming s. 13. Click on Finish to save settings. 14. Return to your Services console and start the HelpSTAR StarWatch Service. 47
48 Additional Resources Technical Specifications: HelpSTAR 2009 Help File: 48
Set Up with Microsoft Outlook 2013 using POP3
 Page 1 of 14 Help Center Set Up E-mail with Microsoft Outlook 2013 using POP3 Learn how to configure Microsoft Outlook 2013 for use with your 1&1 e-mail account using the POP3 Protocol. Before you begin,
SETUP FOR OUTLOOK (Updated October, 2018)
") EMAIL SETUP FOR OUTLOOK (Updated October, 2018) This tutorial will show you how to set up your email in Outlook using IMAP or POP. It also explains how to configure Outlook for MAC. Click on your version
EMAIL SETUP FOR OUTLOOK (Updated October, 2018) This tutorial will show you how to set up your email in Outlook using IMAP or POP. It also explains how to configure Outlook for MAC. Click on your version
User guide NotifySCM Installer
 User guide NotifySCM Installer TABLE OF CONTENTS 1 Overview... 3 2 Office 365 Users synchronization... 3 3 Installation... 5 4 Starting the server... 17 2 P a g e 1 OVERVIEW This user guide provides instruction
How do I setup Outlook Express to get my s?
 How do I setup Outlook Express to get my e-mails? Before you set up a mail account in Outlook Espress you must first have your POP3 mailbox details provided to you by your Account Manager, this will be
Important notice regarding accounts used for installation and configuration
 System Requirements Operating System Nintex Reporting 2008 can be installed on Microsoft Windows Server 2003 or 2008 (32 and 64 bit supported for both OS versions). Browser Client Microsoft Internet Explorer
Service User Manual. Outlook By SYSCOM (USA) May 2nd, Version 1.0. Outlook 2013 Ver.1.0
 May 2nd, Version 1.0. Outlook 2013 Ver.1.0") Outlook 2013 By SYSCOM (USA) May 2nd, 2016 Version 1.0 1 Contents 1. How to Setup POP3/SMTP Setup for Outlook 2013... 3 2. How to Setup IMAP for Outlook 2013... 14 3. How to Manage Spam Filter... 25 2
Outlook 2013 By SYSCOM (USA) May 2nd, 2016 Version 1.0 1 Contents 1. How to Setup POP3/SMTP Setup for Outlook 2013... 3 2. How to Setup IMAP for Outlook 2013... 14 3. How to Manage Spam Filter... 25 2
OneLogin Integration User Guide
 OneLogin Integration User Guide Table of Contents OneLogin Account Setup... 2 Create Account with OneLogin... 2 Setup Application with OneLogin... 2 Setup Required in OneLogin: SSO and AD Connector...
Service User Manual. Outlook By SYSCOM (USA) May 2, Version 2.0. Outlook 2007 Ver. 2.0
 May 2, Version 2.0. Outlook 2007 Ver. 2.0") Outlook 2007 By SYSCOM (USA) May 2, 2013 Version 2.0 1 Contents 1. How to Setup POP3/SMTP Setup for Outlook 2007... 3 2. How to Setup IMAP for Outlook 2007... 13 3. How to Manage Spam Filter... 22 2 1.
Outlook 2007 By SYSCOM (USA) May 2, 2013 Version 2.0 1 Contents 1. How to Setup POP3/SMTP Setup for Outlook 2007... 3 2. How to Setup IMAP for Outlook 2007... 13 3. How to Manage Spam Filter... 22 2 1.
IsItUp Quick Start Manual
 IsItUp - When you need to know the status of your network Taro Software Inc. Website: www.tarosoft.com Telephone: 703-405-4697 Postal address: 8829 110th Lane, Seminole Fl, 33772 Electronic mail: Contact1@tarosoft.com
Assistant User Guide
 mydatavo Assistant User Guide 1 2 3 4 5 6 7 8 9 10 11 12 13 14 15 16 17 18 19 20 21 22 Table Of Contents Features...ii Introduction...1 1. Installing mydatavo Assistant...1 1 System Requirements... 1 1.2
MICROSOFT OUTLOOK 2003
 MICROSOFT OUTLOOK 2003 Follow these steps to update an Outlook 2003 account to send and receive e-mail using CFU's new mail settings. Before you start, make sure your CFU e-mail password is at least eight
Using on Your Sprint PCS Vision Smart Device PPC-6700
 Using Email on Your Sprint PCS Vision Smart Device PPC-6700 2006 Sprint Nextel. All rights reserved. SPRINT, the "Going Forward" logo, and other trademarks are trademarks of Sprint Nextel. June 7, 2006
WhatsUp Gold 2016 Installation and Configuration Guide
 WhatsUp Gold 2016 Installation and Configuration Guide Contents Installing and Configuring WhatsUp Gold using WhatsUp Setup 1 Installation Overview 1 Overview 1 Security considerations 2 Standard WhatsUp
Changes Required for Outlook 2010 for PC
 E-mail Changes Required for Outlook 2010 for PC E-mail Changed required to be made on your designated Date and Time of Migration Change Incoming and Outgoing Mail Server Open Outlook 2010 and Select from
Pre-Installation Checklist v5.0
 Pre-Installation Checklist v5.0 November 2010 Table of Contents Introduction 3 Network infrastructure 4 ShareScan Manager PC 5 Devices 7 ecopy Connectors 8 Network Communication 13 Document Management
KnowledgeSync V6.0 Implementation Guide
 KnowledgeSync V6.0 Implementation Guide Pre-Installllatiion Confiiguratiion Welcome to KnowledgeSync! Welcome KnowledgeSync Active Alerts, the industry s leading Business Activity Monitoring (BAM) technology.
Service User Manual. Outlook By SYSCOM (USA) May 7, Version 2.0. Outlook 2003 Ver. 2.0
 May 7, Version 2.0. Outlook 2003 Ver. 2.0") Outlook 2003 By SYSCOM (USA) May 7, 2013 Version 2.0 1 Contents 1. How to set up POP3/SMTP for Outlook 2003... 3 2. How to Setup IMAP for Outlook 2003... 10 3. How to Manage Spam Filter... 15 2 1. How
Outlook 2003 By SYSCOM (USA) May 7, 2013 Version 2.0 1 Contents 1. How to set up POP3/SMTP for Outlook 2003... 3 2. How to Setup IMAP for Outlook 2003... 10 3. How to Manage Spam Filter... 15 2 1. How
Abila MIP. Human Resource Management Installation Guide
 Human Resource Management Installation Guide This is a publication of Abila, Inc. Version 2017.2 2017 Abila, Inc. and its affiliated entities. All rights reserved. Abila, the Abila logos, and the Abila
Enterprise Vault.cloud CloudLink Google Account Synchronization Guide. CloudLink to 4.0.3
 Enterprise Vault.cloud CloudLink Google Account Synchronization Guide CloudLink 4.0.1 to 4.0.3 Enterprise Vault.cloud: CloudLink Google Account Synchronization Guide Last updated: 2018-06-08. Legal Notice
CLOUD MAIL End User Guide. (Version 1.0)
") End User Guide () Table of Contents 1. How to Activate New Account... 3 2. How to Compose a New Email Message... 5 3. How to View and Edit the Email Draft... 6 4. How to View Sent Email Messages... 6 5.
End User Guide () Table of Contents 1. How to Activate New Account... 3 2. How to Compose a New Email Message... 5 3. How to View and Edit the Email Draft... 6 4. How to View Sent Email Messages... 6 5.
Installation Manual. Fleet Maintenance Software. Version 6.4
 Fleet Maintenance Software Installation Manual Version 6.4 6 Terri Lane, Suite 700 Burlington, NJ 08016 (609) 747-8800 Fax (609) 747-8801 Dossier@dossiersystemsinc.com www.dossiersystemsinc.com Copyright
Installation & Configuration Guide
 Installation & Configuration Guide Installation redisend Installation Steps: 1. Run the setupredisend.exe from the location it was downloaded 2. Select your language and click OK - figure 1.0 Figure 1.0:
User Manual. Admin Report Kit for Exchange Server
 User Manual Admin Report Kit for Exchange Server Table of Contents 1 About ARKES-Admin Report Kit for Exchange Server 1 1.1 System requirements 2 1.2 How to activate the software? 3 1.3 ARKES Reports Primer
Configuring Outlook 2007
 Configuring Outlook 2007 Contents 1. Configuring Outlook 2007... 1 2. Add the new IMAP email account to Outlook... 2 3. Set Default Inbox on Start-up... 8 4. Setup Saved & Deleted Items... 10 5. IMAP Folders:...
MailEnable Connector for Microsoft Outlook
 MailEnable Connector for Microsoft Outlook Version 1.41 This guide describes the installation and functionality of the MailEnable Connector for Microsoft Outlook. Features The MailEnable Connector for
HP Database and Middleware Automation
 HP Database and Middleware Automation For Windows Software Version: 10.10 SQL Server Database Refresh User Guide Document Release Date: June 2013 Software Release Date: June 2013 Legal Notices Warranty
Laserfiche Rio 10.3: Deployment Guide. White Paper
 Laserfiche Rio 10.3: Deployment Guide White Paper January 2018 Table of Contents How Laserfiche Licensing Works... 4 Types of Licenses... 4 Named User Licenses... 4 WebLink Public Portal Licenses... 6
WEBppliance for Windows User Administrator's Help
 WEBppliance for Windows User Administrator's Help September 23, 2003 Contents About This Document...3 How to use this Help system...4 Getting started...6 What to do first... 6 Viewing your account settings...
Configuring an IMAP4 or POP3 Journal Account for Microsoft Exchange Server 2003
 Configuring an IMAP4 or POP3 Journal Account for Microsoft Exchange Server 2003 This article refers to Microsoft Exchange Server 2003. As of April 8, 2014, Microsoft no longer issues security updates for
HR-Lite Database & Web Service Setup Guide
 HR-Lite Database & Web Service Setup Guide Version: 1.00 HR21 Limited All rights reserved. No part of this document may be reproduced or transmitted in any form or by any means, electronic or mechanical,
IQSweb Installation Instructions Version 5.0
 IQSweb Installation Instructions Version 5.0 Contents Additional References... 3 IQSweb ROSS Connection... 3 IQSweb V5.0 Install/Upgrade Scenarios... 4 IQSweb Configuration Options... 5 A. Single Computer/Server
Mail Processor 4.4. Installation and Configuration Guide. Date: June Page 1 of 37
 Mail Processor 4.4 Installation and Configuration Guide Date: June 2014 Page 1 of 37 All rights reserved. No part of this document may be reproduced or transmitted in any form or by any means, or stored
ROCK-POND REPORTING 2.1
 ROCK-POND REPORTING 2.1 Installation and Setup Guide Revised on 09/25/2014 TABLE OF CONTENTS ROCK-POND REPORTING 2.1... 1 SUPPORT FROM ROCK-POND SOLUTIONS... 2 ROCK-POND REPORTING OVERVIEW... 2 INFRASTRUCTURE
Employee Web Services. Installation Guide
 Employee Web Services This is a publication of Abila, Inc. Version 2017.x 2016 Abila, Inc. and its affiliated entities. All rights reserved. Abila, the Abila logos, and the Abila product and service names
MailEnable Connector for Microsoft Outlook
 MailEnable Connector for Microsoft Outlook Version 1.36 This guide describes the installation and functionality of the MailEnable Connector for Microsoft Outlook. Features The MailEnable Connector for
ForeScout Extended Module for Qualys VM
 ForeScout Extended Module for Qualys VM Version 1.2.1 Table of Contents About the Qualys VM Integration... 3 Additional Qualys VM Documentation... 3 About This Module... 3 Components... 4 Considerations...
Client Configuration Guide
 Email Client Configuration Guide Contents Prerequisites... 1 Microsoft Outlook 2007... 2 Microsoft Outlook 2002/XP and 2003... 7 Microsoft Windows Mail (available with Vista only)... 11 Microsoft Outlook
29 March 2017 SECURITY SERVER INSTALLATION GUIDE
 29 March 2017 SECURITY SERVER INSTALLATION GUIDE Contents 1. Introduction... 2 1.1 Assumptions... 2 1.2 Prerequisites... 2 2. Required setups prior the Security Server Installation... 3 1.1 Create domain
SUPERHUB OFFICE 365 OUTLOOK POP3 SETUP GUIDE
 SUPERHUB OFFICE 365 OUTLOOK POP3 SETUP GUIDE 2018 Superhub Limited. All right reserved. Table of Contents 1. Get Started... 3 2. Add New Account... 5 3. Get Help and Support... 10 The guide is to describe
TPS Imaging Installation Guide
 [Revision 1] Publication Date: August, 2008 Last Revision Date: August 6, 2008 Table of Contents Table of Contents...2 TPS Imaging Installation Guide...3 Summary of Installation Steps...3 1. Prerequisites...4
Direct Mail Quick Start User Guide. FL-HIE User Guide.v1.5
 Direct Mail Quick Start User Guide. User Login Credentials Your Administrator has created a FL-HIE Direct address for you. Once activated, your FL-HIE Direct Mail login username and temporary password
Version 1.5 Inbound Integration (POP3) Installation, Configuration and User Guide
 Installation, Configuration and User Guide") Version 1.5 Inbound Email Integration (POP3) Installation, Configuration and User Guide Last updated July 2010 1 Introduction and Overview... 1 2 The Case for Email monitoring... 1 3 Upgrading from earlier
Version 1.5 Inbound Email Integration (POP3) Installation, Configuration and User Guide Last updated July 2010 1 Introduction and Overview... 1 2 The Case for Email monitoring... 1 3 Upgrading from earlier
TABLE OF CONTENTS. Page 1 of 59
 Page 1 of 59 TABLE OF CONTENTS Introduction... 3 Features... 4 General Features... 4 IBackup Professional lets you view the log files of backup, restore, scheduled backup and the details of files and folders
Scribe Insight Installation Guide. Version August 10, 2011
 Scribe Insight Installation Guide Version 7.0.2 August 10, 2011 www.scribesoft.com Important Notice No part of this publication may be reproduced, stored in a retrieval system, or transmitted in any form
Quick Start Guide for Windows
 for Windows The Eudora 5.1 User Manual for Windows is on the Eudora CD included in the product box. If you prefer a printed and bound copy, you can purchase one from www.eudora.com or call 1-800-2-EUDORA
User Guide. Version R94. English
 AuthAnvil User Guide Version R94 English March 8, 2017 Copyright Agreement The purchase and use of all Software and Services is subject to the Agreement as defined in Kaseya s Click-Accept EULATOS as updated
Adding your IMAP Mail Account in Outlook 2013 on Windows
 Adding your IMAP Mail Account in Outlook 2013 on Windows Replace example.co.za with your domain name as it was sent to you by Visualize IT 1. Launch Outlook 2. Select File on the top left menu bar 3. Select
Steps for Advanced Setup on Outlook Express 6:
 Steps for Advanced Email Setup on Outlook Express 6: Advanced Email supports traditional POP3/SMTP email protocol as well as advance IMAP sync protocol, also works with smart mobile devices (e.g. Android/iOS
Vyapin Office 365 Management Suite
 Vyapin Office 365 Management Suite Last Updated: December 2015 Copyright 2015 Vyapin Software Systems Private Limited. All rights reserved. This document is being furnished by Vyapin Software Systems Private
Central Administration Console Installation and User's Guide
 IBM Tivoli Storage Manager FastBack for Workstations Version 7.1.1 Central Administration Console Installation and User's Guide SC27-2808-04 IBM Tivoli Storage Manager FastBack for Workstations Version
VMware Mirage Web Manager Guide
 Mirage 5.3 This document supports the version of each product listed and supports all subsequent versions until the document is replaced by a new edition. To check for more recent editions of this document,
User Guide. Version R92. English
 AuthAnvil User Guide Version R92 English October 9, 2015 Agreement The purchase and use of all Software and Services is subject to the Agreement as defined in Kaseya s Click-Accept EULATOS as updated from
Installing Perseus SurveySolutions/EFM 1.4 for Windows 2000 (Microsoft Internet Information Services and Oracle Server) January 2006
 January 2006") Installing Perseus SurveySolutions/EFM 1.4 for Windows 2000 (Microsoft Internet Information Services and Oracle Server) January 2006 For support, contact Perseus Technical Support at (781) 848-8100, ext.
Installing Perseus SurveySolutions/EFM 1.4 for Windows 2000 (Microsoft Internet Information Services and Oracle Server) January 2006 For support, contact Perseus Technical Support at (781) 848-8100, ext.
Dell Repository Manager Business Client Version 2.2 User s Guide
 Dell Repository Manager Business Client Version 2.2 User s Guide Notes, cautions, and warnings NOTE: A NOTE indicates important information that helps you make better use of your computer. CAUTION: A CAUTION
Dell Repository Manager Business Client Version 2.0 User s Guide
 Dell Repository Manager Business Client Version 2.0 User s Guide Notes, Cautions, and Warnings NOTE: A NOTE indicates important information that helps you make better use of your computer. CAUTION: A CAUTION
ZENworks Mobile Workspace Installation Guide. September 2017
 ZENworks Mobile Workspace Installation Guide September 2017 Legal Notice For information about legal notices, trademarks, disclaimers, warranties, export and other use restrictions, U.S. Government rights,
User Manual. ARK for SharePoint-2007
 User Manual ARK for SharePoint-2007 Table of Contents 1 About ARKSP (Admin Report Kit for SharePoint) 1 1.1 About ARKSP 1 1.2 Who can use ARKSP? 1 1.3 System Requirements 2 1.4 How to activate the software?
CMT for Exchange Installation and Configuration Guide
 CMT for Exchange 3.5.1 Installation and Configuration Guide August 2015 Table of Contents Section 1: Introduction... 5 Purpose & Audience... 5 About CMT for Exchange... 5 Product Overview... 8 Section
ForeScout Extended Module for Tenable Vulnerability Management
 ForeScout Extended Module for Tenable Vulnerability Management Version 2.7.1 Table of Contents About Tenable Vulnerability Management Module... 4 Compatible Tenable Vulnerability Products... 4 About Support
LifeSize Control Installation Guide
 LifeSize Control Installation Guide January 2009 Copyright Notice 2005-2009 LifeSize Communications Inc, and its licensors. All rights reserved. LifeSize Communications has made every effort to ensure
IT Access Portal User Guide (Employees)
") IT Access Portal User Guide (Employees) Introduction The University of Salford IT Access Portal provides University employees with secure, off-campus access to core IT applications and resources; for example:
IT Access Portal User Guide (Employees) Introduction The University of Salford IT Access Portal provides University employees with secure, off-campus access to core IT applications and resources; for example:
Installing GFI MailArchiver
 Installing GFI MailArchiver Introduction This chapter highlights important points you should take into consideration before installing GFI MailArchiver on your network, so that you can make the best decisions
Exchange Pro 4.4. User Guide. March 2017
 Exchange Pro 4.4 User Guide March 2017 Table of Contents 1. Introduction to Exchange Pro... 5 About this Document... 5 Supported Mailbox Migration Paths... 6 Supported Public Folders Migration Paths...
Client Loading Instructions For ProHelp EPM, Release 7.7
 Client Loading Instructions For ProHelp EPM, Release 7.7 This application note describes the steps necessary to install the ProHelp EPM, Release 7.7, client software on a workstation computer. It presumes
VMware AirWatch Database Migration Guide A sample procedure for migrating your AirWatch database
 VMware AirWatch Database Migration Guide A sample procedure for migrating your AirWatch database For multiple versions Have documentation feedback? Submit a Documentation Feedback support ticket using
Scribe Insight Installation Guide. Version August 6,
 Scribe Insight Installation Guide Version 7.7.0 August 6, 2015 www.scribesoft.com Important Notice No part of this publication may be reproduced, stored in a retrieval system, or transmitted in any form
ControlPoint. Advanced Installation Guide. September 07,
 ControlPoint Advanced Installation Guide September 07, 2017 www.metalogix.com info@metalogix.com 202.609.9100 Copyright International GmbH., 2008-2017 All rights reserved. No part or section of the contents
Synchronization Agent Configuration Guide
 SafeNet Authentication Service Synchronization Agent Configuration Guide 1 Document Information Document Part Number 007-012848-001, Rev. B Release Date March 2015 Applicability This version of the SAS
Search for Mail Step 3 Click the Accounts button.
 Manually Set Up E-mail with Microsoft Outlook Learn how to configure Microsoft Outlook 2003, 2007, 2010, 2013, or 2016 for use with your 1&1 Mail Basic account using the IMAP Protocol. Follow the instructions
PST for Outlook Admin Guide
 PST for Outlook 2013 Admin Guide Document Revision Date: Sept. 25, 2015 PST Admin for Outlook 2013 1 Populating Your Exchange Mailbox/Importing and Exporting.PST Files Use this guide to import data (Emails,
DSS User Guide. End User Guide. - i -
 DSS User Guide End User Guide - i - DSS User Guide Table of Contents End User Guide... 1 Table of Contents... 2 Part 1: Getting Started... 1 How to Log in to the Web Portal... 1 How to Manage Account Settings...
KYOCERA Net Admin User Guide
 KYOCERA Net Admin User Guide Legal Notes Unauthorized reproduction of all or part of this guide is prohibited. The information in this guide is subject to change without notice. We cannot be held liable
Jonas Activity Management Technical Deployment Guide
 Jonas Activity Management Technical Deployment Guide [] Software for Life Jonas Activity Management Technical Deployment Guide, Jonas, Jonas Software, Software for Life, and Gary Jonas Computing are registered
Administrator Manual. Last Updated: 15 March 2012 Manual Version:
 Administrator Manual Last Updated: 15 March 2012 Manual Version: 1.6 http://www.helpdeskpilot.com Copyright Information Under the copyright laws, this manual may not be copied, in whole or in part. Your
Installation Guide for Pulse on Windows Server 2012
 USER GUIDE MADCAP PULSE 4 Installation Guide for Pulse on Windows Server 2012 Copyright 2018 MadCap Software. All rights reserved. Information in this document is subject to change without notice. The
Scribe Insight Installation Guide. Version May 17, 2013
 Scribe Insight Installation Guide Version 7.6.1 May 17, 2013 www.scribesoft.com Important Notice No part of this publication may be reproduced, stored in a retrieval system, or transmitted in any form
Version 6.3 Upgrade Guide
 Version 6.3 Upgrade Guide Copyright 2016 Manufacturing Information Systems, Inc. 217-4 Maxham Meadow Way Woodstock, Vermont 05091 MISys and the MISys logo are registered trademarks of Manufacturing Information
Installing Vovici EFM Community Version 2.20 on Windows 2003 Server. September For support, contact Vovici Technical Support.
 Installing Vovici EFM Community Version 2.20 on Windows 2003 Server September 2007 For support, contact Vovici Technical Support. Please contact Vovici Technical Support if you believe any of the information
Re-installing SQL Server 2012 Express
 Re-installing SQL Server 2012 Express This document helps you in re-installing SQL Server 2012 Express edition without losing data on the current TM1000 database (Other databases on SQL will be removed).
Installation on Windows Server 2008
 USER GUIDE MADCAP PULSE 4 Installation on Windows Server 2008 Copyright 2018 MadCap Software. All rights reserved. Information in this document is subject to change without notice. The software described
NeuQs Standard Installation Guide
 NeuQs Standard Installation Guide Neustro Consulting Limited Interlink Industrial Estate Bardon Hill Coalville Leicestershire LE67 1HH Telephone: +44 (0) 1530 811400 www.neustro.com Registered in England
EMS MASTER CALENDAR Installation Guide
 EMS MASTER CALENDAR Installation Guide V44.1 Last Updated: May 2018 EMS Software emssoftware.com/help 800.440.3994 2018 EMS Software, LLC. All Rights Reserved. Table of Contents CHAPTER 1: Introduction
Cisco recommends that you have knowledge of FireSIGHT Management Center, Sourcefire User Agent, and Active Directory.
 Contents Introduction Prerequisites Installation Requirements Installation of Sourcefire User Agent Uninstallation of the Sourcefire User Agent Troubleshoot Uninstallation Issues Symptom Solution Introduction
How to Configure GroupWise Message-Level Backups
 How to Configure GroupWise Message-Level Backups The articles in this section refer to Barracuda Backup Legacy Release firmware or newer, and Novell NetWare Server and GroupWise 8 and 2012. Barracuda Networks
Central Administration Console Installation and User's Guide
 IBM Tivoli Storage Manager FastBack for Workstations Version 7.1 Central Administration Console Installation and User's Guide SC27-2808-03 IBM Tivoli Storage Manager FastBack for Workstations Version
Covene Cohesion Server Installation Guide A Modular Platform for Pexip Infinity Management October 25, 2016 Version 3.3 Revision 1.
 Covene Cohesion Server Installation Guide A Modular Platform for Pexip Infinity Management October 25, 2016 Version 3.3 Revision 1.0 Table of Contents 1. Overview... 3 2. Upgrading an Existing Installation...
MSP/ISP Multi-Tenant Archiving Platform Online Deployment Customer Activation 10-Step Quick Guide
 MSP/ISP Multi-Tenant Archiving Platform Online Deployment Customer Activation 10-Step Quick Guide Copyright (C) 2011 MessageSolution Inc. All Rights Reserved 1 Table of Contents Pre-Implementation... 3
Sage X3 Intelligence Financial Reporting. Installation and Upgrade Guide
 Financial Reporting Installation and Upgrade Guide The software described in this document is protected by copyright, and may not be copied on any medium except as specifically authorized in the license
Installation and Deployment Guide for HEAT Service Management
 Installation and Deployment Guide for HEAT Service Management Supported Deployment Configurations The section briefly describes the deployment configurations that are supported by the HEAT Service Management
Using the isupport Customer Profile Screen
 Using the isupport Customer Profile Screen The Customer Profile screen (accessed via the Desktop menu) enables you to record customer information that can be used in all isupport functionality. Note that
Envelope Journaling for Microsoft Exchange 2003 Version 1.0
 Barracuda Message Archiver Organizations using Microsoft Exchange 2003 can take advantage of its envelope journaling feature to send all messages along with all recipient information directly to the Barracuda
Setup Guide. Page 0
 Email Setup Guide Page 0 Table of Contents Mailbox Setup Guide... 2 Before you Start... 2 Desktop Mail Clients... 3 Outlook 2016 setup... 3 Outlook 2013 setup... 7 Outlook 2010 setup... 12 Windows 10 Mail
Step by Step SQL Server Alerts and Operator Notifications
 Step by Step SQL Server Alerts and Email Operator Notifications Hussain Shakir LinkedIn: https://www.linkedin.com/in/mrhussain Twitter: https://twitter.com/hshakir_ms Blog: http://mstechguru.blogspot.ae/
Installing Vovici EFM Community Version Fall 2007 (3.00) on Windows 2003 Server. November For support, contact Vovici Technical Support.
 on Windows 2003 Server. November For support, contact Vovici Technical Support.") Installing Vovici EFM Community Version Fall 2007 (3.00) on Windows 2003 Server November 2007 For support, contact Vovici Technical Support. Please contact Vovici Technical Support if you believe any of
Installing Vovici EFM Community Version Fall 2007 (3.00) on Windows 2003 Server November 2007 For support, contact Vovici Technical Support. Please contact Vovici Technical Support if you believe any of
XIA Configuration Server
 XIA Configuration Server XIA Configuration Server v6 Cloud Services Quick Start Guide Tuesday, 20 May 2014 1 P a g e X I A C o n f i g u r a t i o n C l o u d S e r v i c e s Contents Overview... 3 Creating
SEMS SOFTWARE SUITE INSTALLATION WHERE TO DOWNLOAD THE INSTALLERS
 SEMS SOFTWARE SUITE INSTALLATION WHERE TO DOWNLOAD THE INSTALLERS 1 SEMS SOFTWARE SUITE INSTALLATION INFORMATION Getting Started FTP Link The installation files can be downloaded from our FTP site. The
Administering isupport
 Administering isupport Tracking and Monitoring isupport Usage Agents perform tasks in the background that are an integral part of isupport functionality. See Enabling and Scheduling Agents on page 2 for
User Guide - Exchange Mailbox Archiver Agent
 Page 1 of 245 User Guide - Exchange Mailbox Archiver Agent TABLE OF CONTENTS OVERVIEW Introduction Key Features Add-On Components Terminology SYSTEM REQUIREMENTS - EXCHANGE MAILBOX ARCHIVER AGENT DEPLOYMENT
Use a class C setting for maximum security. The class C setting is Click RoomWizard Setup.
 Use a class C setting for maximum security. The class C setting is 255.255.255.0. 2 Click RoomWizard Setup. The Default Gateway is the IP address of the router or gateway that provides internet access.
Installation Guide. for 6.5 and all add-on modules
 Kaseya Server Setup Installation Guide for 6.5 and all add-on modules February 11, 2014 Agreement The purchase and use of all Software and Services is subject to the Agreement as defined in Kaseya s Click-Accept