Electrical Starter Pack User Guide
|
|
|
- Agnes Strickland
- 5 years ago
- Views:
Transcription


1 Electrical Starter Pack User Guide UPDATED ON 11/21/2018 PlanSwift Authored by: Dave Hansen 1
2 Table of Contents Overview... 3 Purchasing and Installation... 4 Purchasing Plugins... 4 Installation and Uninstallation... 4 Features... 5 How To... 6 How to: Add Your Own Electrical Symbol Icons... 6 How to: Copy and Paste an Assembly... 8 How to: Copy and Paste Parts How to: Drag and Drop Parts FAQ Compendium Electrical Starter Pack Templates Electrical Assemblies Electrical Parts Electrical Symbols Electrical Starter Pack Lists Boxes Conduit Connectors Covers Lighting A/V and Communication Motorized and HVAC Plaster Rings Power Distribution Receptacles Switches Wire Complete Symbol List Conduit Fittings
3 Overview This guide will teach you how to properly use the tools and features found within the Electrical Starter Pack. It is designed for use with PlanSwift Takeoff and Estimating Software. This guide is not meant to be a step-by-step walk through document, although it can be used as a reference for getting the work done. If you encounter technical difficulty, consult this guide (including the FAQ section of this user manual) or contact the technical support department at: PlanSwift Technical Support support@planswift.com ext. 2 PlanSwift also offers additional training. For training options, contact the training department at: PlanSwift Training Department training@planswift.com ext. 4 3

4 Purchasing and Installation Purchasing Plugins If you need to purchase PlanSwift or a plugin product, contact the Sales Department at: Installation and Uninstallation PlanSwift Sales sales@planswift.com Ext. 1 Installing and uninstalling starter packs is simple. For installing them, click on the Import Plugin Package icon (arrow 1 in Figure 1) from the PlanSwift Main Ribbon-bar Plugin tab (arrow 3 of Figure 1) and follow the prompts from there. For uninstalling, click on the Uninstall Plugin (arrow 2 in Figure 1) and follow those prompts. Figure 1 4

5 Features The Electrical Starter Pack includes Electrical Assemblies, Electrical Parts, and Electrical Symbols found in the Templates tab of PlanSwift (Figure 2, arrows 1, 2, and 3). This starter pack has an additional feature that allows you to add your own electrical symbols. Note that the Electrical Symbols tab is not visible after the plugin is installed until you click on the down-arrow (arrow 4) and select the Electrical Symbols tab (arrow 5) to be visible. The assemblies, parts, symbols, and lists of them (on the Lists tab) are listed in the Compendium at the end of this guide. The templates are also visible in the Templates sidebar window (arrow 6), where they may be used to initiate takeoffs. With these Electrical Starter Pack assemblies and parts, PlanSwift users can easily customize assemblies and parts for later use. Figure 2 Starter Packs contain a large library of prebuilt templates, parts and assemblies. Modifying the library of parts and assemblies for any Starter Pack allows users the ability to customize their Templates to their specific needs. Users will save countless hours of setup by utilizing a Starter Pack as their starting point for building custom parts and assemblies. The instructions below will guide new users through the basics of modifying parts and assemblies. We highly recommend purchasing a training package for accelerated learning and faster customization. 5
 2. Click on the Electrical Symbols tab.")
6 How To How to: Add Your Own Electrical Symbol Icons Adding an electrical symbol icon requires you to copy an existing template item, paste it as a new template item, rename it, assign a new icon to it, and then add it to the Complete Symbol List under the Lists tab. 1. To create a new symbol icon, click on the Templates window (see Figure 2) 2. Click on the Electrical Symbols tab. See Features for how to unhide this tab. 3. Click to select any template item from the list on the Electrical Symbols tab. 4. Click on Copy on the Templates tab ribbon-bar. 5. Click on the Paste button to paste the copy right below the original. 6. Right-click (or double-click) on the name to open the Properties window. 7. Double-clicking in the Symbol Icon field opens a window, allowing you to browse and select a new symbol (we recommend using.png images). 8. You must give the newly created template item a unique Name. Figure 2 6
, and add the name of the new symbol icon you created. (Adding your new names to the bottom allows you to track your changes to the list.")
7 9. Click on the Lists tab (Figure 3) on the Main ribbon-bar menu. 10. Click on Complete Symbol List under the Electrical folder. The main window displays the names of electrical symbols. 11. Click in this window, scroll to the bottom (optional), and add the name of the new symbol icon you created. (Adding your new names to the bottom allows you to track your changes to the list.) Figure 3 7

8 How to: Copy and Paste an Assembly The purpose of copying and pasting an assembly is to allow the user to copy and then modify the assembly for later use. As an example, you may want two different assemblies: one might include a part, and another might have an alternative part or not include that part at all. By copying one assembly and then modifying and renaming the copy (for easy identification), you can have two different assemblies available, allowing for easier and faster takeoffs. Figure 4 shows the Templates Tab (arrow 1) and the Area Takeoff Item Example 1 assembly (arrow 2). If you want to add another assembly but with no Material 3, then you would click on the assembly you want to copy (arrow 2), click on Copy (arrow 3), and then click on Paste (arrow 4). Figure 4 8
 from the newly created Area Takeoff Item Example 1 assembly (arrow 2), click on Material 3 (arrow 3), click on Delete (arrow 4),")
9 Figure 5 shows the original (arrow 1) and new Area Takeoff Item Example 1 assembly (arrow 2). To delete the Material 3 (arrow 3) from the newly created Area Takeoff Item Example 1 assembly (arrow 2), click on Material 3 (arrow 3), click on Delete (arrow 4), and click on OK in the popup window to confirm the deletion. Figure 5 9
 without the Material 3 item by double-clicking the duplicate")
10 Figure 6 now shows the two assemblies, one with (arrow 1) and one without (arrow 2) the Material 3 item. You can now change the description of the duplicated Area Takeoff Item Example 1 (arrow 3) without the Material 3 item by double-clicking the duplicate Area Takeoff Item Example 1 (arrow 3). Figure 6 10
![This opens the Properties [Area Takeoff Item Example 1] window (Figure 7) where](/docs-images/88/117252070/images/11-0.jpg "you can change the assembly s name to something like Area Takeoff Item Example 1")

11 This opens the Properties [Area Takeoff Item Example 1] window (Figure 7) where you can change the assembly s name to something like Area Takeoff Item Example 1 No Material 3 to make it easier to identify. Figure 7 Click on Ok in the Properties window after you have entered the name. Figure 8 shows the new name. Figure 8 11

12 To perform a takeoff with the Area Takeoff Item Example 1 No Material 3 assembly, go to the takeoff page, click on the green Record Button (see the arrow in Figure 9) in the Templates sidebar window, and then proceed to do your takeoff. Figure 9 Disclaimer Any modifications that a user makes to a Starter Pack should always be tested and verified by that user to ensure quantities and calculations are accurate. PlanSwift cannot verify the accuracy of modifications made to templates, parts and assemblies by the user. 12
,")
13 How to: Copy and Paste Parts Copying and pasting parts is handled similarly to copying and pasting an assembly. If, for instance, you want to move Material 6 in Area Takeoff Item Example 2 to Area Takeoff Item Example 1, click on Material 6 (Figure 10, arrow 1), then click on copy (arrow 2). Figure 10 13


14 There are now two ways to paste the part. The first is to paste it at the same hierarchical level of a selected item, and the second is to paste it as a sub-item of a selected item. Figure 11 shows the Paste button. Clicking on the top half of the button pastes the part at the same hierarchical level of a selected item. Clicking on the dropdown half of the button, then selecting As Sub-Item pastes the part as a sub-item of the selected item. Figure 11 Click on Area Takeoff Item Example 1, then click on the top half of Paste. As shown in Figure 12, Material 6 gets pasted at the same hierarchical level as Area Takeoff Item Example 1. Figure 12 14

.")
15 If you had selected the drop-down half of the Paste button, then Material 6 would be a sub-item of Area Takeoff Item Example 1. Figure 13 shows Material 6 as a sub-item. Figure 13 Another way to adjust the hierarchy of an item, such as Material 6, is to use the Main Ribbon bar arrow Adjust keys (Figure 14). Figure 14 The left and right Adjust arrows move the item left and right (up or down) in the hierarchy, and the up and down Adjust arrows keys moves the item higher and lower in the list of items. 15

.")
16 A shortcut to the Copy and Paste and Past as Sub-Item selections is available with a right-click menu. Figure 15 shows the Copy, Paste, and Paste As Sub-Item options on the right-click menu when Material 6 is right-clicked on. Figure 15 Double-clicking on Material 6 allows you to change the name of the item and alter other properties of the item (Figure 16). To change the name of Material 6, doubleclick on the Material 6 name, type the new name, and click on Ok. Figure 16 16

17 Figure 17 shows Material 6 renamed to Material 6A. Disclaimer Figure 17 Disclaimer Any modifications that a user makes to a Starter Pack should always be tested and verified by that user to ensure quantities and calculations are accurate. PlanSwift cannot verify the accuracy of modifications made to templates, parts and assemblies by the user. 17
")
18 How to: Drag and Drop Parts Parts may be dragged and dropped from one assembly to another assembly. If, for instance, you want to drag the Material 8 item from Area Takeoff Item Example 2 up to Area Takeoff Item Example 1, click on Material 8 and drag it up to just below Material 6A (see Figure 18) and release the mouse button. Figure 18 Notice that dragging the part this way moves the part from the Example 2 assembly to the Example 1 assembly, not leaving behind a copy. 18

19 The Templates sidebar window is a summarized view of everything in the Templates Tab. It is designed for easily dragging and dropping parts and for quickly launching takeoff templates and assemblies. Parts may be dragged over from the Templates sidebar window into the Templates Tab window; note that dragging any part from the Templates sidebar window makes a copy of it. If, for instance, you want a Material 7 item added to Area Takeoff Item Example 1 as a sub-item, simply drag the Material 7 from the right Templates sidebar window over on top of Area Takeoff Item Example 1 label and release the mouse button. (Figure 19). Figure 19 Figure 19 shows the Material 7 item in place after it was dropped on top of Area Takeoff Item Example 1. In addition, the Properties [Material 7] window automatically opens, allowing the user to change any properties for Material 7. Click on Ok to close the Properties [Material 7] window. 19
20 Disclaimer Any modifications that a user makes to a Starter Pack should always be tested and verified by that user to ensure quantities and calculations are accurate. PlanSwift cannot verify the accuracy of modifications made to templates, parts and assemblies by the user. FAQ Question: I ve read this user guide, and I still have questions. What do I do? Answer: PlanSwift recommends that you purchase a training package. We highly recommend new users purchase a training package, because training is customized to each user. We offer one-on-one training and classroom training. Contact training@planswift.com or at Ext. 4. Question: Does the Starter Pack include everything a contractor will need to generate an estimate? Answer: No. A Starter Pack is a tool to get you started toward creating a complete estimate. For example, the Starter Pack does not include industry pricing for materials and labor. However, you can supply prices for materials and labor on the assemblies and labor included in the Starter Pack. Question: Do I have to input all the pricing for all my parts? Answer: Inputting pricing is optional. You can use the Starter Pack to generate quantities that you can then send to your supplier, who can then provide you current pricing. Inputting pricing on your own is optional. If your industry s pricing is not subject to frequent changes, you may want to consider inputting your pricing in PlanSwift. 20

21 Compendium Electrical Starter Pack Templates Electrical Assemblies 21
22 Electrical Assemblies -- Continued 22
23 Electrical Assemblies -- Continued 23

24 Electrical Assemblies -- Continued 24
25 Electrical Assemblies -- Continued 25

26 Electrical Assemblies -- Continued 26

27 Electrical Assemblies -- Continued 27
28 Electrical Assemblies -- Continued 28

29 Electrical Assemblies -- Continued 29

30 Electrical Assemblies -- Continued 30

31 Electrical Assemblies -- Continued 31

32 Electrical Assemblies -- Continued 32

33 Electrical Assemblies -- Continued 33

34 Electrical Assemblies -- Continued 34
35 Electrical Assemblies -- Continued 35

36 Electrical Assemblies -- Continued 36

37 Electrical Assemblies -- Continued 37
38 Electrical Assemblies -- Continued 38

39 Electrical Assemblies -- Continued 39

40 Electrical Assemblies -- Continued 40

41 Electrical Assemblies -- Continued 41

42 Electrical Assemblies -- Continued 42

43 Electrical Assemblies -- Continued 43
44 Electrical Assemblies -- Continued 44
45 Electrical Assemblies -- Continued 45

46 Electrical Assemblies -- Continued 46
47 Electrical Assemblies -- Continued 47

48 Electrical Assemblies -- Continued 48

49 Electrical Assemblies -- Continued 49

50 Electrical Assemblies -- Continued 50
51 Electrical Parts 51
52 Electrical Parts Continued 52
53 Electrical Parts Continued 53
54 Electrical Symbols 54
55 Electrical Symbols Continued 55
56 Electrical Symbols Continued 56
57 Electrical Symbols Continued 57

58 Electrical Starter Pack Lists Boxes 58

59 Conduit 59
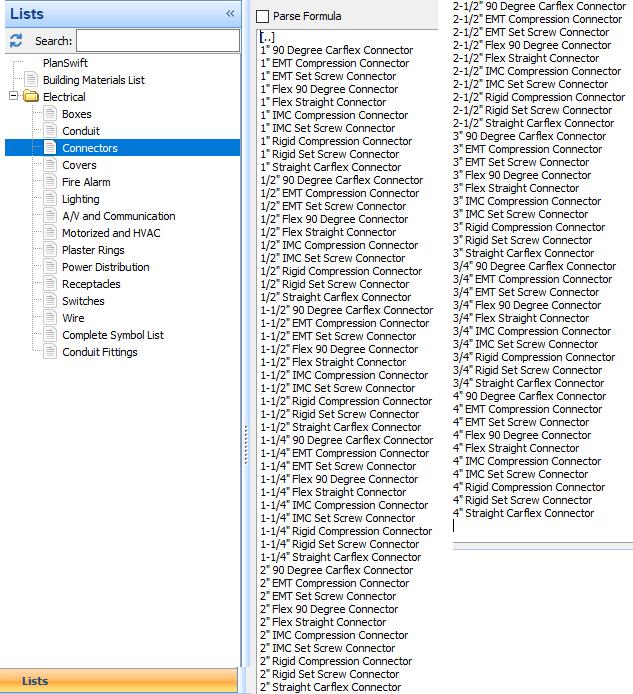
60 Connectors 60


61 Covers Fire Alarm 61


62 Lighting A/V and Communication 62


63 Motorized and HVAC Plaster Rings 63


64 Power Distribution Receptacles 64

65 Switches 65

66 Wire 66

67 Complete Symbol List 67

68 Conduit Fittings 68
Masonry Starter Pack User Guide
 Masonry Starter Pack User Guide UPDATED ON 11/21/2018 PlanSwift Authored by: Dave Hansen 1 Table of Contents Overview... 3 Purchasing and Installation... 4 Purchasing Plugins... 4 Installation and Uninstallation...
Concrete Starter Pack User Guide
 Concrete Starter Pack User Guide UPDATED ON 6/26/2018 PlanSwift Authored by: Dave Hansen 1 Table of Contents Overview... 3 Purchasing and Installation... 4 Purchasing Plugins... 4 Installation and Uninstallation...
Premier Roofing Plugin User Guide
 Premier Roofing Plugin User Guide UPDATED ON 6/26/2018 PlanSwift Authored by: Dave Hansen 1 Table of Contents... 1 Overview... 3 Purchasing and Installation... 4 Purchasing Plugins... 4 Installation and
PlanSwift. Import from Excel Tool User Guide UPDATED ON 6/26/2018. PlanSwift. Authored by: Dave Hansen
 PlanSwift Import from Excel Tool User Guide UPDATED ON 6/26/2018 PlanSwift Authored by: Dave Hansen 1 Table of Contents Overview... 3 Purchasing and Installation... 4 Purchasing Plugins... 4 Installation
SwiftMaps Plugin User Guide
 SwiftMaps Plugin User Guide UPDATED ON 6/26/2018 PlanSwift Authored by: Dave Hansen 1 Table of Contents Overview... 3 Purchasing and Installation... 4 Purchasing Plugins... 4 Installation and Uninstallation...
Export to Excel by Page Plugin User Guide
 Export to Excel by Page Plugin User Guide UPDATED ON 11/21/2018 PlanSwift Authored by: Dave Hansen 1 Table of Contents Overview... 3 Purchasing and Installation... 4 Purchasing Plugins... 4 Installation
SwiftMaps Plugin User Guide
 SwiftMaps Plugin User Guide UPDATED ON 2/21/2019 PlanSwift Authored by: Dave Hansen 1 Table of Contents Overview... 3 Purchasing and Installation... 4 Purchasing Plugins... 4 Installation and Uninstallation...
Advanced Copy Pro 9.0 Plugin User Guide
 Advanced Copy Pro 9.0 Plugin User Guide UPDATED ON 6/26/2018 PlanSwift Authored by: Dave Hansen 1 Table of Contents Overview... 3 Purchasing and Installation... 4 Purchasing Plugins... 4 Installation and
Create a Customised Tab on the Office 2013 Ribbon
 Create a Customised Tab on the Office 2013 Ribbon Office 2007 saw the addition of the Ribbon feature, which some users found confusing. However, you can use it to your advantage by adding your own custom
Customizing Ribbon with New Main Tab. 1 of 8
 Customizing the Ribbon with your own Main tab (Menu) on THIS COMPUTER is a one-time setup Create your own Main tab with the most frequent commands YOU use. Here is the Main tab on my Ribbon which I created,
Access Review. 4. Save the table by clicking the Save icon in the Quick Access Toolbar or by pulling
 Access Review Relational Databases Different tables can have the same field in common. This feature is used to explicitly specify a relationship between two tables. Values appearing in field A in one table
Discovering Computers & Microsoft Office Office 2010 and Windows 7: Essential Concepts and Skills
 Discovering Computers & Microsoft Office 2010 Office 2010 and Windows 7: Essential Concepts and Skills Objectives Perform basic mouse operations Start Windows and log on to the computer Identify the objects
Sage Estimating (SQL) v17.12
 v17.12") Sage Estimating (SQL) v17.12 Release Notes October 2017 This is a publication of Sage Software, Inc. 2017 The Sage Group plc or its licensors. All rights reserved. Sage, Sage logos, and Sage product and
Sage Estimating (SQL) v17.12 Release Notes October 2017 This is a publication of Sage Software, Inc. 2017 The Sage Group plc or its licensors. All rights reserved. Sage, Sage logos, and Sage product and
Introduction to Moodle
 Introduction to Moodle Preparing for a Moodle Staff Development Session... 2 Logging in to Moodle... 2 Adding an image to your profile... 4 Navigate to and within a course... 6 Content of the basic template
Colleague UI4.3 Documentation
 Colleague UI4.3 Documentation Table of Contents Getting Started... 2 Add the Shortcuts to your Desktop... 2 Searching for and Using Forms... 3 Begin Your Form Search... 3 Form Search Results... 3 The Navigation
AHC SharePoint 2010 Intro to Content Administration
 AHC SharePoint 2010 Intro to Content Administration Email: training@health.ufl.edu Web Page: http://training.health.ufl.edu Last Updated 2/7/2014 1.0 INTRODUCTION TO SHAREPOINT 2010 1.4 Your New Site Before
2. create the workbook file
 2. create the workbook file Excel documents are called workbook files. A workbook can include multiple sheets of information. Excel supports two kinds of sheets for working with data: Worksheets, which
Sage Estimating (SQL) v18.11
 v18.11") Sage Estimating (SQL) v18.11 Release Notes July 2018 This is a publication of Sage Software, Inc. 2018 The Sage Group plc or its licensors. All rights reserved. Sage, Sage logos, and Sage product and service
Sage Estimating (SQL) v18.11 Release Notes July 2018 This is a publication of Sage Software, Inc. 2018 The Sage Group plc or its licensors. All rights reserved. Sage, Sage logos, and Sage product and service
OBIEE. Oracle Business Intelligence Enterprise Edition. Rensselaer Business Intelligence Finance Author Training
 OBIEE Oracle Business Intelligence Enterprise Edition Rensselaer Business Intelligence Finance Author Training TABLE OF CONTENTS INTRODUCTION... 1 USER INTERFACE... 1 HOW TO LAUNCH OBIEE... 1 TERMINOLOGY...
Minfos Label Maintenance. User Guide
 Minfos Label Maintenance User Guide Version 2.0 June 2016 Contents Introduction... 4 Audience... 4 Prerequisites... 4 Launch Label Maintenance... 5 Managing labels... 6 Set a label as active or inactive...
Sage Estimating (SQL) v17.12
 v17.12") Sage Estimating (SQL) v17.12 Getting Started Guide October 2017 This is a publication of Sage Software, Inc. 2017 The Sage Group plc or its licensors. All rights reserved. Sage, Sage logos, and Sage product
Sage Estimating (SQL) v17.12 Getting Started Guide October 2017 This is a publication of Sage Software, Inc. 2017 The Sage Group plc or its licensors. All rights reserved. Sage, Sage logos, and Sage product
Reporting Center. Primary (Stand-Alone) Interface
 Interface") Reporting Center The Reporting Center is where you will go to run or create reports on projects. It can be accessed in any of the follow ways, each with a slightly different user interface and functionality.
Reporting Center The Reporting Center is where you will go to run or create reports on projects. It can be accessed in any of the follow ways, each with a slightly different user interface and functionality.
QUESTION ITEM BANK MAINTENANCE PROGRAM QUICK GUIDE & ILLUSTRATED HELP
 PROJECT PHOENIX EduTrax Instructional Management Solution Phoenix/EIM ItemPlus QUESTION ITEM BANK MAINTENANCE PROGRAM QUICK GUIDE & ILLUSTRATED HELP Version 1.3.3.2 The ItemPlus Windows PC program is used
Microsoft PowerPoint Lesson 2
 Microsoft PowerPoint 2010 Lesson 2 On completion of this lesson, students will be able to do the following: Create a new presentation from a theme Create a new slide Delete a slide Enter text in the Outline
1. Adjusting Your Work Area
 21 1. Adjusting Your Work Area You can customize the Windows Vista operating system to look and function exactly how you want. In the book Windows Vista for SENIORS you learned for example how to change
SITE DESIGN & ADVANCED WEB PART FEATURES...
 Overview OVERVIEW... 2 SITE DESIGN & ADVANCED WEB PART FEATURES... 4 SITE HIERARCHY... 4 Planning Your Site Hierarchy & Content... 4 Content Building Tools... 5 Pages vs Sites... 6 Creating Pages... 6
Table of Contents 1. Introduction to SmartScan Label Link Using SmartScan Label Link Using the Labeler Software...
 Table of Contents 1. Introduction to SmartScan Label Link 3.0 2 Getting Started...2 Startup Checklist...2 Installing SmartScan Label Link...3 Registering SmartScan Label Link...3 Working with QuickBooks...4
Task On Gingerbread On Ice Cream Sandwich Notification bar on lock screen Notification bar is not accessible on the lock screen.
 HTC Rezound to 3.14.605.12 710RD: What s Different and New? Congratulations on updating your HTC Rezound to 3.14.605.12 710RD. You might have some questions about the new update and how you can take advantage
BRIEFCASES & TASKS ZIMBRA. Briefcase can be used to share and manage documents. Documents can be shared, edited, and created using Briefcases.
 BRIEFCASES & TASKS ZIMBRA BRIEFCASES Briefcase can be used to share and manage documents. Documents can be shared, edited, and created using Briefcases. Options Briefcase New Briefcase To create briefcases,
ASSEMBLER USER GUIDE. Developed and published by Expedience Software Copyright Expedience Software
 ASSEMBLER USER GUIDE Developed and published by Expedience Software Copyright 2012-2017 Expedience Software User Guide Contents About this Guide... 1 The User Guide 1 Install Expedience Ribbons... 2 Open
Adobe Dreamweaver CS5 Tutorial
 Adobe Dreamweaver CS5 Tutorial GETTING STARTED This tutorial focuses on the basic steps involved in creating an attractive, functional website. In using this tutorial you will learn to design a site layout,
BASIC NAVIGATION & VIEWS...
 Content Overview VISUAL TOUR... 5 NEW FEATURES IN OUTLOOK 2010... 6 BASIC NAVIGATION & VIEWS... 7 SETTING PREFERENCES... 7 Creating an Outlook Shortcut... 7 Choosing a Startup View... 7 CUSTOMIZING INBOX
Getting Started With the Cisco PAM Desktop Software
 CHAPTER 3 Getting Started With the Cisco PAM Desktop Software This chapter describes how to install the Cisco PAM desktop client software, log on to Cisco PAM, and begin configuring access control features
How to Use Internet Explorer 9
 How to Use Internet Explorer 9 The Basics: 1. The Address Bar is located at the very top of your open webpage. This is where you will type in the address of the website you d like to visit. For example,
Caja File Manager. Desktop User Guide
 Caja File Manager Desktop User Guide Desktop User Guide» Working with Files This chapter describes how to use the Caja file manager. Introduction Spatial Mode Browser Mode Opening Files Searching For Files
Using Microsoft Word. Paragraph Formatting. Displaying Hidden Characters
 Using Microsoft Word Paragraph Formatting Every time you press the full-stop key in a document, you are telling Word that you are finishing one sentence and starting a new one. Similarly, if you press
Click on OneDrive on the menu bar at the top to display your Documents home page.
 Getting started with OneDrive Information Services Getting started with OneDrive What is OneDrive @ University of Edinburgh? OneDrive @ University of Edinburgh is a cloud storage area you can use to share
Lab 3-1 Lab Installing Kofax Capture 10
 In the following lab instructions, you re going to install and license Kofax Capture, turn on User Tracking, review the product documentation, and prepare your system for the lab exercises in this course.
Installing Version 14.4 Drivers & Firmware for Colordyne Printer
 Installing Version 14.4 Drivers & Firmware for Colordyne Printer Overview: 1. Exporting custom media settings including media sizes 2. Uninstalling previous versions of software 3. Download & Install new
Quick Guide for Suppliers - Catalogs Supplier Portal (October 2012)
") Quick Guide for Suppliers - Catalogs Supplier Portal (October 2012) Copyright 1999-2012 Basware Corporation. All rights reserved. About Basware Supplier Portal Documentation The following documentation
Quick Guide for Suppliers - Catalogs Supplier Portal (October 2012) Copyright 1999-2012 Basware Corporation. All rights reserved. About Basware Supplier Portal Documentation The following documentation
Publishing with Adobe Presenter 10 (Detailed)
") Publishing with Adobe Presenter 10 (Detailed) Open PowerPoint Find PowerPoint and open it by clicking its icon. The PowerPoint icon may be found in one of the following locations: 1. Desktop 2. Start Menu
Publishing with Adobe Presenter 10 (Detailed) Open PowerPoint Find PowerPoint and open it by clicking its icon. The PowerPoint icon may be found in one of the following locations: 1. Desktop 2. Start Menu
In order to update you will have to uninstall the current version and install the newer version using the same procedure.
 Installing the 3M Cloud Library app on your Kindle Fire DISCLAIMER These instructions are to be used as a reference only. Please note that by downloading the 3M Cloud Library app you assume all risk of
BP-VA Quick Start. Last update: 29 th January, Copyright Visual Paradigm International Ltd.
 BP-VA Quick Start Last update: 29 th January, 2010 Copyright 2002-2010 Visual Paradigm International Ltd. Table of Contents Table of Contents... 2 Getting started... 3 Installing Business Process Visual
User Guide. Document Version: 1.0. Solution Version: 365_102017_3_4
 User Guide Document Version: 1.0 Solution Version: 365_102017_3_4 Table of Contents How to Install Purchase Manager in your Dynamics 365?... 3 How to Configure Purchase Manager Security Roles in your Dynamics
Wesleyan University. PeopleSoft - Configuring Web Browser Settings
 PeopleSoft - Configuring Web Browser Settings In order to use the PeopleSoft applications, your web browser must be configured to allow certain settings related to popups, security and clearing your cache.
Creating Your Electronic Portfolio With Adobe Acrobat 7 (2008)
") N Creating Your Electronic Portfolio With Adobe Acrobat 7 (2008) ote: Please refer to the Division of Social Work Student Handbook and your Advisor for the content and formatting requirements for the portfolio.
N Creating Your Electronic Portfolio With Adobe Acrobat 7 (2008) ote: Please refer to the Division of Social Work Student Handbook and your Advisor for the content and formatting requirements for the portfolio.
Enterprise Architect. User Guide Series. Model Wizard
 Enterprise Architect User Guide Series Model Wizard How to create a model quickly? In Sparx Systems Enterprise Architect, the Model Wizard provides Patterns from a wide range of technologies, to help you
Isograph Software Products
 Isograph Software Products Installation and Licensing Guide Isograph Copyright 2018 Isograph Limited. All rights reserved. This document and the associated software contains proprietary information which
Getting Started With Estimating Extended
 Getting Started With Estimating Extended NOTICE This document and the Sage Timberline Office software may be used only in accordance with the accompanying Sage Timberline End User License Agreement. You
INTRODUCTION TO VISUAL BASIC 2010
 INTRODUCTION TO VISUAL BASIC 2010 Microsoft Visual Basic is a set of programming tools that allows you to create applications for the Windows operating system. With Visual Basic, even a beginner can create
USB 3.0 Dual Head Docking Station
 Introduction USB 3.0 Dual Head Docking Station Installation Guide The USB 3.0 Dual Head Docking Station is a unique design for a computer that has extra connectivity demands. Features and Benefits Adds
Imagine. Create. Discover. User Manual. TopLine Results Corporation
 Imagine. Create. Discover. User Manual TopLine Results Corporation 2008-2009 Created: Tuesday, March 17, 2009 Table of Contents 1 Welcome 1 Features 2 2 Installation 4 System Requirements 5 Obtaining Installation
PART 7. Getting Started with Excel
 PART 7 Getting ed with Excel When you start the application, Excel displays a blank workbook. A workbook is a file in which you store your data, similar to a three-ring binder. Within a workbook are worksheets,
Adobe Dreamweaver CC 17 Tutorial
 Adobe Dreamweaver CC 17 Tutorial GETTING STARTED This tutorial focuses on the basic steps involved in creating an attractive, functional website. In using this tutorial you will learn to design a site
TRIM Document Queue Instructions
 TRIM Document Queue Instructions Document Queues allow TRIM/Records Online users to process large numbers of documents, using templates with predefined, rule based values. To begin, create a folder to
InsightUnlimited Upgrades Best Practices. July 2014
 InsightUnlimited Upgrades Best Practices July 2014 InsightUnlimited Version: 2012.2 and above Document Version: 1.1 Last Updated: July 29, 2014 Table of Contents Introduction... 4 Overview... 4 Audience...
Learning Series. Volume 8: Service Design and Business Processes
 Learning Series Volume 8: Service Design and Business Processes NOTICES ServicePRO Learning Series Edition November 2014 HelpSTAR and ServicePRO are registered trademarks of Help Desk Technology International
Excel window. This will open the Tools menu. Select. from this list, Figure 3. This will launch a window that
 Getting Started with the Superpave Calculator worksheet. The worksheet containing the Superpave macros must be copied onto the computer. The user can place the worksheet in any desired directory or folder.
Enterprise Architect. User Guide Series. Maintenance
 Enterprise Architect User Guide Series Maintenance In Sparx Systems Enterprise Architect, Maintenance items (such as defects, tasks and events) are managed as element properties. Change and Issue elements
Sage Estimating (SQL) v18.12
 v18.12") Sage Estimating (SQL) v18.12 Release Notes October 2018 This is a publication of Sage Software, Inc. 2018 The Sage Group plc or its licensors. All rights reserved. Sage, Sage logos, and Sage product and
Sage Estimating (SQL) v18.12 Release Notes October 2018 This is a publication of Sage Software, Inc. 2018 The Sage Group plc or its licensors. All rights reserved. Sage, Sage logos, and Sage product and
DEKAFLOW Access Upgrade FAQ & Troubleshooting. Frequently Asked Questions Troubleshooting Guide Installation Issues Help
 DEKAFLOW 2018 Access Upgrade FAQ & Troubleshooting Click the link below for: Frequently Asked Questions Troubleshooting Guide Installation Issues Help Access Upgrade FAQ Why is this change being made?
INSTALLATION IN WINDOWS
 USER'S MANUAL 01 INSTALLATION IN WINDOWS Download the installation package from www.prodlib.com. Note that Autodesk applications and ArchiCAD use separate packages. Begin the installation by double clicking
CPSM MEDITECH Inventory Requisition Options. Page 1 of 49. Created: April 30, 2015 Revised: April 10, 2018
 CPSM MEDITECH 5.67 Inventory Requisition Options Page 1 of 49 Contents CPSM Inventory Requisition Options... 2 Process Item Requisition Using a Template... 2 Process Item Requisition Using a Department
ORGANIZING YOUR ARTWORK WITH LAYERS
 9 ORGANIZING YOUR ARTWORK WITH LAYERS Lesson overview In this lesson, you ll learn how to do the following: Work with the Layers panel. Create, rearrange, and lock layers and sublayers. Move objects between
On Monday, July 26 th SunRISE will have a different look & feel. We think you will be happy with the changes!
 Shopping: Simple Search On Monday, July 26 th SunRISE will have a different look & feel. We think you will be happy with the changes! The simple or standard search allows users to enter one or more keywords
Getting Started Guide
 Getting Started Guide Sage MAS Intelligence 90/200 Table of Contents Getting Started Guide... 1 Login Properties... 1 Standard Reports Available... 2 Financial Report... 2 Financial Trend Analysis... 3
T-Invoicer User Guide
 - 1 - T-Invoicer User Guide Introduction T-Invoicer is an entry level invoicing system designed for small & startup business's who need to invoice customers quickly & easily. T-Invoicer has all the basic
Internet Explorer 11 QUICK START GUIDE ADDRESS BAR SEARCH ACCESSING FMS
 QUICK START GUIDE While Internet Explorer 11 does not look that much different to what you are used to, there are a few useful features that have been added/enhanced that may make your life easier. ADDRESS
SISpro building 2.1. User's reference manual
 SISpro building 2.1 User's reference manual SISpro building 2.1 Page 2 Contents Overview....5. Project step....13. Design step....17. Single line diagram step....191. Quotation step....195. Order form
Installation Guide. NSi AutoStore TM 6.0
 Installation Guide NSi AutoStore TM 6.0 TABLE OF CONTENTS PREREQUISITES... 3 INSTALLATION: UPGRADING FROM AUTOSTORE 5.0... 4 INSTALLATION: NEW INSTALLATION... 8 LICENSING... 17 GETTING STARTED... 34 2012
Win Products. Tutorial B for the WIN 1000/3000/4000/6000 Electrical Estimating Systems
 Win Products Tutorial B for the WIN 1000/3000/4000/6000 Electrical Estimating Systems Version 12.2 Page 1 Stop If you are a beginning McCormick Estimating System user, and have not completed Tutorial A,
Scanning CoverPage Creator Setup Guide
 Scanning CoverPage Creator Setup Guide Chickasaw Nation Division of Commerce For Support or Feature Requests Please Contact: coverpage@summitokc.com www.summitokc.com/coverpage (405) 946-6510 Reference
How to Show Tax Breakdown When Printing Sales and Purchasing Documents
 SAP Business One How-To Guide PUBLIC How to Show Tax Breakdown When Printing Sales and Purchasing Documents Applicable Release: SAP Business One 8.8 India English July 2009 Table of Contents Introduction...
MindView Online - Quick Start Guide
 MindView Online - Quick Start Guide Overview MindView Online is an online concept mapping program that allows users to organize their thoughts visually to create, share, and export mind maps to Microsoft
X-Sign 2.0 User Manual
 X-Sign 2.0 User Manual Copyright Copyright 2018 by BenQ Corporation. All rights reserved. No part of this publication may be reproduced, transmitted, transcribed, stored in a retrieval system or translated
College of Pharmacy Windows 10
 College of Pharmacy Windows 10 Windows 10 is the version of Microsoft s flagship operating system that follows Windows 8; the OS was released in July 2015. Windows 10 is designed to address common criticisms
Locate your Advanced Tools and Applications
 WordPress is an easy-to-use weblog system, providing numerous features like categories, ratings, as well as plugins installation. This installer application will easily install the WordPress tool to a
HomeOnTrack.com. HomeOnTrack User Guide
 HomeOnTrack User Guide HomeOnTrack.com HomeOnTrack User Guide 2018 Contents GETTING STARTED 3 Signing Up 3 PROJECT WIZARD 4 YOUR DASHBOARD 4 GET IMAGE CLIPPER 5 HELP AND TUTORIALS 6 SETTINGS 6 Personal
System 44 Installation Guide
 System 44 Installation Guide For use with System 44 version 2.5 or later and Student Achievement Manager version 2.5 or later Table of Contents Introduction... 3 Getting Started... 3 Windows and Mac OS
POS Designer Utility
 POS Designer Utility POS Designer Utility 01/15/2015 User Reference Manual Copyright 2012-2015 by Celerant Technology Corp. All rights reserved worldwide. This manual, as well as the software described
Instructions for MX350 Firmware Upload
 Instructions for MX350 Firmware Upload MX350 Document AN10048 Page 1 of 39 Contents Section Description Page 1 Requirements 3 2 Install MX350 Setup Software 3 3 Download MX350 Firmware 4 4 Connect MX350
Sage 50 U.S. Edition Intelligence Reporting Getting Started Guide
 Sage Intelligence Reporting Sage 50 U.S. Edition Intelligence Reporting Getting Started Guide Table of Contents Introduction... 2 System requirements... 3 How it works... 4 Getting started guide... 5 Running
Managing Content with AutoCAD DesignCenter
 Managing Content with AutoCAD DesignCenter In This Chapter 14 This chapter introduces AutoCAD DesignCenter. You can now locate and organize drawing data and insert blocks, layers, external references,
Getting Started Creating Cable and Harness Designs
 Chapter Getting Started Creating Cable and Harness Designs 1 In this chapter, you learn about Autodesk Inventor Cable and Harness functionality and the basic workflow to create and document a design. Objectives
StrikeRisk v5.0 Getting started
 StrikeRisk v5.0 Getting started Contents 1 Introduction 1 2 Installing StrikeRisk 2 7 2.1 System Requirements 2 2.2 Installing StrikeRisk 2 5 2.3 Installation troubleshooting 6 2.4 Uninstalling StrikeRisk
Part 2 Downloading and installing templates and dummy patient records into Medical Director
 Part 2 Downloading and installing templates and dummy patient records into Medical Director Preparing a folder for the patient files 1. Close any programs and folders so that you have a clear view of your
Technical White Paper
 Technical White Paper Via Excel (VXL) Item Templates This technical white paper is designed for Spitfire Project Management System users. In this paper, you will learn how to create Via Excel Item Templates
OUTLOOK TIPS AND TRICKS GINI COURTER, M.B.A., TRIAD CONSULTING
 1 OUTLOOK TIPS AND TRICKS GINI COURTER, M.B.A., TRIAD CONSULTING DISPLAYING THE ADVANCED TOOLBAR (2007) The Advanced toolbar isn t advanced; it s just the commands that they couldn t fit on the Standard
Colligo Contributor Pro 4.4 SP2. User Guide
 4.4 SP2 User Guide CONTENTS Introduction... 3 Benefits... 3 System Requirements... 3 Software Requirements... 3 Client Software Requirements... 3 Server Software Requirements... 3 Installing Colligo Contributor...
Getting Familiar with Microsoft Word 2010 for Windows
 Lesson 1: Getting Familiar with Microsoft Word 2010 for Windows Microsoft Word is a word processing software package. You can use it to type letters, reports, and other documents. This tutorial teaches
Designed by Jason Wagner, Course Web Programmer, Office of e-learning NOTE ABOUT CELL REFERENCES IN THIS DOCUMENT... 1
 Excel Essentials Designed by Jason Wagner, Course Web Programmer, Office of e-learning NOTE ABOUT CELL REFERENCES IN THIS DOCUMENT... 1 FREQUENTLY USED KEYBOARD SHORTCUTS... 1 FORMATTING CELLS WITH PRESET
A GET YOU GOING GUIDE
 A GET YOU GOING GUIDE To Your copy here MindView 5 June 2013 1 Learning Support Getting started with MindView 5 1) Click on Start 2) Move up to All Programs 3) Click on MatchWare MindView 5 MindView will
Colligo Engage Outlook App 7.1. Offline Mode - User Guide
 Colligo Engage Outlook App 7.1 Offline Mode - User Guide Contents Colligo Engage Outlook App 1 Benefits 1 Key Features 1 Platforms Supported 1 Installing and Activating Colligo Engage Outlook App 3 Checking
Detailed Guide to Office Word
 Detailed Guide to Office 2010 - Word Microsoft Word is many different things to many different people. It can be used for anything from creating a simple document to creating templates to creating forms.
1. WELDMANAGEMENT PRODUCT
 Table of Contents WeldManagement Product.................................. 3 Workflow Overview........................................ 4 Weld Types.............................................. 5 Weld
Worldox Integration with Canon imageformula DR-C225 Scanner. Version 1.0
 Worldox Integration with Canon imageformula DR-C225 Scanner Version 1.0 WARRANTIES AND COPYRIGHT NOTICES Disclaimer of Warranty World Software Corporation makes no representations or warranties, either
Unit III: Working with Windows and Applications. Chapters 5, 7, & 8
 Unit III: Working with Windows and Applications Chapters 5, 7, & 8 Learning Objectives In this unit, you will: Launch programs and navigate the Windows task bar. Perform common windows functions. Customize
How to set up an Amazon Work Profile for Windows 8
 How to set up an Amazon Work Profile for Windows 8 Setting up a new profile for Windows 8 requires you to navigate some screens that may lead you to create the wrong type of account. By following this
Microsoft Excel 2010 Level III
 Microsoft Excel 2010 Level III Excel is a spreadsheet program used to enter, manipulate, compute, graph, analyze, and store numeric data. Its uses, include managing budgets, grade books, and maintain simple
Getting Started with HCA and X10
 Getting Started with HCA and X10 This Getting Started Guide continues from the previous Getting Started with HCA Installation and Introduction which covers installing HCA and the basic operations available