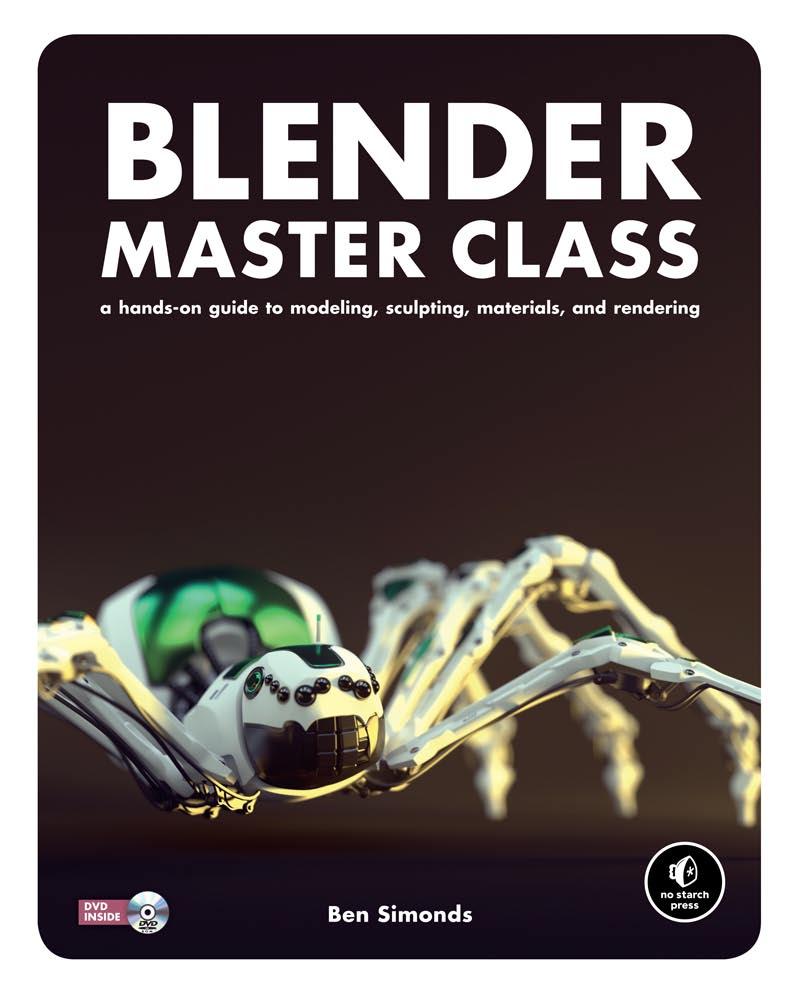
Topology. Blender Master Class 2013, Ben Simonds
|
|
|
- Arnold Montgomery
- 5 years ago
- Views:
Transcription
1
2 5 Modeling the Details In Chapter 4, we blocked in the basic elements of the projects, creating the block-in of the Jungle Temple and modeling base meshes for sculpting the Bat Creature and Spider Bot. In this chapter, you ll learn how to flesh out this framework to create finished models. To create the final models, we need to transform our simple geometry using a mix of techniques. These techniques include using modifiers to add procedural details as well as modeling elements by hand. Our aim should be to end up with clean, wellmodeled, detailed meshes, without overcomplicating things or introducing unhelpful geometry that could slow down renders or create artifacts. Modeling details is great fun, but it can also be quite repetitive, so I won t exhaustively cover the process of making every part. Instead, I ll focus on key aspects of creating certain elements of projects that are the most interesting or tricky and leave the rest to your imagination. We ll begin with some discussion of topology, discuss what constitutes a good mesh, and then move on to the actual modeling. Topology Topology describes the way that the edges and faces of a mesh connect and flow across its surface. We covered the basics of topology when creating the base meshes for sculpting the Bat Creature and Spider Bot namely, creating even loops of vertices around the arms and legs and avoiding triangular faces. Now let s talk about why we do things this way. There are many ways to create meshes that have the same basic shapes but use very different configurations of faces in their construction, as you can see in Figure 5-1. While the shapes in Figure 5-1 are roughly the same, the middle mesh is the most useful because its geometry flows with the form of the face, creating loops around the eyes and the mouth and running neatly down the neck and over the head. Also, it describes the forms of the head just as well as (or better than) the other meshes, while using fewer faces. The flowing characteristics of this mesh are also important for animation because they allow the mesh to deform easily and smoothly. For example,

3 closing the eyes or opening the mouth won t stretch edges awkwardly or cause parts of the mesh to intersect unpleasantly. This kind of loop-based topology also helps when creating further variations on the shape, and it makes it easier to place UV seams and to UV unwrap the mesh without too much stretching (see Chapter 8 for more on unwrapping). Figure 5-1: The same head shape with three very different meshes Another reason that the middle mesh in Figure 5-1 is the better choice is that its topology is the best suited for use with the Subdivision Surface (Subsurf) modifier. The Subdivision Surface modifier, which we covered in Chapter 4, is used to subdivide and smooth a mesh. The algorithm used by the Subdivision Surface modifier, Catmull-Clark subdivision, works best when given a mesh constructed like this one. When the Subdivision Surface modifier is used with a mesh containing a lot of triangles or long, oddly shaped faces, it can give poor results, but when given well-constructed, flowing topology, it produces very predictable, smooth forms. What Is Good Topology? Good topology for animation is usually good for subdivision and vice versa. But what constitutes good topology? While there are no absolute rules, there are a few important principles. It s a mix of art and science. Avoid triangles and n-gons where possible. This is the big one. While triangles are fine in a static mesh that you don t intend to subdivide or in a low-poly object for a game, if you plan to subdivide your mesh, use as few triangles as possible because triangles don t subdivide as well as quads. Equally, n-gons are converted to triangles before being subdivided, resulting in the same kinds of problems. 50 Chapter 5 Avoid poles with lots of edges. A pole is a vertex where three, five, or more edges meet that is, a point in a mesh that deviates from a gridlike structure. Like triangles, poles can create artifacts when subdividing a mesh. Poles with three or five edges aren t so bad indeed, it s just about impossible to create anything but toroids and grids without creating a few poles but poles with six or more edges subdivide poorly. Create loops around important forms. This allows you to easily select, deform, and animate your meshes, and it also ensures they will subdivide cleanly. For example, in Figure 5-1, the use of edge loops that flow around the eyes makes it easier to adjust their shape. Align edges with the form. If your object is roughly cylindrical, the edges of the mesh should flow around its circumference and along its length. If your object is roughly cuboidal, create it by starting from a cube and adding loop cuts. In general, try to create a mesh structure that goes with the grain of the shape you are trying to create, as shown in Figure 5-2. Dealing with Difficult Topology The rules listed above are simple, but you may run into trouble following them from time to time, especially when trying to eliminate triangles and poles from your models. Here are some tips for dealing with difficult topology: Plan ahead. Most topology woes can be sidestepped simply by planning ahead. That s why, for example, we made sure there were eight vertices in the loops around the arms and legs when creating the base mesh for the Bat Creature: It made joining the hands easy, as there were no surplus edges to join together when it came to bridging the gap. Powers of 2 (8, 16, or 32) are often a good way to think about this, but regardless, try to keep to even numbers when creating edge loops. If you are new to 3D modeling, it can be helpful to sketch your desired mesh over a photo or your concept art, either in GIMP or on paper, as shown in Figure 5-3. Two tris make a quad. You can join two adjacent triangles to make a quad, killing two birds with one stone. To convert multiple triangles into quads automatically, select your mesh and press alt-j to turn suitable pairs of triangles into quads.
.")

4 ❶ ❷ ❸ ❹ Figure 5-2: Topology dos and don ts: Avoid triangles ❶, avoid poles ❷, create loops around important forms ❸, and align edges with the forms, not against them ❹. Rotate edges to move triangles. To rotate or spin an edge, select it and press ctrl-e4rotate Edge CW/CCW (clockwise/counterclockwise). This rearranges the faces around that edge, allowing you to move triangles. You can combine this trick with the joining adjacent triangles trick Figure 5-3: Sketching your topology beforehand can help you avoid difficulties. above: By spinning edges to bring two triangles together, you can eliminate them, as shown in Figure 5-4. Add an edge loop. Adding a loop cut (ctrl-r) that ends on a triangle will turn that triangle into a quad (or two triangles, which you can merge into a quad). If the new edge loop terminates at an open edge, you ve eliminated your triangle. If your mesh is closed, it might just move the triangle to the other end of the edge loop, and, if you have triangles at both ends, you can take out two at a time (see Figure 5-5). Split a pole in two. A pole with six edges can easily be split into two fives by adding a face loop between the two halves. Add further faces for even cleaner topology, as shown in Figure 5-6. Cut, dissolve, and join. The cut tool (K) allows you to arbitrarily cut edges and faces to get the topology you want. You can combine this tool with the Dissolve operator (X4Dissolve) Modeling the Details 51


5 Figure 5-4: Rotating edges to bring two triangles together allows you to eliminate them. Figure 5-6: Adding faces to remove poles. Adding one face loop across six poles reduces it to two five poles, which will subdivide much more cleanly. Figure 5-7: This triangle hidden in the corner of an ear isn t likely to cause much trouble. Figure 5-5: Adding edge loops with the Loop Cut tool (ctrl-r) can get rid of triangles. If you add one between two triangles, you can eliminate them both in one go. Alternatively, you could delete one of the edge loops already present with similar effect. Triangle to get rid of vertices edges without deleting the faces they are part of. Then use the Join Edges operator to connect two vertices that are already part of a face but do not have an edge connecting them. These tools are great for arbitrarily rearranging difficult topology. If you can t get rid of it, hide it. If you really can t get rid of a triangle, hide it where it won t cause trouble or create subdivision artifacts, such as inside an ear or nostril or someplace really flat that doesn t need to deform, as shown in Figure 5-7. When in doubt, start over. If you managed to make something once, chances are you can do it again and get it right. It might take some extra time, but it s usually worth it. Modeling the Details of the Jungle Temple The Jungle Temple scene was already blocked in, so next it needed to be refined to make it more final. This process required me to think about the shapes I wanted to create and to model more complex meshes with the shapes I wanted in the final renders. 52 Chapter 5

6 Walls For the main walls of the Jungle Temple, I first laid out cubes to form the stone blocks of the wall (see Figure 5-8). Beginning with the bottom row, I added each one by hand and modified its length to give some variation. Next, I built up the higher layers by duplicating and scaling the cubes. To add further variety, I selected blocks at random, moved them in or out from the wall a bit, and rotated them slightly to make the surface of the wall somewhat more uneven. Leaving the basic walls from the blocking-in stage behind the new blocks provided a filler for the gaps between the blocks. To add a beveled edge to the blocks (see Figure 5-8), I subdivided them a couple of times (select all [A] in Edit mode, then W4Subdivide) and then added a Bevel modifier and set the limit method to Angle. The limit restricts the beveling to edges between faces at a sharp angle, and setting the angle to about 45 gives a nicely rounded bevel that is heavier on the corners of the blocks than at the edges. The sides are left alone. * When applied, the Bevel modifier can create errors that will turn your geometry into triangles and create a lot of duplicate vertices. To fix this, apply the modifier only once you re finished modeling. Then, in Edit mode, select everything (A) and use the Remove Doubles (W4Remove Doubles) operator to eliminate duplicated vertices. Next, use the Triangles to Quads operator (alt-j) to return to a cleaner mesh without so many triangles. You can also bevel individual edges and vertices in Edit mode, using the Bevel operator (W4Bevel). Figure 5-8: Creating the stone blocks for the walls. First, I blocked in the walls with simple cubes, which I scaled and moved to build up the wall. Next, I damaged the walls a bit by adding some basic subdivisions and roughening some edges. Finally, I beveled the edges of the blocks using a Bevel modifier limited by angle. Modeling the Details 53


7 For the block details, I subdivided some of the blocks and then added extra features, such as a crack down the middle, a chunk out of a corner, and a split. I added loop cuts or subdivided specific parts and moved vertices around to create cracks, dents, and chips. Because the mesh won t be subdivided or deformed significantly, there s no need to avoid triangles here; they won t cause problems. To prevent the blocks from looking faceted, I set their shading mode to Smooth and then added an Edge Split modifier to split the mesh at certain edges in order to produce separate surfaces (see Figure 5-9). The Edge Split modifier breaks the mesh into separate pieces so that when shaded smooth or when further modifiers are applied, the edge between the pieces is preserved. You can set Edge Split to split the mesh either along edges tagged as Sharp in Edit mode (ctrl-e4mark Sharp) or along edges with sharp enough angles between their faces. Using the angles only with a setting of 30 resulted in nice-looking blocks. I created the other incidental blocks and paving slabs in the same way as the walls, using the initial block-in cubes as a guide for placement and then deleting the old geometry once the new blocks were placed. The final blocks are shown in Figure Statues I modeled the statues in the corners by the door of the Jungle Temple using fairly basic building blocks and my concept art as a guide. Each part began with a simple primitive usually a cube or cylinder transformed, subdivided, and extruded to create what I need. As shown in Figure 5-11, each part is fairly simple. To add beveled edges, I used the same method that I used for the wall and floor blocks. Adding some loop cuts around the ends of some pieces (for example, to the legs and the ends of the arms) allowed these edges to retain their square shape and sharper corners when beveled, without too much subdivision. Figure 5-9: The final walls, with a Bevel and an Edge Split modifier to give them beveled edges and flat sides 54 Chapter 5


8 Figure 5-10: The rest of the stone blocks in the scene were modeled in the same way as the walls. Figure 5-11: The statue model exploded into its constituent parts. Most are derived from simple cubes or cylinders. Stone Carvings For the stone glyphs, I used my concept art as a single orthographic reference, loading it as a background image, as discussed in Chapter 3. Then, beginning with a plane, I traced each piece of the designs, sticking primarily to quads where possible. Next, I extruded the whole design downward to give it some thickness and deleted the new faces afterward to leave just the sides and front of the design. By placing edges along the forms of the design s interior elements, I could move the grooves in the design downward to create the details. To clean up the design, I used creasing (see Figure 5-12). By adding a Subsurf modifier and tagging edges as creased, you can create smooth objects with sharp creases along the tagged edges. Creasing allowed me to add tight creases to the model without using more polygons than necessary. Adding an Edge Split modifier after the Subsurf modifier then gave a nice smooth mesh with sharp transitions at the creased edges. With the carvings complete, I moved on to placing them in my scene by replacing some of the rows of stone blocks in the walls with rows of the glyphs. To do this, I lined up all six glyphs in a row and then used an Array modifier to repeat the design to fill the length of the wall (see Figure 5-13). Tagging Edges The edges of a mesh can be tagged or marked in a variety of ways, each of which tells different Blender operators and modifiers how to perform operations Modeling the Details 55

9 on the mesh. The shortcut for Edge operators, including Tagging, in Edit mode is ctrl-e. Edges can be marked as Sharp, which allows operators like Bevel and Edge Split to work only on these edges. They can also be given a crease value, either from the ctrl-e menu or with shift-e, which tells the Subsurf modifier not to smooth these edges when doing subdivision, resulting in nice sharp edges. Figure 5-12: Creating the stone carvings. I first blocked out the carvings as individual pieces over the concept art, using primarily quads. Next, I tagged some edges as creased (purple) to give sharp edges when subdivided. Finally, I added Subsurf and Edge Split modifiers to give smooth carvings with sharp edges where the edges had been tagged. The result uses fewer polygons and simpler topology than if I had used support loops to produce sharp edges. Sharp Edges and Subdivision Creasing is one way to achieve a sharp crease in a subdivided mesh; another way is with support loops. Support loops work by placing two or more edge loops close together at the edge of a form. When the mesh is subdivided, the new geometry can t be smoothed out as much because the extra geometry defines the corner more tightly (see Figure 5-14). Both methods have their place. Support loops are the better choice when you re trying to produce nicely beveled edges and need fine control over precisely how your forms look. However, if your goal is to produce very sharp creases or you are working with simpler models with less extra topology, creasing is preferable. You can always mix and match both methods as the situation demands. Support loops are also useful for ensuring that objects subdivide to give the shapes you want. For example, Figure 5-15 shows a cube with a Subsurf modifier applied and its wireframe visible. With no support loops, the modifier turns it into a sphere. With extra support loops running around the middle of the faces, the object more closely resembles a cube, and shifting these support loops toward the edges of the cube makes the corners sharper. This is useful when modeling all sorts of surfaces. 56 Chapter 5
 Figure 5-14: Two methods of getting sharp edges when working with a subdivision surface.")


10 Figure 5-13: Using the Array modifier to repeat the stone carvings multiple times Unaltered Support loops Creased edges (bold) Figure 5-14: Two methods of getting sharp edges when working with a subdivision surface. Top: Unaltered mesh with a gentle slope and a Subdivision Surface modifier applied. Middle: Support loops added to give sharp edges. Bottom: Edges creased to give sharp edges (without extra geometry). Figure 5-15: Clockwise from top left: A cube with zero loops, one loop, two widely spaced loops, and two evenly spaced loops running around the middle of each side. As the edge loops get closer to the edge, the corners become more sharply defined. Modeling the Details 57


11 Plants The plants in this scene are simple. To create them, I began by modeling a few varieties of leaves from planes; I scaled and subdivided the planes into leafy shapes (see Figure 5-16). Next, I started duplicating these different leaf objects and placing them around the scene. By creating linked duplicates with alt-d, you can create multiple copies of the same mesh that all update together when you change one duplicate, which makes creating UVs and textures much easier because you only have to do so once for each type of plant. By scaling and rotating these duplicates in Object mode and placing them around the scene, you can give the impression of a lot of variation without having to create a lot of different meshes (see Figure 5-17). There are two ways to duplicate a mesh in Object mode. One way is to create a simple copy, which then becomes a unique object (shift-d); the other is to duplicate a linked copy (alt-d), which retains the same mesh data and materials as the original and updates along with it. You can still apply different modifiers to a linked duplicate and move, scale, and rotate it independently in Object mode, but its mesh data and materials, as well as other data, will remain linked with the original object; if you edit one, the changes are applied to both. Both methods are extremely useful for different tasks. Basically, you should use simple duplicates in the following situations: You plan on recombining the new mesh with other elements in the scene. You want to keep the old mesh as a backup or alternative. You should use linked duplicates if the following is true: You want to create many copies of a single object and don t want to edit them individually. You want only one set of UVs and materials for multiple objects. When you select a linked duplicate, you can see how many users (copies) of that object are using the same datablock by examining its object data properties in the Properties panel (see Figure 5-18). You can also make the object unique by clicking the number icon next to the datablock s name. Making the object unique creates a new mesh datablock that You want to edit the new object independently. Figure 5-16: The plants were all made with very simple meshes (shown with a Subdivision Surface modifier applied). Figure 5-17: Duplicating the different plant components and placing them around the scene. Varying the scale and rotation of the duplicates can go a long way toward making them distinctive. 58 Chapter 5
.")
.")
12 is now independent of the one it was copied from, allowing you to edit the object s mesh and change its materials separately (as if it were a simple copy). IvyGen The IvyGen add-on for Blender is a procedural generator that allows you to quickly create ivy-like vines that creep over your scene (see Figure 5-19). To use it, first enable it from the User Preferences editor (File4User Preferences) and then look under the Add-On tab in the Add Curve category. Once you have enabled the add-on, you should have the option to grow ivy on a selected object via the Add menu (shift-a4 Curve4AddIvyToMesh in Object mode). Figure 5-18: Checking the number of users of a mesh datablock. Click the number (4 in this case) next to the datablock s name to create a new copy that you can edit independently. The F icon will create a fake user of that datablock, which will save the object and prevent it from being deleted when you save the.blend file, even if there are no instances of that mesh in the scene. Figure 5-19: Using IvyGen to generate procedural vines. The parameters for how your ivy will grow are in the Tool Options region on the left when using IvyGen. For clarity here, I ve added a green material for the leaves and a brown material for the vines. Modeling the Details 59
, apply any modifiers (using the Convert to Mesh operator in Object mode alt-c), and merge them into one object")

13 In order for IvyGen to generate vines, it needs a single mesh object for them to grow over, so we need to create a new mesh that includes all of the geometry we want to grow vines over. To do so, select all of the objects you want the ivy to cover, duplicate them (shift-d), apply any modifiers (using the Convert to Mesh operator in Object mode alt-c), and merge them into one object (ctrl-j). The result should be one object. If your scene has a high poly count, you might want to skip applying modifiers that increase the poly count a lot in order to give you a lower-poly mesh to grow ivy over; unfortunately, this may come at the cost of some accuracy in how it will grow. Later, once you ve finished growing your ivy, delete this duplicate or move it to another layer so that it doesn t get in your way (M). Next, place the 3D cursor where you want the ivy to start and activate IvyGen with the Add Curve menu (shift-a4add Curve4Add Ivy To Mesh). The IvyGen allows you to tweak numerous parameters to determine how the ivy looks, the most important of which are the Max Ivy Length option, which determines how far the ivy spreads, and the Ivy Size and Leaf Size options, which determine the thickness of the vines and the size of the leaves. The leaf probability option determines the leaf density. Other options, like Float Length and Adhesion Length, determine how far the vines can reach out from the wall and how they are affected by gravity. Keep tweaking IvyGen s settings and pressing Update Ivy to regenerate your ivy with any new settings until you re happy with the look of your foliage. Keep in mind that the higher you set the Max Ivy Length, the longer the ivy will take to generate. Also, if you want to cover a large area, it s easier to run IvyGen repeatedly using different starting locations in order to create multiple ivy meshes. For example, in the Jungle Temple scene, I hid the starting locations in the corners of the scene in a couple of different starting locations and let my ivy grow out from there. You can see the final results in Figure IvyGen also creates automatic UV coordinates for the leaves and vines it generates, as Figure 5-20: Adding puddles to the scene by first creating depressions in the main ground plane mesh and then adding a second flat plane to intersect with it Figure 5-21: The final modeled Jungle Temple scene 60 Chapter 5
 Ground/Soil To make the ground a bit more interesting, I subdivided it a couple of times and roughened it up a bit with the Sculpt tools, which I ll discuss in detail in Chapter 6.")
14 well as assigning material slots to them. This feature will greatly speed up texturing and assigning materials to your ivy later. (See Chapters 8 and 12 for more on UV unwrapping and materials.) Ground/Soil To make the ground a bit more interesting, I subdivided it a couple of times and roughened it up a bit with the Sculpt tools, which I ll discuss in detail in Chapter 6. Next, I added a new plane (this time keeping it unsubdivided and perfectly flat) and placed it just below the average height of the ground so that some of the deeper areas poked down through it. This produces the effect of puddles on the ground (see Figure 5-20). Additionally, I created piles of dirt in the corners of the scene simply by creating a plane, subdividing it several times, and using proportional editing to add lumps. By combining this with a bit of sculpting to build up dirt in the cracks and corners between the blocks and other elements, I was able to give the surroundings more of an aged look. The final scene is shown in Figure * While the following flows from the modeling techniques already discussed, the parts we are creating fit in alongside the sculpted and retopologized meshes we will be working on in Chapters 6 and 7. You can follow along with this part first or skip forward to Chapters 6 and 7 on sculpting and retopology and then return to this later. Modeling the Details of the Spider Bot For the Spider Bot, I needed to create the other mechanical parts of the body that will complete the model when combined with the main body and leg pieces I will be sculpting and retopolo gizing in Chapters 6 and 7. The aim was to create some feasible mechanical-looking parts, such as joints, wires, and so forth, that complete the look of the Spider Bot. Joints The joints were all designed from the same basic template: a cylinder for the central part, which allows them to move freely, with struts coming out that attach to the legs (see Figure 5-22). To produce the struts, I began with a curve object to make the Figure 5-22: The leg joints. Both joints were created using a mix of cylinders for the simple parts and curves (converted into meshes) for the longer pieces. Adding support loops around the edges of the cylindrical parts allows them to subdivide much better. basic shape a 2D curve, used the Extrude setting to give it some thickness, and then converted it to a mesh. Blender s default curve-filling topology is full of skinny triangles, which do not subdivide at all well, so I deleted these faces and filled in the front and back by hand to produce nicer topology (see Figure 5-23). Wires The wires are all created from 3D Bézier curves modeled around the legs and other areas to add interest and connect the parts (see Figure 5-24). To add further detail, I converted some wires to meshes to allow me to add some loop cuts and extrusions (see Figure 5-25). For some of the more elaborate wires, I combined the Array and Curve modifiers to duplicate a single mesh along a curve (see Figure 5-26). First, I modeled a single unit (the ring-shaped object in Figure 5-26), and then I added an Array modifier and a Curve modifier to duplicate that unit and deform it to the shape of the curve. Modeling the Details 61


 and a Curve")
15 Figure 5-23: Creating the strut elements of the legs with curves and then filling in the flat surfaces of the resulting mesh with cleaner topology Figure 5-24: Creating the wires for the underside of the legs. These were made with 3D Bézier curves and given thickness using the Bevel setting in the Object Data panel. Figure 5-25: Initially, I modeled these tubes using curves. Then I converted the curves to meshes to allow me to add some loop cuts and scale them in to create grooves. 62 Chapter 5 Figure 5-26: A more complex curved object, made by combining an Array modifier to duplicate the base unit (the ring-shaped object) and a Curve modifier to deform the resulting stack along a curve. I also used an Edge Split modifier and a Mirror modifier to mirror the results to the other side of the model.

16 Coupling For the coupling between the body and abdomen, I initially created the shape with curves and then duplicated it and converted the duplicate to a mesh (alt-c). Because Blender s default curve filling creates ugly, long triangles that don t deform well, I fixed the topology by hand by deleting the inside faces and filling in the shape manually (see Figure 5-27). Figure 5-27: Creating the coupling. I converted the curve object (right) into a mesh and then deleted some of the edge loops around the edges to even out the distribution of faces. I filled the inner faces with nicer topology by hand. Then, using proportional editing, I added a bend in the middle. Other Parts I placed the Spider Bot s eyes using Blender s Snapping tools: I turned on Snapping to Faces, added spheres in Object mode, and then snapped them to the surface of the head. The fangs are simply cubes, extruded and with loop cuts added to make constrictions where they bend. I added some further embellishments using a mix of Blender s modeling tools and retopology techniques. (See Chapter 7 for these parts and the finished model.) Modeling the Details of the Bat Creature The final Bat Creature will consist only of one mesh for the body, which we ll discuss in Chapter 6, but it will need eyes, teeth, and fingernails, too. As these wouldn t be sculpted or retopologized in any way, I aimed straight for the final mesh. Eyes There are many ways to model eyes, but in general it helps to model some of the internal structure of the eye first to allow the rendered eye to catch light and reflections realistically. My model for the eye (see Figure 5-28) consisted of an outer layer, which will have a transparent material and which makes up the cornea and the reflective surface of the eye, and an inner layer, which will later be textured with the pupil, iris, and sclera (the white of the eye). Both the inner and outer layers are made in the same way, beginning with a UV sphere (in Object mode shift-a4mesh4uvsphere) and then using proportional edit to push in the end of the sphere for the inner part or to push it out a little for the outer part to add a bulge to the cornea. For the inner part, after pushing the surface in with proportional editing, I extruded back the most central faces to create a pit for the pupil. For the cornea, I deleted the end triangular faces of the UV sphere and replaced them with a subdivided plane to avoid artifacts when a Subdivision Surface modifier is added (see the left of Figure 5-27). Using the To Sphere operator (alt-shift-s) can help you regain the spherical shape of the eye after adjusting its topology. Teeth and Nails Both the teeth and nails were derived from cubes (see Figure 5-29). To create the teeth, I began with a cube, scaled it down, and extruded from the bottom. By repeatedly scaling down the bottom of the tooth and then extruding again, I was able to refine the tooth into a point. I then positioned and duplicated the teeth and used a Mirror modifier to fill in the other side of the mouth. For the nails, I flattened the cube a bit, added a loop cut down the middle, and moved it out a little to give the nail a bit of a curve. I then repeated the same process I had used for the teeth, refining them into a point and then placing them by hand and duplicating as many as I needed. Modeling the Details 63


17 Figure 5-28: Modeling the eye. Left: The outer layer. Note the grid topology at the end of the cornea. Middle: The inner layer. Right: The two combined in wireframe view, shown from the side. Figure 5-29: Modeling the teeth and nails In Review This completes our discussion of modeling the Jungle Temple scene and adding some extra details to the Spider Bot and Bat Creature projects. You ve learned how to use a variety of Blender s modeling tools, including modifying existing meshes with modifiers, applying the results of these modifiers so you can edit the results, modeling with curves and adjusting the results, and modeling parts from scratch using primitives and extrusions to build up complex forms. In the next chapter, we will move on to sculpting in Blender using the Multiresolution modifier and Sculpt tools to create detailed organic and hard-surface forms. In Chapter 7, you ll learn how to re topologize these forms using Blender s modeling tools in order to create your models. 64 Chapter 5
1 INTRoduCTIon to BLENDER 1. 3 PREPARATIon 19
 INTRoduCTIoN xv 2 INTRoduCTIon to GIMP 13 Topics Covered... xv What Isn t Covered...xvi Requirements....xvi The Projects....xvi The Bat Creature... xvii The Spider Bot... xvii The Jungle Temple... xvii
5 Subdivision Surfaces
 5 Subdivision Surfaces In Maya, subdivision surfaces possess characteristics of both polygon and NURBS surface types. This hybrid surface type offers some features not offered by the other surface types.
Tutorial Model the perfect 3D face
 Model the perfect D face Want to get your head around D modelling? We use Maya to show you how to build an animatable face feature by feature T here are many ways in which to model a head in D. In this
Key 3D Modeling Terms Beginners Need To Master
 Key 3D Modeling Terms Beginners Need To Master Starting your 3D modeling journey is an exciting and rewarding experience. As you begin to learn and practice, there are essential terms you need to know
Textures and UV Mapping in Blender
 Textures and UV Mapping in Blender Categories : Uncategorised Date : 21st November 2017 1 / 25 (See below for an introduction to UV maps and unwrapping) Jim s Notes regarding Blender objects, the UV Editor
Character Modeling IAT 343 Lab 6. Lanz Singbeil
 Character Modeling IAT 343 Lab 6 Modeling Using Reference Sketches Start by creating a character sketch in a T-Pose (arms outstretched) Separate the sketch into 2 images with the same pixel height. Make
3 Polygonal Modeling. Getting Started with Maya 103
 3 Polygonal Modeling In Maya, modeling refers to the process of creating virtual 3D surfaces for the characters and objects in the Maya scene. Surfaces play an important role in the overall Maya workflow
Bonus Ch. 1. Subdivisional Modeling. Understanding Sub-Ds
 Bonus Ch. 1 Subdivisional Modeling Throughout this book, you ve used the modo toolset to create various objects. Some objects included the use of subdivisional surfaces, and some did not. But I ve yet
Character Modeling COPYRIGHTED MATERIAL
 38 Character Modeling p a r t _ 1 COPYRIGHTED MATERIAL 39 Character Modeling Character Modeling 40 1Subdivision & Polygon Modeling Many of Maya's features have seen great improvements in recent updates
Transforming Objects and Components
 4 Transforming Objects and Components Arrow selection Lasso selection Paint selection Move Rotate Scale Universal Manipulator Soft Modification Show Manipulator Last tool used Figure 4.1 Maya s manipulation
CGS 3220 Lecture 13 Polygonal Character Modeling
 CGS 3220 Lecture 13 Polygonal Character Modeling Introduction to Computer Aided Modeling Instructor: Brent Rossen Overview Box modeling Polygon proxy Mirroring Polygonal components Topology editing Procedural
Brief 3ds max Shaping Tutorial
 Brief 3ds max Shaping Tutorial Part1: Power Key Axe Shaft Written by Maestro 1. Creation: Go to top view, create a 6 sided cylinder, 0.1 radius this is the perfect shaft thickness to fit in the hand, so
UV Mapping to avoid texture flaws and enable proper shading
 UV Mapping to avoid texture flaws and enable proper shading Foreword: Throughout this tutorial I am going to be using Maya s built in UV Mapping utility, which I am going to base my projections on individual
Editing Polygons. Adding material/volume: Extrude. Learning objectives
 Learning objectives Be able to: use the Extrude tool to add volume to a polygon know what edge loops are and how to insert edge loops in a polygon cut edges in a polygon know multiple methods of sewing
Images from 3D Creative Magazine. 3D Modelling Systems
 Images from 3D Creative Magazine 3D Modelling Systems Contents Reference & Accuracy 3D Primitives Transforms Move (Translate) Rotate Scale Mirror Align 3D Booleans Deforms Bend Taper Skew Twist Squash
Basic Walk Mesh Editing. for Neverwinter Nights 2. Using Blender
 Basic Walk Mesh Editing for Neverwinter Nights 2 Using Blender Copyright 2013 by Robert J. Hall November 16, 2013 Introduction Greetings. In this introductory tutorial I propose to show how to edit the
How to model a car body in T-Splines
 How to model a car body in T-Splines My name is and I ll show you how to model complex cars like the Alfa Romeo 147 gta using the T-Splines Maya plugin and various techniques. This will be useful if you
The Pilot Bust: Low-Poly Head CHAPTER Modeling 7
 Li kewhatyou see? Buyt hebookat t hefocalbookst or e Mayaf orgames Ingr assi a ISBN 9780240810645 The Pilot Bust: Low-Poly Head CHAPTER Modeling 7 The Pilot Bust: Low-Poly Head Modeling This lesson will
3D Modeling Course Outline
 3D Modeling Course Outline Points Possible Course Hours Course Overview 4 Lab 1: Start the Course Identify computer requirements. Learn how to move through the course. Switch between windows. Lab 2: Set
Create Models or Use a Library? Create your own library How to Get Started? [ 140 ]
![Create Models or Use a Library? Create your own library How to Get Started? [ 140 ]](/thumbs/80/81103423.jpg "Create Models or Use a Library? Create your own library How to Get Started? [ 140 ]") The next step for our scenes is to add some furniture, to further increase the realism. As furniture is a key element, every item of furniture that we add to the scene increases the level of detail, and
The next step for our scenes is to add some furniture, to further increase the realism. As furniture is a key element, every item of furniture that we add to the scene increases the level of detail, and
Mesh Modeling Vase and Flower
 Course: 3D Design Title: Mesh Modeling Vase and Flower Dropbox File: VaseAndFlower.zip Blender: Version 2.45 Level: Beginning Author: Neal Hirsig (nhirsig@tufts.edu) Mesh Modeling Vase and Flower In this
Chapter 13 - Modifiers
 Chapter 13 - Modifiers The modifier list continues to grow with each new release of Blender. We have already discussed the Subdivision Surface (SubSurf) and Ocean modifiers in previous chapters and will
GroBoto v3 SeamNet Mesh Notes
 GroBoto v3 SeamNet Mesh Notes These notes offer some detailed descriptions of Seam Settings in the GroBoto OS X 3.0 release and Windows Beta 2.9.9e released in mid February 2011. These tools will continue
NURBS Sailboat on Ocean (Modeling/Animation)
") Course: 3D Design Title: NURBS Sailboat Blender: Version 2.6X Level: Beginning Author; Neal Hirsig (nhirsig@tufts.edu) (April 2013) NURBS Sailboat on Ocean (Modeling/Animation) The objective of this PDF
Course: 3D Design Title: NURBS Sailboat Blender: Version 2.6X Level: Beginning Author; Neal Hirsig (nhirsig@tufts.edu) (April 2013) NURBS Sailboat on Ocean (Modeling/Animation) The objective of this PDF
Google SketchUp. and SketchUp Pro 7. The book you need to succeed! CD-ROM Included! Kelly L. Murdock. Master SketchUp Pro 7 s tools and features
 CD-ROM Included! Free version of Google SketchUp 7 Trial version of Google SketchUp Pro 7 Chapter example files from the book Kelly L. Murdock Google SketchUp and SketchUp Pro 7 Master SketchUp Pro 7 s
ARCHITECTURE & GAMES. A is for Architect Simple Mass Modeling FORM & SPACE. Industry Careers Framework. Applied. Getting Started.
 A is for Architect Simple Mass Modeling One of the first introductions to form and space usually comes at a very early age. As an infant, you might have played with building blocks to help hone your motor
Where to get Blender. Go to Download the latest version
 Basic Building in Where to get Blender Go to www.blender.org Download the latest version Heads up! If using Linux the Software Center's safe version is out of date and doesn't do all that the new one does,
Chapter 3- Creating & Editing Objects
 Working with Basic Meshes Chapter 3- Creating & Editing Objects Now that we know how to move around in Blender, let s start doing some basic building and shaping. In this chapter we will talk about creating
LOOSE FITTING CLOTHES
 LOOSE FITTING CLOTHES Begin by opening the basic box modeled figure 0-BasicFigure.blend. He s at https://users.soe.ucsc. edu/~yonge/05_homework_resources/. This exercise uses some retopology techniques
RETOPOLOGY. Introduction. Technique
 Introduction RETOPOLOGY Occationally we need to convert a high resolution mesh into a low resolution version for animation or game development. Working entirely in Blender we can do this automatically
Visualization Insider A Little Background Information
 Visualization Insider A Little Background Information Visualization Insider 2 Creating Backgrounds for 3D Scenes Backgrounds are a critical part of just about every type of 3D scene. Although they are
Chapter 3- Creating & Editing Objects
 ` Chapter 3- Creating & Editing Objects Edit Mode- Mesh Editing Object Mode After you have created a mesh, you can go into Edit mode (Tab key or Mode option in window) and change its shape. In edit mode,
WIRE BASICS ESTIMATED TIME REQUIRED. This tutorial will teach you the basics of sketching wires and using them as contours for solid objects.
 WIRE BASICS This tutorial will teach you the basics of sketching wires and using them as contours for solid objects. ESTIMATED TIME REQUIRED 30 Minutes LEARNING GOALS In this tutorial you will learn how
Polygon Modeling Basics Chapter 1 - Vertices
 Polygon Modeling Basics Chapter 1 - Vertices In this tutorial we will cover the basic tools necessary for Polygon Modeling using the Vertex sub-object selection. It is less of a how to tutorial and more
Actions and Graphs in Blender - Week 8
 Actions and Graphs in Blender - Week 8 Sculpt Tool Sculpting tools in Blender are very easy to use and they will help you create interesting effects and model characters when working with animation and
Lesson 11. Polygonal Spaceship
 11 Polygonal Spaceship In this lesson, you will build and texture map a polygonal spaceship. Starting with a polygonal cube, you will extrude facets until you have a completed ship. You will then be able
Computer graphics Labs: Blender (1/3) Modelling, transparency and reflection
 Modelling, transparency and reflection") Computer graphics Labs: Blender (1/3) Modelling, transparency and reflection University of Liège Department of Aerospace and Mechanical engineering Designed with Blender 2.76b Introduction to the interface
Computer graphics Labs: Blender (1/3) Modelling, transparency and reflection University of Liège Department of Aerospace and Mechanical engineering Designed with Blender 2.76b Introduction to the interface
lundi 7 janvier 2002 Blender: tutorial: Building a Castle Page: 1
 lundi 7 janvier 2002 Blender: tutorial: Building a Castle Page: 1 www.blender.nl this document is online at http://www.blender.nl/showitem.php?id=4 Building a Castle 2000 07 19 Bart Veldhuizen id4 Introduction
HOW TO USE THE INSTANCING LAB IN BRYCE 7.1 PRO/ A complete tutorial
 http://www.daz3d.com/forums/viewthread/3381/ Rashad Carter, Posted: 03 July 2012 01:43 PM HOW TO USE THE INSTANCING LAB IN BRYCE 7.1 PRO/ A complete tutorial The Instancing Lab in Bryce 7.1 Pro is a mysterious
1 of 8 11/25/ :42 PM
 1 of 8 11/25/2008 12:42 PM ART 484 - UV Mapping a Suitcase This page is designed as a supplement to lectures. It is not intended to be a stand alone tutorial. The task is to recreate this old suitcase.
CS 465 Program 4: Modeller
 CS 465 Program 4: Modeller out: 30 October 2004 due: 16 November 2004 1 Introduction In this assignment you will work on a simple 3D modelling system that uses simple primitives and curved surfaces organized
CGS 3220 Lecture 17 Subdivision Surfaces
 CGS 3220 Lecture 17 Subdivision Surfaces Introduction to Computer Aided Modeling Instructor: Brent Rossen Overview Converting from polygons to subdivision surfaces (sub-d) Modeling with sub-d using polygon
Sculpting 3D Models. Glossary
 A Array An array clones copies of an object in a pattern, such as in rows and columns, or in a circle. Each object in an array can be transformed individually. Array Flyout Array flyout is available in
Autodesk Fusion 360: Model. Overview. Modeling techniques in Fusion 360
 Overview Modeling techniques in Fusion 360 Modeling in Fusion 360 is quite a different experience from how you would model in conventional history-based CAD software. Some users have expressed that it
ZBrush To Softimage XSI 16-Bit Displacement Guide
 ZBrush To Softimage XSI 16-Bit Displacement Guide Greg Punchatz Senior Creative Director, Janimation November 10, 2005 2005 Pixologic, Inc. All rights reserved. Pixologic and the Pixologic logo, and ZBrush
Creating a Snowman Scene
 Creating a Snowman Scene By: Shane Trautsch Blender 2.72 What you will learn Basic Modeling Particle systems sculpting Materials and Textures Lighting Creating a Snow By now, you have created a snowman.
4) Finish the spline here. To complete the spline, double click the last point or select the spline tool again.
 Finish the spline here. To complete the spline, double click the last point or select the spline tool again.") 1) Select the line tool 3) Move the cursor along the X direction (be careful to stay on the X axis alignment so that the line is perpendicular) and click for the second point of the line. Type 0.5 for
1) Select the line tool 3) Move the cursor along the X direction (be careful to stay on the X axis alignment so that the line is perpendicular) and click for the second point of the line. Type 0.5 for
CG Cookie Workshop: Mastering Mesh Modeling
 CG Cookie Workshop: Mastering Mesh Modeling By: Jonathan Williamson This CG Cookie workshop is intended to provide an in-depth study of the key theories, fundamentals, and techniques you need to know about
Unit 1, Lesson 1: Moving in the Plane
 Unit 1, Lesson 1: Moving in the Plane Let s describe ways figures can move in the plane. 1.1: Which One Doesn t Belong: Diagrams Which one doesn t belong? 1.2: Triangle Square Dance m.openup.org/1/8-1-1-2
3D Modeling and Design Glossary - Beginner
 3D Modeling and Design Glossary - Beginner Align: to place or arrange (things) in a straight line. To use the Align tool, select at least two objects by Shift left-clicking on them or by dragging a box
Dave s Phenomenal Maya Cheat Sheet Polygon Modeling Menu Set By David Schneider
 Dave s Phenomenal Maya Cheat Sheet Polygon Modeling Menu Set By David Schneider POLYGONS NURBS to Polygons This allows the user to change the objects created with NURBS into polygons so that polygon tools
Platformer Tutorial 8 - Adding Mr.Green and Character Animation. Last month. Character FX
 Last month Things became a lot more dangerous as traps and deadly particles were added. It just wouldn t be the same without Mr.Green so he s making his debut this month. As this has always been the plan,
Who has worked on a voxel engine before? Who wants to? My goal is to give the talk I wish I would have had before I started on our procedural engine.
 1 Who has worked on a voxel engine before? Who wants to? My goal is to give the talk I wish I would have had before I started on our procedural engine. Three parts to this talk. A lot of content, so I
O Hailey: Chapter 3 Bonus Materials
 O Hailey: Chapter 3 Bonus Materials Maya s Toon Line For those familiar with toon lines in Maya, you may skip ahead past this section. Those not familiar might find it useful to understand the basics of
Basic Blender Commands This is just a partial list of Blender commands. Please visit the Blender.org website for more details.
 Basic Key Commands Basic Blender Commands This is just a partial list of Blender commands. Please visit the Blender.org website for more details. TAB key- Toggles between edit mode (vertex editing) and
This group is dedicated to Modeler tools for Layout s FiberFX hair and fur system. For the Layout interface and controls see FiberFX
 Fiber FX Click here to expand Table of Contents... FiberFX Strand Modeler Global Controls Fiber Tab Guides Tab Random Tab Gravity Tab Tools1 Tab Tools2 Tab Options Tab Strand Tool Strand Maker This group
Basic Blender Commands This is just a partial list of Blender commands. Please visit the Blender.org website for more details.
 Basic Key Commands Basic Blender Commands This is just a partial list of Blender commands. Please visit the Blender.org website for more details. TAB key- Toggles between edit mode (vertex editing) and
Presets are the heart of Genoma. They can be added to so you can build up a library of reusable rig parts or even complete rigs to suit your
 Genoma 1 Genoma 1 Presets Presets are the heart of Genoma. They can be added to so you can build up a library of reusable rig parts or even complete rigs to suit your needs. Opening the Genoma Presets
Designing Simple Buildings
 Designing Simple Buildings Contents Introduction 2 1. Pitched-roof Buildings 5 2. Flat-roof Buildings 25 3. Adding Doors and Windows 27 9. Windmill Sequence 45 10. Drawing Round Towers 49 11. Drawing Polygonal
The Blender Quick Start Guide
 The Blender Quick Start Guide by Darrin Lile Blender Foundation Certified Trainer It takes time and practice to learn and internalize Blender s workflow. But given the right guidance, anyone can quickly
Freeform / Freeform PLUS
 Freeform / Freeform PLUS WORKING WITH FREEFORM Work from Coarse Clay to Fine When creating new models from scratch, it is best to first create a rough shape using a coarse clay setting such as Rough Shape
An Approach to Content Creation for Trainz
 An Approach to Content Creation for Trainz Paul Hobbs Part 6 GMax Basics (Updates and sample files available from http://www.44090digitalmodels.de) Page 1 of 18 Version 3 Index Foreward... 3 The Interface...
SketchUp. SketchUp. Google SketchUp. Using SketchUp. The Tool Set
 Google Google is a 3D Modelling program which specialises in making computer generated representations of real-world objects, especially architectural, mechanical and building components, such as windows,
This lesson introduces Blender, covering the tools and concepts necessary to set up a minimal scene in virtual 3D space.
 3D Modeling with Blender: 01. Blender Basics Overview This lesson introduces Blender, covering the tools and concepts necessary to set up a minimal scene in virtual 3D space. Concepts Covered Blender s
Blender Character Modeling A companion book to the Blender Character Creation Series on Youtube
 Blender Character Modeling A companion book to the Blender Character Creation Series on Youtube https://www.youtube.com/user/darrinlile Darrin Lile Blender Foundation Certified Trainer 2017, Darrin Lile.
Project 9. Render a Kitchen
 Project 9 Render a Kitchen Creating a kitchen in 3D is one of those projects that help a lot in improving our skills. Since a kitchen can be created without having to resort to complex modeling skills,
Beaumont Middle School Design Project April May 2014 Carl Lee and Craig Schroeder
 Beaumont Middle School Design Project April May 2014 Carl Lee and Craig Schroeder 1 2 SketchUp 1. SketchUp is free, and you can download it from the website www.sketchup.com. For some K12 use, see www.sketchup.com/3dfor/k12-education.
TRAINING SESSION Q3 2016
 There are 6 main topics in this training session which is focusing on 3D Import and 2D Drawing Tips and Tricks in IRONCAD. Content 3D modeling kernels... 2 3D Import... 3 Direct Face Modeling... 5 Unfold
Lesson 1: Creating T- Spline Forms. In Samples section of your Data Panel, browse to: Fusion 101 Training > 03 Sculpt > 03_Sculpting_Introduction.
 3.1: Sculpting Sculpting in Fusion 360 allows for the intuitive freeform creation of organic solid bodies and surfaces by leveraging the T- Splines technology. In the Sculpt Workspace, you can rapidly
In Wings 3D: Basic Pants
 Modeling for Poser In Wings 3D: Basic Pants Cyberwoman 2010; illustrations by Cyberwoman with the cooperation of Sydney G2. Do not reproduce or redistribute without permission. This tutorial will show
Create a Rubber Duck. This tutorial shows you how to. Create simple surfaces. Rebuild a surface. Edit surface control points. Draw and project curves
 Page 1 of 24 Create a Rubber Duck This exercise focuses on the free form, squishy aspect. Unlike the flashlight model, the exact size and placement of the objects is not critical. The overall form is the
You can select polygons that use per-poly UVs by choosing the Select by Polymap command ( View > Selection > Maps > Select by Polygon Map).
.") UV Texture What is UV Mapping? Sometimes, when mapping textures onto objects, you will find that the normal projection mapping just doesn t work. This usually happens when the object is organic, or irregular
UV Texture What is UV Mapping? Sometimes, when mapping textures onto objects, you will find that the normal projection mapping just doesn t work. This usually happens when the object is organic, or irregular
MatterHackers. How to make a 3D model using Google Earth. Written By: Ryan Lutz. How to make a 3D model using Google Earth data
 MatterHackers How to make a 3D model using Google Earth data Written By: Ryan Lutz 2017 matterhackers.dozuki.com Page 1 of 20 INTRODUCTION EDIT 7/25/17: Sadly, Sketchup has changed the map service they
Photography by Christina Sizemore. Mudbox Hotkeys
 Digital Sculpting with Mudbox FIG 2.12 Digital Images Are Composed of a Pixel Grid. Each Pixel Stores Information Like Color and Transparency. Mudbox Uses Digital Images as Stencils and Stamps and Creates
Modeling a Gear Standard Tools, Surface Tools Solid Tool View, Trackball, Show-Hide Snaps Window 1-1
 Modeling a Gear This tutorial describes how to create a toothed gear. It combines using wireframe, solid, and surface modeling together to create a part. The model was created in standard units. To begin,
Manual Version September 2018
 Mesh Modeler Manual Version 3.5.0 September 2018 1 1. Introduction 1.1 Background SCAN2FX was developed out of the need to create photo-realistic assets, visualizations, structures and sets for production
LAB # 2 3D Modeling, Properties Commands & Attributes
 COMSATS Institute of Information Technology Electrical Engineering Department (Islamabad Campus) LAB # 2 3D Modeling, Properties Commands & Attributes Designed by Syed Muzahir Abbas 1 1. Overview of the
Full Screen Layout. Main Menu Property-specific Options. Object Tools ( t ) Outliner. Object Properties ( n ) Properties Buttons
 Outliner. Object Properties ( n ) Properties Buttons") Object Tools ( t ) Full Screen Layout Main Menu Property-specific Options Object Properties ( n ) Properties Buttons Outliner 1 Animation Controls The Create and Add Menus 2 The Coordinate and Viewing
Object Tools ( t ) Full Screen Layout Main Menu Property-specific Options Object Properties ( n ) Properties Buttons Outliner 1 Animation Controls The Create and Add Menus 2 The Coordinate and Viewing
Blender Notes. Introduction to Digital Modelling and Animation in Design Blender Tutorial - week 1 The Blender Interface and Basic Shapes
 Blender Notes Introduction to Digital Modelling and Animation in Design Blender Tutorial - week 1 The Blender Interface and Basic Shapes Introduction Blender is a powerful modeling, animation and rendering
Shading Techniques Denbigh Starkey
 Shading Techniques Denbigh Starkey 1. Summary of shading techniques 2 2. Lambert (flat) shading 3 3. Smooth shading and vertex normals 4 4. Gouraud shading 6 5. Phong shading 8 6. Why do Gouraud and Phong
An Introduction to Maya. Maya. Used in industrial design, CAD, computer games and motion picture effects. The ambition is what get
 An Introduction to Maya Gustav Taxén gustavt@nada.kth.se 2D1640 Grafik och Interaktionsprogrammering VT 2006 Maya Used in industrial design, CAD, computer games and motion picture effects Special focus
Chapter 23- UV Texture Mapping
 Chapter 23- UV Texture Mapping Since games need to be able to process operations as fast as possible, traditional rendering techniques (specular, ray tracing reflections and refractions) cannot typically
Course: 3D Design Title: Mesh Modeling Shark Dropbox File: Shark.zip Blender: Version 2.45 Level: Beginning Author: Neal Hirsig
 Course: 3D Design Title: Mesh Modeling Shark Dropbox File: Shark.zip Blender: Version 2.45 Level: Beginning Author: Neal Hirsig (nhirsig@tufts.edu) Mesh Modeling Shark In this tutorial, we ll model a Shark.
Lesson 01 Polygon Basics 17. Lesson 02 Modeling a Body 27. Lesson 03 Modeling a Head 63. Lesson 04 Polygon Texturing 87. Lesson 05 NURBS Basics 117
 Table of Contents Project 01 Lesson 01 Polygon Basics 17 Lesson 02 Modeling a Body 27 Lesson 03 Modeling a Head 63 Lesson 04 Polygon Texturing 87 Project 02 Lesson 05 NURBS Basics 117 Lesson 06 Modeling
STL File Repair for Beginners
 STL File Repair for Beginners 99% of the time you will be 3D modelling in your favourite CAD programs using their native file formats, and this will likely look perfectly accurate on screen. However in
LESSON 2 MODELING BASICS
 LESSON 2 MODELING BASICS In this lesson we ll start to model a multi-story office building from scratch. We ll construct the base grid, create the two towers and place slabs between the stories. Also we
Text. 5.4 Modeling - Text
 5.4 Modeling - Text Text...1 Editing Text...3 Inserting Text...4 Special Characters...4 Convert Text to Text Object...4 3D Mesh...4 Text Selection...5 Formatting Text...5 Fonts...5 Loading and Changing
Geometric Entities for Pilot3D. Copyright 2001 by New Wave Systems, Inc. All Rights Reserved
 Geometric Entities for Pilot3D Copyright 2001 by New Wave Systems, Inc. All Rights Reserved Introduction on Geometric Entities for Pilot3D The best way to develop a good understanding of any Computer-Aided
You re the best! Discover how versatile and powerful 3Shaper has become, offering now dozens of new markets and applications.
 Discover 3Shaper V2 Today, it is with great pride that we unveil 3Shaper V2, the latest version of our organic modeling solution, part of our 3DESIGN s family of software solutions. Our teams have been
Introduction to Digital Modelling and Animation in Design week 4 Textures
 Introduction to Digital Modelling and Animation in Design week 4 Textures Thaleia Deniozou - - - - - - - - - - - - - - - - - - - - - - - - - - - - - - - - - - - - - - - - - - - - - - - - - - - - - - -
3D Design with 123D Design
 3D Design with 123D Design Introduction: 3D Design involves thinking and creating in 3 dimensions. x, y and z axis Working with 123D Design 123D Design is a 3D design software package from Autodesk. A
Chapter 20- Springs, Screws and Gears
 So far, we see that Blender has many features that are found in almost all 3D computer programs like the ability to extrude along paths, subtract and add meshes through Boolean expressions and now we will
Spring 2011 Workshop ESSENTIALS OF 3D MODELING IN RHINOCEROS February 10 th 2011 S.R. Crown Hall Lower Core Computer Lab
 [1] Open Rhinoceros. PART 1 INTRODUCTION [4] Click and hold on the Boundary Lines in where they form a crossing and Drag from TOP RIGHT to BOTTOM LEFT to enable only the PERSPECTIVE VIEW. [2] When the
AUTODESK FUSION 360 Designing a RC Car Body
 AUTODESK FUSION 360 Designing a RC Car Body Abstract This project explores how to use the sculpting tools available in Autodesk Fusion 360 Ultimate to design the body of a RC car. John Helfen john.helfen@autodesk.com
Mastering Truspace 7
 How to move your Truespace models in Dark Basic Pro by Vickie Eagle Welcome Dark Basic Users to the Vickie Eagle Truspace Tutorials, In this first tutorial we are going to build some basic landscape models
COMPUTER AIDED ARCHITECTURAL GRAPHICS FFD 201/Fall 2013 HAND OUT 1 : INTRODUCTION TO 3D
 COMPUTER AIDED ARCHITECTURAL GRAPHICS FFD 201/Fall 2013 INSTRUCTORS E-MAIL ADDRESS OFFICE HOURS Özgür Genca ozgurgenca@gmail.com part time Tuba Doğu tubadogu@gmail.com part time Şebnem Yanç Demirkan sebnem.demirkan@gmail.com
Week 5: Assignment: Animation
 Animating a Tennis Ball This tutorial will teach you the main principles of animation, specifically how to animate a tennis ball being fired from a cannon and bouncing off a wall to a stop. We would recommend
Facial Animation. Chapter 7
 Chapter 7 Facial Animation Although you can go a long way toward completing a scene simply by animating the character s body, animating the character s face adds greatly to the expressiveness of a sequence.
1st Point. 2nd Point. hold shift & drag along Y. Splines
 Splines STEP 1: open 3DS Max _ from the Command Panel under the Create tab click on Shapes (note: shapes are really Splines) _ under Object Type click on Ellipse STEP 2: Expand the Keyboard Entry tab type
ROTOSCOPING AND MATTE PAINTING In Blender v2.48a
 In the world of Visual Effects, Rotoscoping, Matte Painting and Garbage Painting are necessary and complementary functions. They are used each time a cut-out in the image is necessary, to remove a background