PRESENTER RESOURCES. Notes: The Web Promethean Planet ActivInspire Help ActivInspire Cheatsheet (pdf) ActivInspire Basics (pdf)
|
|
|
- Edgar Gallagher
- 5 years ago
- Views:
Transcription

1
2
3


")


4 PRESENTER RESOURCES Notes: The Web Promethean Planet ActivInspire Help ActivInspire Cheatsheet (pdf) ActivInspire Basics (pdf) Teacher Share Drive "Teacher_Share" Folder "Interactive Whiteboard Lessons Folder ActivInspire Studio Beginner Tutorial Intermediate Folder ActivInspire Flip Charts

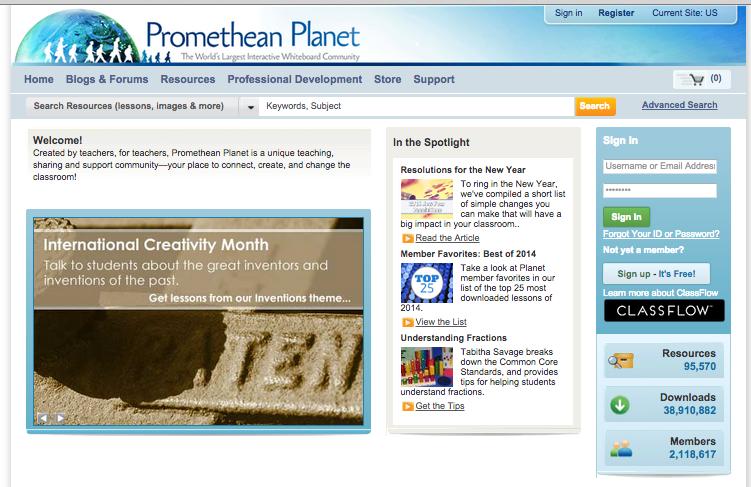
5 Home Page

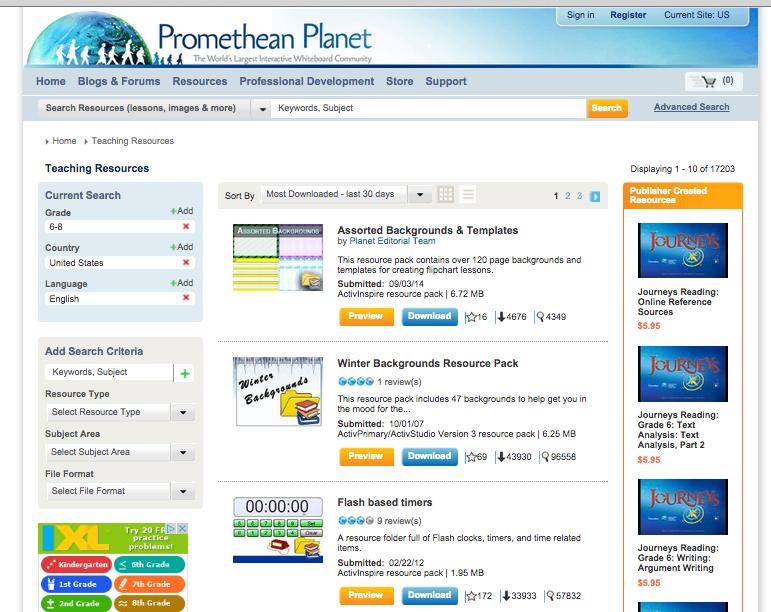
6 Resources Downloadable Flipcharts
7 Support


, choose configure. Check the box that says 'Launch next time with the Primary Look and Feel'.")
8 A C T I V i ns p i r e C h e a t S h e e t page 1 Mark West The Dashboard When ActivInspire opens, you are immediately greeted with the Dashboard. The Dashboard contains shortcuts to flipcharts and time-saving tools. The Dashboard remains open until it is closed. TIP: Make It Go Away If you do not want this popping up every time you run ActivInspire, uncheck the 'Show the dashboard window on startup' box. TIP: Make It Come Back From the VIEW menu, click on dashboard. If you decide you want it back everytime on startup, check the 'Show the dashboard window on startup' box. Change ActivInspire's Look And Feel <- Primary If you want to get a simpler interface better suited for younger grades, try Activinspire Primary. From the Dashboard (View -> Dashboard), choose configure. Check the box that says 'Launch next time with the Primary Look and Feel'. When you exit and re-launch ActivInspire, the interface will change. If you don't like that look, you can go back. To go back, from the Dashboard (View > Dashboard), choose configure. Check the box that says 'Launch next time with the Studio Look and Feel'. When you exit and re-launch ActivInspire, the interface will change back. ActivInspire Primary Studio -> ActivInspire Primary is designed for younger grades. The tools are simpler (fewer choices, big pictures to click) and ordered at the bottom for ease of reach for the "vertically challenged". Even with the low mounting of the interactive white boards to the walls, tool access can be an issue for young students. This configuration is ideal for elementary school. ActivInspire Studio ActivInspire Studio has a more "grownup" look and feel; there are more tools and more options. This configuration is ideal for the high school setting.

.")

 can also be pinned and unpinned.")

9 A C T I V i ns p i r e C h e a t S h e e t page 2 Toolbox Mark West PROFILES A profile is simply a collection of settings. You can modify existing profiles to better suit your needs or even make your own profiles. You can tweak a profile by clicking on the Dashboard's 'Configure' button and then choosing 'Manage Profiles'. You can use the dashboard to switch between profiles, but you also have an icon in your toolbar to switch profiles (which is faster). Adjust Your Toolbox ToolBox Options provides you with placement options. There are options menus on nearly every browser/box/window. Check them out! Roll-up - just like rolling a window shade it hides it out of your way. Click roll-up again to restore the toolbox. Pin Toolbox lets you make the tool box stick in place and not travel around freely. You can unpin it and scoot it about. Note that other windows (like the browsers) can also be pinned and unpinned. When you edit your profiles, the one thing you will definitely want is the most colors; be sure the main toolbox has 24 colors. Uncheck "Rolled in" if you do not like the toolbox hiding features from you. The "Commands" tab will let you add more buttons for ActivInspire to your toolbox. The "User defined buttons" tab lets you configure buttons for other applications (such as Firefox) that you might want as buttons on your toolbox. The "Settings" tab lets you change behaviors for ActivInspire (such as how big the layout of the screen is, background colors, clock, etc.)

 to spice up your flipchart pages with.")
 means a resource can be expanded. (-) means a resource can be collapsed.")
10 A C T I V i ns p i r e C h e a t S h e e t page 3 Mark West Browser The Browser starts off on your left. Page Browser Like Microsoft PowerPoint's slide sorter, the Page Browser allows you to add, delete, duplicate or move pages. You can use the scroll bar to preview your flipchart pages. The slider at the bottom of the page browser allows you to resize the preview size of the pages. Resource Browser The Resource Browser lets you look for multimedia resources (pictures, photos, movies, sounds, etc.) to spice up your flipchart pages with. The single silhouette head is your personal stuff. The multiple heads are shared resources that anyone on that computer could use. The Blue Computer Screen is a link to another folder, which you can specify. (+) means a resource can be expanded. (-) means a resource can be collapsed. Object Browser The Object Browser lets you sort things from layer to layer and restack items within a layer. You can also lock things so that your students can't move them.


, Appearance (make it translucent or switch layers), Position on the page, Labels")
 to the objects you have on your flipchart page.")
11 A C T I V i ns p i r e C h e a t S h e e t page 4 Mark West Notes Browser The Notes Browser is a place to keep notes. At the bottom is a button that says 'Format ToolBar'; this lets you format the fonts in your notes. If you're going to share this with others, this is the ideal location for you to put instructions for the next person who uses your flipchart. Likewise, if you download a chart from this is the place to get pointers on how to use their material. Property Browser The Property Browser lets you change the appearance of the objects in your flipchart page. You can change things such as identification (such as how it identifies itself in the object browser), Appearance (make it translucent or switch layers), Position on the page, Labels (tooltips that popup), turn it into a container, rotate the object, place restrictions on how the object is moved, and so forth. If you edit a page's properties, you can custom design a grid. Action Browser The Action Browser lets you assign an action (such as to open a webpage or start playing a movie) to the objects you have on your flipchart page. A pull-down menu lets you switch between all actions (more than 250) or by groups. There are also drag and drop actions. Voting Browser You can register devices (such as the ActiVote classroom response units), manage those devices, and export information (look for a head and a question mark icon). At the bottom you can manage your settings and get training on the results this provides.
. Click or tap on the object.")
 the object like a movie marquee.")
12 A C T I V i ns p i r e C h e a t S h e e t page 5 Marquee and Sizing Handles Mark West To Edit An Object Place your cursor on the object (text, shape, etc). The cursor becomes a small arrowhead with a cross (like the knight's red cross, only black). Click or tap on the object. This causes the "Marquee and Sizing Handle" (or just "Marquee Handles") to appear. The name "Marquee" refers to the grey or yellow dotted outline around the object, which encircles (or "ensquares") the object like a movie marquee. The Marquee Handles are a row of icons (often) above the object; they can appear to the side or below. Each icon allows a specific action (move, rotate, edit, make translucent (seethrough), group objects, bring forward, send backward, duplicate, increase or decrease size. Text objects also allow the text to be edited. The marquee (square outline) of an object has Sizing Handles (grey circles) at the corners and in the middle of each side. Click and drag a grey circle to alter the object's shape. In the lower right corner is a circle with a line through it. This sizing handle changes the size proportionally (it gains or loses as much height as width, thus keeping the original look of the object). Fast Accessing Changes As a Mac user, you can right click (if you have a mouse with a right button) or you can always hold down the control button when you click. Control-Clicking This gives you really fast access to menus in ActivInspire (and other programs, such as Safari, Firefox, Microsoft Word, Excel, PowerPoint, etc). Menus Are Easy -- And Everywhere! The Main Menu icon. Menus are not only along the menu bar at the top, but you can control click (see above) or even use the built in menus from the toolbar. The Top Left icon is the Main Menu icon. If you click the Main Menu icon, you have access to everything on any of ActivInspire's menus. This is especially helpful for when you switch your profile to "At The Board"; the menu bar at the top goes away, but you can still access the program's full features, right from the Toolbox. When you're designing a flipchart page, all the menus are useful. But when you're in class, the Tools menu will give you quick access to any tools you haven't configured in the Toolbox.


13 A C T I V i ns p i r e C h e a t S h e e t page 6 Right clicking (or for Macs with a single mouse button, control-clicking - holding the control key while clicking) opens up a world of easily accessible possibilites. Design Mode Presentation Mode Mark West The shape object is re-vamped from ActiveStudio 3, making shapes more dynamic for presentation purposes. The Design Mode/Presentation Mode icon is at the top right of the flipchart. Design Mode lets you work on objects that are locked or have actions attached without fear of the actions happening. Hidden objects will also be visible. Presentation Mode lets the flipchart function just like it would for you in class. If your flipchart actions aren't working, check if Design Mode is on. Click the icon to switch modes. The connector tool allows you to click and drag to create links between objects. This is useful for making concept maps. If you move a connected object, the line redraws itself, so that the two objects remain linked. Pens, highlighters and magic ink start on the top layer. Other objects start on the middle layer. You can move items to other layers (including the bottom layer) if needed. The object browser lets you see which Backgrounds and grids stay layers objects are on, as well as if they are on the background layer. hidden or locked in place. This icon allows you to insert media from a file on your computer. By Media, it means sound files (wavs, mp3s, etc.), movies (.mov,.flv,.avi, etc.), or pictures (.gif,.jpg,.png, etc.). If you change the location of the media on your harddrive, the media will be a broken link (it won't work), so organize your files and then link to them. The Text Tool lets you create text on your flipchart pages. As will most computer programs, you can change the font, the size and the color of the text you type. Tools menu -> More Tools -> Spell Check Flipchart is also handy. The eraser tool only erases the pen and the highlighter. It won't erase pictures or text. This means that you can safely remove highlighting from text without worrying about removing the text beneath it. Magic Ink is a special eraser that erases objects on the top layer. If magic ink isn't in your toolbox, you can access it from the Tools menu -> Magic Ink. Unlike the eraser, you could erase a picture (if that picture is on the top layer). Thus, you could hide a picture (placed on the middle layer) beneath another picture (on the top layer). Magic ink will let your erase the picture on the top layer to reveal the middle layer picture. Clear Annotations removes all pen, magic ink and highlighter marks. Clear Objects gets rid of everything on the top, middle and bottom (but not background) layers. Clear Grid and Clear Background do just what they say they will do. Clear Page removes it all. If you don't save your flipchart, then the reset icon works just like the Clear Page tool (removes it all). However, if you save your flipchart, this puts all your objects back as when you started. Between classes, use this rather than re-opening a flipchart to reset it.
ACTIVINSPIRE CHEATSHEET
 ACTIVINSPIRE CHEATSHEET Dashboard Toolbox Customize Browser Marquee THE DASHBOARD When ActivInspire opens, the Dashboard appears. The Dashboard contains shortcuts to flipcharts and time-saving tools. It
Customizing FlipCharts Promethean Module 2 (ActivInspire)
") Customizing FlipCharts Promethean Module 2 (ActivInspire) Section 1: Browsers The browsers (located on the left side of the flipchart) are menus for various functions. To view the browsers, click Main
Customizing FlipCharts Promethean Module 2 (ActivInspire) Section 1: Browsers The browsers (located on the left side of the flipchart) are menus for various functions. To view the browsers, click Main
Promethean ActivInspire
 New Features What s New? The newest version of Promethean software, ActivInspire, can be used only on an Intel based Mac, such as a Macbook. It will not run on an ibook. The flipchart is already set to
ActivInspire Main Tool Box
 Toolbox Options Docking Roll In/Out ActivInspire Main Tool Box Roll In must be unchecked to view the 3rd column of the Tool Box to display your Tool History.your most recently used tools. Constantly updates.
Basic Classroom Tools Promethean Module 1 (ActivInspire)
") Basic Classroom Tools Promethean Module 1 (ActivInspire) Section 1: Power On The Promethean ActivBoard is activated when the power cord is plugged into the wall outlet. The flame icon in the upper right
Basic Classroom Tools Promethean Module 1 (ActivInspire) Section 1: Power On The Promethean ActivBoard is activated when the power cord is plugged into the wall outlet. The flame icon in the upper right
Getting Started with ActivInspire
 Getting Started with ActivInspire In this guide, you will learn not only how to get started with ActivInspire, but also the basics of creating and delivering your own cutting-edge ActivInspire flipcharts.
ActivInspire 101! Promethean. ActivInspire 101. Madera Unified School District. Madera Unified School District! 7
 Promethean ActivInspire 101 Tu torial Madera Unified School District Ouline: - Dashboard - Main Toolbar - Editing Profiles (ToolStore) - New & Modified Tools - Browsers - Layers & Ordering Objects - Locking
ActivInspire Intro Training Manual
 Spring Branch ISD ActivInspire Intro Training Manual Hardware Calibration Formative Assessment ACTIVote Teachers are expected to routinely use Learner Response Systems (ACTIV votes, ACTIVexpressions, or
Creating an Interactive Lesson in ActivInspire with Multiple Components. Component 1: Objective Slide
 Creating an Interactive Lesson in ActivInspire with Multiple Components Component 1: Objective Slide To create the Objective Slide: a. Make sure ActivInspire is open to a Blank Page b. If the first thing
Basics of ActivInspire
 Basics of ActivInspire Course Instructor: Ashley Witman witman@wlake.org Handbook by Heather Hamker Flipchart by: Ashley Witman 1 credit class 1 Table of Contents Topics Page # Module 1: Breaking it Down
Promethean ActivInspire. Bachelor of Arts ActivTraining. Madera Unified School District
 Promethean ActivInspire Bachelor of Arts ActivTraining Madera Unified School District Day 1 Creating and Editing Profiles Purpose Teacher and Student Profiles Adding Tools Modifying Marquee Handles toolbar
ACTIVINSPIRE USER GUIDE TO HELP STAFF TRANSITION FROM ACTIVSTUDIO SUMMER 2010 MONTGOMERY COUNTY PUBLIC SCHOOLS TECHNOLOGY CONSULTING TEAM
 ACTIVINSPIRE USER GUIDE TO HELP STAFF TRANSITION FROM ACTIVSTUDIO SUMMER 2010 MONTGOMERY COUNTY PUBLIC SCHOOLS TECHNOLOGY CONSULTING TEAM CONTENTS ACTIVINSPIRE DASHBOARD... 5 Changes and Additions... 5
Migration Guide. Notebook to ActivInspire
 Migration Guide Notebook to ActivInspire 1 DESKTOP ICON Once your software has been installed, you will notice an ActivInspire icon on your desktop. DASHBOARD The Welcome Center is now called your ActivInspire
ActivInspire Layout and Tools Orientation
 ActivInspire Layout and Tools Orientation Here are some ideas on how to start using your board: Project What s on the Computer Most simply, you can use the interactive whiteboard as a screen to project
Inspire Ten Minute Task #1
 Inspire Ten Minute Task #1 Pen Power Take advantage of virtual pens with their variety of colours, pen thicknesses and transparency levels, there is so much more they enable you to do. 1. Look on the toolbar
Quick Keyboard Short Cuts. Instructor: Rachel Miller
 Quick Keyboard Short Cuts Instructor: Rachel Miller Table of Contents Main Tool Bar 4-5 Quick Keyboard Short Cuts Menus 6-7 Brower Bars 8-9 Object Tool Bar 10 Calibrating the Board - Using the Activ Pen
Promethean Board. Guide to Basics
 Promethean Board Guide to Basics 1 Table of Contents Introduction... 3 Aligning the Projector Image... 3 Calibrating the ACTIVboard... 4 Opening ACTIVstudio/Creating a Profile... 4 Features Located Within
OnPoint s Guide to MimioStudio 9
 1 OnPoint s Guide to MimioStudio 9 Getting started with MimioStudio 9 Mimio Studio 9 Notebook Overview.... 2 MimioStudio 9 Notebook...... 3 MimioStudio 9 ActivityWizard.. 4 MimioStudio 9 Tools Overview......
ACTIVINSPIRE BASICS. Chapter 1 - Connecting the Equipment. Two things to remember--power and connection!
 ACTIVINSPIRE BASICS Chapter 1 - Connecting the Equipment Two things to remember--power and connection! 1. The ActivBoard must be plugged into an outlet, and the power button on the left side must be pushed
ActivInspire 101 Beginners. Presented by MUSD Instructional Technology
 ActivInspire 101 Beginners Presented by MUSD Instructional Technology All Instructional Tech tutorials available @ http://www.madera.k12.ca.us/page/6494 ActivInspire- 101-Beginner 2014 Getting Started
Center for Faculty Development and Support Creating Powerful and Accessible Presentation
 Creating Powerful and Accessible Presentation PowerPoint 2007 Windows Tutorial Contents Create a New Document... 3 Navigate in the Normal View (default view)... 3 Input and Manipulate Text in a Slide...
USING SMART NOTEBOOK SOFTWARE
 USING SMART NOTEBOOK SOFTWARE THE NOTEBOOK INTERFACE The Notebook interface is easy to use and many functions (such as inserting pictures, saving files etc.) will be famillar as they are simillar to those
ActivLearning. Training Series. addendum
 ActivLearning Training Series addendum ActivInspire 1.6 Update Promethean continues to evolve the ActivInspire software to maximize functionality, simplify lesson preparation, and enable you to deliver
INSERVICE DAY - 11/11/11 TECHNOLOGY
 INSERVICE DAY - 11/11/11 TECHNOLOGY Converting PowerPoints into Movies (examples using imovie& Windows MovieMaker) (More detailed tutorials with pictures can be found at http://www.whsd.net/olc/teacher.aspx?s=1452).
Introducing Interactive Whiteboards & ActivInspire
 1 Introducing Interactive Whiteboards and ActivInspire Contents 1. Using your Whiteboard What can a whiteboard be used for, What are the benefits, what are the pitfalls, Good practice, Safety issues, Troubleshooting,
Lesson 1 New Presentation
 Powerpoint Lesson 1 New Presentation 1. When PowerPoint first opens, there are four choices on how to create a new presentation. You can select AutoContent wizard, Template, Blank presentation or Open
SMART Board Quick Reference
 The Ready Light Your SMART Board interactive whiteboard includes a Ready Light that indicates the status of your interactive whiteboard. Color of Ready Light Not lit Solid green Flashing green Solid red
SMARTBOARD TRAINING HANDBOOK
 SMARTBOARD TRAINING HANDBOOK Created by Nicki Callahan Library Media Specialist, RLMS Computer Resource Teacher, FWMS Image from: Teacher Training Online, http://teacheronlinetraining.com/images/smartboard1.gif
Code X Digital User s Guide
 Code X Digital User s Guide PDF0531 (PDF) Houghton Mifflin Harcourt Publishing Company Table of Contents Introduction... 4 Code X Digital and Scholastic Achievement Manager... 5 Enrolling Students and
Introduction to Microsoft Word 2008
 1. Launch Microsoft Word icon in Applications > Microsoft Office 2008 (or on the Dock). 2. When the Project Gallery opens, view some of the available Word templates by clicking to expand the Groups, and
Microsoft PowerPoint 2007 Beginning
 Microsoft PowerPoint 2007 Beginning Educational Technology Center PowerPoint Presentations on the Web... 2 Starting PowerPoint... 2 Opening a Presentation... 2 Microsoft Office Button... 3 Quick Access
Contents. How to use Magic Ink... p Creating Magic Revealers (with Magic Ink)... p Basic Containers... p. 7-11
... p Basic Containers... p. 7-11") Rachel Heroth 2014 Contents Magic Ink: How to use Magic Ink... p. 1-2 Creating Magic Revealers (with Magic Ink)... p. 3-6 Containers: Basic Containers... p. 7-11 Troubleshooting Containers...... p. 12
Rachel Heroth 2014 Contents Magic Ink: How to use Magic Ink... p. 1-2 Creating Magic Revealers (with Magic Ink)... p. 3-6 Containers: Basic Containers... p. 7-11 Troubleshooting Containers...... p. 12
Part 1: Basics. Page Sorter:
 Part 1: Basics Page Sorter: The Page Sorter displays all the pages in an open file as thumbnails and automatically updates as you add content. The page sorter can do the following. Display Pages Create
EASY INTERACTIVE WHITEBOARD
 EASY INTERACTIVE WHITEBOARD CONNECT COMPUTER/TURN ON PROJECTOR LAPTOP For the projectors in the labs, a computer is connected. These instructions are for you to connect a laptop computer to the projector.
Introducing Activstudio
 Introducing Activstudio Version 3 COPYRIGHT INFORMATION Introducing Activstudio Version 3 Copyright 2007 Promethean Limited. All rights reserved. If this guide is distributed with Activstudio software,
This guide will help you with many of the basics of operation for your Epson 485wi BrightLink Projector with interactive functionality.
 This guide will help you with many of the basics of operation for your Epson 485wi BrightLink Projector with interactive functionality. If you need further assistance with questions, you can refer to the
Introduction to Microsoft Office PowerPoint 2010
 Introduction to Microsoft Office PowerPoint 2010 TABLE OF CONTENTS Open PowerPoint 2010... 1 About the Editing Screen... 1 Create a Title Slide... 6 Save Your Presentation... 6 Create a New Slide... 7
Annotating Over a Document Camera Image
 Annotating Over a Document Camera Image You can write over (annotate) any image on your document camera using Promethean software in conjunction with the Document Camera software. To do this, you will
Shape Cluster Photo Written by Steve Patterson
 Shape Cluster Photo Written by Steve Patterson Before After Step 1: Create A New Document Let's begin by creating a new Photoshop document. Go up to the File menu in the Menu Bar along the top of the screen
Your Brand New Promethean Board: Beginner Basics
 This webinar will begin shortly. Stay tuned. Your Brand New Promethean Board: Beginner Basics Phyllis Manning Ed-Pro Consultants http://edproconsultants.weebly.com Is this you? This can be your class!
Bridgit Conferencing Software User s Guide. Version 3.0
 Bridgit Conferencing Software User s Guide Version 3.0 ii Table Of Contents Introducing Bridgit Conferencing Software... 1 System Requirements... 1 Getting Bridgit Conferencing Software... 2 The Bridgit
CLEAR TOOL... 7 BASIC NAVIGATION... 7 PAGE SORTER... 7
 Interwrite Workspace WHAT IS WORKSPACE?...2 INSTALLATION...2 SETUP...2 CONNECTING DEVICES... 2 NAMING DEVICES... 3 CALIBRATING DEVICES... 3 THE PEN...3 INTERACTIVE MODE...4 THE TOOLBAR...4 MOVING THE TOOLBAR...
SmartBoard and Notebook Part 2
 SmartBoard and Notebook Part 2 The SmartBoard is an Interactive Whiteboard that allows you to touch the board and interact with the computer using your finger as the mouse. 4/2009 Floating Tools Control
Microsoft PowerPoint 2010 Beginning
 Microsoft PowerPoint 2010 Beginning PowerPoint Presentations on the Web... 2 Starting PowerPoint... 2 Opening a Presentation... 2 File Tab... 3 Quick Access Toolbar... 3 The Ribbon... 4 Keyboard Shortcuts...
Microsoft PowerPoint 2013 Beginning
 Microsoft PowerPoint 2013 Beginning PowerPoint Presentations on the Web... 2 Starting PowerPoint... 2 Opening a Presentation... 2 File Tab... 3 Quick Access Toolbar... 3 The Ribbon... 4 Keyboard Shortcuts...
Interface. 2. Interface Adobe InDesign CS2 H O T
 2. Interface Adobe InDesign CS2 H O T 2 Interface The Welcome Screen Interface Overview The Toolbox Toolbox Fly-Out Menus InDesign Palettes Collapsing and Grouping Palettes Moving and Resizing Docked or
Basic Concepts 1. Starting Powerpoint 2000 (Windows) For the Basics workshop, select Template. For this workshop, select Artsy
 For the Basics workshop, select Template. For this workshop, select Artsy") 1 Starting Powerpoint 2000 (Windows) When you create a new presentation, you re prompted to choose between: Autocontent wizard Prompts you through a series of questions about the context and content of
1 Starting Powerpoint 2000 (Windows) When you create a new presentation, you re prompted to choose between: Autocontent wizard Prompts you through a series of questions about the context and content of
ActivInspire in the ActivClassroom
 ActivInspire in the ActivClassroom ActivClassroom Training Series by Promethean, Inc. Copyright 2009 Promethean, Inc. All rights reserved. This manual may only be reproduced for use within the Promethean
PowerPoint Tips and Tricks
 PowerPoint Tips and Tricks Viewing Your Presentation PowerPoint provides multiple ways to view your slide show presentation. You can access these options either through a toolbar on your screen or by pulling
Getting Started with. PowerPoint 2010
 Getting Started with 13 PowerPoint 2010 You can use PowerPoint to create presentations for almost any occasion, such as a business meeting, government forum, school project or lecture, church function,
SMART Meeting Pro 4.2 personal license USER S GUIDE
 smarttech.com/docfeedback/170973 SMART Meeting Pro 4.2 personal license USER S GUIDE Product registration If you register your SMART product, we ll notify you of new features and software upgrades. Register
ACTIVPRIMARY. Foundation Skills
 ACTIVPRIMARY Foundation Skills COPYRIGHT INFORMATION Activprimary Foundation Skills Issue 3 2008 Promethean Limited. All rights reserved. If this guide is distributed with Activprimary software, it may
POWERPOINT 2003 OVERVIEW DISCLAIMER:
 DISCLAIMER: POWERPOINT 2003 This reference guide is meant for experienced Microsoft Office users. It provides a list of quick tips and shortcuts for familiar features. This guide does NOT replace training
Interactive Teaching System User s Guide
 Interactive Teaching System User s Guide June 23, 2015 For use with READ 180 Next Generation, READ 180 Enterprise Edition, System 44 Next Generation, System 44, Expert 21, and Scholastic Achievement Manager
SMARTBOARD TRAINING HANDBOOK
 SMARTBOARD TRAINING HANDBOOK Created by Nicki Callahan Library Media Specialist, RLMS Computer Resource Teacher, FWMS Image from: Teacher Training Online, http://teacheronlinetraining.com/images/smartboard1.gif
Section 2. Slides. By the end of this Section you should be able to:
 Section 2 Slides By the end of this Section you should be able to: Understand and Use Different Views Understand Slide Show Basics Save, Close and Open Presentations Exit PowerPoint 26 CIA Training Ltd
SMART Meeting Pro PE 4.1 software
 Help us make this document better smarttech.com/feedback/170973 SMART Meeting Pro PE 4.1 software USER S GUIDE Product registration If you register your SMART product, we ll notify you of new features
Keynote 08 Basics Website:
 Website: http://etc.usf.edu/te/ Keynote is Apple's presentation application. Keynote is installed as part of the iwork suite, which also includes the word processing program Pages and the spreadsheet program
NVU Web Authoring System
 NVU Web Authoring System http://www.nvu.com/index.php Table of Contents Using Nvu as Your Web Page Authoring System: Getting Started Opening a page, saving, and previewing your work...3 Formatting the
End User Guide. 2.1 Getting Started Toolbar Right-click Contextual Menu Navigation Panels... 2
 TABLE OF CONTENTS 1 OVERVIEW...1 2 WEB VIEWER DEMO ON DESKTOP...1 2.1 Getting Started... 1 2.1.1 Toolbar... 1 2.1.2 Right-click Contextual Menu... 2 2.1.3 Navigation Panels... 2 2.1.4 Floating Toolbar...
PowerPoint X. 1. The Project Gallery window with the PowerPoint presentation icon already selected. 2. Click on OK.
 PowerPoint X Launching PowerPointX 1. Start PowerPointX by clicking on the PowerPoint icon in the dock or finding it in the hard drive in the Applications folder under Microsoft PowerPoint. PowerPoint
Table of Contents. Revu ipad. v3.6. Navigation. Document Manager. File Access. Markups. Signature Tool. Field Verification Measurements
 Table of Contents Navigation Document Manager File Access Markups Signature Tool Field Verification Measurements Editing Properties Tool Sets & the Tool Chest Markups List Forms Studio Sessions Studio
Exercise 5 Animated Excel Charts in PowerPoint
 Exercise 5 Animated Excel Charts in PowerPoint This is a fun exercise to show you how even graphs can become even more interesting if you use multimedia. You will write some slides on your own to summarize
Empty the Recycle Bin Right Click the Recycle Bin Select Empty Recycle Bin
 Taskbar Windows taskbar is that horizontal strip at the bottom of your desktop where your open files and programs appear. It s where the Start button lives. Below are improvements to the taskbar that will
Scholastic Interactive Teaching System User s Guide
 Scholastic Interactive Teaching System User s Guide For use with READ 180 Next Generation version 2.1 or later, READ 180 Enterprise Edition version 2.1 or later, System 44 version 2.1 or later, Expert
Interactive Whiteboards Introductory Training Manual
 Interactive Whiteboards Introductory Training Manual Contents 1. Using your Whiteboard What can a whiteboard be used for, What are the benefits, what are the pitfalls, Good practice, Safety issues, Troubleshooting,
Application of Skills: Microsoft PowerPoint 2013 Tutorial
 Application of Skills: Microsoft PowerPoint 2013 Tutorial Throughout this tutorial, you will progress through a series of steps to create a presentation about yourself. You will continue to add to this
To learn more about the Milestones window choose: Help Help Topics Select the Index tab and type in the feature. For Example toolbox.
 To learn more about the Milestones window choose: Help Help Topics Select the Index tab and type in the feature. For Example toolbox. 1 of 12 CHOOSE THE DATES TAB TO: 1. Set the schedule s Date Range.
Keynote Basics Website:
 Keynote Basics Website: http://etc.usf.edu/te/ Keynote is Apple's presentation application. Keynote is installed as part of the iwork suite, which also includes the word processing program Pages. If you
SMART Board Interactive Whiteboard Basics
 SMART Board Interactive Whiteboard Basics This Quick Reference Guide provides an overview of the information you need to begin using a SMART Board interactive whiteboard. Before you begin, make sure the
Training Series. The ActivClassroom by Promethean
 Training Series be yond the essential s workshop The ActivClassroom by Promethean ActivClassroom Training Series by Promethean Professional Development 2009 Promethean. All Rights Reserved The reproduction
Interwrite Workspace v. 8.9 Intermediate Technology Integration Center
 Interwrite Workspace v. 8.9 Intermediate The Toolbar... 2 Moving the Toolbar... 2 Resizing the Toolbar... 2 Toolbar Settings... 2 Enable the Primary Toolbar... 2 Enable Properties with Right Click... 2
Microsoft PowerPoint 2007 Tutorial
 Microsoft PowerPoint 2007 Tutorial Prepared By:- Mohammad Murtaza Khan I. T. Expert Sindh Judicial Academy Contents Getting Started... 5 Presentations... 5 Microsoft Office Button... 5 Ribbon... 6 Quick
Promethean Interactive User Guide
 Promethean Interactive User Guide http://cede.lboro.ac.uk The Centre for Engineering and Design Education The 1st Floor, Keith Green Building, Loughborough University, Leicestershire, LE11 3TU For enquiries
Microsoft PowerPoint Tutorial
 Microsoft PowerPoint Tutorial GETTING STARTED Microsoft PowerPoint is one of the most popular presentation programs supported by both Mac and PC platforms. Microsoft PowerPoint can be used to create interactive
Mac OS X Handbook MacBook Westhampton Beach School District
 Mac OS X Handbook MacBook Westhampton Beach School District www.westhamptonbeach.k12.ny.us Table of Contents Features and Design! 3 The Downloads Stack! 4 Customization! 5 Finder! 6 Cover Flow! 7 Icons!
Beginning PowerPoint: 2010 A Presentation Software
 Beginning PowerPoint: 2010 A Presentation Software Objective 1: Review Screen Layout PowerPoint 2010 offers a similar user interface as 2007. The top portion of the window has a new structure for PowerPoint
Fundamentals. Training Kit. Presentation Products, Inc. 632 W 28th St, 7th fl New York, NY f presentationproducts.
 Fundamentals Training Kit Presentation Products, Inc. 632 W 28th St, 7th fl New York, NY 10001 212.736.6350 f 212.736.6353 presentationproducts.com Table of Contents Getting Started How Does the SMART
Appleworks 6.0 Word Processing
 Appleworks 6.0 Word Processing AppleWorks 6.0 Starting Points What s New in AppleWorks 6.0 AppleWorks 6.0 is a versatile and powerful program that integrates the best of everything you need - word processing,
PowerPoint Intermediate 2010
 PowerPoint Intermediate 2010 I. Creating a Slide Master A. Using the design feature of PowerPoint essentially sets up similar formatting for all of your slides within a presentation. However, there are
A Step-by-step guide to creating a Professional PowerPoint Presentation
 Quick introduction to Microsoft PowerPoint A Step-by-step guide to creating a Professional PowerPoint Presentation Created by Cruse Control creative services Tel +44 (0) 1923 842 295 training@crusecontrol.com
Window Designer. Opening Screen: When you start Window Designer, you will see the Opening Screen. Here you will be choosing from 4 options:
 Window Designer Opening Screen: When you start Window Designer, you will see the Opening Screen. Here you will be choosing from 4 options: New Design: Use this option when no pre-built templates are available
PowerPoint. Tutorial 1 Creating a Presentation. Tutorial 2 Applying and Modifying Text and Graphic Objects
 PowerPoint Tutorial 1 Creating a Presentation Tutorial 2 Applying and Modifying Text and Graphic Objects Tutorial 3 Adding Special Effects to a Presentation COMPREHENSIVE PowerPoint Tutorial 1 Creating
Creating Notebook Files. Notebook 10 Collaborative Learning Software for Windows Operating Systems
 Creating Notebook Files Notebook 10 Collaborative Learning Software for Windows Operating Systems Trademark Notice SMART Board, Notebook, Sympodium, Senteo, Bridgit, smarttech and the SMART logo are trademarks
SMART board Training. April 2014 Erika Kindoll
 SMART board Training April 2014 Erika Kindoll Lots of Resources My website: http://tulpytechteacher.wikispaces.com/smart%20res ources Links also on Turtlenet Under Shared Documents, Technology, SMARTboard
Adobe InDesign CS6 Tutorial
 Adobe InDesign CS6 Tutorial Adobe InDesign CS6 is a page-layout software that takes print publishing and page design beyond current boundaries. InDesign is a desktop publishing program that incorporates
POWERPOINT BASICS: MICROSOFT OFFICE 2010
 POWERPOINT BASICS: MICROSOFT OFFICE 2010 GETTING STARTED PAGE 02 Prerequisites What You Will Learn USING MICROSOFT POWERPOINT PAGE 03 Microsoft PowerPoint Components SIMPLE TASKS IN MICROSOFT POWERPOINT
This guide will show you how to create a basic multi-media PowerPoint presentation containing text, graphics, charts, and audio/video elements.
 This guide will show you how to create a basic multi-media PowerPoint presentation containing text, graphics, charts, and audio/video elements. Before starting the steps outlined in this guide, it is recommended
To create a notebook on desktop version 1. Open One Note 2. File > New. o FILE. Options
 OneNote Training When you open OneNote for the first time there will be notebooks already started and you can see them on the left hand side. There is an introduction section that you can go through, if
2. This tutorial will teach you the basics of PowerPoint and how to hyperlink and embed (insert) videos into your PowerPoint.
 videos into your PowerPoint.") 37 Creating Your Own PowerPoint for Macintosh and PC Computers and unitedstreaming Video Clips Tutorial created using PowerPoint 2000. This tutorial will work with similar images, messages, and navigation
37 Creating Your Own PowerPoint for Macintosh and PC Computers and unitedstreaming Video Clips Tutorial created using PowerPoint 2000. This tutorial will work with similar images, messages, and navigation
Create and edit word processing. Pages.
 Create and edit word processing documents with Pages. In this chapter, we begin to get work done on the ipad by using Pages to create and format documents. Creating a New Document Styling and Formatting
Vision Pointer Tools
 Vision Pointer Tools Pointer Tools - Uses Pointer Tools can be used in a variety of ways: during a Vision Demo to annotate on the master station s screen during a Remote Control session to annotate on
BASIC MICROSOFT POWERPOINT
 BASIC MICROSOFT POWERPOINT PART ONE PHONE: 504-838-1144 IT Training Team Jefferson Parish Library EMAIL: jpltrain@jplibrary.net In this class you will learn to: Launch, close, and interact with Microsoft
Excel 2003 Tutorial II
 This tutorial was adapted from a tutorial by see its complete version at http://www.fgcu.edu/support/office2000/excel/index.html Excel 2003 Tutorial II Charts Chart Wizard Chart toolbar Resizing a chart
Introduction to the Visual Studio.NET Integrated Development Environment IDE. CSC 211 Intermediate Programming
 Introduction to the Visual Studio.NET Integrated Development Environment IDE CSC 211 Intermediate Programming Visual Studio.NET Integrated Development Environment (IDE) The Start Page(Fig. 1) Helpful links
PowerPoint 2010: Basic Skills
 PowerPoint 2010: Basic Skills Application Support and Training Office of Information Technology, West Virginia University OIT Help Desk (304) 293-4444, oithelp@mail.wvu.edu oit.wvu.edu/training/classmat/ppt/
PowerPoint 2016 Basics for Mac
 1 PowerPoint 2016 Basics for Mac PowerPoint 2016 Basics for Mac Training Objective To learn the tools and features to get started using PowerPoint more efficiently and effectively. What you can expect
SmartBoard & Smart Notebook Software
 SmartBoard & Smart Notebook Software A SMART Board is an interactive whiteboard that is connected to a computer, touch sensitive display acting as both a monitor and input device. SMART Notebook software
BrightLink Welcome Kit
 BrightLink Welcome Kit Welcome to BrightLink! This kit has everything you need to get started with BrightLink. Here s how: 1 First, follow the steps on the Start Here card to get up and running. 2 Install
The purpose of this tutorial is to introduce you to the Construct 2 program. First, you will be told where the software is located on the computer
 Learning Targets: Students will be introduced to industry recognized game development software Students will learn how to navigate within the software Students will learn the basics on how to use Construct